This section describes how you can develop and deploy a Post Processor Plugin. It uses a predefined project and shows how to
- set up the project,
- package the plugin as a service provider,
- register the jar file in WebSphere Application Server as a shared library,
- link the TaskContainer application with the shared library,
- configure the Human Task Manager for using a plugin.
Import the prepared project
A project has been prepared, which served as the basis to build this sample. The project already contains the code implementing the plugin and the required packaging information. To import the prepared project interchange file, perform the following steps:
- Download the PPPSample.zip file, and save it to a temporary directory.
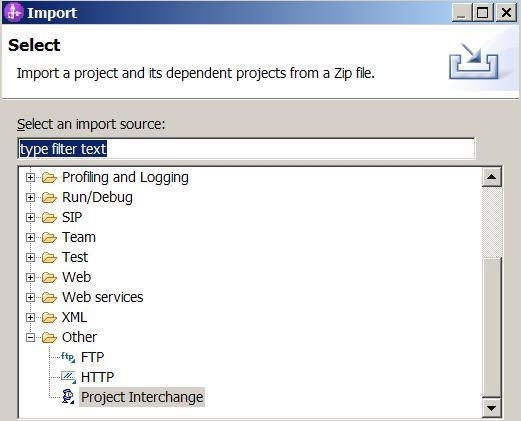
- In WebSphere Integration Developer, click File > Import. The Import window opens.
- Select Other > Project Interchange.
- Click Next. The Import Project Interchange Contents window opens.
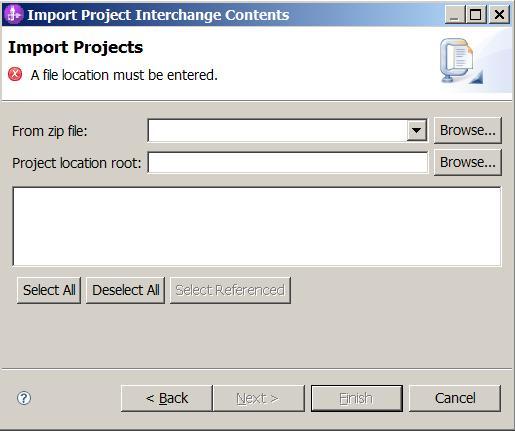
- Click Browse next to the From zip file field.
- Browse to the temporary directory and select the zip file you downloaded in step 1.
- Click Open.
- Select your workspace directory as your Project location root.
- Click Select All.
- Click Finish.
- Wait until the automatic build process has finished.
You may notice that there are several problems indicated. We will fix those in the following steps.
Project setup
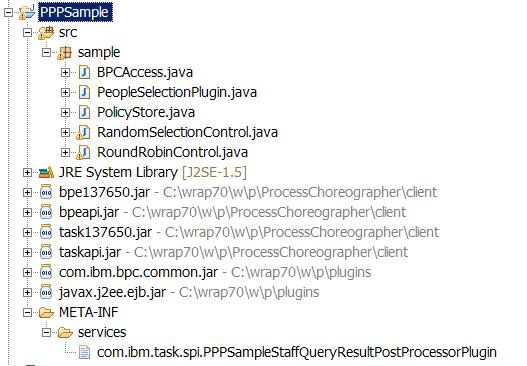
You can use a Java project for implementing the plugin. Also, you can use any desired Java package structure. In the provided sample, all classes are defined under the same package 'sample'.
You need to provide a class implementing the pre-defined com.ibm.task.spi.StaffQueryResultPostProcessorPlugin interface. In order to have
the class definition available in the project Java build path, you need to include the file <wps-root>/ProcessChoreographer/client/taskapi.jar,
where
The sample plugin contains code accessing the Human Task Manager EJB API methods. In order to make stub and other required API classes available, you need to include the files taskapi.jar and task137650.jar in the project Java build path. In case your plugin needs access to the Business Flow Manager EJB API methods, the files bpeapi.jar, bpe137650.jar have to be included (located in the same directory). In order to make required J2EE defined classes available, you need to include a J2EE jar. In the provided sample, the file <wps-root>/plugins/javax.j2ee.ejb.jar is included in the build path.

Packaging the plugin
For packaging, a logical name of the plugin has to be defined. Using this name, a configuration file has to be provided in the META-INF/services directory of the project. In this file, in the first non-comment line, the name of the class implementing the StaffQueryResultPostProcessorPlugin interface is expected.
In the provided sample, the following applies:
- the logical name of the plugin is: PPPSample
- the name of the configuration file in META-INF/services is: com.ibm.task.spi.PPPSampleStaffQueryResultPostProcessorPlugin
- the name of the plugin implementation class is: sample.PeopleSelectionPlugin
The project has to be exported as a jar file containing the Java classes and the configuration file.
- In WebSphere Integration Developer, right-click on the project PPPSample > Export. The Export window opens.
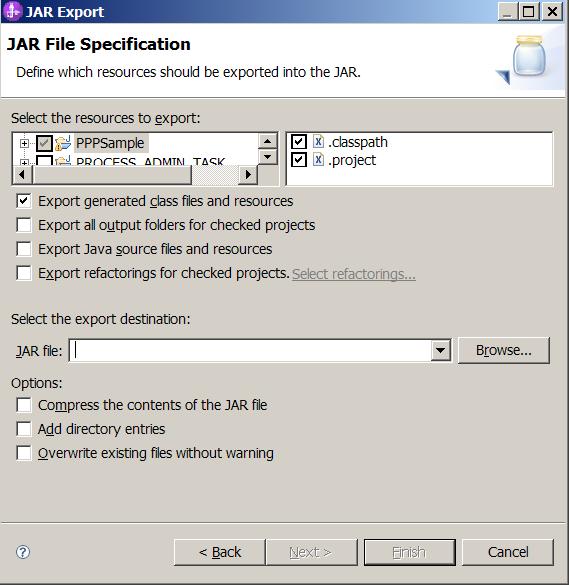
- Select Java > JAR file, the JAR File Specification window opens.
- Select the project PPPSample.
- Select the export destination as desired
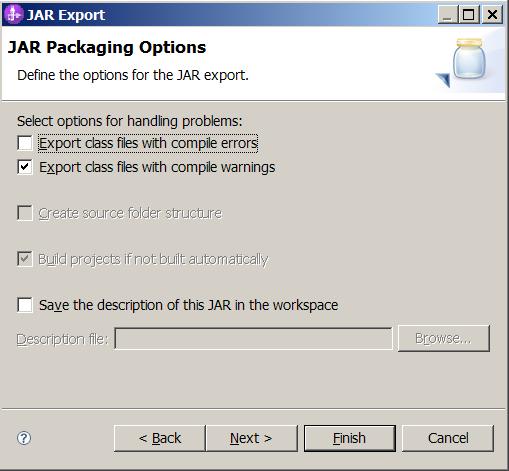
- Click Next, the JAR Packaging Options window opens.
- Unselect the option 'Export class files with compile errors'
- Click Finish
In order to be available for Human Task Manager, the jar file should be placed in the <wps-root>/lib or <wps-root>/lib/ext directory.
Registering the plugin as a shared library in WebSphere Application Server
For registering, the standard WebSphere Application Server defined approach applies:
- In a browser, open the administrative console.
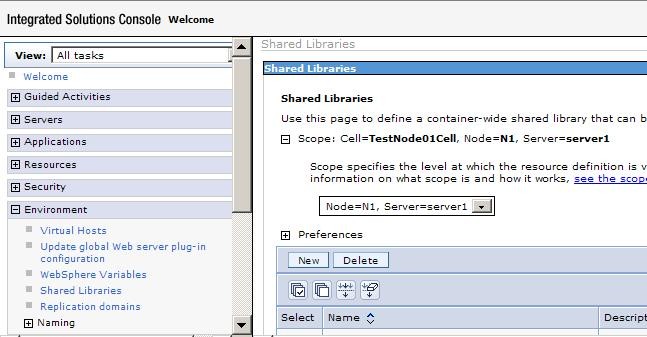
The default URL is - Select the submenu Environment > Shared libraries, the Shared Libraries window opens
- Select the scope for which the library should be provided.
The same scope or a higher scope should be selected as the one used for deploying the TaskContainer application. For instance, if TaskContainer has been deployed to a cluster, the plugin library should be registered for that cluster or the entire cell. This avoids having to register the shared library for each server individually. - Click New, the New library window opens
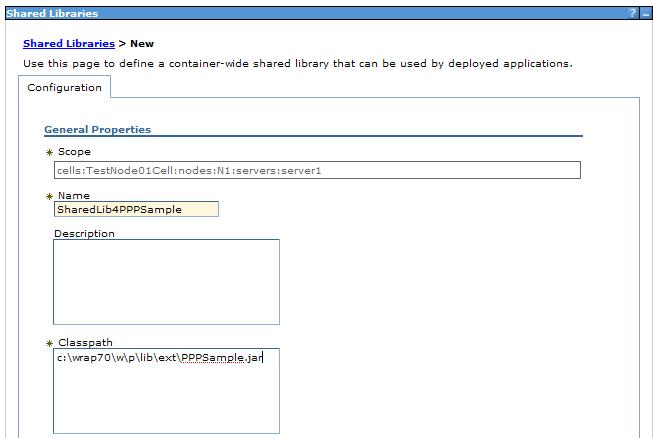
- Specify the name of the shared library, for instance: SharedLib4PPPSample
- Specify the classpath to the plugin jar file, for instance: C:/wrap70/w/p/lib/ext/PPPSample.jar
- Click OK
- Click Save
Linking the shared library with the TaskContainer application
For a WPS installation, only one Post Processor Plugin can be made available. Moreover, the shared library representing the plugin has to be linked with the TaskContainer application. Again, the standard WebSphere Application Server defined approach applies:
- Log in to the Admin Console of WebSphere Application server
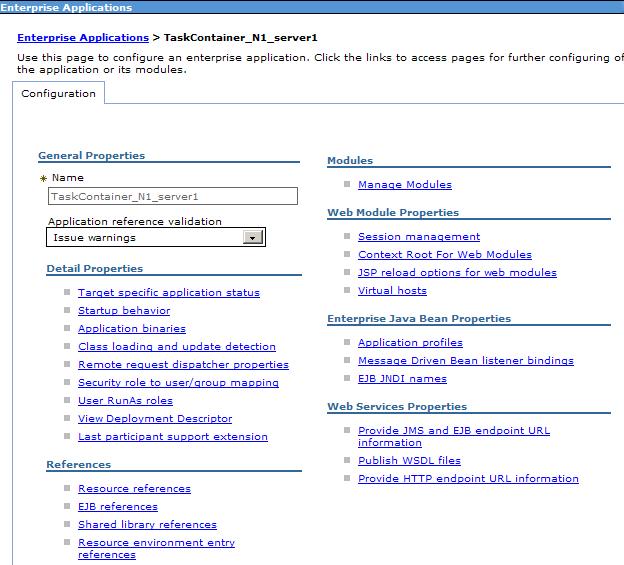
- Select the submenu Applications > Applicationt Types > WebSphere enterprise applications, the Enterprise Applications window opens
- Select the TaskContainer_... application, the window showing application details opens
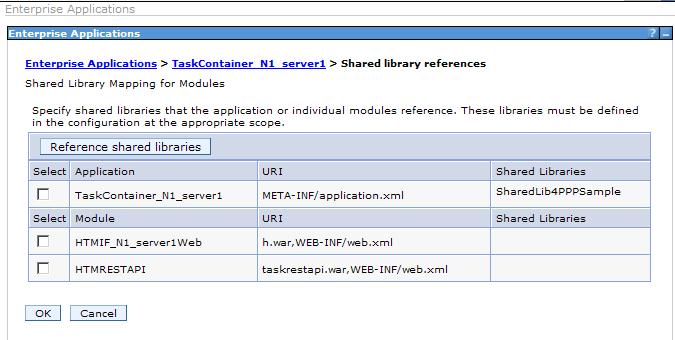
- Select Shared library references, the Shared Library References window opens
- Select theTaskContainer_... application
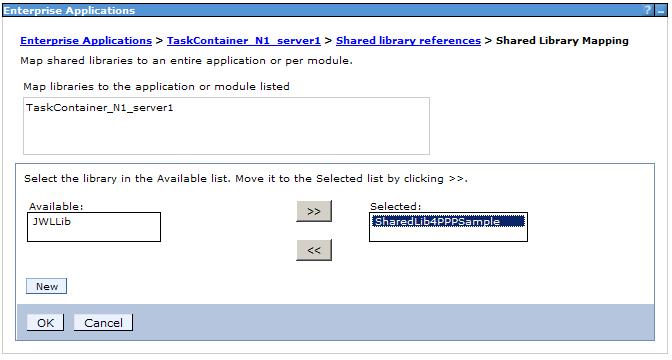
- Click Reference shared libraries, the Shared library mapping window opens
- Select the plugin shared library (e.g. SharedLib4PPPSample) and move it to the list of selected shared libraries
- Click OK, in the Shared Library references window, you should see the new association
- Click OK
- Click Save
Configuring the plugin for Human Task Manager
The following steps need to be applied:
- Log in to the Admin Console of WebSphere Application server
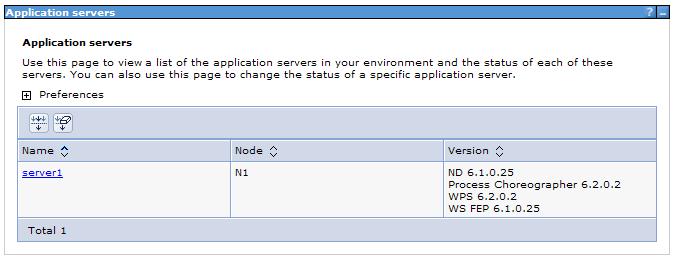
- Select the submenu Servers > Server Types > WebSphere application servers, the Application servers window opens
- Select your server or cluster, e.g. server1, the corresponding window opens
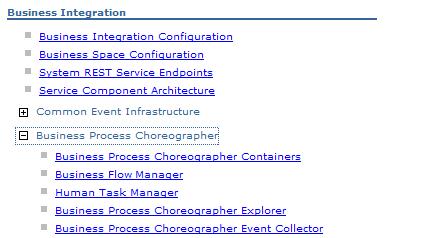
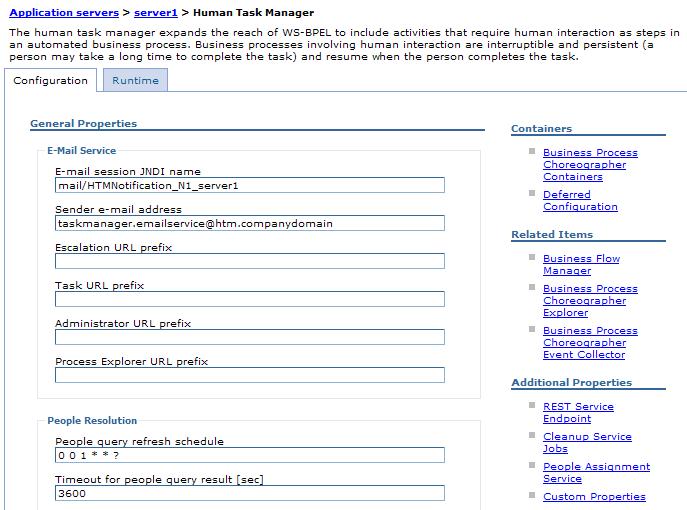
- Select submenu Business Integration > Business Process Choreographer > Human Task Manager, the Human Task Configuration page opens
- Select submenu custom properties, the Custom properties page opens
- Click Staff.PostProcessorPlugin, the window for setting the value opens.
- Specify the logical plugin name used at the plugin packaging time, e.g.: PPPSample
- Click OK
- Click Save
- Restart the server to make (this and all above) changes effective
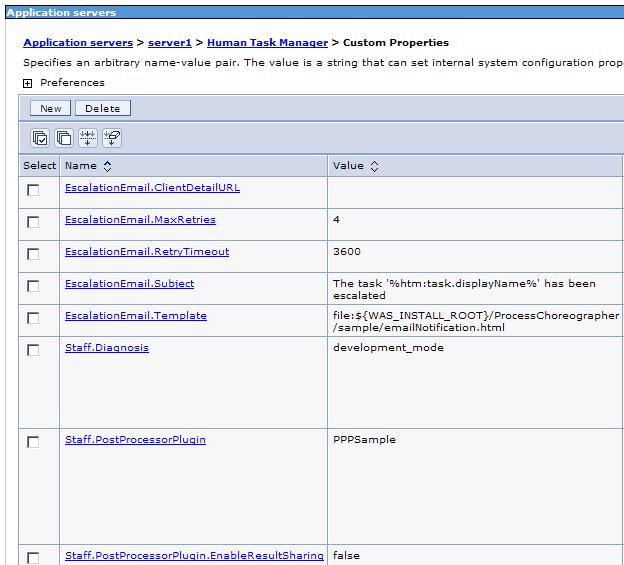
Note that the setting Staff.PostProcessorPlugin.EnablineResultSharing has to be associated with the default value 'false', as the sharing mode cannot be applied to the sample plugin.