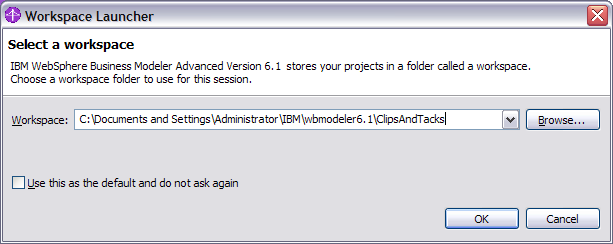
- Create a new workspace for this tutorial, such as C:\Documents
and Settings\Administrator\IBM\wbmodeler6.1\ClipsAndTacks. Do not
select Use this as the default and do not ask again so
that you are prompted with this dialog box each time on each launch. Click OK.
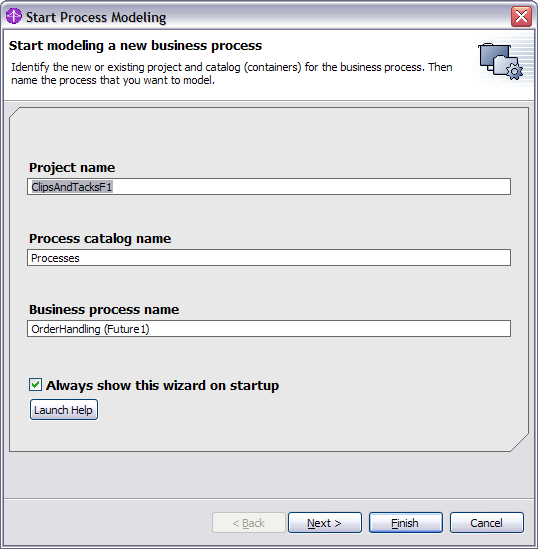
- Enter ClipsAndTacksF1 as the project name
and OrderHandling (Future1) as the business process
name. Click Next >.
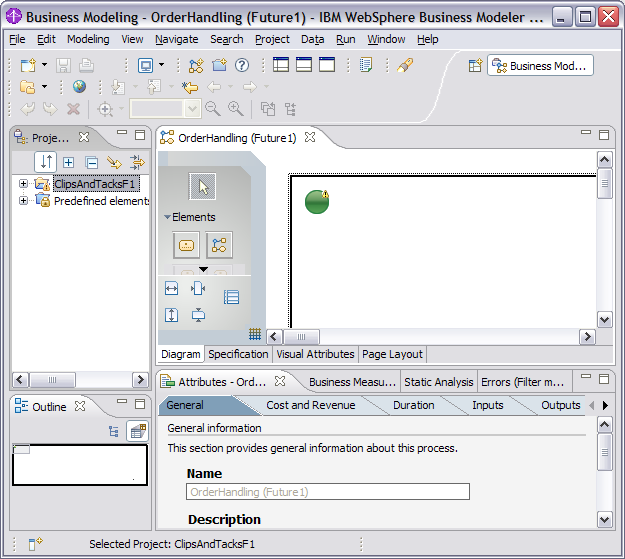
- Click the Apply 4-Pane Layout icon
 .
. 
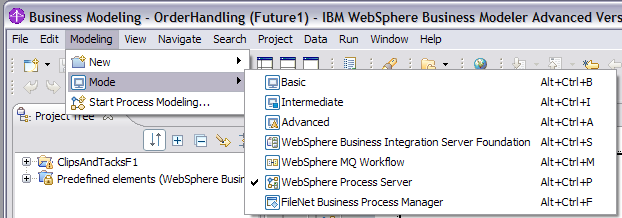
- Select Modeling > Mode > WebSphere Process Server to
ensure that the model you are going to build can be imported into WebSphere Integration
Developer and later deployed to WebSphere Process Server. WebSphere Business
Modeler allows you to model for different run time environments.