Build it yourself
This section describes how you monitor WebSphere MQ Workflow using WebSphere
Business Monitor 6.1.0. It covers how you can
- Import FDL file into WID and generate a seed monitor model
- Edit monitor model and generate the J2EE project
- Deploy the monitor model
Import FDL file into WebSphere Integration Developer and generate a seed
monitor model
- Start Rational Application Developer.
- Click File -> Import.
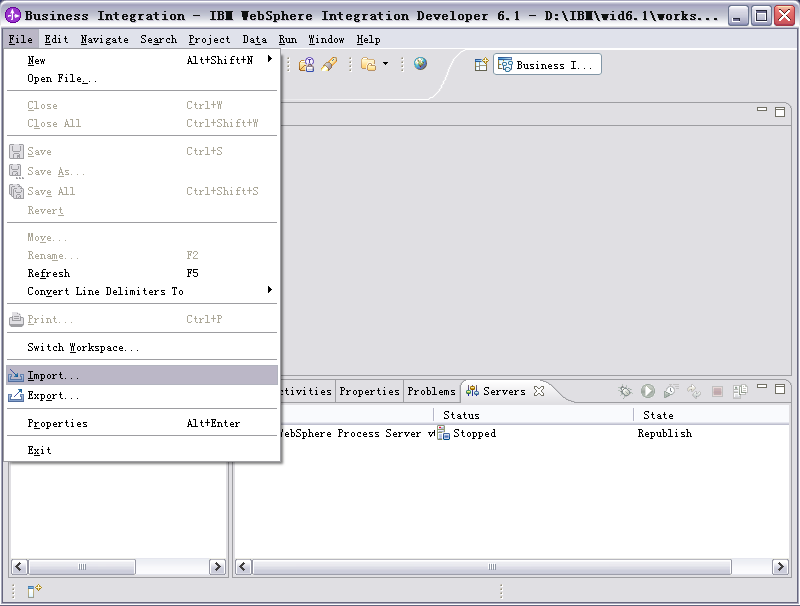
- Select Import FDL File from the FDL to Monitor Model Utility for WebSphere Workflow
category.

- Select an FDL from file system, and enter the Project Name (for example:
Workflow).
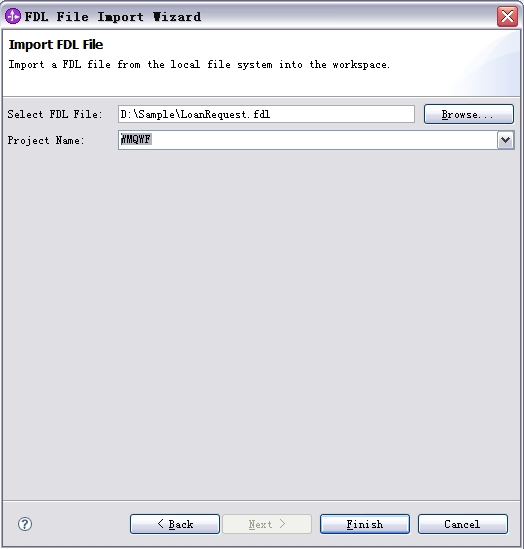
- Click Finish. If the current perspective of workbench is not Java,
you are alerted that the perspective was switched to Java automatically.
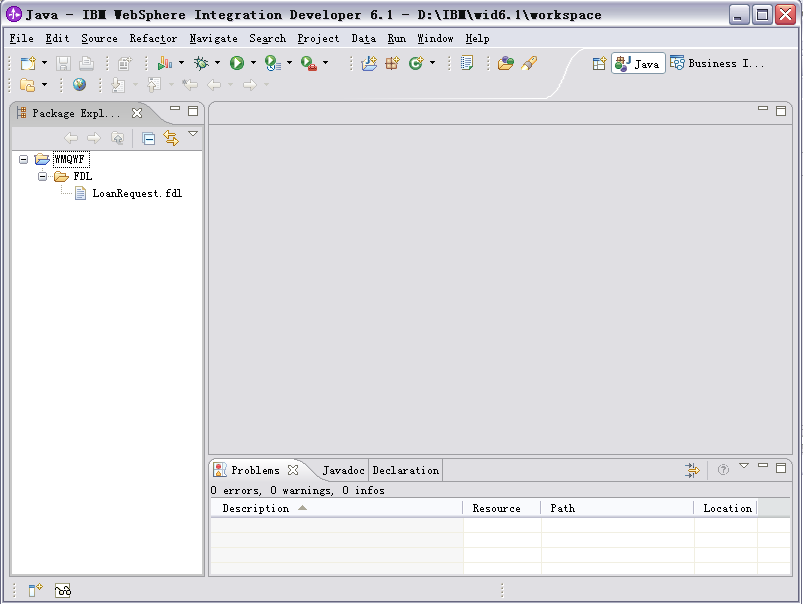
- Click Yes. The FDL file is then imported, and a new FDL project is
created.
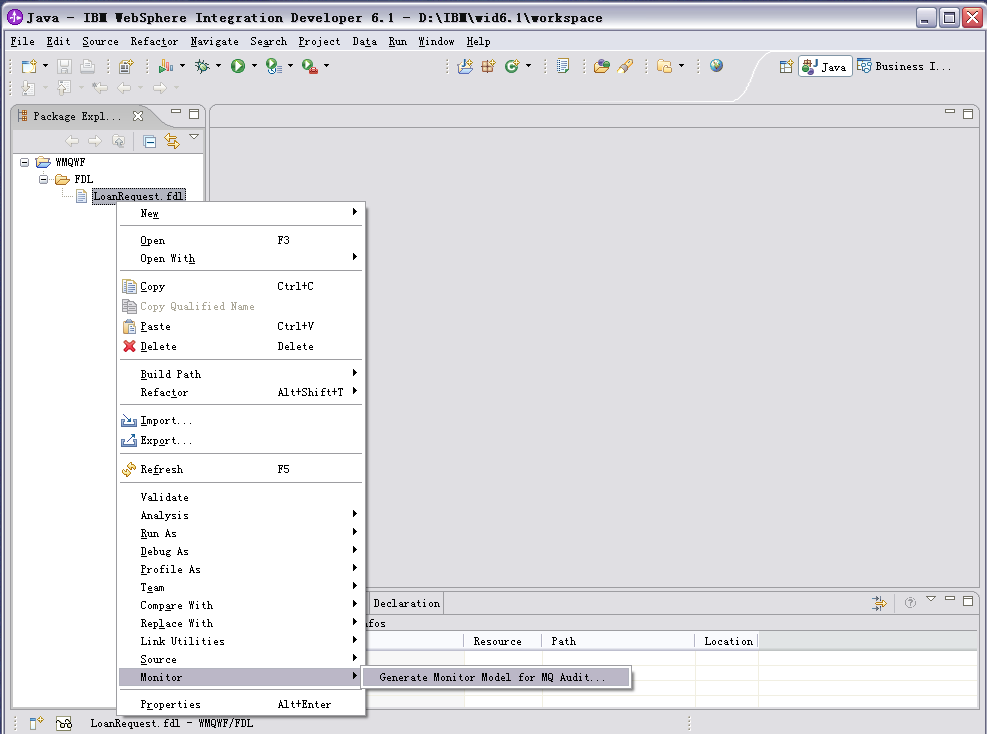
- Right-click the imported FDL file, and select Monitor ->
Generate Monitor Model for MQ Audit.
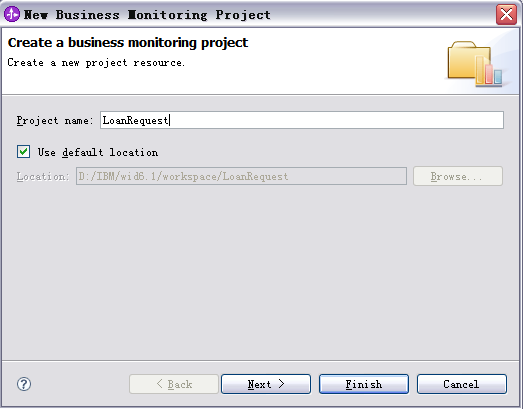
- On the resulting window, click New Project.
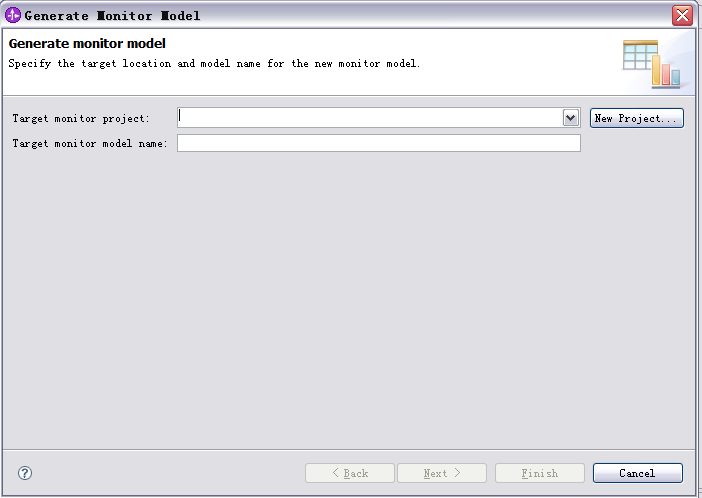
- Enter
LoanRequest as the new business monitoring project
name. Click Finish.
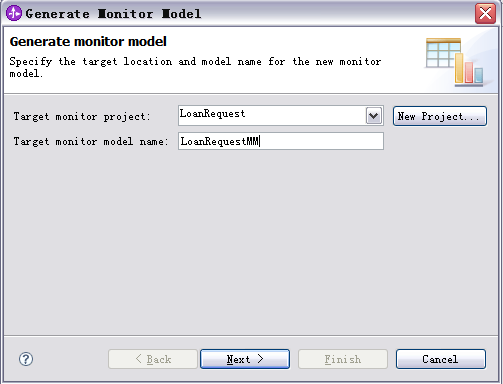
- Enter
LoanRequestMM as the monitor model name. Click
Next.
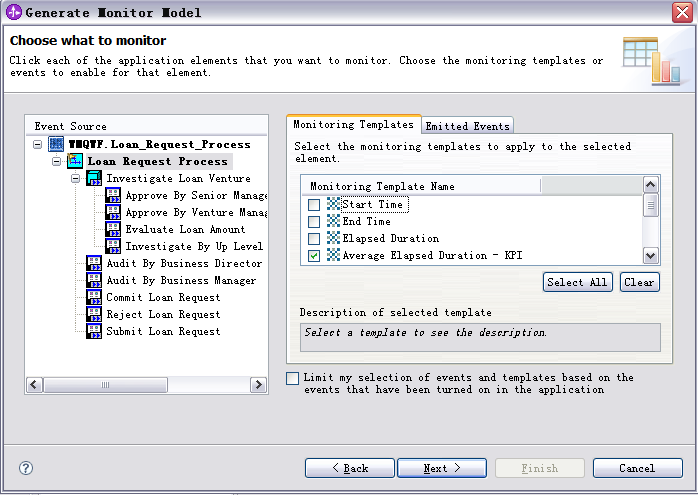
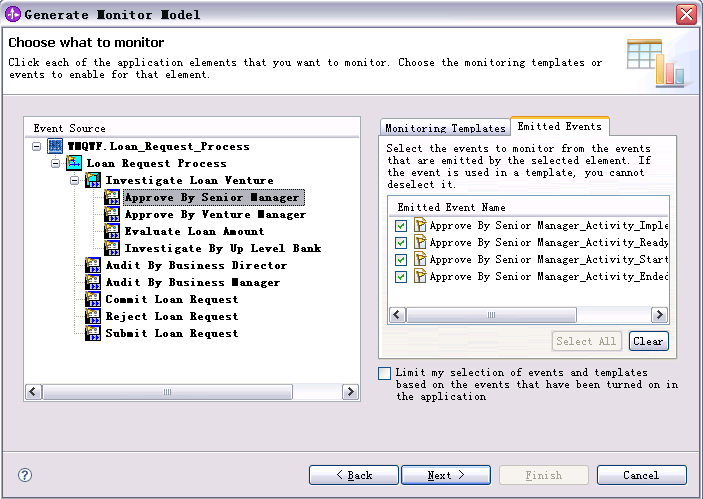
- Select Average Elapsed Duration - KPI from the Monitoring Templates
tab as the event source for Loan Request Process as in the following figure.
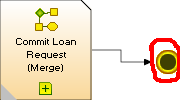
- Select Start Time for event source Commit Loan Request.
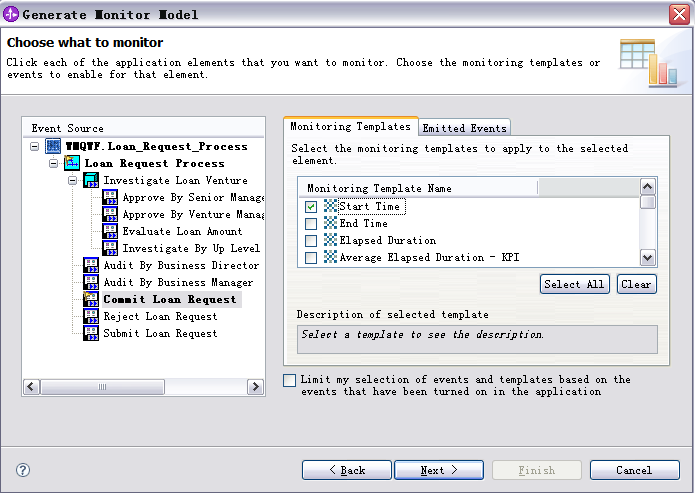
- Select all of the events for every event source under the Emitted Events
tab, and click Next.
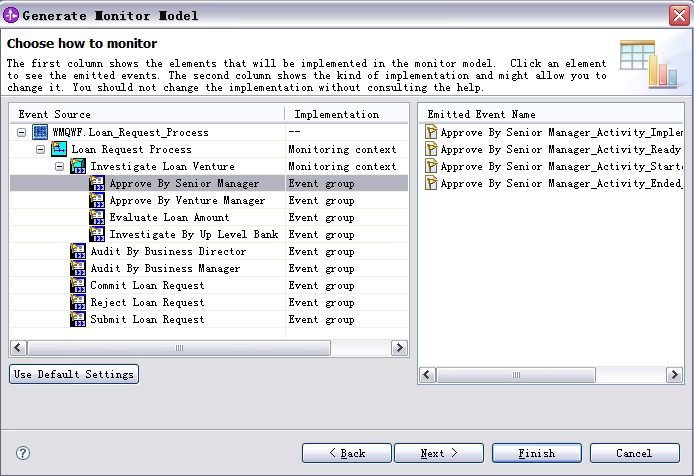
- Except for Loan Request Process and Loan Venture Investigate, select Event
group as the Implementation for every Event Source, and then click
Next.
- Click Finish on the next window.
Note: In this sample, you are not monitoring metrics in every MC, just the child MCs of their parents.
Therefore, here you select the child MCs implementation type as Event
group.
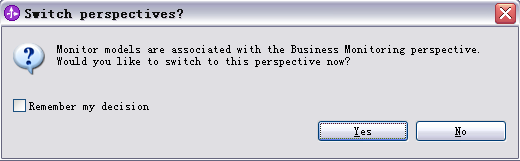
- When a dialog box is displayed, click Yes to switch to the Business
Monitoring perspective.
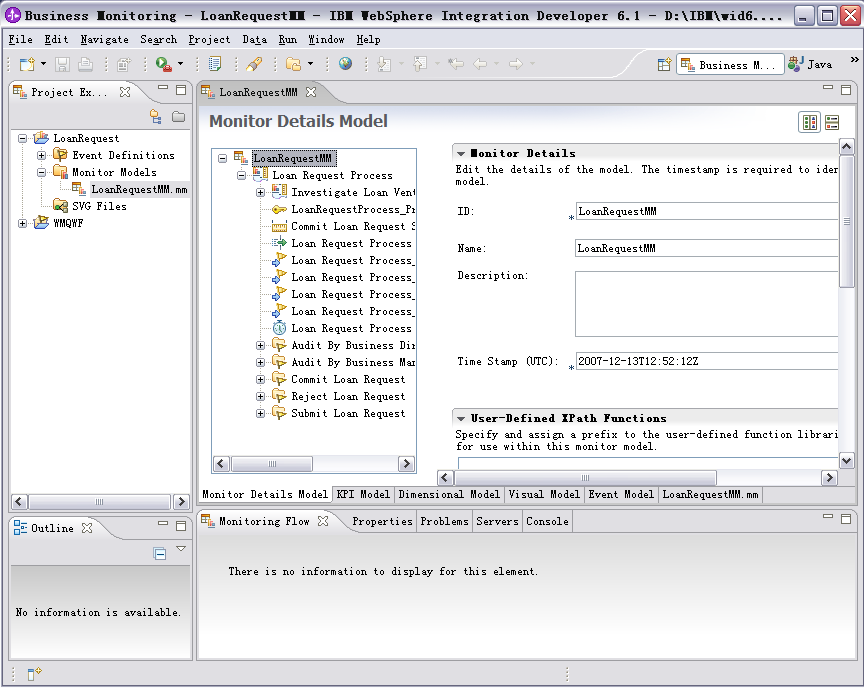
A seed monitor model is then generated that will be augmented by the
sequent steps.
Edit the monitor model and
generate the J2EE project
Configure the Monitor Details Model
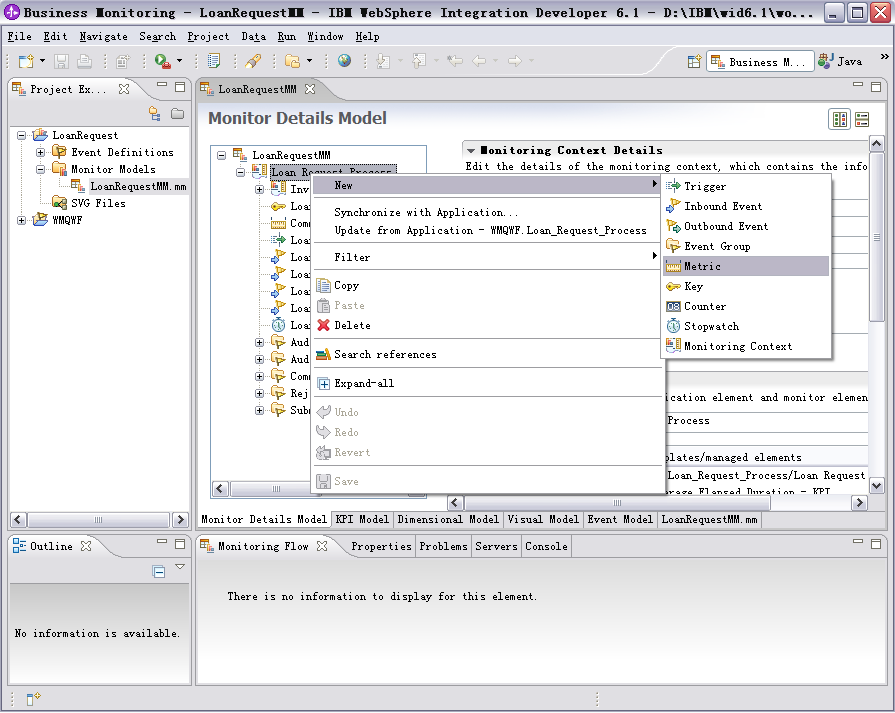
- In the Monitor Details Model view, right-click
Loan Request Process
  MC
, and then select New -> Metric.
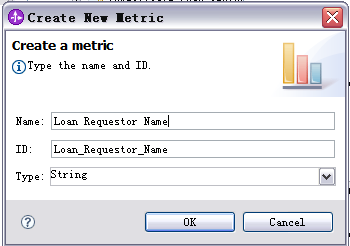
- Enter
Loan Requester Name as the Name, and select
String as the Type. Then click OK.
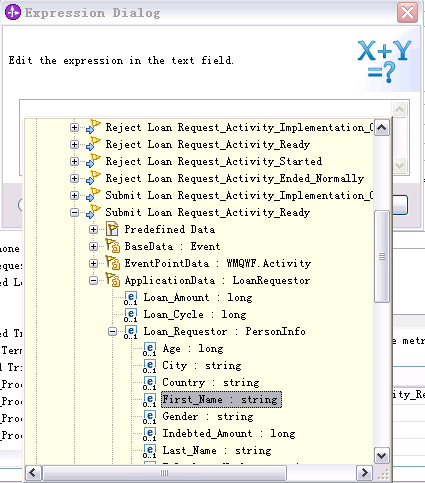
- On the right panel, click Add to add a Metric Value Expression.
- Click the space under Expression. A button then is displayed. Click this
button, and enter the following text:
fn:concat(Submit_Loan_Request_Activity_Ready/ApplicationData/wmqwf:Loan_Requester/wmqwf:First_Name,',',
        Submit_Loan_Request_Activity_Ready/ApplicationData/wmqwf:Loan_Requester/wmqwf:Last_Name)
- Click OK.
Note: Press Ctrl+Space to use Content Assist to select attributes for inbound event.
- In the Monitor Details Model view, right-click
Loan Request Process
  MC
, and then select New -> Metric.
- Enter
Loan Requester Country as the Name, select
String as the Type, and then click OK.
- On the right panel, click Add for Metric Value Expressions.
- Click the space under Expression. A button is displayed. Click this
button, and enter the following text:
Submit_Loan_Request_Activity_Ready/ApplicationData/wmqwf:Loan_Requester/wmqwf:Country
- Click OK.
- In the Monitor Details Model view, right-click
Loan Request Process
  MC
, and then click New -> Metric.
- Enter
Loan Requester City as the Name, and select
String as the Type. Then click OK.
- On the right panel, click Add for Metric Value Expressions.
- Click the space under Expression. A button is displayed. Click this
button, and enter the following text:
Submit_Loan_Request_Activity_Ready/ApplicationData/wmqwf:Loan_Requester/wmqwf:City
- When you are finished, click OK.
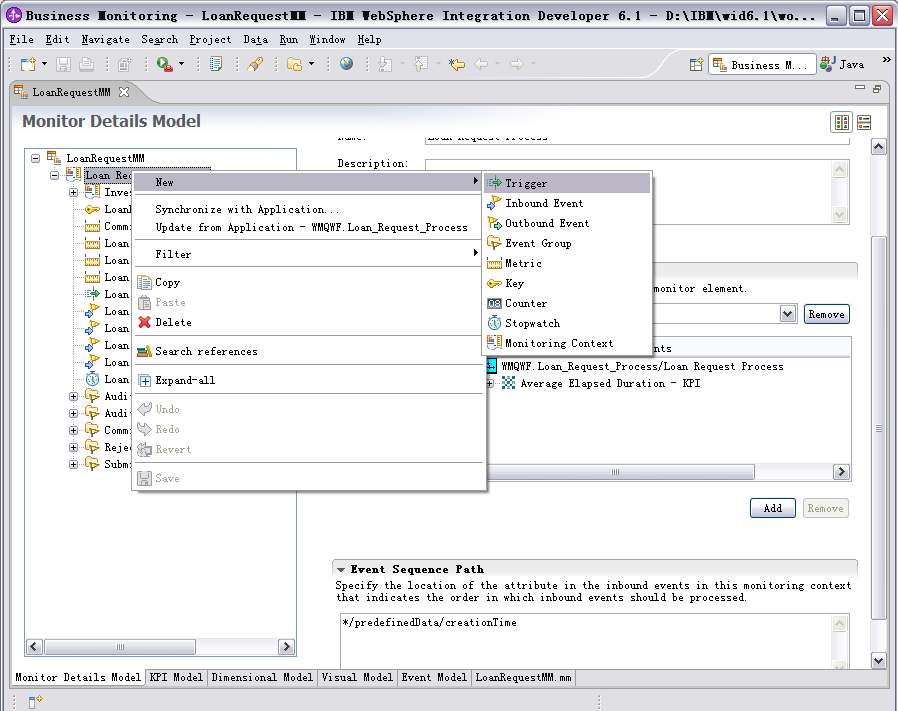
- In the Monitor Details Model view , right-click
Loan Request Process
  MC
, and click New -> Trigger.
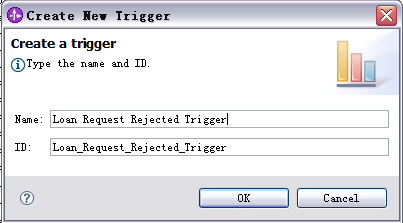
- Enter
Loan Request Rejected Trigger as the Name.
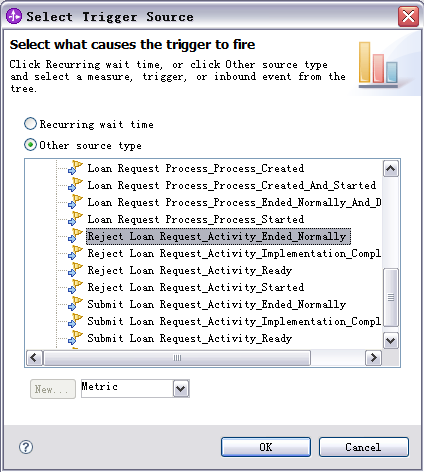
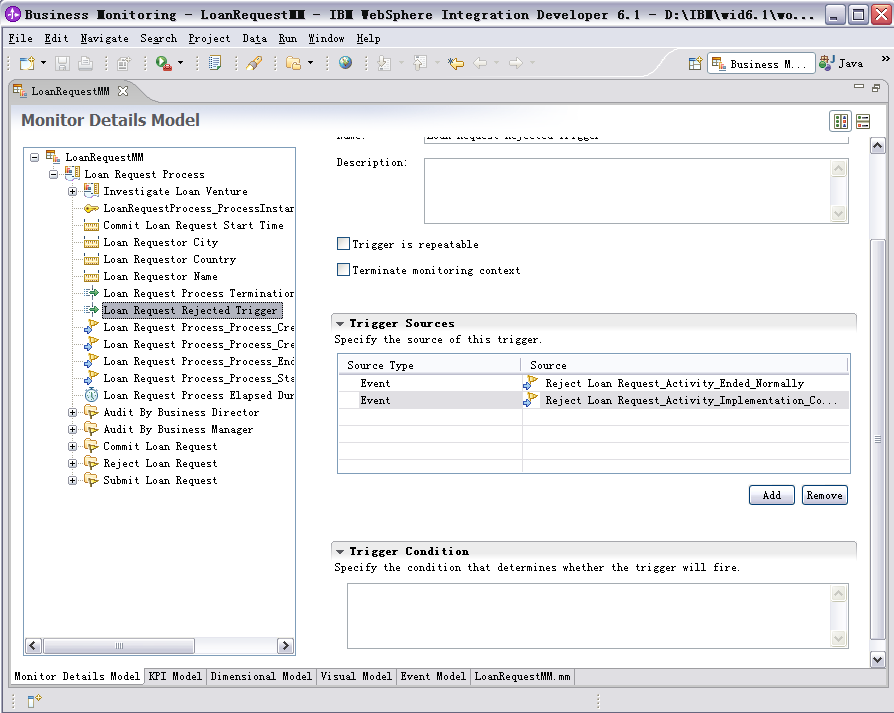
- On the right panel, clear Trigger is repeatable, and click
Add to select
Reject_Loan_Request_Activity_Implementation_Completed and
Reject_Loan_Request_Activity_Ended_Normally as the source event of
trigger.
- In the Monitor Details Model view, right-click
Loan Request Process
  MC
, and click New -> Trigger.
- Enter
Loan Request Committed Trigger as the Name.
- On the right panel, clear the Trigger is repeatable check box, and
click Add to select
Commit_Loan_Request_Activity_Implementation_Completed and
Commit_Loan_Request _Activity_Ended_Normally as the source event of
trigger.
- In the Monitor Details Model view, right-click
Loan Request Process
  MC
, and then click New -> Metric.
- Enter
Percentage of Rejected Loan Requests as the
Name, and select Decimal as the Type. When you are
finished, click OK.
- On the right panel, set the default value of the metric to be 0,
and click Add for Metric Value Expressions.
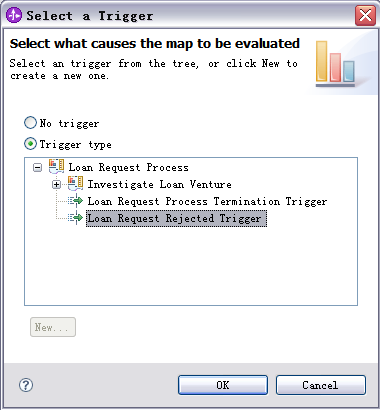
- Click the space under Trigger. A button is displayed. Click this button,
and select Loan Request Rejected Trigger.
- Click the space under Expression. A button is displayed. Click the button and enter
100.
- Then click OK.
Note: Refer to Appendix 1 to complete the other metrics.
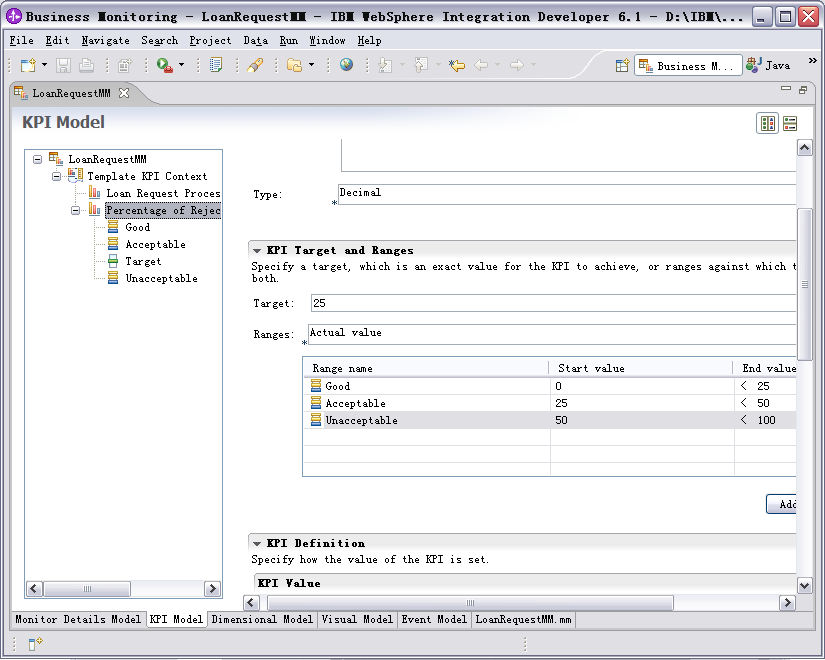
Configure KPI Model
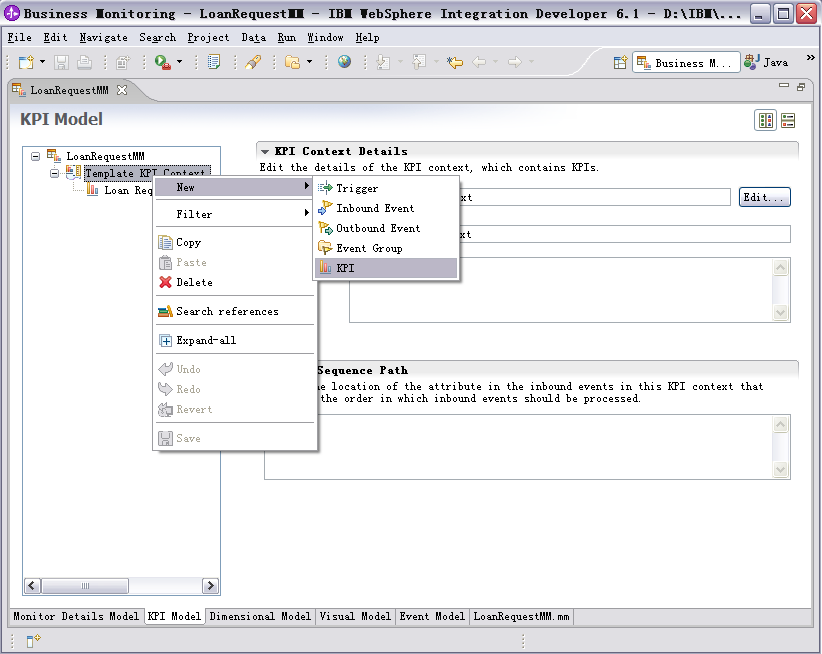
- Switch to the KPI Model view, right-click
Template KPI
  Context
and select New -> KPI.
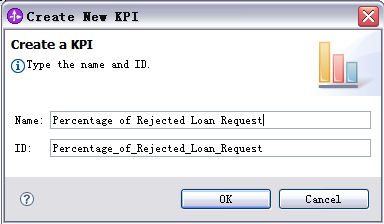
- Enter
Percentage of Rejected Loan Request as the Name.
- On the right panel, for the KPI Definition, select Base this KPI on a
metric and aggregation function under KPI Value.

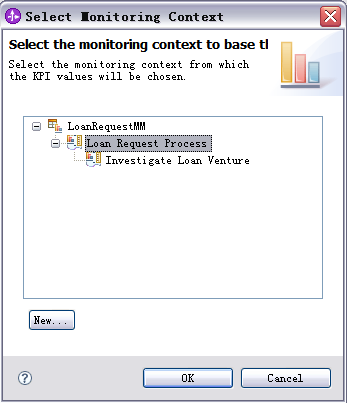
- Under KPI Details, click Browse and then select Monitoring
context as the Loan Request Process.
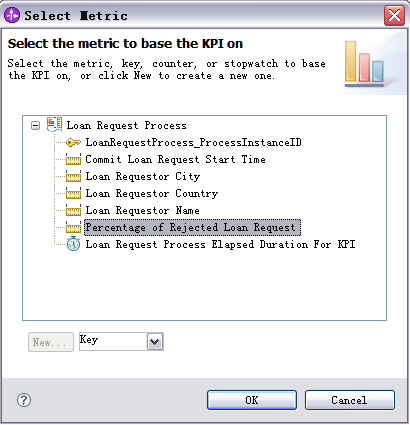
- Click Browse and then select Percentage_of_Rejected_Loan_Request
as the Metric.
- Select Aggregation function to be the Average.

- For KPI Target and Ranges, enter the following values:
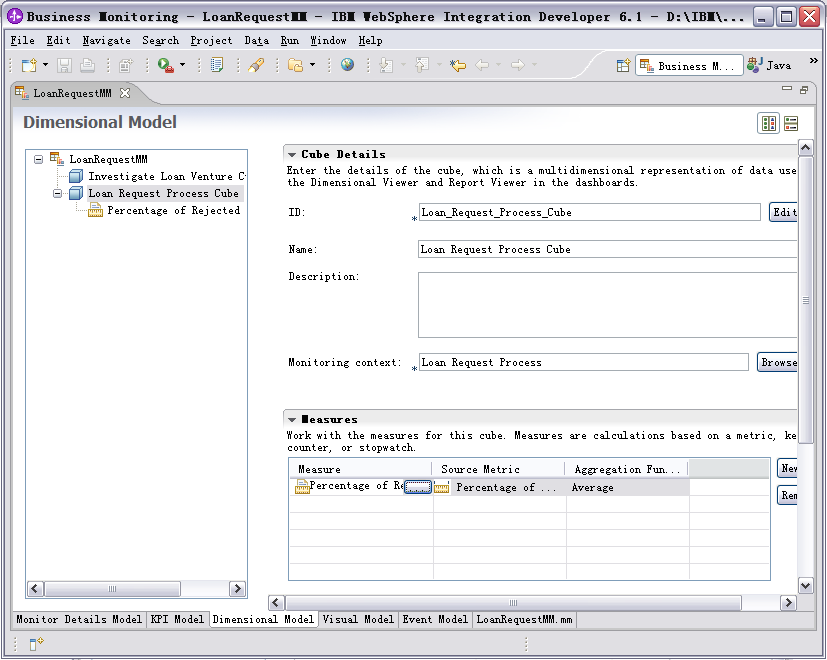
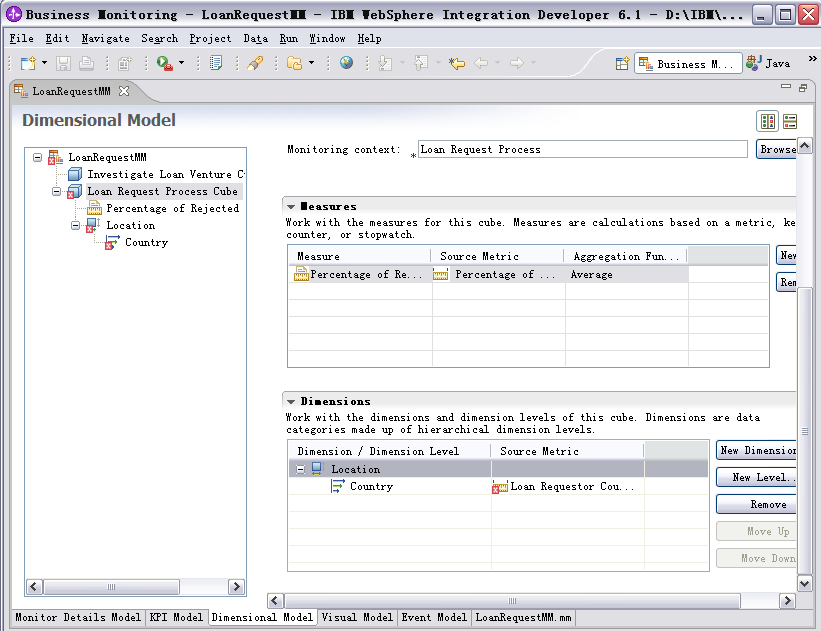
Configure Dimensions Model
- Switch to the Dimensional Model view, and select
Loan Request
  Process Cube
in the navigation tree.

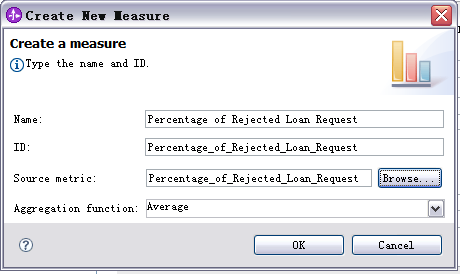
- For the Measures table, click New and enter the following values:
- For Name, enter
Percentage of Rejected Loan Request.
- For ID, enter
Percentage_of_Rejected_Loan_Request.
- For Source metric, enter
Percentage_of_Rejected_Loan_Request.
- For Aggregation function, select
Average.
- When you are finished, click OK.
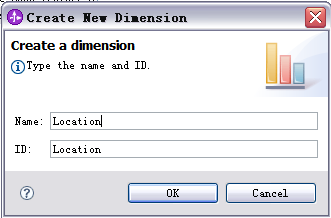
- For the Dimensions table, click New Dimension, and enter the
following values:
- For Name, enter
Location
- For ID, enter,
Location
- When you are finished, click OK.
A new row is added to the Dimensions table, and the New Level button is enabled.
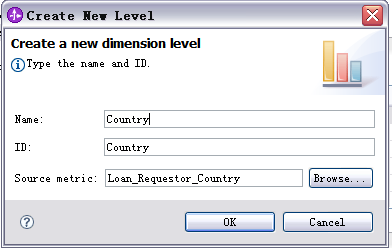
- Select the new row, click New Level, and
then enter the following values:
- For Name, enter
Country
- For ID, enter,
Country
- For Source metric, enter,
Loan_Requester_Country
- When you are finished, click OK.
You now see a new row added into the Dimensions table, but with an error
icon.
- To eliminate this error, switch to the Monitor Details Model view, and select
Loan Requester Country metric in the navigation tree. Then select
A value is required for this metric, and enter N/A as the
Default Value.
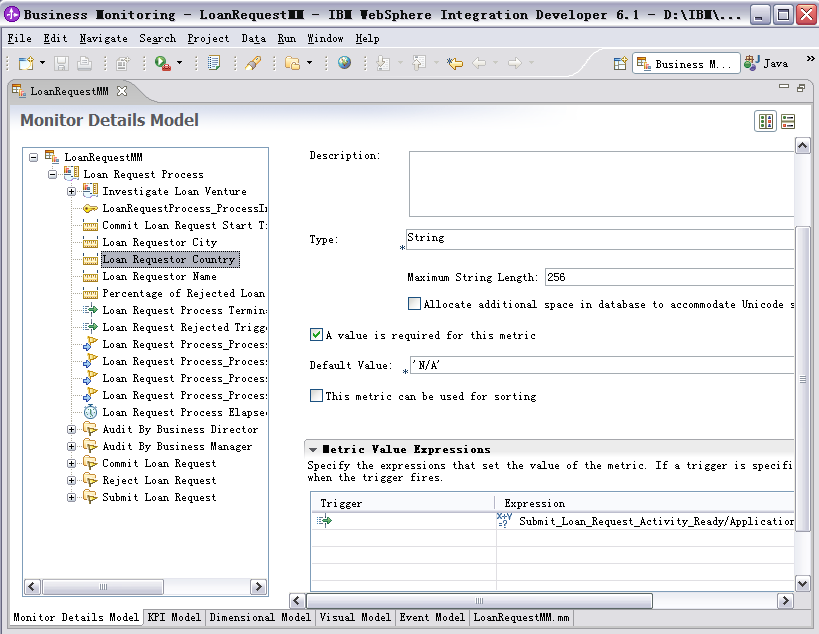
- Switch back to the Dimensional Model view, The error icon is no longer
visible.
- Select the level Country in the table, click New Level, and enter
the following values to add another level:
- For Name, enter
City
- For ID, enter,
City
- For Source metric, enter,
Loan_Requester_City
- Eliminate errors by repeating the previous.
Note: Refer to Appendix 3 to complete other
measures.
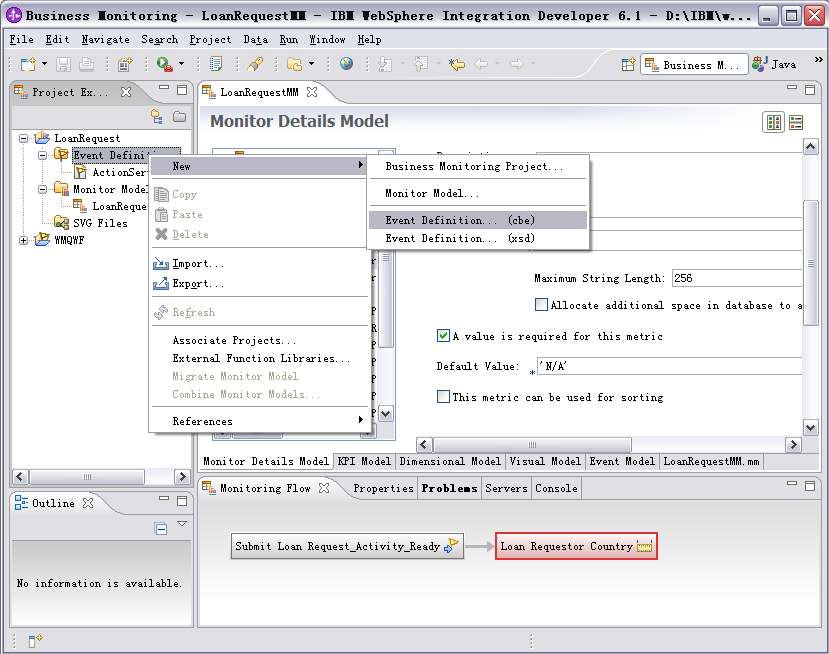
Configure Alerts
Create Event Definition for outbound event by completing the following
steps:
- From the Business Monitoring perspective, right-click the Project
Explorer view, and then click New -> Event Definition(cbe).
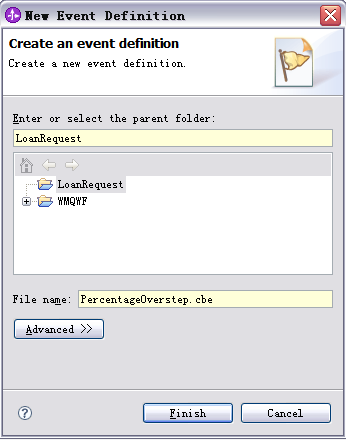
- In the New Event Definition dialog, select Monitor Model project, and
enter
PercentageOverstep.cbe as the File name. Then click
Finish.
- Open the cbe file with a text editor, and edit PercentageOverstep.cbe as
shown here or download it: PercentageOverstep.cbe:
<eventdefinition501:eventDefinitionList
xmlns:eventdefinition501="http://www.ibm.com/ac/eventdefinition5_0_1">
<eventDefinition
name=" PercentageOverstep"
parent="event">
<extendedDataElement
name="BusinessSituationName" type="string"/>
<extendedDataElement name="CurrentPercentage"
type="float"/>
<extendedDataElement
name="PercentageLimitation"
type="float"/>
</eventDefinition>
</eventdefinition501:eventDefinitionList>
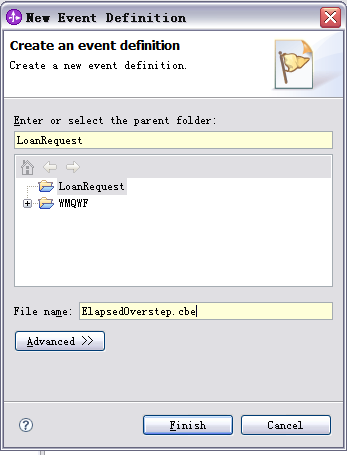
- From the Business Monitoring perspective, right-click the Project
Explorer view, and then click New -> Event Definition(cbe).
- In the New Event Definition dialog, select Monitor Model project, enter
ElapsedOverstep.cbe as the File name, then click Finish.
- Open the cbe file with a text editor and edit ElapsedOverstep.cbe as shown
here or download it:ElapsedOverstep.cbe:
?xml version="1.0"
encoding="UTF-8"?>
<eventdefinition501:eventDefinitionList
xmlns:eventdefinition501="http://www.ibm.com/ac/eventdefinition5_0_1">
<eventDefinition
name="ElapsedDurationOverstep"
parent="event">
<extendedDataElement
name="BusinessSituationName" type="string"/>
<extendedDataElement name="Activity Name"
type="string"/>
<extendedDataElement
name="DurationLimitation"
type="float"/>
</eventDefinition>
</eventdefinition501:eventDefinitionList>
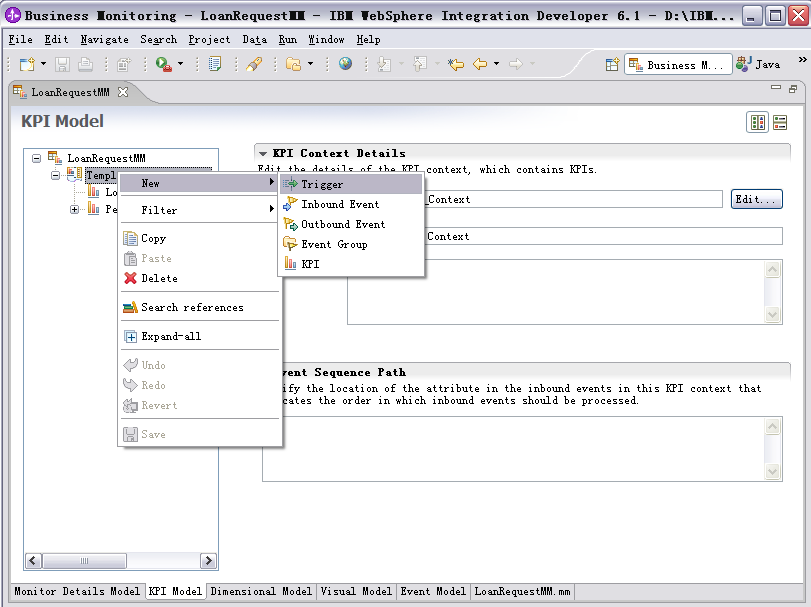
- Switch to the KPI Model view, right-click Template KPI Context, and click
New -> Trigger.
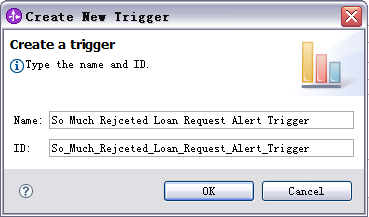
- Enter
So Much
  Rejected Loan Request Alert Trigger
as the
Name.
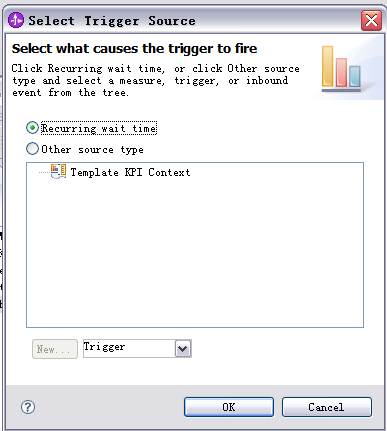
- On the right panel, clear the Trigger is repeatable check box, and
click Add to select
Recurring wait time as the source
event of trigger.
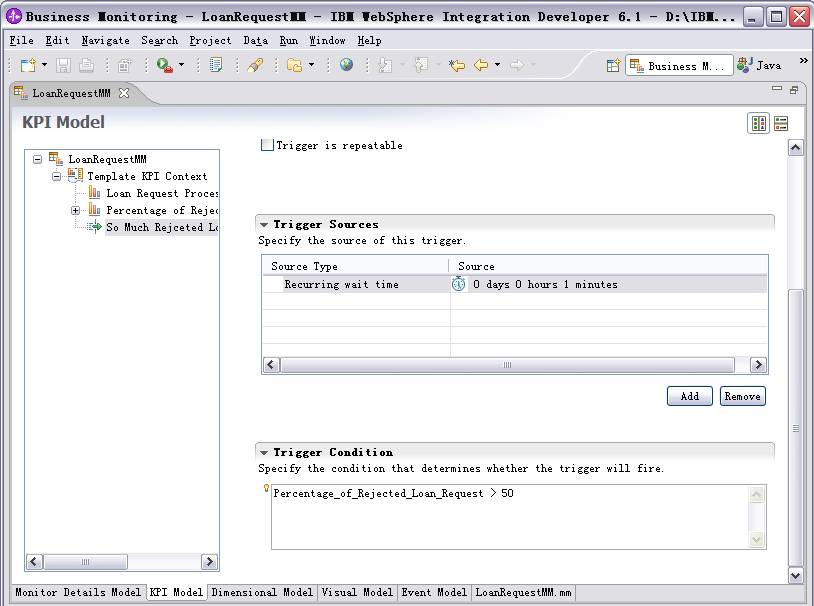
- For the trigger condition, enter the following text:
Percentage_of_Rejected_Loan_Request -> 50
- In the KPI Model view, right-click Template KPI Context, and click
New -> New Outbound Event.
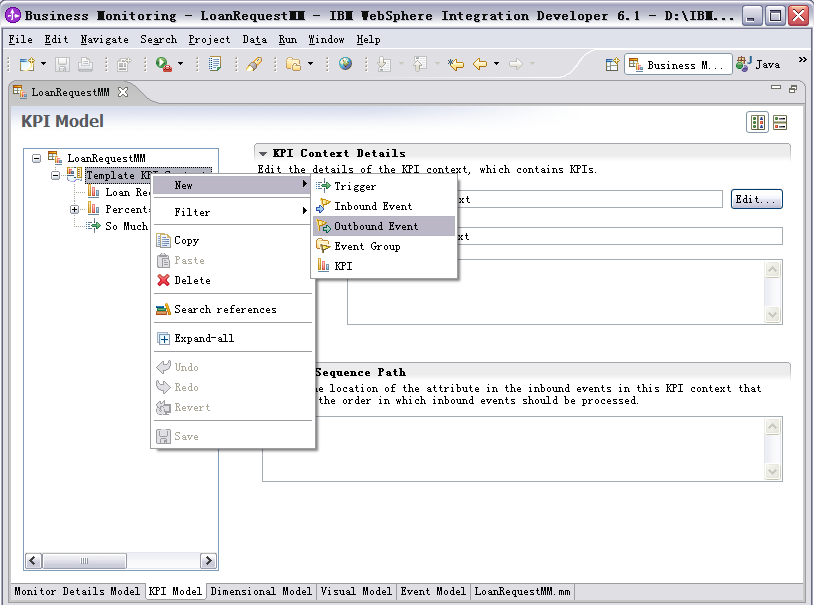
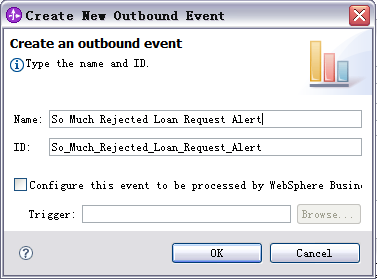
- Enter
So Much Rejected Loan Request Alert as the Name,
and click OK.
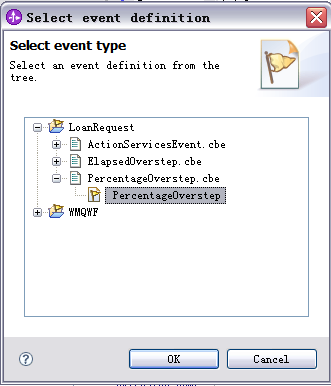
- On the right panel, for Event Type Details, click Browse to search for and select
,
PercentageOverstep as the extension name.
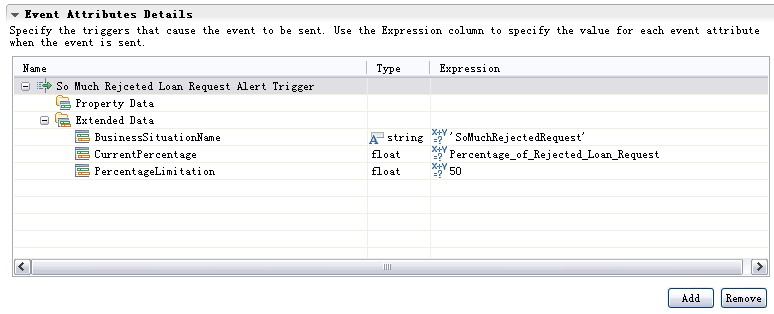
- For Event Attributes Details, click Add to select
So Much
Rejected Loan Request Alert Trigger as the trigger.
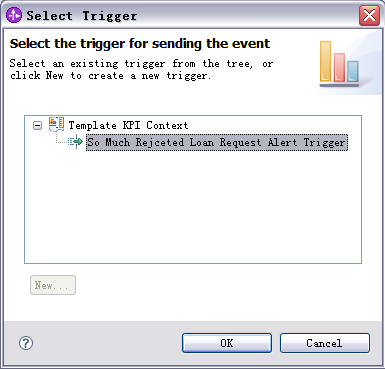
Now you can see some content in the table of Event Attributes Details.
- Complete the following actions in the table:
- On the same row as BusinessSituationName, enter Expression to (include
the hyphens):
'SoMuchRejectedRequest'
- On the same row as CurrentPercentage, enter Expression to
Percentage_of_Rejected_Loan_Request (KPI)
- On the same row as PercentageLimitation, enter Expression to
50

Note: Refer to Appendix 4 to complete other alerts.
Configure Visual Model
To configure the visual model, you first need to get the SVG file
that corresponds to each MC. You can use WebSphere Business Modeler v6.1.0 to
import an FDL file and then export the SVG files.
Note: To improve the appearance of the SVG file, eliminate the input data and output data before exporting the SVG file.
After obtaining the SVG file, configure the visual model by completing the
following steps.
Step 1: Import the SVG file.
Import the SVG file by completing the following steps:
- Right-click the Project Explorer view, and click Import.
- Select File system, and then click Next.
- Browse to the location containing the SVG file (for example,
D:\Sample\SVG)
- Select the SVG file.
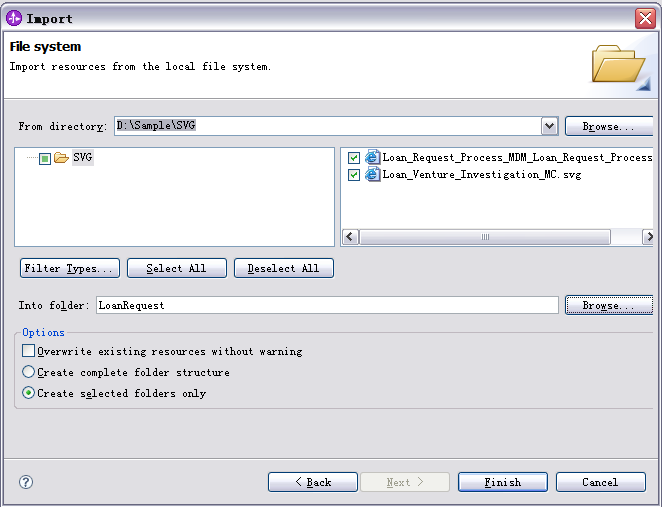
- Click Finish.
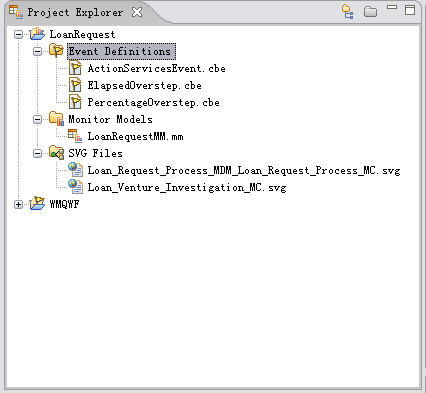
- Expand the project in the Project Explorer view, and then expand the SVG
Files. The new SVG file are now listed.
Step 2: Add the SVG files for two MCs
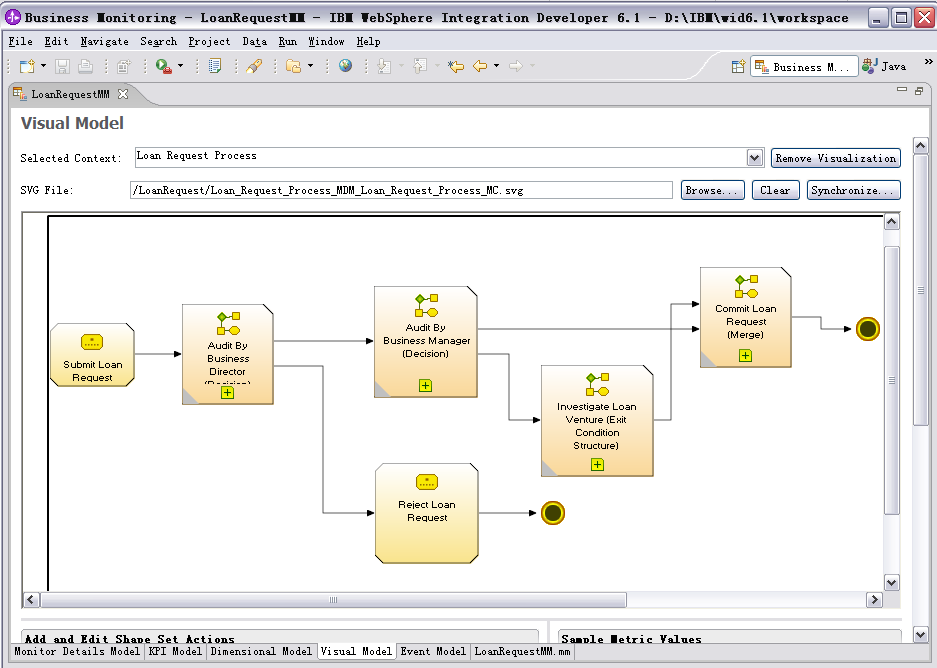
Switch to the Visual Model view, and add the SVG files for two MCs by
completing the following steps:
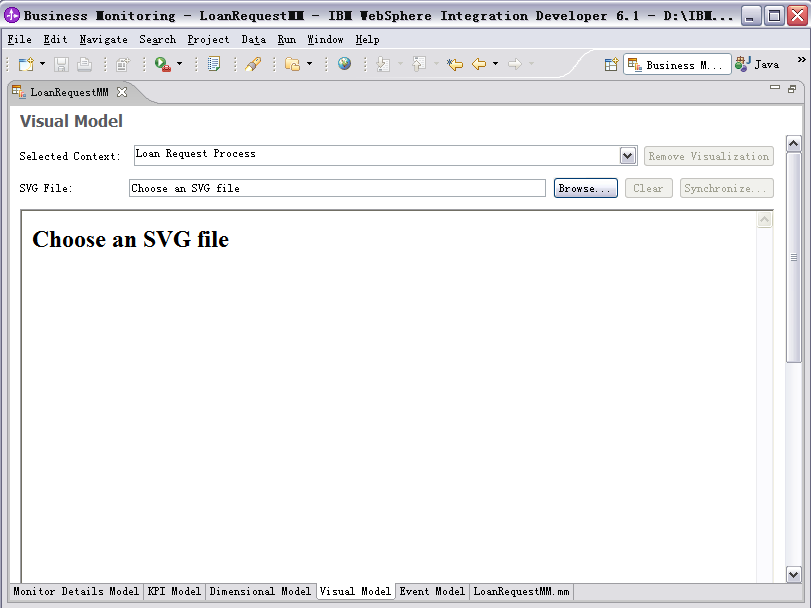
For the Loan Request Process MC
- In the Selected Context field, select Loan Request Process.
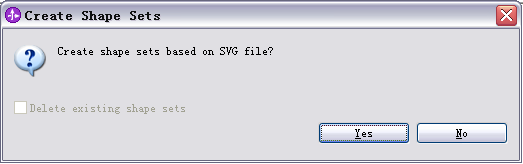
- In the SVG File field, click Browse and select the SVG file.
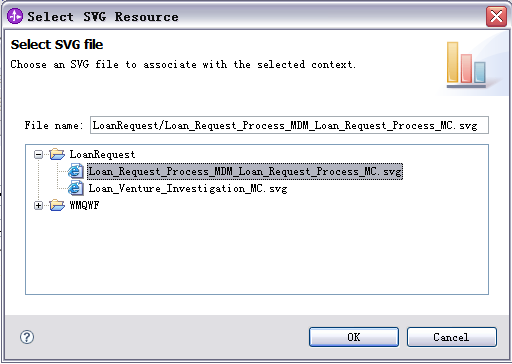
- On the prompt window, click Yes to display the SVG file below.
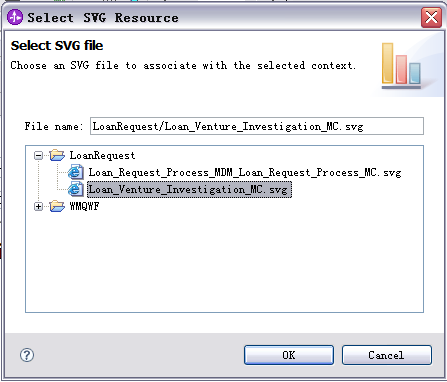
For the Loan Venture Investigate MC
- In the Selected Context field, select Loan Request Process/ Loan Venture
Investigate.
- In the SVG File field, click Browse and select Loan_Venture_Investigation_MC.svg.
- Click Yes to display the SVG file.
- Press Ctrl-S to save your work.
Step 3: Edit shape set actions
Edit the shape set actions by completing the following steps:
Add the link between Loan Request Process MC and Loan Request Process/Loan
Venture Investigate MC
To go to the SVG view of Loan Venture Investigate, click the icon on the SVG view of Loan Request Process.
- Click the plus icon
 on the frame Investigate Loan Venture
 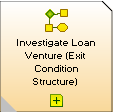 on the SVG of Loan
Request Process MC.
on the SVG of Loan
Request Process MC.
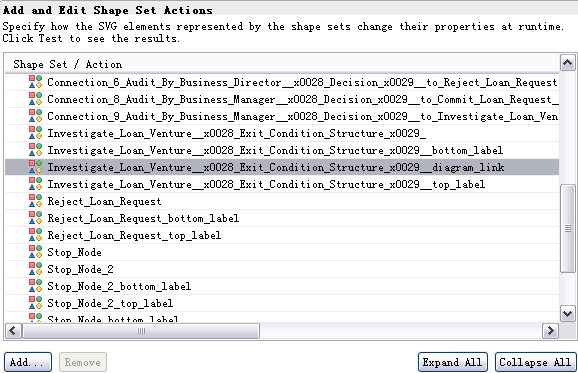
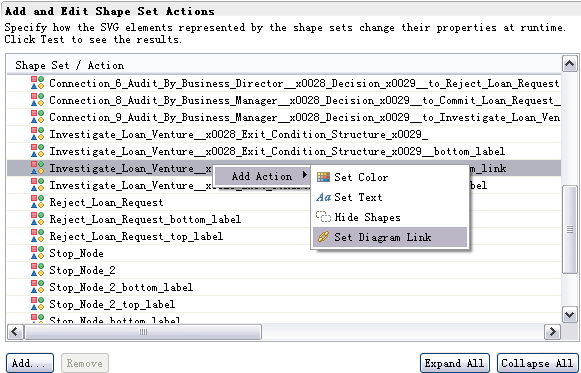
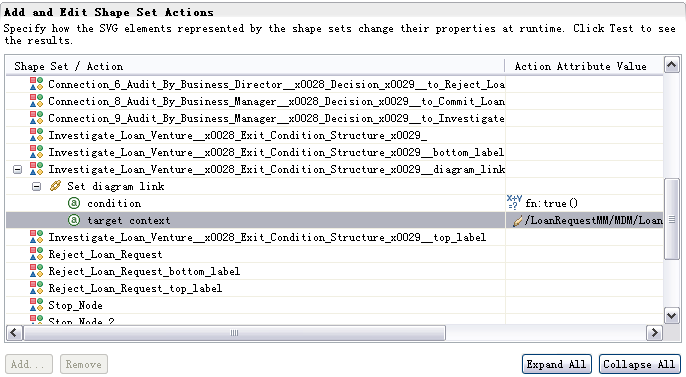
- Right-click the selected row, and click Add Action -> Set
Diagram Link. Several new rows are added to the table as follows.
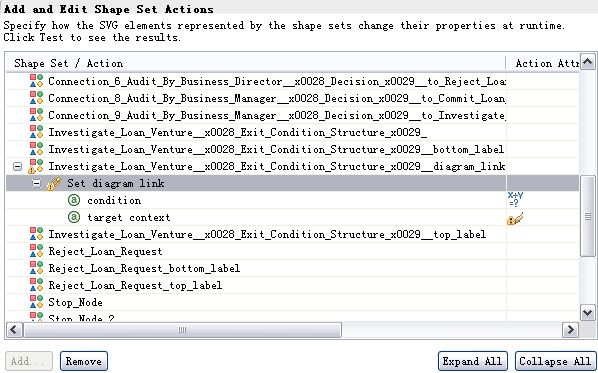
- Under the Shape Set/Action column, select the row that contains
condition, and click the cell under the Action Attribute column.
A button is displayed. Click this button to display the expression editor, and enter the following text:
fn:true()
- Under the Shape Set/Action column, select the row that contains
target
  context
, and then click the cell under Action Attribute Value. A button is
displayed. Click this button and then select the linked MC.

The table should now look like the one below.
Add action to monitor process progress
This step enables you to see which activity is currently executed.
- Switch to the Monitor Details Model view, right-click Loan Request Process
MC, and then select New -> Metric. Enter the following
values:
- In the Name field, enter
Executed Activity Currently.
- In the ID field, enter,
Executed_Activity_Currently.
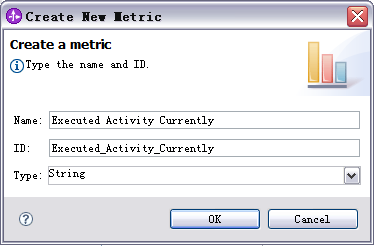
- When you are finished, click OK.
- For Metric Value Expressions, click Add .
- In the first row of the Metric Value Expressions table, leave the cell
under Trigger blank, and select the cell under the Expression column. Click the button and enter this text:
Submit_Loan_Request_Activity_Ready/EventPointData/wmqwf:ActivityName
- Repeat this step to add the Metric Value Expressions to the table,
using the following information:
- Audit_By_Business_Director_Activity_Ready/EventPointData/wmqwf:ActivityName
- Audit_By_Business_Manager_Activity_Ready/EventPointData/wmqwf:ActivityName
- Commit_Loan_Request_Activity_Ready/EventPointData/wmqwf:ActivityName
- Reject_Loan_Request_Activity_Ready/EventPointData/wmqwf:ActivityName
- Investigate_Loan_Venture/Investigate_Loan_Venture_Block_Activity_Started/EventPointData/wmqwf:ActivityName
- Select the cell under Trigger. Click the button to select Loan Request Committed Trigger, select the cell
under Expression , and then enter
Committed.
- Select the cell under Trigger . Click the button to select Loan Request Rejected Trigger, select the cell
under Expression , and then enter
Rejected.
- Press Ctrl-S to save your work.
- Repeat these steps to create the same metric for Investigate Loan
Venture MC.
The metric value expression for this metric is as follows:
- Approve_By_Senior_Manager_Activity_Ready/EventPointData/wmqwf:ActivityName
- Evaluate_Loan_Amount_Activity_Ready/EventPointData/wmqwf:ActivityName
- Investigate_By_Up_Level_Bank_Activity_Ready/EventPointData/wmqwf:ActivityName
- Approve_By_Venture_Manager_Activity_Ready/EventPointData/wmqwf:ActivityName
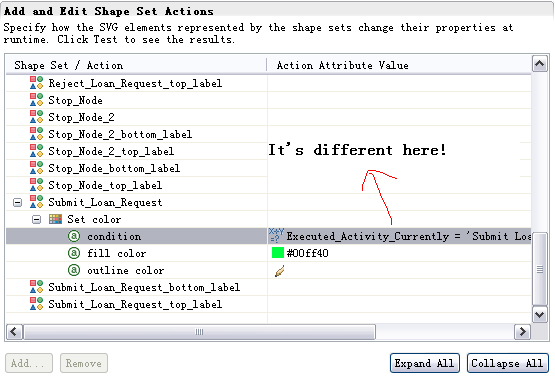
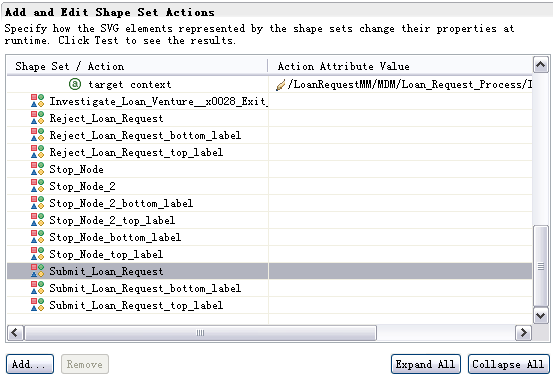
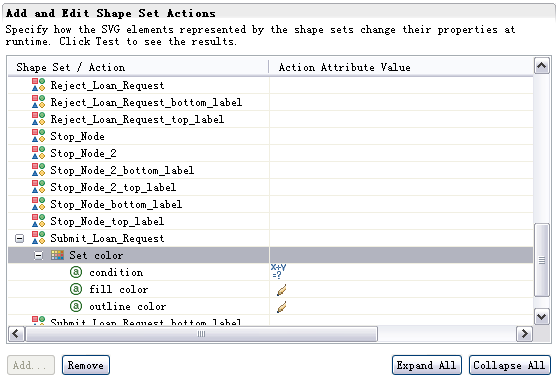
- Switch back to Visual Model view, click the icon
 on the SVG view of Loan
Request Process MC, then one row in the Add and Edit Shape Set Actions table
will be selected automatically.
on the SVG view of Loan
Request Process MC, then one row in the Add and Edit Shape Set Actions table
will be selected automatically.
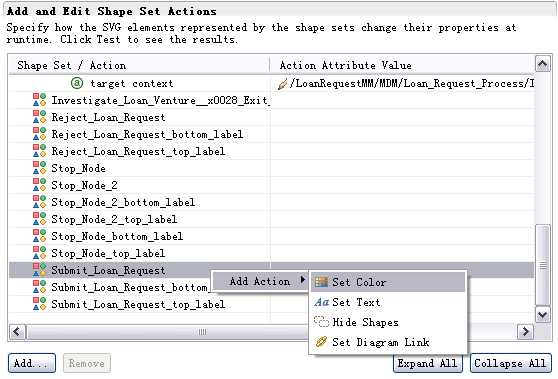
- Right-click the selected row, and select Add Action -> Set Color,
then several new rows are added to the table as follows.
Generate a J2EE Project
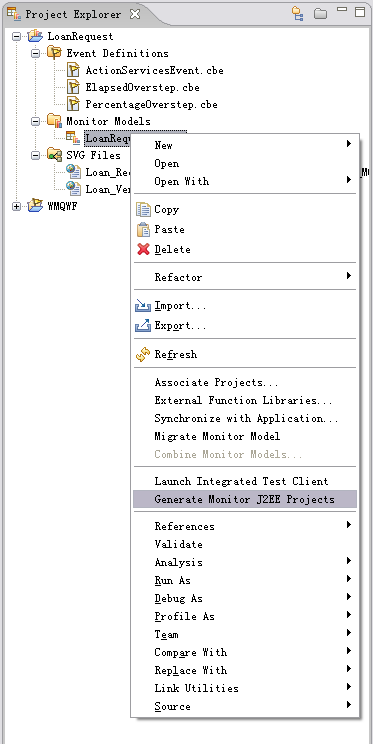
- In the Project Explorer view, right-click LoanRequestMM and click
Generate Monitor Model J2EE Project.
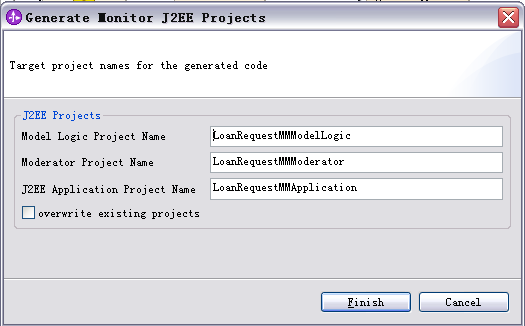
- On the window, click Finish.
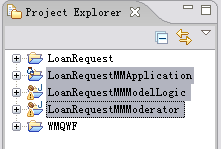
- Switch to the J2EE perspective. Three projects have been generated in the
Project Explorer view.
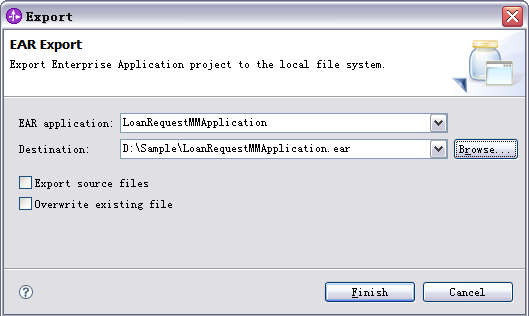
- Right-click LoanRequestMMApplication, and click Export ->
EAR file.
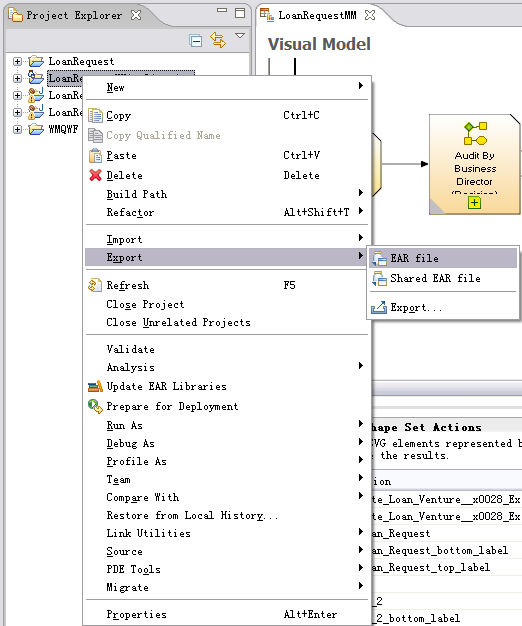
- Select a destination (for example D:\Sample\LoanRequestMMApplication.ear),
and click Finish.
Deploy the monitor model
In this section, you will use the WebSphere Application Server administrative
console to run the lifecycle steps to deploy the monitor model.
Install the monitor model
- In the WebSphere Application Server administrative console, select
Applications -> Monitor Models.

- Click Install.
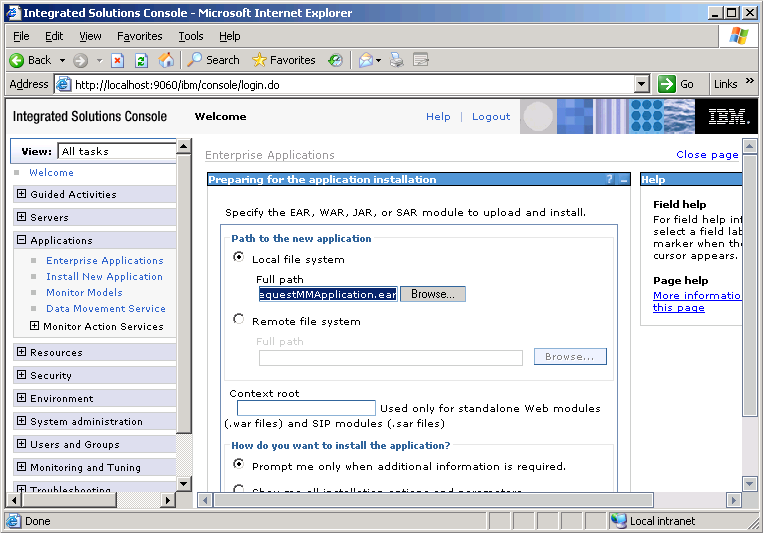
- Browse to and select LoanRequestMMApplication.ear. This is the EAR file that you
created using WebSphere
Integrated Developer.
- Click Next.
- Click Step 3 to accept the defaults for the installation.
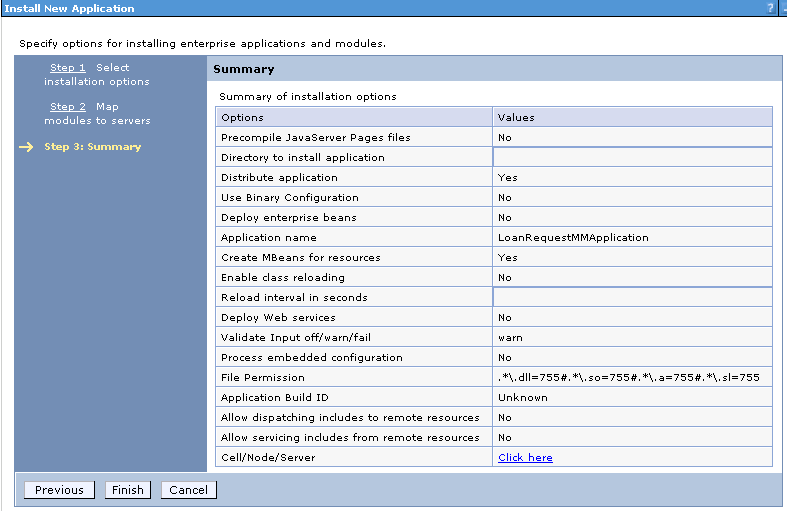
- Click Finish.
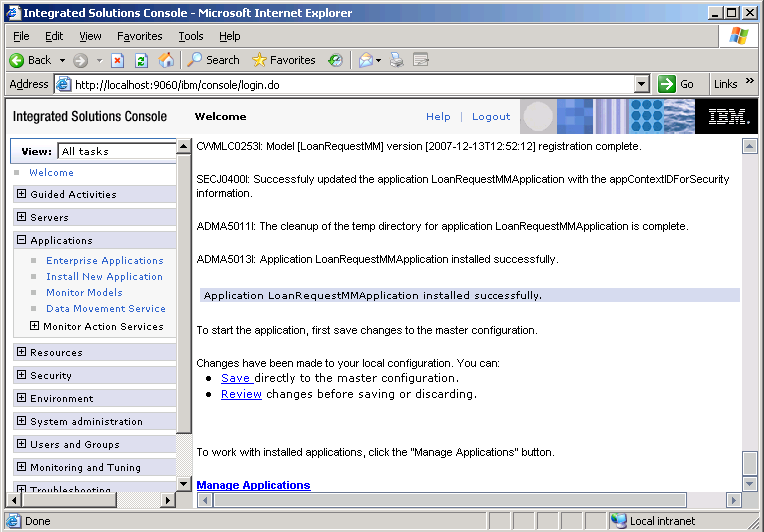
- Click Save to finish deploying the monitor model.
Add a template for the So Much Rejected Loan Request Alert
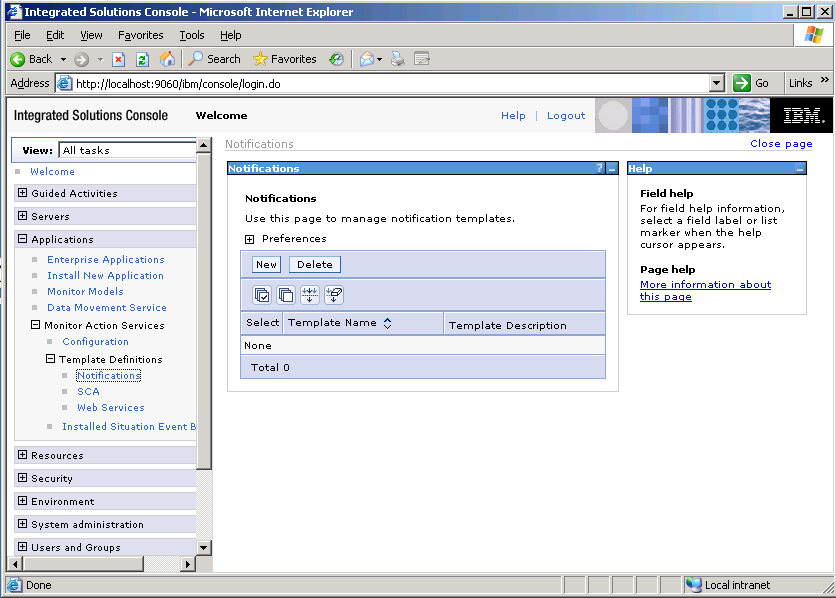
- In the WebSphere Application Server administrative console, click
Applications -> Monitor Action Services -> Template
Definitions -> Notification.
- Click New.
- For the template name, enter
RejectedLoanRequestSoMuch.
- For the description, enter some text or leave the field blank.
- For the Default action service type, select Dashboard Alert.
- For the To query type, select User id.
- In the To field, enter
zczc. ZCZC is the user that is used to
log in to the Web Dashboard.
- For the subject, enter
The rejected loan request is so much.
- In the body, enter
The percentage of rejected loan request is so much! The
    current percentage is %CurrentPercentage%, it exceeds the defined limitation
    (< %PercentageLimitation%)
.
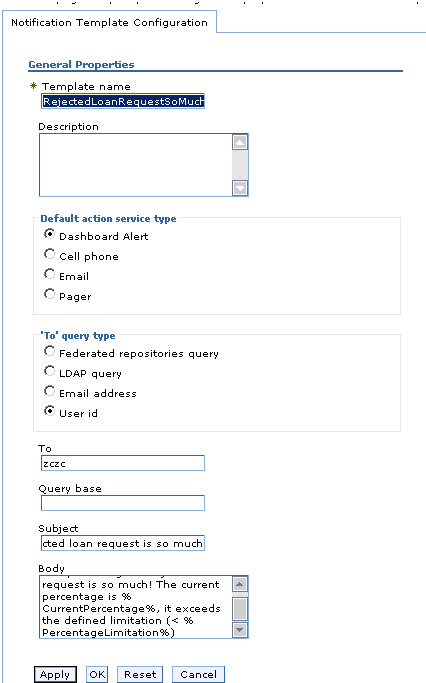
- Click OK.
Add the binding from the situation event to the action type for the
RejectedLoanRequestSoMuch template
In this section, add the binding from the situation event to the action
type for RejectedLoanRequestSoMuch template that you just configured.
- On the WebSphere Application Server administrative console, click
Applications -> Monitor Action Services -> Installed
Situation Event Bindings.
- Click New.
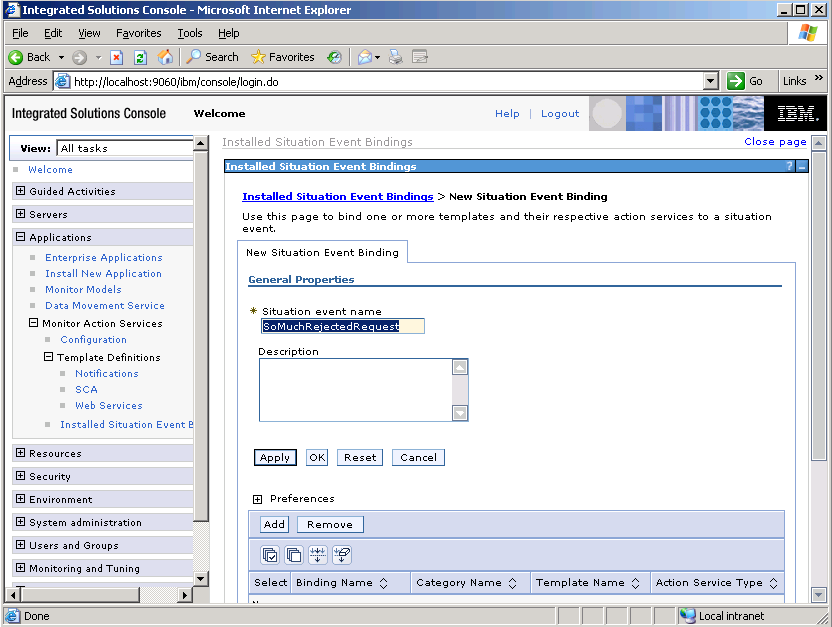
- For the outbound event, enter the situation event name that you defined in the model (
SoMuchRejectedRequest.
This value must match exactly the value in the BusinessSituationName field in the outbound event. You might want to
copy and paste this name from the model.
- Enter a description, and then click Apply.
- Click Add just below Preferences to add a new binding as shown in the sample below.
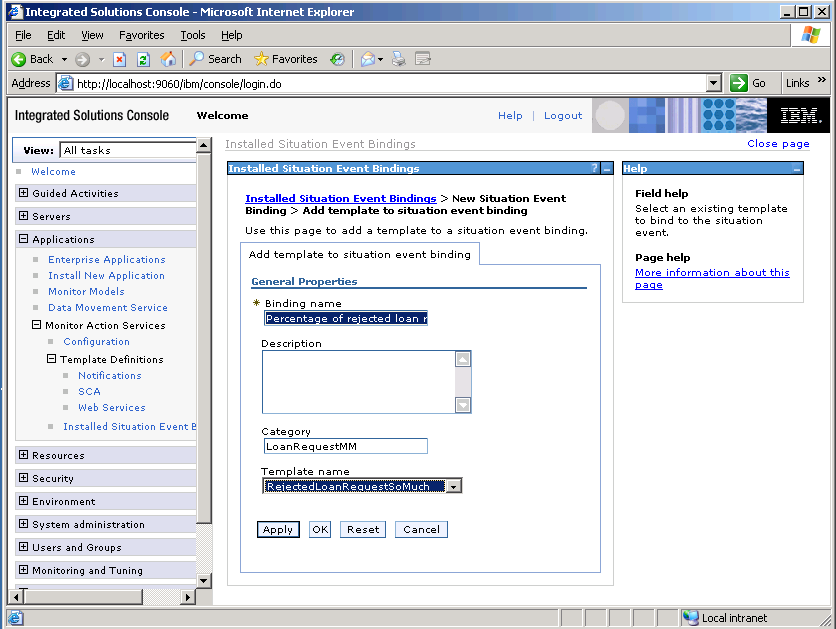
- For the binding name, enter
Percentage of rejected loan request overstep.
- For the category, enter
LoanRequestMM.
- For the template name, select
RejectedLoanRequestSoMuch.
- Click OK.
Note: Refer to Appendix 5 to add other templates and situation
bindings.
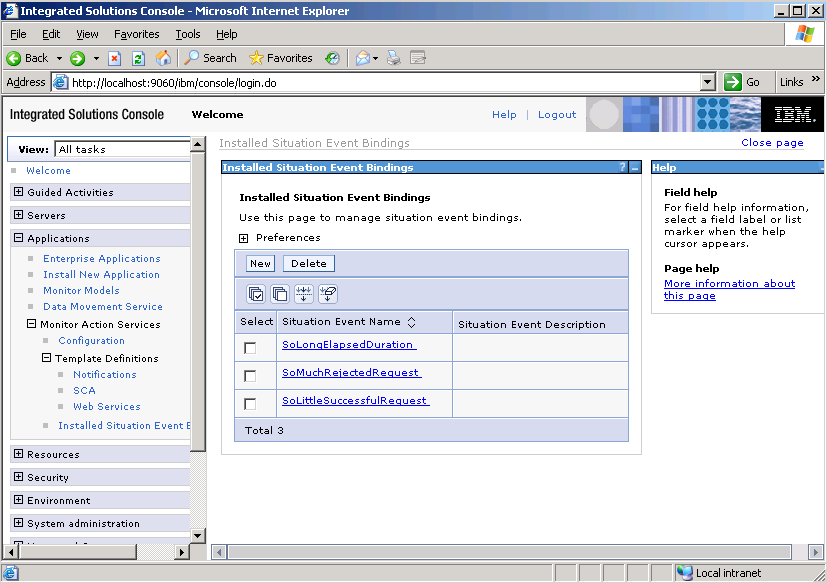
When you finish configuring the installed situation binding, you should see
a summary similar to the one below:
Appendixes
Appendix 1 - Other Metrics
Add the Loan Requester Gender metric
- In the Monitor Details Model view, right-click Loan Request Process
MC, and then click New -> Metric.
- Enter
Loan Requester Gender as the Name and select
String as the Type. Click OK.
- On the right panel, click Add for Metric Value Expressions.
- Click the space under Expression. A button is displayed. Click this
button, and enter the following text:
Submit_Loan_Request_Activity_Ready/ApplicationData/wmqwf:Loan_Requester/wmqwf:Gender
- Click OK.
Add the Loan Requester Age metric
- In the Monitor Details Model view, right-click Loan Request Process
MC, then select New -> Metric.
- Enter
Loan Requester Age as the Name, and select
Integer as the Type. Click OK.
- On the right panel, click Add button for Metric Value
Expressions.
- Click the space under Expression. A button is displayed. Click this
button, and enter the following text:
Submit_Loan_Request_Activity_Ready/ApplicationData/wmqwf:Loan_Requester/wmqwf:Age
- Click OK.
Add the Loan Requester Telephone Number metric
- In Monitor Details Model view, right-click Loan Request Process
MC, then click New -> Metric.
- Enter
Loan Requester Telephone Number as the Name, and
click String as the Type. Click OK.
- On the right panel, click Add for Metric Value Expressions.
- Click the space under Expression. A button appears. Click this button,
and enter the following text:
Submit_Loan_Request_Activity_Ready/ApplicationData/wmqwf:Loan_Requester/wmqwf:Telephone_Number
- Click OK.
Add the Loan Requester Indebted Amount metric
- In Monitor Details Model view, right-click Loan Request Process
MC, and then click New -> Metric.
- Enter
Loan Requester Indebted Amount as the Name, and click
Decimal as the Type. Click OK.
- On the right panel, click Add for Metric Value Expressions.
- Click the space under Expression. A button is displayed. Click this
button, and enter the following text:
Submit_Loan_Request_Activity_Ready/ApplicationData/wmqwf:Loan_Requester/wmqwf:Indebted_Amount
- Click OK.
Add the Loan Amount metric
- In Monitor Details Model view, right-click Loan Request Process
MC, and then click New -> Metric.
- Enter
Loan Amount as the Name, and click Decimal as the
Type. Click OK.
- On the right panel, click Add for Metric Value Expressions.
- Click the space under Expression. A button is displayed. Click this
button, and enter the following text:<
Submit_Loan_Request_Activity_Ready/ApplicationData/wmqwf:Loan_Amount
- Click OK.
Add the Loan Cycle metric
- In Monitor Details Model view, right-click Loan Request Process
MC, and then click New -> Metric.
- Enter
Loan Cycle as the Name, and click Integer as
the Type. Click OK.
- On the right panel, click Add for Metric Value Expressions.
- Click the space under Expression. A button is displayed. Click this
button, and enter the following text:
Submit_Loan_Request_Activity_Ready/ApplicationData/wmqwf:Loan_Cycle
- Click OK.
Add the Lending Rate metric
- In Monitor Details Model view, right-click Loan Request Process
MC, and then click New -> Metric.
- Enter
Lending Rate as the Name, and click Decimal as
the Type. Click OK.
- On the right panel, click Add for Metric Value Expressions.
- Click the space under Expression. A button is displayed. Click this
button, and enter the following text:
Submit_Loan_Request_Activity_Implementation_Completed/ApplicationData/wmqwf:Current_Lending_Rate
- Click OK.
Add the Loan Requester Credit Standing Status metric
- In Monitor Details Model view, right-click Loan Request Process
MC, and then click New -> Metric.
- Enter
Loan Requester Credit Standing Status as the Name,
and click String as the Type. Click OK.
- On the right panel, click Add for Metric Value Expressions.
- Click the space under Expression. A button is displayed. Click this
button, and enter the following text:
Submit_Loan_Request_Activity_Implementation_Completed/ApplicationData/wmqwf:Requester_Credit_Standing_Status
- Click OK.
Add the Business Director Name metric
- In Monitor Details Model view, right-click Loan Request Process
MC, and then click New -> Metric.
- Enter
Business Director Name as the Name, and click String
as the Type. Click OK.
- On the right panel, click Add for Metric Value Expressions.
- Click the space under Expression. A button is displayed. Click this
button, and enter the following text:
Audit_By_Business_Director_Activity_Implementation_Completed/ApplicationData/wmqwf:Business_Director_Name
- Click OK.
Add the Business Manager Name metric
- In Monitor Details Model view, right-click Loan Request Process
MC, and then click New -> Metric.
- Enter
Business Manager Name as the Name, and click
String as the Type. Click OK.
- On the right panel, click Add for Metric Value Expressions.
- Click the space under Expression. A button is displayed. Click this
button, and enter the following text:
Audit_By_Business_Manager_Activity_Implementation_Completed/ApplicationData/wmqwf:Business_Manager_Name
- Click OK.
Add the Repay Mode metric
- In Monitor Details Model view, right-click Loan Request Process
MC, and then click New -> Metric.
- Enter
Repay Mode as the Name, and click String as
the Type. Click OK.
- On the right panel, click Add for Metric Value Expressions.
- Click the space under Expression. A button is displayed. Click this
button, and enter the following text:
Submit_Loan_Request_Activity_Ready/ApplicationData/wmqwf:Repay_Mode
- Click OK.
Add the Commit Loan Request Result metric
- In Monitor Details Model view, right-click Loan Request Process
MC, and then click New -> Metric.
- Enter
Commit Loan Request Result as the Name, and select
String as the Type. Click OK.
- On the right panel, click Add for Metric Value Expressions.
- Click the space under Expression. A button is displayed. Click this
button, and enter the following text:
Commit_Loan_Request_Activity_Implementation_Completed/ApplicationData/wmqwf:LoanRequest_Committed_Result
- Click OK.
Add the Loan Rejected Reason metric
- In Monitor Details Model view, right-click Loan Request Process
MC, and then click New -> Metric.
- Enter
Loan Rejected Reason as the Name, and click
String as the Type. Click OK.
- On the right panel, click Add for Metric Value Expressions.
- Click the space under Expression. A button is displayed. Click this
button, and enter the following text:
Reject_Loan_Request_Activity_Implementation_Completed/ApplicationData/wmqwf:Business_Director_Audit_Result
- Click OK.
Add the Senior Manager Name metric
- In Monitor Details Model view, right-click Investigate Loan Venture
MC, and then click New -> Metric.
- Enter
Senior Manager Name as the Name, and click
String as the Type. Click OK.
- On the right panel, click Add button of Metric Value Expressions.
- Click the space under Expression. A button is displayed. Click this
button, and enter the following text:
Approve_By_Senior_Manager_Activity_Implementation_Completed/ApplicationData/wmqwf:Senior_Manager_Name
- Click OK.
Add the UpLevel Bank Investigation Result metric
- In Monitor Details Model view, right-click Investigate Loan Venture
MC, and then click New -> Metric.
- Enter
UpLevel Bank Investigation Result as the Name, and
click String as the Type. Click OK.
- On the right panel, click Add for Metric Value Expressions.
- Click the space under Expression. A button is displayed. Click this
button, and enter the following text:
Investigate_By_Up_Level_Bank_Activity_Implementation_Completed/ApplicationData/wmqwf:Venture_Investigation_Result
- Click OK.
Add the Venture Manager Name metric
- In Monitor Details Model view, right-click Investigate Loan Venture
MC, and then click New -> Metric.
- Enter
Venture Manager Name as the Name, and select
String as the Type. Click OK.
- On the right panel, click Add for Metric Value Expressions.
- Click the space under Expression. A button is displayed. Click this
button, and enter the following text:
Approve_By_Venture_Manager_Activity_Implementation_Completed/ApplicationData/wmqwf:Venture_Manager_Name
- Click OK.
Add the Percentage of Loan Request Committed Successfully metric
- In Monitor Details Model view, right-click Loan Request Process
MC, and then select New -> Metric.
- Enter
Percentage of Loan Request Committed Successfully as
the Name, and click Decimal as the Type. Click OK.
- On the right panel, enter
0 as the default value of the
metric, and click Add for Metric Value Expressions.
- Click the space under Expression. A button is displayed. Click this
button, and enter the following text:
if (Commit_Loan_Request_Activity_Implementation_Completed/ApplicationData/wmqwf:LoanRequest_Committed_Result
          = 'Successfully') then 100 else
          Percentage_of_Loan_Request_Committed_Successfully
- Click OK.
Appendix 2 - Other KPIs
- In KPI Model view, right-click Template KPI Context, and click
New -> KPI
- Enter
Percentage of Committed Successfully Loan Request as
the Name.
- On the right panel, for the KPI Definition, select KPI Value as Base
this KPI on a metric and aggregation function. The KPI Details tab is
now visible.
- For KPI Details, complete the following steps:
- Click Browser to select
Monitoring context to be Loan
      Request Process
.
- Click Browser to select
Metric as
      Percentage_of_Loan_Request_Committed_Successfully
.
- Select Aggregation function to be Average.
- For KPI Target and Ranges, enter the following values:
- For Target, enter
75.
- For Ranges, enter
Actual Value
- In the Range table, click Add.
- Change the Name to
Good and the ID to Good
A row is created in the Range table with a range name Good.
- For this new row, select the cell in the Start value column. A button
is displayed. Click this button, and then change the value to
75. Click OK.
- For this row, select the cell in the End value column. A button is
displayed. Click this button, and then change the value to
100. Click OK.
- Repeat the previous step to create two more ranges:
Acceptable with start value 50 and end value 75
UnAcceptable with start value 0 and end value
50
Appendix 3 - Other measures
- In Dimensional Model view, select Loan Request Process Cube in
the navigation tree.
- For the Measures table, click New, and enter the following
values, and then click OK to finish:
- For Name, enter
Percentage of Loan Request Committed
      Successfully
.
- For ID, enter
Percentage of Loan Request Committed
      Successfully
.
- For Source metric, enter
Percentage_of_Loan_Request_Committed_Successfully.
- For Aggregation function, enter
Average.
Appendix 4 - Other alerts
- In KPI Model view , right-click Template KPI Context, and click
New -> Trigger.
- Enter
So Little Loan Request Committed Successfully Alert
    Trigger
as the Name.
- On the right panel, clear the Trigger is repeatable check box,
and click Add to select Recurring wait time as the source event of
trigger.
- For the trigger condition, enter the following text:<
Percentage_of_Committed_Successfully_Loan_Request <
      50
- In the KPI Model view, right-click Template KPI Context, and
click New -> New Outbound Event.
- Enter
So Little Loan Request Committed Successfully Alert
as the Name. Click OK.
- On the right panel, for Event Type Details, click Browser to
select extension name to be PercentageOverstep.
- For Event Attributes Details, click Add button to select trigger
So Little Loan Request Committed Successfully Alert Trigger.
Some content is now displayed in the table of Event Attributes Details.
Complete the following actions in the table:
- On the same row as BusinessSituationName, enter
'SoLittleSuccessfulRequest' as the Expression (include the
hyphens).
- On the same row as CurrentPercentage, enter
Percentage_of_Loan_Request_Committed_Successfully (KPI) as
the Expression.
- On the same row as PercentageLimitation, enter
50 as the
Expression.
- Switch to Monitor Details Model view , right-click Loan Request
Process MC, and click New -> Trigger.
- Enter
DurationAlertTrigger as the Name.
- On the right panel, clear the Trigger is repeatable check box, and click
Add to select Recurring wait time as the source event of
trigger.
- For the trigger condition, enter the following text:
(fn:current-dateTime() - Commit_Loan_Request_Start_Time) ge
    dayTimeDuration('P0DT0H1M0.000S')
- In the Monitor Details Model view, right-click Loan Request Process
MC, and click New -> New Outbound Event.
- Enter
DurationAlert as the Name. Click OK.
- On the right panel, for Event Type Details, click the Browser to
select extension name to be ElapsedDurationOverstep.
- For Event Attributes Details, click Add to select trigger
Percentage of Rejected Loan Request Overstep Trigger.
Some content is now displayed in the table of Event Attributes Details.
Enter the following information in the table:
- On the same row as BusinessSituationName, enter
'SoLongElapsedDuration' as the Expression (include the
hyphens).
- On the same row as Activity Name, enter
Commit Loan
      Request
as the Expression.
- On the same row as DurationLimitation, enter
1 as the
Expression.
Appendix 5
Add a template for DurationAlert alert
- In the WebSphere Application Server administrative console, navigate to
Applications -> Monitor Action Services -> Template
Definitions -> Notification.
- Click New.
- Enter
ElapsedDurationSoLong for the Template name.
- Enter some text for Description or leave it blank.
- Select Dashboard Alert for Default action service type.
- Select User id for To query type
- Enter
zczc for To.
Note that zczc is the user that is used to log in to the Web
Dashboard
- Enter
The elapsed duration is so long for the Subject.
- Enter
The elapsed duration of this activity is so long. The
    current duration is %CurrentDuration%, it exceeds the defined limitation
    (<%DurationLimitation%)
for the Body.
- Click OK
Add a template for So Little Loan Request Committed Successfully
Alert
- In the WebSphere Application Server administrative console, click
Applications -> Monitor Action Services -> Template
Definitions -> Notification.
- Click New.
- Enter
CommittedLoanRequestSoLittle for the Template name.
- Enter some text for Description, or leave it blank
- Select Dashboard Alert for Default action service type.
- Select User id for To query type
- Enter
zczc for To.
Note that zczc is the user that is used to log in to the Web
Dashboard
- Enter
The loan request committed successfully is so little
as the Subject.
- Enter
The percentage of loan request committed successfully is so
    little! The current percentage is %CurrentPercentage%, it exceeds the
    defined limitation (> %PercentageLimitation%)
as the Body.
- Click OK
Add the binding from the situation event to the action type for
ElapsedDurationSoLong template configured previously
- In the WebSphere Application Server administrative console, click
Applications -> Monitor Action Services -> Installed
Situation Event Bindings.
- Click New.
- Enter the situation event name that you defined in the model (meaning,
SoLongElapsedDuration). This must match exactly the value in
the BusinessSituationName field in the outbound event. You might want to
copy and paste this name from the model.
- Enter a description, and then click Apply.
Click Add for the preference table to add a new binding as follows
- Enter
Elapsed duration overstep as the Binding name.
- Enter
LoanRequestMM as the Category.
- Select
ElapsedDurationSoLong as the Template name.
- Click OK
Add the binding from the situation event to the action type for
CommittedLoanRequestSoLittle template configured previously.
- In the WebSphere Application Server administrative console, click
Applications -> Monitor Action Services -> Installed
Situation Event Bindings.
- Click New.
- Enter the situation event name that you defined in the model (meaning,
SoLittleSuccessfulRequest). This must match exactly the value
in the BusinessSituationName field in the outbound event. You might want to
copy and paste the name from the model.
- Enter a description, and then click Apply.
Click the Add for the preference table to add a new binding as
follows
- Enter
Percentage of loan request committed successfully
      overstep
as the Binding name.
- Enter
LoanRequestMM as the Category.
- Select CommittedLoanRequestSoLittle as the Template name
- Click OK.