Prerequisites
Before you can run the sample application, you have to install and start the order management process. Refer to the Download section for details.
Also ensure that security is enabled for WebSphere Process Server. Please refer to the WebSphere information center for more details.
Client application
To run the client application, perform the following steps:
- In a web browser, open URL
http://yourhost:yourport/CustomClient70. - On the welcome page, there are two links. To start the order management process, click Start order management process. To work with the tasks associated with the order management process, click List my tasks.
- If the Login page is displayed, enter Name and Password, then click Login.
- To navigate through the client pages, use the links in the navigation header.
Note: Replace yourhost with your server's internet address and replace yourport with the port of your server's HTTP transport,
for example
The welcome page is displayed:


Depending on the link you have clicked, either the process template list or the task list is displayed.

Starting the order management process
To start an instance of the order management process, perform the following steps:
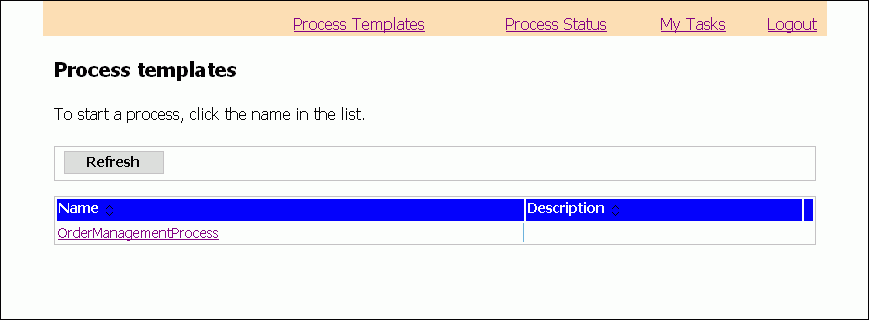
- In the navigation header, click Process Templates.
- In the list, click OrderManagementProcess.
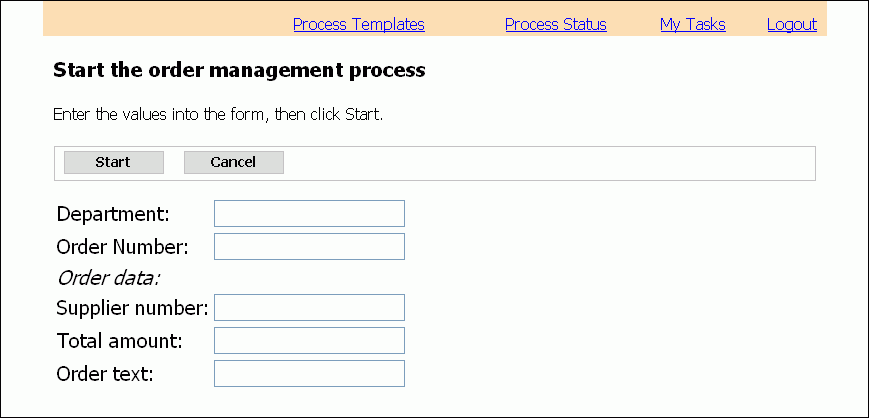
- In the Department field, enter a string.
- In the Order Number field, enter a string. This string must be unique.
- In the Supplier number field, enter a string.
- In the Total amount field, enter a numeric value.
- In the Order text field, enter a string.
- Click Start.
The Process templates page is displayed. The only process template you should see is OrderManagementProcess.
The process start form is displayed.
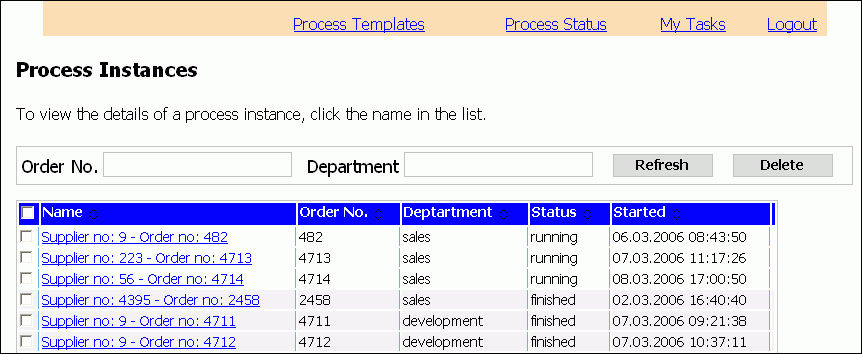
The Process Instances page is displayed:
Working with process instances
Listing process instances
To list the process instances, perform the following steps:
- In the navigation header, click Process Status.
The Process Instances page is displayed:
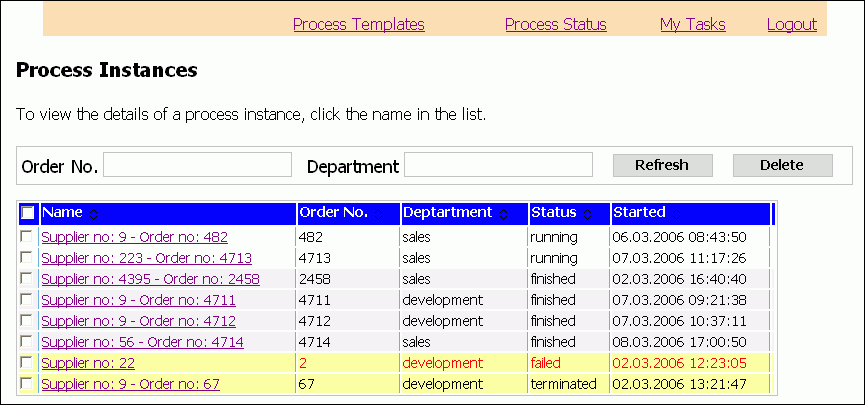
You will notice that process instances with a state of 'finished', 'failed', or 'terminated' are highlighted.
Filtering process instances
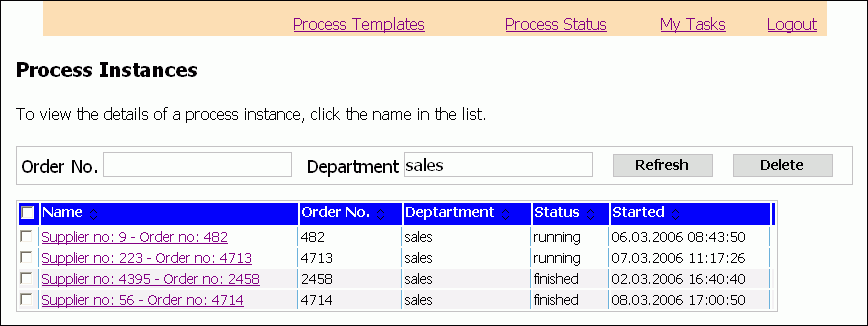
You can filter the process instances by order no. and department.
To apply a filter, perform the following steps:
- Enter a string in the Order No. field and/or the Department field.
- Click Refresh.
A filtered process instance list is displayed:
To disable the filter, perform the following steps:
- Clear the Order No. and Department fields.
- Click Refresh.
Displaying process instance details
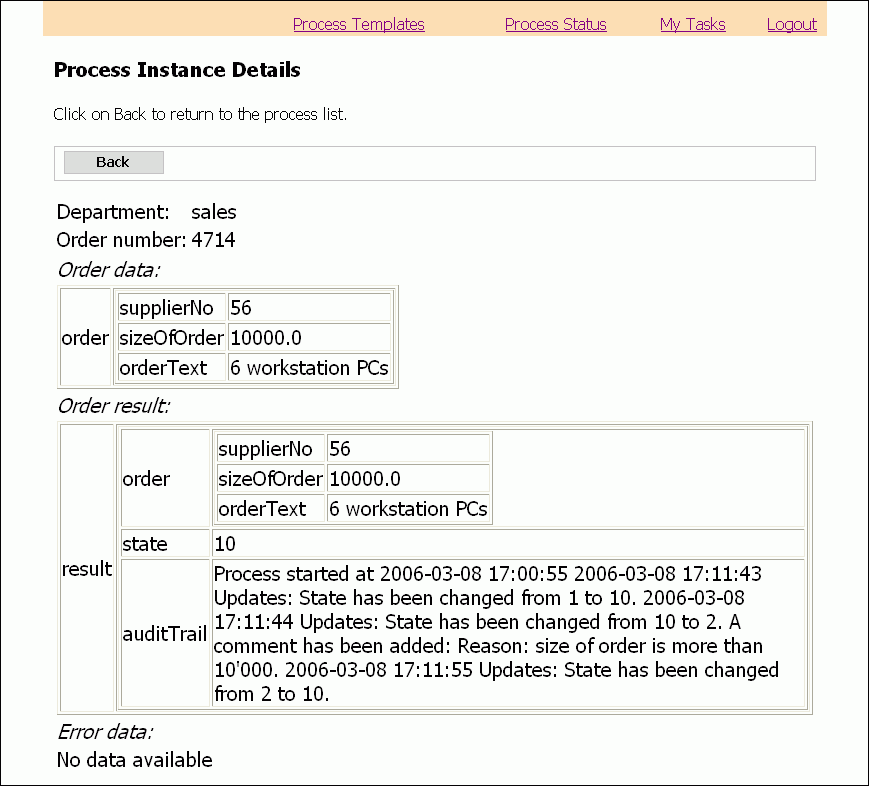
To display process instance details, perform the following steps:
- Switch to the Process Instances page.
- In the list, click the name of the process instance.
The Process Instance Details page is displayed:
Deleting process instances
To delete process instances, perform the following steps:
- Switch to the Process Instance page.
- In the list, mark the process instances to delete.
- Click Delete.

Note: only process instances in the states 'finished', 'failed', or 'terminated' can be deleted.
Working with tasks
Listing task instances
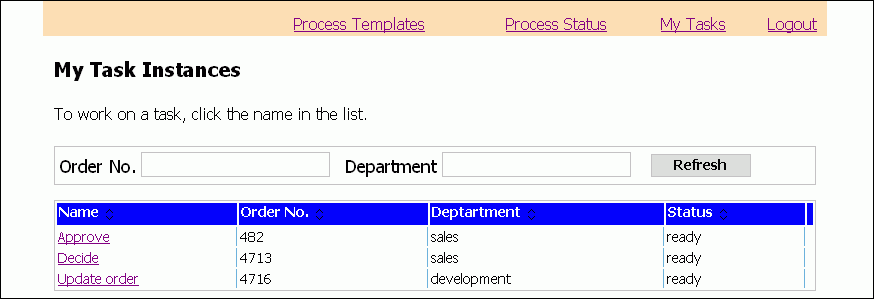
To list the task instances, perform the following steps:
- In the navigation header, click My Tasks.
The My Task Instances page is displayed:
Filters can be applied as described in the filtering process instances section.
Working with task instances
To display the task instance details, perform the following steps:
- Switch to the My Task Instances page.
- In the task list, click the name of the task.
The task details page is displayed:
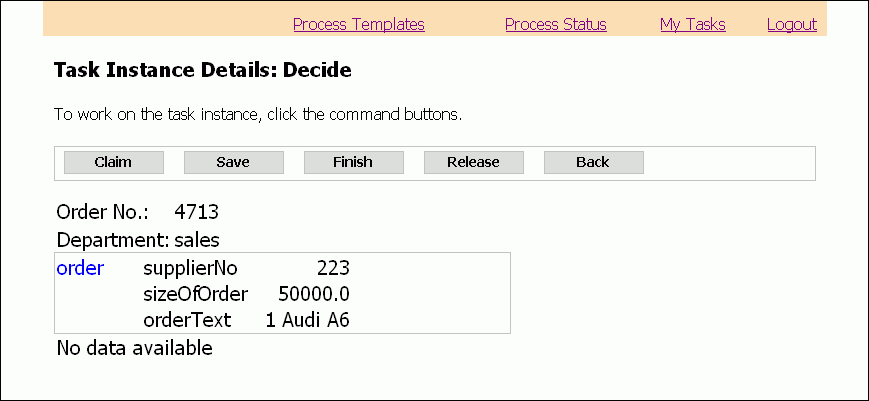
This page looks different depending on the kind and the state of the task.
To return to the task instance list, perform the following steps:
- In the command-bar, click Back.
The My Task Instances page is displayed.
To work on a task instance, perform the following steps:
- Switch to the My Task Instances page.
- In the task list, click the name of the task. The task details page is displayed.
- On the command-bar click Claim.
Note: this command is only valid for tasks in the state 'ready'.
The output message is displayed for editing. In this sample, custom JSPs are used to render the output message:
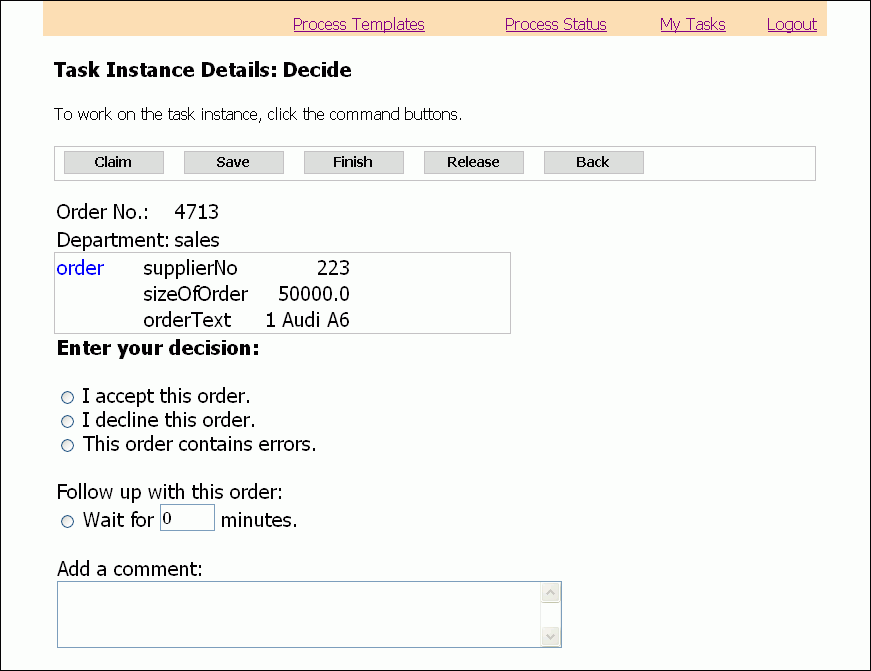
This page looks different depending on the kind and state of the task.
To save the task output message, perform the following steps:
- On the command-bar click Save.
Note: this command is only valid for tasks in the state 'claimed'.
You can now go back to the My Task Instances page and continue to work wit the task later.
To finish a task, perform the following steps:
- On the command-bar click Finish.
Note: this command is only valid for tasks in the state 'claimed'.
The My Task Instances page is displayed.
To release a task, perform the following steps:
- On the command-bar click Release.
Note: this command is only valid for tasks in the state 'claimed'.
The My Task Instances page is displayed.
Decide task

- To accept the order, click the radio-button I accept this order.
- To accept the order, click the radio-button I decline this order.
- If the order contains errors, click the radio-button This order contains errors.
- Optionally, if you want to work with this task later, click the radio-button Follow up with this order, then enter a numeric value into the minutes field.
- Optionally, enter a string in the Add a comment text area.
Approve task
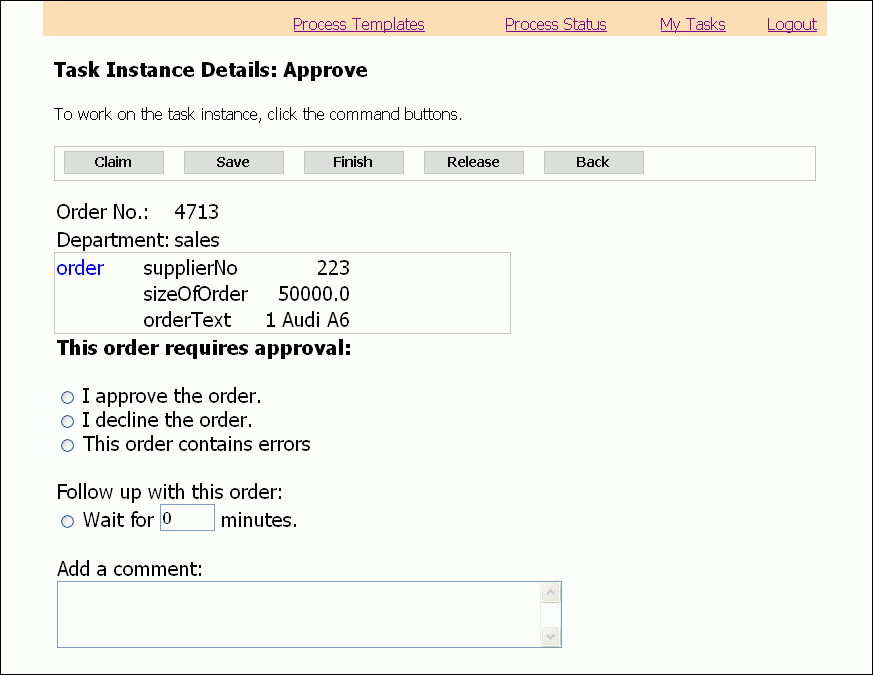
- To approve the order, click the radio-button I approve this order.
- To accept the order, click the radio-button I decline this order.
- If the order contains errors, click the radio-button This order contains errors.
- Optionally, if you want to work with this task later, click the radio-button Follow up with this order, then enter a numeric value into the minutes field.
- Optionally, enter a string in the Add a comment text area.
Update order task
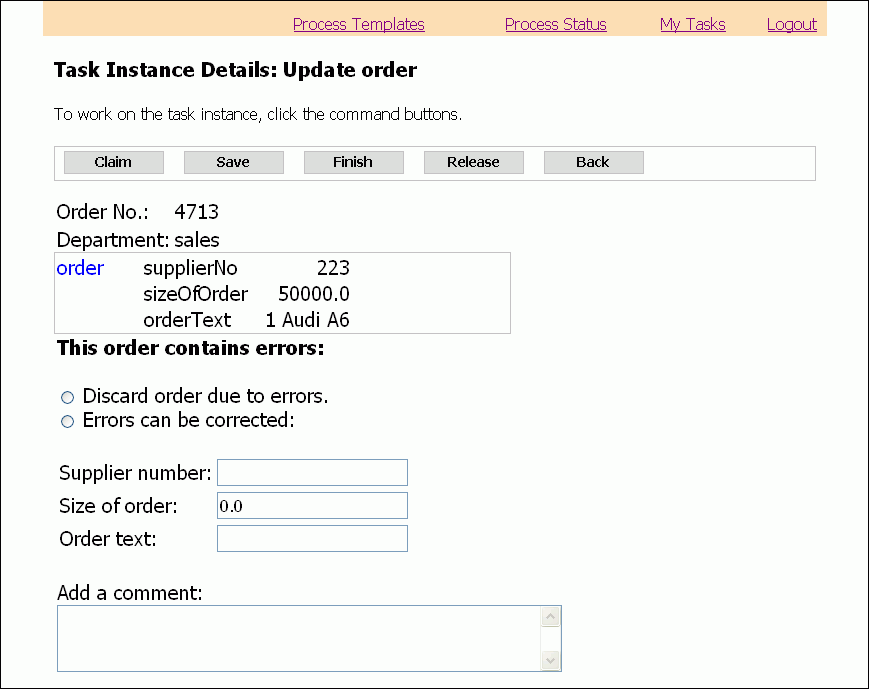
- To discard the order, click the radio-button Discard order due to errors.
- To correct the order data, click the radio-button Errors can be corrected, then update the following fields:
- Optionally, enter a string in the Add a comment text area.
In the Supplier number field, enter a string.
In the Size of order field, enter a numeric value.
In the Order text field, enter a string.
Logout
To logout from your application, perform the following steps:
- In the navigation header, click Logout.
- The Login page is displayed:
- To re-login to the application, enter Name and Password, then click Login.
