Run the sample

In this section you install the required process and client applictions. Afterwards you can run the basic sample client application developed in the Build it yourself section to query process templates. The advanced client application extends this to start a process instance.

1 Import sample applications

Import, deploy and familiarize with the process started by the JAX-WS client

Click on the link WSApiModule project to save the zip file to a directory of your choice, for example C:\temp. Import this process to WID and deploy to the WebSphere Process Server.

For more details refer to Import, deploy and familiarize with the process called WSApiModuleApp in the "build it yourself" section. This process is going to be started by the JAX-WS client applcation.

Import and deploy the provided Web Service Client

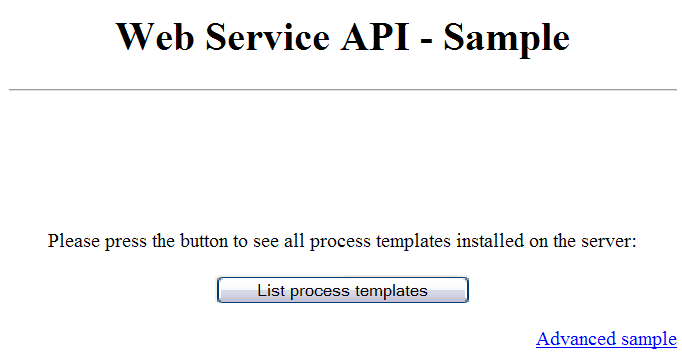
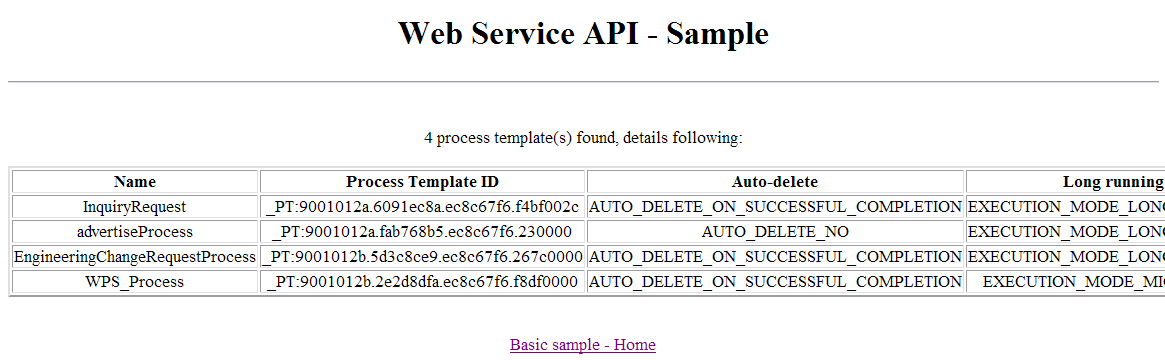
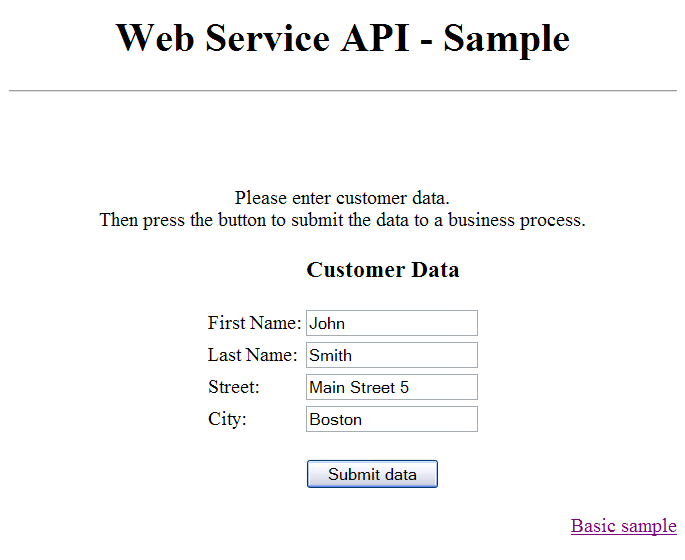
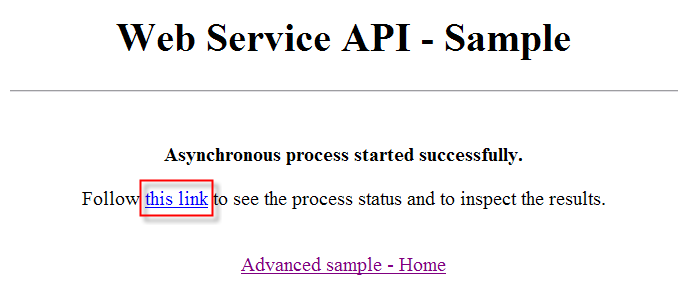
A project has been prepared, which includes a WebService Client to query process templates and to start a process instance.

To import the prepared project interchange file, perform the following steps:
  1. Click on the link WebServiceClient.ear to save the ear file to a directory of your choice, for example C:\temp.
    You might have to rename the file to an ear file, if is was saved as a zip file.
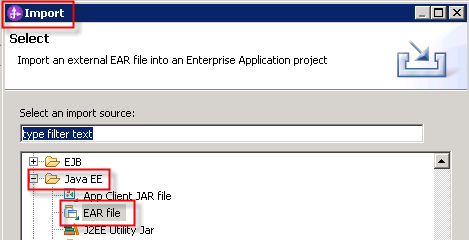
  2. In WebSphere Integration Developer, click File > Import. The Import window opens.
  3. Select Java EE > EAR File.
  4. Click Next. The Enterprise Application Import window opens.
    Click Browse next to the EAR file field.
    Browse and navigate to the directory that you have used before to save the ear file.

  5. Press Next.
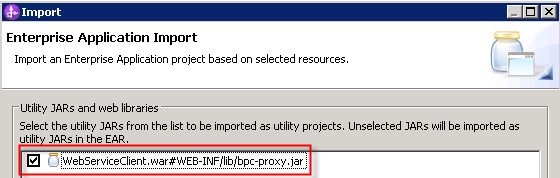
    Select the Utility Jar file, here bpc-proxy.jar.

  6. Click Finish.
  7. Wait until the automatic build process has finished.


  8. Deploy the WebServiceClient project in WID to the integrated process server.
    • In WebSphere Integration Developer, switch to the Servers view.
    • Ensure that your WebSphere Process Server V7.0 is started.
  9. Right click the server. From the pop-up menu, select Add and Remove Projects.
  10. Select the project you want to deploy: WebServiceClient. Press Add > and click Finish.

    Wait until the project has been successfully deployed.

    Note:
    You also might have installed the WebServiceClient.ear application directly to the process server.

2 Basic sample client application

Make sure that the client application is deployed on your WebSphereŽ Process Server. If you need more details how to add an application to the server, refer to the "Build it Yourself" section of the Getting Started > Hello World sample.

Run the Basic sample

To run the client application after deploying it to the WebSphere Process Server, follow these steps:

  1. In a Web browser, open the URL http://yourhost:yourport/WebServiceClient.index
  2. Note: Replace yourhost with your server's internet address and replace yourport with the port of your server's HTTP transport, for example


  3. The entry page of your client application is displayed.
    Press the button List process templates.

    Note:
    To query process templates requires to pass a userid and password. These are hard coded (admin/admin) within the invoke.jsp file. For more details refer to "Enforce authentication for the Web application."

  4. The result page of your client application is displayed.
    In case that you did not deploy and start any enterprise applications which contain a business process, the samples page will displayed indicating that no process templates are found on the server.

  5. Otherwise, the result page will contain the entries about currently available process templates, for example:

  6. Click to return to your entry page.

3 Advanced sample client application

The WSApiModuleApp application you deployed to the server contains the advertiseProcess. This process simulates the scenario that for a given customer it is computed whether the customer is eligible to receive an advertisement gift. Doing so you pass initial process start parameters when you create a process instance.

As part of this we use Java Architecture for XML Binding (JAXB). JAXB provides a convenient way to bind an XML schema to a representation in Java code. This makes it easy for you to incorporate XML data and processing functions into applications based on Java technology without having to know much about XML itself.

Run the Advanced sample

To run the client application after deploying it to the WebSphere Process Server, follow these steps:

  1. In a Web browser, open the URL http://yourhost:yourport/wsclient/startprocess.html.
  2. Note: Replace yourhost with your server's internet address and replace yourport with the port of your server's HTTP transport, for example

    Instead, you can start as well from the Basic sample and follow the link Advanced sample.

  3. If prompted, authenticate yourself to the server:
    • If you did not authenticate to your WebSphere Process Server during your current browser session, a login dialog appears.
    • If you already did authenticate to your WebSphere Process Server, e.g. by opening the administrative console, the login dialog will be skipped.

  4. The start page of the Advanced sample is displayed. Enter the fields with any values of your choice and press Submit data:
  5. An indication is given whether the business process was started successfully. If the start did not succeed ("No response available") then double-check that the WSApiModuleApp is deployed and started successfully on your server, and then look for problems visible in the server logs.
    After a successful start of the process, the screen looks like this:
  6. To be reworked To be reqworked Follow the first hyperlink on the screen; this link uses a parameterized URL similar to http://localhost:9080/wsclient/viewprocess.jsp?PIID=_PI:90030119.ec15872f.b61b67f6.dc830215 which navigates to a status page for this particular process instance. For some seconds, the status will be STATE_RUNNING as the underlying BPEL process uses a sleep operation to delay the execution for some time (sleep time 10 seconds):

  7. Wait a moment. The status page will automatically trigger a refresh operation (refresh interval specified in this sample is 4 seconds) and after a few refresh operations, the screen will change to look similar to this:

Run the sample

R_StartProcess

R_StartProcessConfirmation.png


StartProcessConsole


Link R_StartProcessInstanceDetails.png


***********************************
The endpoint used for the web service API was specified implicitly when the Java web service proxy was generated from the WebSphere Process Server WSDL file. If this implicitly specified default value for the service endpoint does not reflect the environment where you want to run this sample, you may modify the service endpoint dynamically.