Build it yourself
In order to build and test the sample, a running instance of WebSphere Integration Developer v7.0 including an appropriate WebSphere Process Server unit test environment (UTE) installation is required.
To build the first part of the sample, the following steps need to be taken:
- Create a new module named 'BusinessRulesSample'.
- Create an interface named 'CostCalculationInterface'.
- Create a rule group named 'QuoteRuleGroup'.
- Create a rule set named 'QuoteRuleSet'.
- Create a decision table named 'QuoteDecisionTable'.
- Assemble the rule group.
The second part of the sample consists of the following activities:
- Convert business rules to templates.
- Edit the templates using Business Rules Manager.
- Publish the modified business rules.
Part One
Create a new module named 'BusinessRulesSample'
In WebSphere Integration Developer (WID), open the File menu, select New and then Module. The Create Module dialog will appear as shown below.
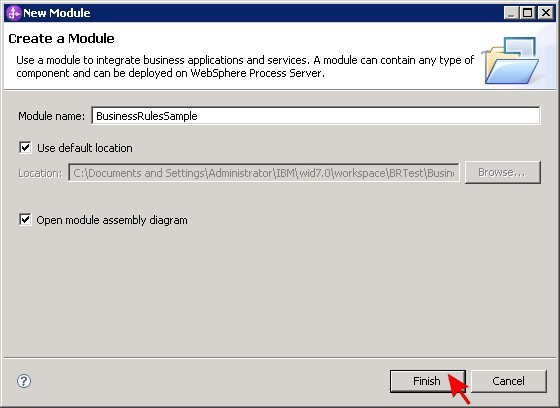
Enter BusinessRulesSample as the module name, leave the defaults for the other offered choices and press the Finish button. A new module will be generated and opened for editing in the Projects panel on the left side. This module will serve as a container for all subsequently created SCA components.
Create an interface named 'CostCalculationInterface'
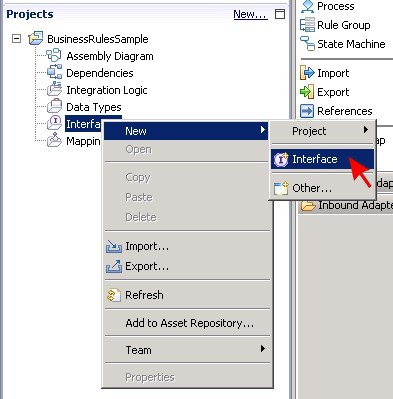
Expand the BusinessRulesSample module in the Projects panel, right-click on Interfaces and select New and then Interface from the context menu that appears.
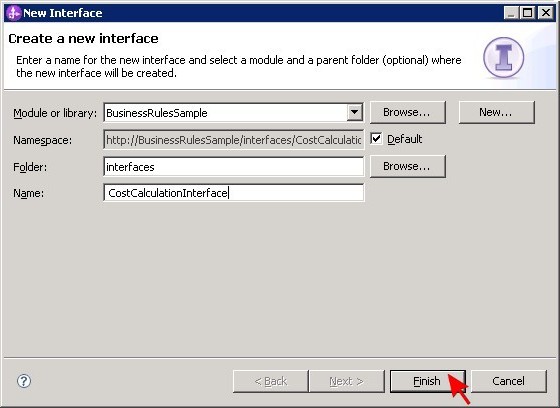
The New Interface dialog will show up. Enter interfaces for the folder name and CostCalculationInterface for the interface name and press the Finish button.
A new interface will be generated using the specified settings and it will be opened for editing.
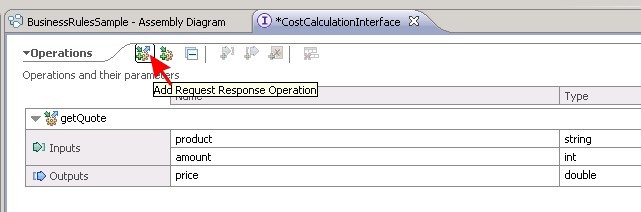
Invoke the command Add Request Response Operation from the Edit menu. The operation to be added shall be used later to request price quotes.
Change the operation name from operation1 to getQuote and rename the predefined input input1 to product and the output output1 to price.
Also change the output type to double. As the sample scenario foresees two inputs for the operation, select the getQuote operation and then choose Add Input from the Edit menu.
A second input will appear. Rename it to amount and set int as the corresponding type. The interface should look as in the following picture afterwards.
Save the interface to preserve all changes.
Create a rule group named 'QuoteRuleGroup'
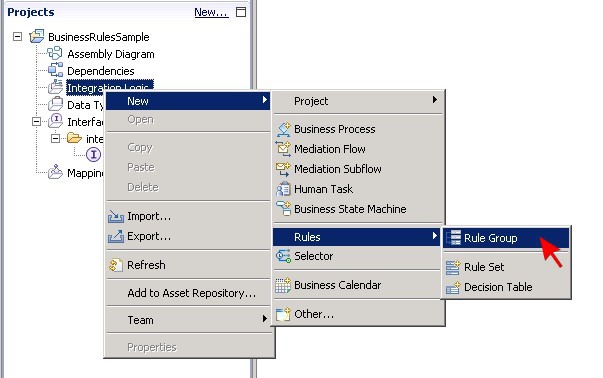
The next step is to create a rule group that can serve as a container for the business rules to be defined. Right-click on the module section Integration Logic in the Projects panel and select New > Rules > Rule Group.
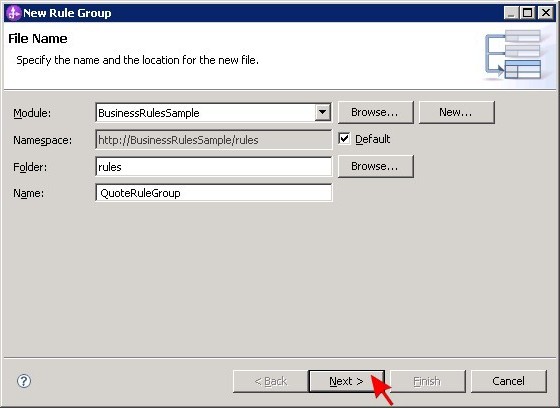
In the New Rule Group dialog, enter rules as the folder and QuoteRuleGroup as the name. Don't change any of the other values.
Afterwards, click Next and select the previously created interface from the drop-down list. Then press the Finish button.

Save the generated rule group. It is not yet fully defined at this point. The missing parts will be added later. Please ignore any errors or warnings shown in the Problems section and proceed with the next steps.
Now it is time to define the actual business rules. Business rules can be integrated in two different ways: as part of a rule set or in form of a decision table.
In the business scenario this sample is based on, a company deploys rules for the calculation of price quotes for its customers. The rules are supposed to be different in 2011/2012 and 2013/2014. The company decides to use a rule set for the calculations in 2011 and 2012 and a decision table for the same task in 2013 and 2014.
Create a rule set named 'QuoteRuleSet'
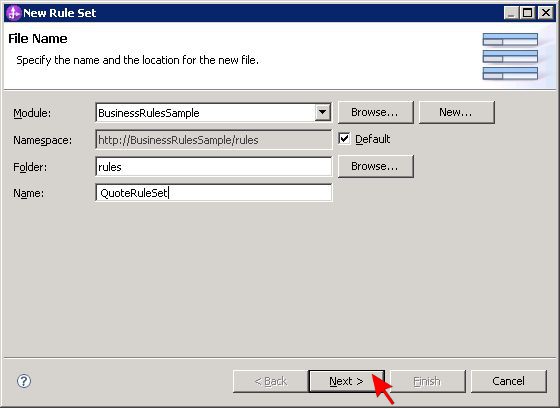
Right-click on the module section Integration Logic in the Projects panel and select New > Rules > Rule Set. In the appearing New Rule Set dialog, please enter rules for the folder and QuoteRuleSet for the name. Leave the remaining values unchanged.
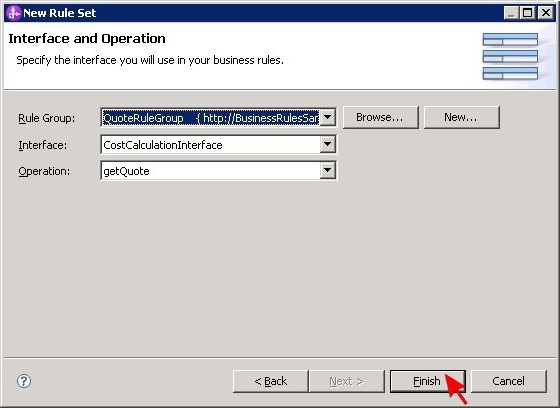
Click Next and select the previously created QuoteRuleGroup from the drop-down list for the rule group. The Interface and Operation fields should be filled automatically then.
Push the Finish button and wait for the new rule set to be generated and opened for editing. More errors will show up in the Problems section but they can still be ignored as they will be resolved later on.
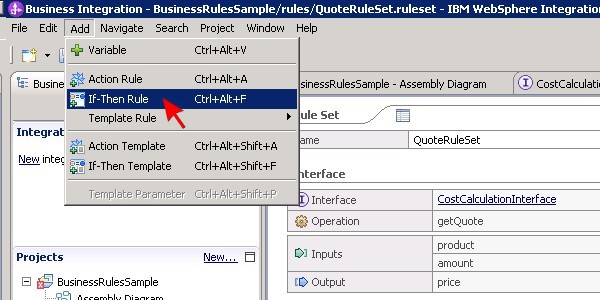
According to the business scenario, the company in this sample offers two products P1 and P2. In 2011 and 2012, a discount is allowed for any purchase of three or more pieces of P1 whereas no discount is offered for P2. These conditions can be mapped to three simple if-then rules. Open the Add menu and select If-Then Rule.
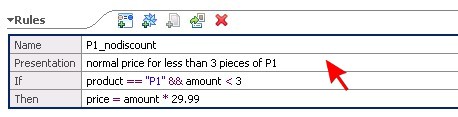
A new rule entry is added to the Rules section of QuoteRuleSet. The rule entry comprises four rows: name, presentation, if and then. Enter P1_nodiscount as the name and fill the remaining rows as shown in the following picture:
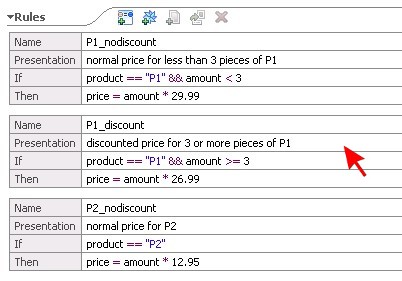
Add two more if-then rules and complete them to match the following picture:
Afterwards, save QuoteRuleSet to preserve all changes.
Create a decision table named 'QuoteDecisionTable'
Right-click on the module section Integration Logic in the Projects panel and select New > Rules > Decision Table. The New Decision Table dialog resembles the New Rule Set dialog.
Enter rules for the folder, QuoteDecisionTable for the name, leave the other values unchanged and click Next. Select QuoteRuleGroup from the drop-down list for the rule group and push the Finish button.
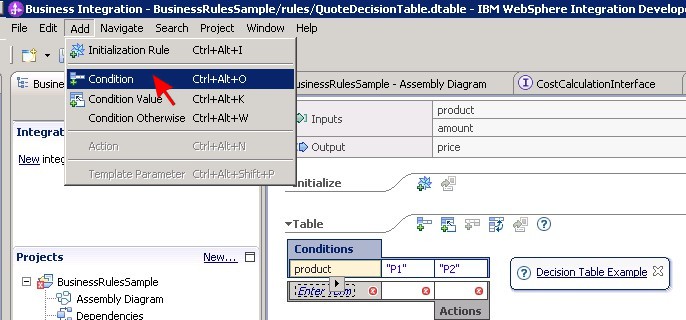
When the new decision table is opened for editing, it will show an empty table in the Table section consisting of two rows and three columns:
![]()
Fill the Conditions row with the values product, "P1" and "P2". Then click on the one of the three entered values so that the corresponding field gets highlighted and select Condition from the Add menu.
A second condition row with five columns will be generated. Fill all remaining gaps in the table by entering values into the cells so that in the end the following result can be seen:
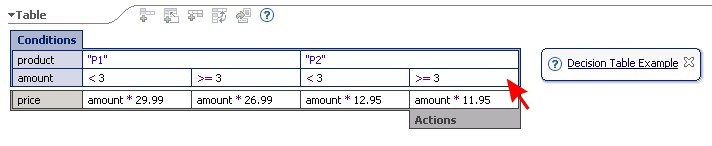
The decision table is now appropriate to calculate price quotes for the products P1 and P2 while considering discounts for larger quantities. This meets the requirements from the samples's business scenario for 2013 and 2014.
Save QuoteDecisionTable to preserve all changes.
Assemble the rule group
Open rule group QuoteRuleGroup and expand CostCalculationInterface which is listed in the Interfaces section on the left side. Select the getQuote operation.
A rule logic related form will be displayed in the main panel. Click on the green plus sign in the Available Rule Logic section.
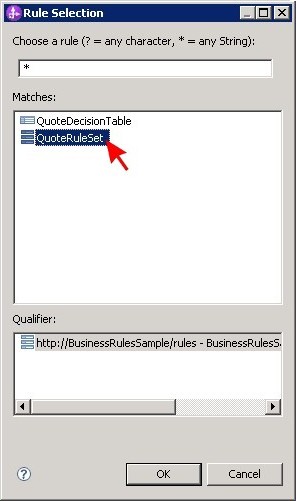
In the subsequently opened dialog, select QuoteRuleSet from the list of offered matches and press OK.
Repeat the procedure to also add QuoteDecisionTable to the Available Rule Logic.
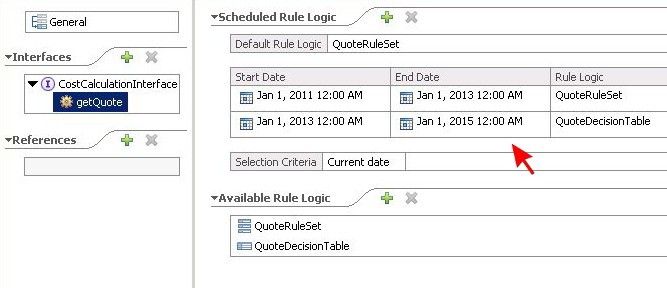
Afterwards, click on the green plus sign in the Scheduled Rule Logic section. A new row will be added, consisting of a default start date, a default end date and a placeholder for rule logic.
Change the start date to January 1, 2011 and the end date to January 1, 2013 and select QuoteRuleSet as the rule logic.
This new schedule entry will ensure that throughout 2011 and 2012, the rules given in QuoteRuleSet are applied when the rule group is invoked through its interface.
Add another entry for a period between January 1, 2013 and January 1, 2015 with QuoteDecisionTable as the rule logic to be used.
Finally, specify QuoteRuleSet as the Default Rule Logic. That way, QuoteRuleSet will be applied for all time frames not covered by any defined schedule entry.
Save the rule group and take a look at the Problems section. There must not be any more errors. If you still see any, please double-check whether you have correctly followed the instructions above.
Open the assembly diagram for module BusinessRulesSample and drag the QuoteRuleGroup component from the Projects panel on the left side into the blank diagram area.
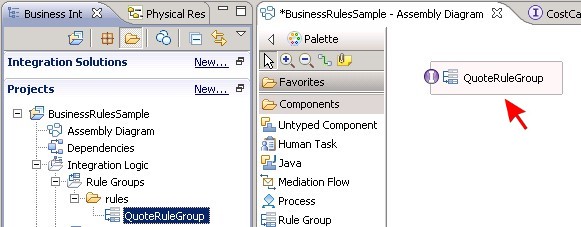
Save the assembly diagram. You may run the sample at this point or continue with part two.
Part Two
Convert business rules to templates
Open rule set 'QuoteRuleSet' for editing in WebSphere Integration Developer and review the defined three rules. Select the first rule and click on the 'Convert Rule To Template' icon as shown in the following figure.
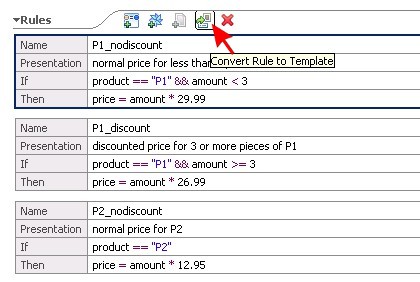
A new template will be generated based on the selected rule and shown in the Templates section of the rule set. In parallel, the converted rule will appear differently. It will no longer contain if and then clauses but a link to the newly created template instead.
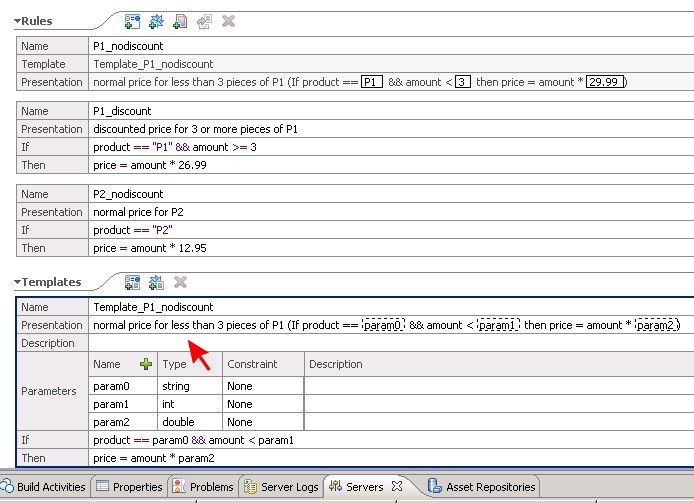
Repeat the conversion procedure for the other two rules to get a total of three new templates. Then save all changes to the rule set.

Edit the templates using Business Rules Manager
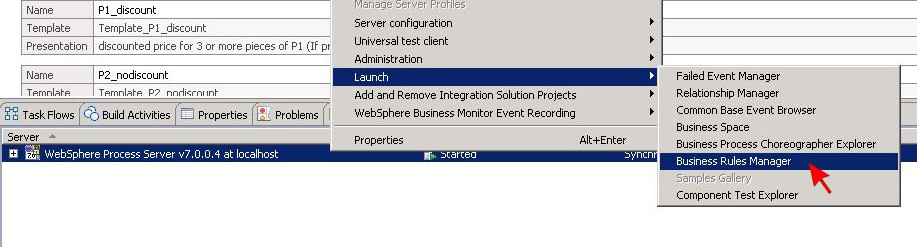
If not already done, start a WebSphere Process Server instance in WebSphere Integration Developer and publish module BusinessRulesSample on it. Then right-click on the server instance and select Launch and then Business Rules Manager from the context menu. This will start the web application Business Rules Manager.
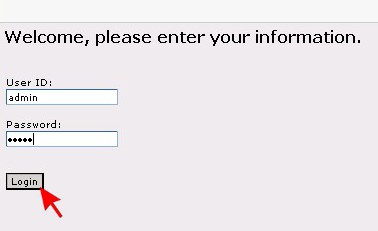
At the login panel, enter your user credentials and press the Login button to proceed.
The Business Rules Manager application is divided into three panels: the main panel on the right side, the navigation panel on the left and an action panel at the top.
Expand the section Business Rule Groups in the navigation panel to discover QuoteRuleGroup with its operation getQuote and the components
QuoteDecisionTable and QuoteRuleSet underneath. Click on QuoteRuleSet to display the rule set definition.
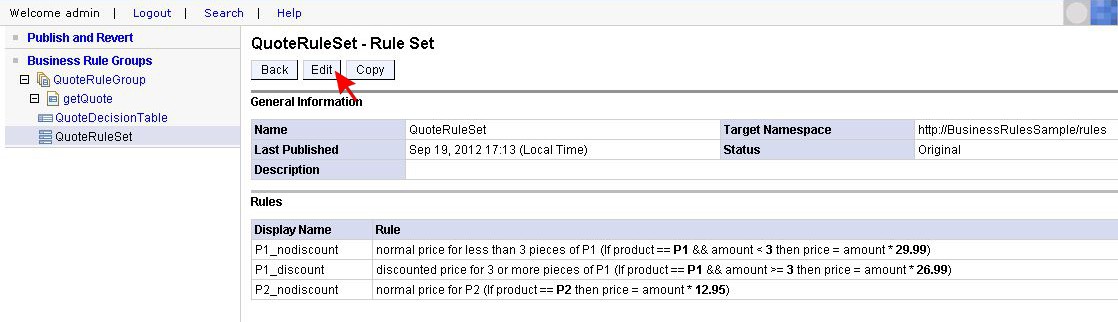
Click on the Edit button to modify the included rules. Change some of the editable values as shown in the following picture.
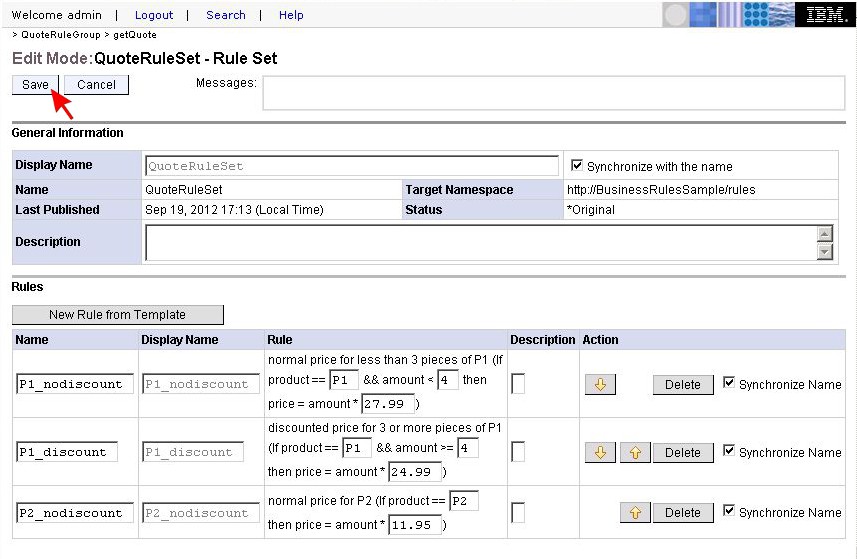
Click on the Save button when done. The Business Rules Manager will display what the modified QuoteRuleSet looks like afterwards.
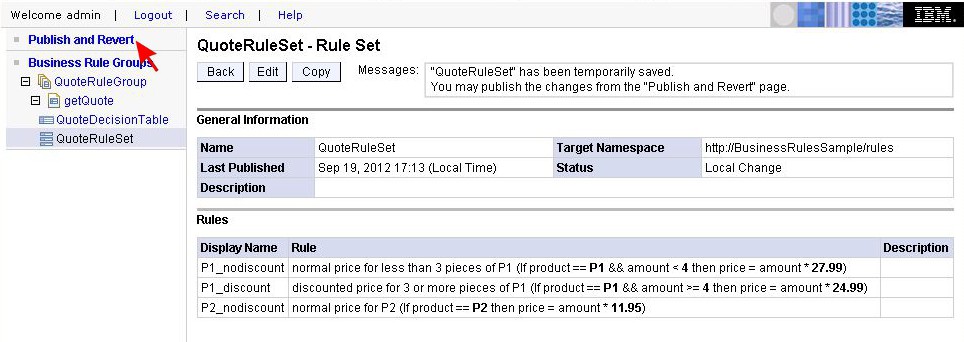
In order to deploy the just made changes, it is necessary to publish them.
Publish the modified business rules
Click on Publish and Revert in the navigation panel. The main panel will show a summary of the resource updates to be published.
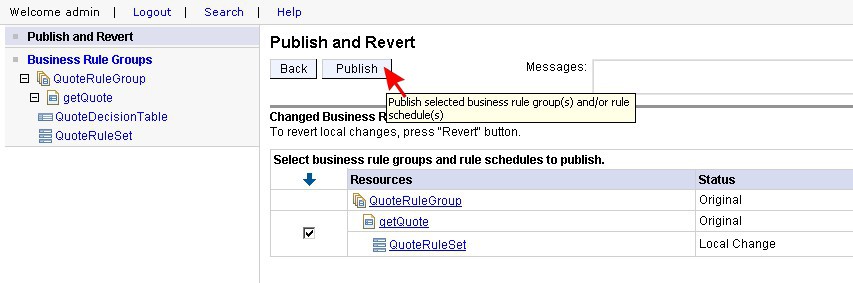
Proceed by pressing the Publish button. The publishing process may take a few moments. Then a success message should appear indicating that it has completed successfully.

Click on Logout in the action panel to leave Business Rules Manager. You may now run another test of the sample to verify the applied changes.