Build it Yourself
Task 1: Create the execution object model using WebSphere Integration Developer
Recall that in ILOG Rule Studio, the first steps in creating a rules application involve defining the execution object model (XOM) and the business object model (BOM). These object models define the items that are necessary for writing and running the application and the attributes and data types that are related to those items.
In the JRules Quick Start tutorial, the XOM is based on existing Java™ code. Java is one option for defining the object models. The second option, the one that you will use in this tutorial, is to define the XOM in XML as an XML Schema Definition (XSD) file.
You can create the XSD file with any XML editor, or even a text editor. However, another option is to create the XSD graphically using WebSphere Integration Developer. In WebSphere Integration Developer, any data type that you define is stored as an XSD file and can be used as a XOM in ILOG Rule Studio.
To create the XOM using WebSphere Integration Developer, complete the following steps:
1.
Open WebSphere Integration Developer in a new workspace.
Note the location and name of this workspace because you will need it later. We
will refer to this full path as <main workspace>.
2. Create a business integration module:
a. Close the Welcome page.
b. In the Business Integration view, click Click to add an integration project.
c. Select Create a module, and then click Next.
d.
For the module name, enter PopcornXSDModule,
and then click Finish.
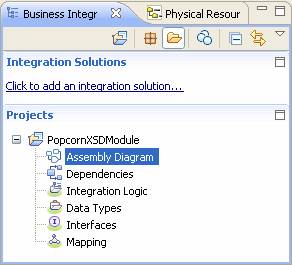
The following
screen capture shows the module in your Business Integration view.
3. Create the XSD:
a. Right-click Data Types and select New > Business Object.
b.
In the Name field, enter Child
and then click Finish.
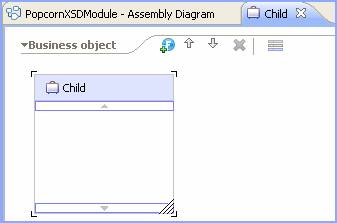
The following screen capture shows the Business Object editor open with your
new business object.
c.
Add the following fields to the Child business object.
|
Field Name |
Field Type |
|
Name |
string |
|
Age |
int |
|
Advice |
string |
d. Save your changes. The following screen capture shows the completed business object.
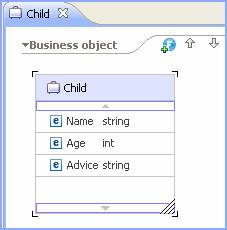
The file Child.xsd has now been created in <main workspace>\PopcornXSDModule.
You have now completed Task 1: Create the execution object model using WebSphere Integration Developer. You can minimize or close WebSphere Integration Developer.
Task 2: Create and author the rule project in ILOG Rule Studio
The following high-level steps are needed to author a rule application in ILOG Rule Studio:
1. Create a new Rule Project.
2. Import the XOM.
3. Create the Business Object Model (BOM) based on the XOM.
4. Define application parameters.
5.
Define the individual rules.
To create and author the rule project in ILOG Rule Studio, complete the following steps:
1. Open ILOG Rule Studio with a new workspace.
2. Create a Rule Project
a. Close the Welcome page.
b. Right-click in the Rule Explorer view and select New > Rule Project.
c. In the New Rule Project wizard, select the Standard Rule Project template, and then click Next.
d.
In the Project name field, enter PopcornRuleProject,
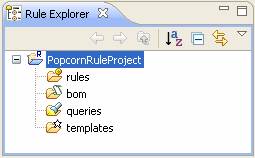
and then click Finish.
The following screen capture shows the project in your Rule Explorer view.
3. Import the Child.xsd file, which you created in WebSphere Integration Developer, as your Execution Object Model (XOM).
a. In the Rule Project Map view, click Import XOM.
b. Select Dynamic Execution Object Model (XSD or WSDL), and then click OK.
c. Click Add External XSD.
d.
Select the Child.xsd file:
<main workspace>\
PopcornXSDModule\Child.xsd, and then click OK.
The Rule Project Map editor now shows that you have imported one XOM, as you can see in the following screen capture.
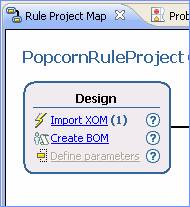
The next step is to create a business object model (BOM). Recall that the BOM is based on the XOM and provides the actions and entities, that is, the vocabulary required to author rules using natural language.
4. Create a BOM based on your XOM:
a. In the Rule Project Map view, click Create BOM.
b. In the Name field, enter PopcornBOM, and then click Next.
c. Click Browse XOM and select the Child.xsd file as the base for the BOM.
d. Under Select classes, select the popcornxsdmodule class, and then click Next.
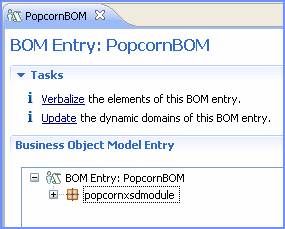
e. On the BOM Verbalization page, select All Methods and leave the others options checked as well. Click Finish.
The following screen capture shows the BOM editor open with the PopcornBOM and the popcornxsdmodule package.
5.
Define the parameters for the ruleset.
Because you defined the XSD to have fields for both the input data (Name and
Age) and the output data (Advice), you can use one parameter for both input and
output instead of creating two parameters.
a. In the Rule Project Map, click Define parameters.
b. Click Add to create a parameter.
c. Change the parameter definition according to the items in the following table:
|
Column |
Value |
|
Name |
theChild |
|
Type |
Child |
|
Direction |
IN_OUT |
|
Default Value |
<leave blank> |
|
Verbalization |
theChild |
![]()
d. Click OK.
At this point, according to the Rule Project Map, the next step is to create a rule package. However, because this application is not complex, a rule package and a rule flow are not necessary, so you can skip these steps and begin authoring the rules.
Recall the advice that you are implementing in this application
- Children under 2 years old should not eat popcorn.
- Children ages 2 to 4 can eat popcorn under close supervision
- Children older than 4 can eat popcorn unsupervised
6. Author the rules.
a. In the Rule Explorer view, right-click PopcornRuleProject and select New > Business Rule.
b. Enter the rule name (see the following table), and then click Finish.
c. Enter the code for the rule (see the following table).
d. Save and close the rule editor.
|
Rule Name |
Rule Code |
|
old enough |
if the age of theChild is at least 4 then set the advice of theChild to "This child can eat popcorn unsupervised"; |
|
too young |
if the age of theChild is less than 2 then set the advice of theChild to "This child should not eat popcorn"; |
|
borderline |
if the age of theChild is between 2 and 4 then set the advice of theChild to "This child can eat popcorn under close supervision"; |
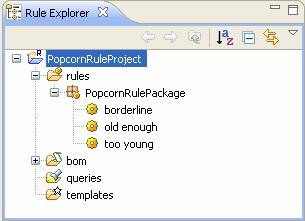
The following screen capture shows the rules that you created in the Rule Explorer view.
You have now completed Task 2: Create and author the rule project in ILOG Rule Studio and your business rules are ready to run.
Task 3: Export and deploy the rule application in ILOG Rule Studio
To use JRules with a process that are authored in WebSphere Integration Developer and running on WebSphere Process Server, you must both export and deploy your RuleApp.
You export the RuleApp as a project archive to create an artifact that WebSphere Integration Developer can interpret and use to create the bridge between the process and the rules.
You deploy the RuleApp to the JRules Execution server running on the WebSphere Process Server as the executable that will be called from within the process.
1. Create the RuleApp project:
a. Right-click in the Rule Explorer view and select New > Other > RuleApp Project, and then click Next.
b. In the Project name field, enter PopcornRuleApp, and then click Next.
c. Add PopcornRulePoject to the list of Rule Projects, and then click Finish.
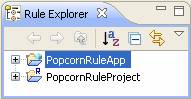
You can now see the PopcornRuleApp in your Rule Explorer, as shown in the following screen capture. It is also open in the RuleApp editor.
2. Export the RuleApp for use in WebSphere Integration Developer:
a. If you closed the RuleApp editor, reopen it by expanding PopcornRuleApp and double clicking archive.xml.
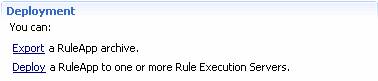
b. Under Deployment, click Export a RuleApp archive.
c. Use the Browse button to select a local directory, and save the file as popcornRules.jar.
The Console view now shows a message similar to the following message:
The "PopcornRuleApp" RuleApp project is exported to: C:\temp\popcornRules.jar
Note this directory. You need it in the next task.
3. Deploy the RuleApp to the JRules Execution Server:
a. Under Deployment, click Deploy a RuleApp to one or more Rule Execution Servers.
b. In the wizard, leave Increment RuleApp major version selected, and click Next.
c. In the second screen, select Create a temporary Rule Execution Server configuration, enter these values and then click Finish.
URL: http://localhost:9080/bres
(Careful! The default is close but not the same: 8080)
Login: bres
Password: bres
The Console view now shows the following message:
The "PopcornRuleApp" RuleApp project was successfully deployed on the "temporaryServer" configuration.
/PopcornRuleApp/1.0 -> /PopcornRuleApp/1.0: Element added
/PopcornRuleApp/1.0/PopcornRuleProject/1.0 -> /PopcornRuleApp/1.0/PopcornRuleProject/1.0: Element added
Task 4: Create the business process module and ILOG JRules component in WebSphere Integration Developer
Recall the overall process flow from the Overview section.
You have now completed the Rules portion of this flow. In this task you will create the module used to hold the Business Process and the artifacts necessary to connect the Business Process to the Rules.
1.
Open WebSphere Integration Developer with the same workspace you used in
Task 1: Create the object model using WebSphere Integration Developer. The
following steps will also work if you use a different workspace; we are
recommending one workspace for simplicity only.
Note: Close the PopcornXSDModule to avoid confusion between the
two modules.
2. Create a business integration module:
a. Right-click in the Business Integration view and select New > Project > Module.
b.
In the Module name field, enter PopcornProcessModule.
Click Finish.
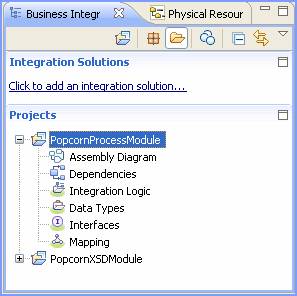
You now have a second module in your Business Integration view as shown in the following screen capture.
To gain access to the services provided by a JRules RuleApp, you must first add several artifacts to this module that together specify how to connect to the JRules server and the specific service that is running on the server. Fortunately, WebSphere Integration Developer provides a Decision Services wizard that helps you create and add these artifacts.
3. In the Business Integration view, right-click PopcornProcessModule and select New > Other > ILOG Rule Studio > SCA Component from RuleApp. Click Next.
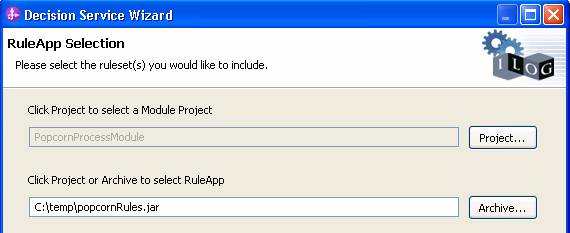
4. Complete the RuleApp Selection page:
a. Ensure that the project is selected (PopcornProcessModule).
b. Click Archive to select the archive that you exported from Rules Studio, which is called popcornRules.jar. Click Next.
The following screen shot shows the RuleApp Selection page.
5.
On the Set Up Object Model page, you see a warning in the Tasks section.
The object model (XSD) is not part of the archive. Therefore, you must add it
directly to resolve references.
Click Add External XSDs and select the <main
workspace>\PopcornXSDModule\Child.xsd file. The XSD will now be listed in
the XML Schemas section, as in the following image.
After you add this file, the warning disappears and you can click Next.

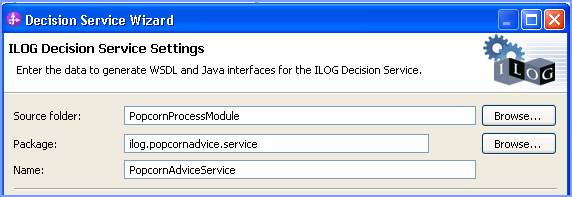
6.
You must create a name and package for the service. The package is used only
for the underlying Java implementation, not within the authoring tools. However,
the service name is the name given to the SCA component and the interface that
is used to access this service. When authoring the process in WebSphere
Integration Developer, you will use this value; therefore, it should always be
descriptive.
Use these values, as shown in the following screen capture:
Package: ilog.popcornadvice.service
Name: PopcornAdviceService
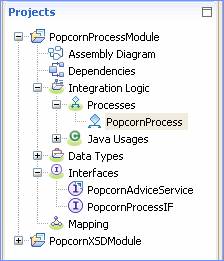
If you now expand your PopcornProcessModule, you can see the artifacts that were created.
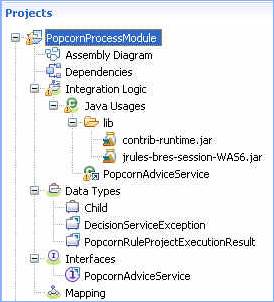
The following table gives a brief description of each artifact.
|
Artifact |
Description |
|
contrib-runtime.jar |
Java libraries used by the service implementation |
|
jrules-bres-session-WAS6.jar |
|
|
PopcornAdviceService |
The SCA component, implemented in Java, which calls the rule application |
|
Child |
The data type or XSD that you defined in Task 1 |
|
DecisionServiceException |
The data type that the PopcornAdviceService component returns if the service call fails |
|
PopcornRuleProjectExecutionResult |
The data type that the PopcornAdviceService component returned if the service call succeeds. This data type contains a single field of type Child, which represents the output parameter that you defined for your RuleApp.
RuleApps can return more than one parameter. In that case, the ExecutionResult data type has one field for each parameter. |
|
PopcornAdviceService (interface) |
The interface for the PopcornAdviceService component |
You might have noticed the warning icon on the PopcornAdviceService component.
7. Investigate any warnings:
a. Open the Problems view and expand Warnings. If you see warnings that are for ILOG imports that are never used by our application, it is safe to suppress these warnings.
b. Right-click one warning and select Quick Fix.
c. Select Add @SuppressWarnings 'unused' to 'PopcornAdviceService'. Click Finish. The Java editor opens showing the affected file and the necessary change is made. You do not need to edit the file manually.
d. Save and close the editor to clear the warnings.
Task 5: Create the business process in WebSphere Integration Developer
You will now create the business process portion of the sample application.
The business process does the following.
1. The process accepts information about the child: a data structure of type Child.
2. It passes this information to the RuleApp, which adds the advice to the Child data structure and returns it to the process.
3. The process assigns the advice string to an output parameter.
4. It then passes the output parameter back to the user.
The process flow and data types are shown in the following image.
Before creating the business process, you need to create the interface that it will use. As you can see from the process description, the process will take a Child variable as its input and pass back a string variable as its output.
To create the business process in WebSphere Integration Developer, complete the following steps:
1. Create the interface for the business process:
a. In the Business Integration view, under PopcornProcessModule, right-click Interfaces and select New > Interface.
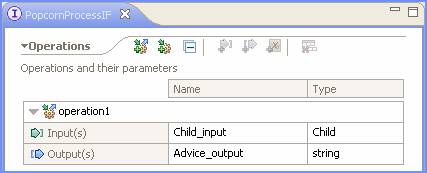
b. In the Name field, enter PopcornProcessIF and then click Finish. The Interface editor opens for your new interface.
c. Right-click within the editor and select Add Request Response Operation. This creates an operation with default input and output parameters.
d. Change the name input1 to Child_input and change the Type to Child, as shown in the following screen capture.
e. Change the name output1 to Advice_output and leave the type as string, as shown in the following screen capture.
f. Save and close the Interface editor.
2. Create the business process component:
a. In the Business Integration view, under PopcornProcessModule, right-click Integration Logic and select New > Business Process.
b. In the Name field, enter PopcornProcess, and click Next.
c. Select Microflow (because there is no human interaction within the process) and then click Next.
d. For Interface, use the Browse button to select the PopcornProcessIF that you just created and then click Finish.
The following screen capture shows the Business Process editor open with your new process.
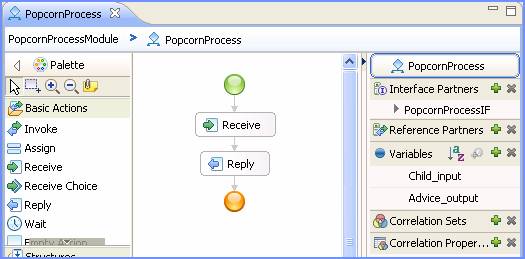
You can also see you process highlighted in the Business Integration view.
3. Add the Business Rules service call to the process:
a.
From the Business Integration view, drag the PopcornAdviceService
Interface onto the process editor.
Note: This drag and drop functionality is not available in all fixpack
versions of WebSphere Integration Developer. An alternate method is to click
the green plus symbol next to Reference Partners in the right column and then
select the PopcornAdviceService interface.
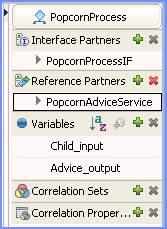
This adds the interface as a reference partner, so that it can be called from
within the process. It is now listed in the right column of the editor as shown
in the following screen capture.
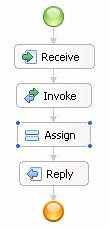
b.
To add the service call, drag PopcornAdviceService from this column to between
the Receive and Reply actions on the diagram. This creates the Invoke action that
calls the service, as shown in the following screen capture.

There are still
a few more details necessary to make the service call. You still need to tell
the process what data to pass to the service and what to do with the data
handed back.
c. With the Invoke action selected, open the Properties view (in the pane below the process diagram) and select the Details tab on the left.
d. In the Input(s) row, under Read From Variable, click (none) and select Child_input:Child. This is the variable that you defined as the input to the process, and it can be passed directly to the PopcornAdviceService.
e.
The output variable is a little bit more complicated because the service
passes the data type PopcornRuleProjectExecutionResult back to the process, and
the string that the process needs to return to the parent is within this data
structure. You need to create a temporary variable to handle this.
In the Output(s) row, under Store Into Variable, click (none) and select
New. Name the variable tempResult.
This completes the details for the Invoke action.
4. The last step in the process is to extract the advice string from the tempResult variable. You do this with an Assign action.
a.
Drag the Assign action from the palette to just below the Invoke action
in the process diagram, as shown in the following screen capture.
b. With the Assign action selected, go to the Details tab of the Properties view, click Select From, and select tempResult > theChild > Advice.
c. Click Select To and select Advice_output. Recall that Advice_output is the variable name for the output of the PopcornProcessIF interface.
d. Save and close the PopcornProcess editor.
5. The component that you just created must now be added to the assembly diagram:
a. Double-click Assembly Diagram in the Business Integration view to open the Assembly editor.
b. Drag PopcornProcess from the Business Integration view onto the assembly diagram.
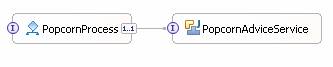
c.
Add a wire from the PopcornProcess to the PopcornAdviceService, as shown
in the following screen capture.
Note: Any of the methods for wiring works. One method is to right-click
the PopcornProcess component and select Wire to Existing.
d. Save and close the Assembly editor.