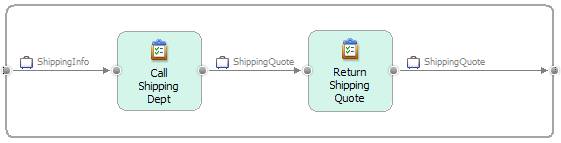
In this section of the tutorial, you will use WebSphere Business Modeler to create the process model for the Impact shipping department by creating three WebSphere Business Modeler projects: one project will contain the shipping departments business items, one will contain the shipping departments process (in the following picture), and one will contain the shipping departments process variations.
After you complete the process model, you will export it as a Project Interchange file (a file format used by WebSphere Integration Developer) so that your IT department can implement the model.
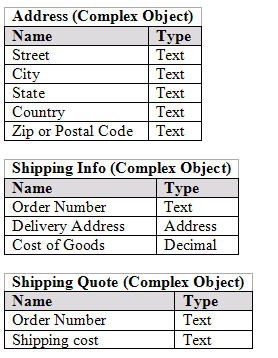
Project 1: Details of the business items for this tutorial
Project 1 has three main business items: Address, Shipping Info, and Shipping Quote. The following tables show the relationship between the business concepts.
Project 2 will model the process described in the Overview section.
Project 3: The shipping department process variations
Impact does business with three shipping companies: Standard Domestic Shipping, Ship Big, and Worldwide Shipping. Project 3 will model each of these companies process flows.
1. Open WebSphere Business Modeler and use a workspace called "ImpactLab".
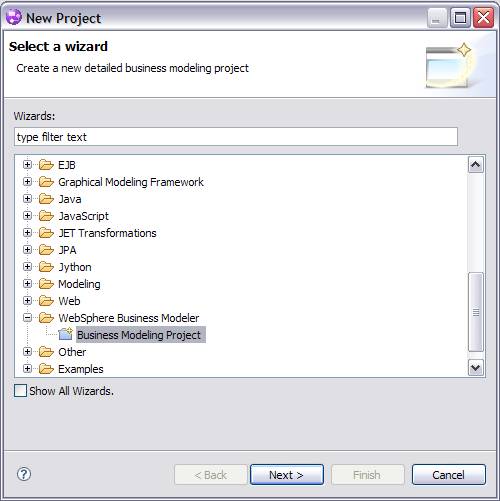
2. Create the project for the shipping departments business items.
a. Select File > New > Project > WebSphere Business Modeler > Business Modeling Project and click Next.
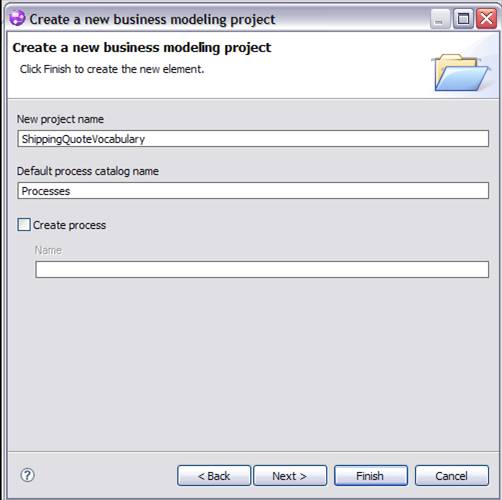
b. In the "Create a new business modeling project" window:
i. Type ShippingQuoteVocabulary for the new project name.
ii. Clear the Create process check box.
iii. Keep all the other defaults and click Finish.
3. To create your model in a WebSphere Business Services Fabric mode, select Modeling > Mode > WebSphere Business Services Fabric.
Note: WebSphere Business Modeler provides several modes to model in. It checks for validation errors based on the mode that you select. The WebSphere Business Services Fabric mode behaves like the WebSphere Process Server mode but with the added support for WebSphere Business Services Fabric technical attributes.
4. Model the business items.
a. Create the Address business item.
i. Expand the ShippingQuoteVocabulary project in the Project Tree view, right-click Business items, and select New > Business Item.
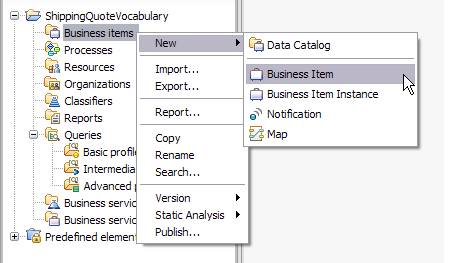
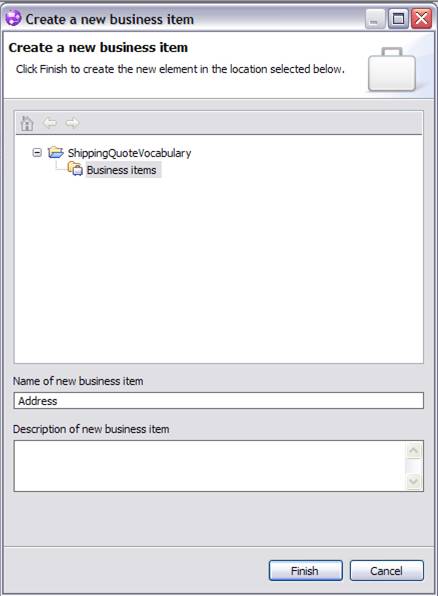
ii. For the name, type Address and click Finish.
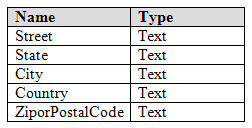
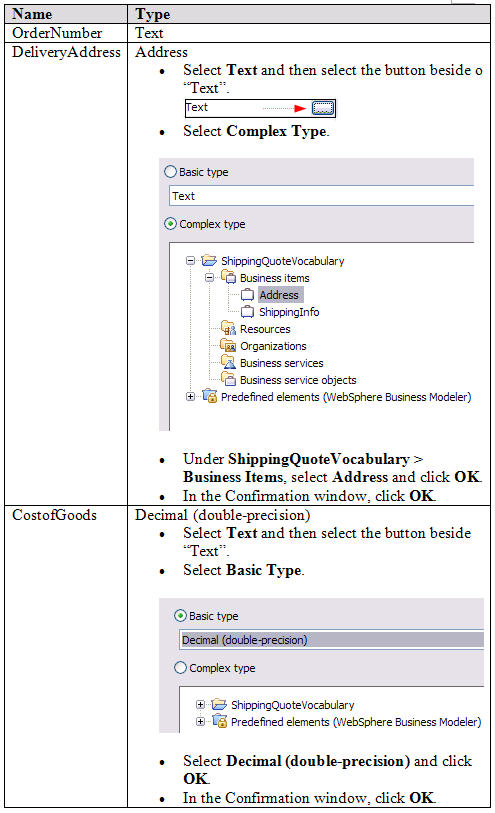
iii. Add the attributes for the Address business item by clicking Add and changing the default attribute name (click the default attribute name to change it).
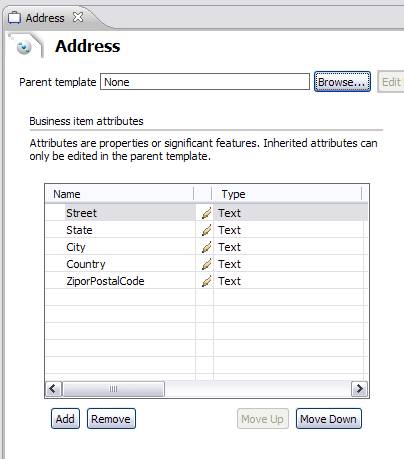
iv. Save the Address business item.
b. Create the ShippingInfo business item.
i. Expand the ShippingQuoteVocabulary project in the Project Tree view, right-click Business items, and select New > Business Item.
ii. For the name, type ShippingInfo and click Finish.
iii. Add the attributes for the ShippingInfo business item as you did for the Address business item.
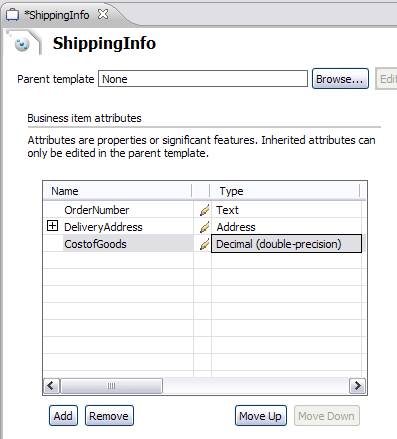
iv. Save the ShippingInfo business item.
c. Create the ShippingQuote business item.
i. Expand the ShippingQuoteVocabulary project in the Project Tree view,right-click Business items, and select New > Business Item.
ii. For the name, type ShippingQuote and click Finish.
iii. Add the attributes for the ShippingQuote business item as you did for the previous business items.
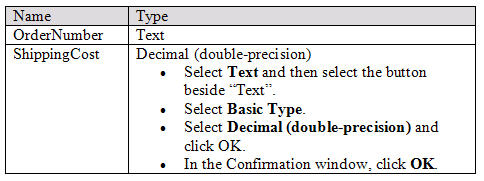
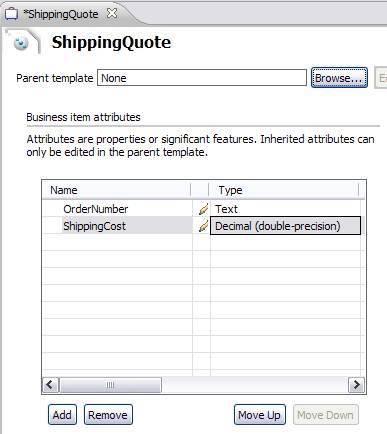
iv. Save the ShippingQuote business item.
1. Create the project for the shipping departments business process.
a. Select File > New > Project > WebSphere Business Modeler > Business Modeling Project and click Next.
b. In the "Create a new business modeling project" window:
i. Type ShippingDept for the new project name.
ii. Under the Create process check box, type Shipping Dept for the name.
iii. Keep all the other defaults and click Finish.

c. Make the business items in ShippingQuoteVocabulary available to the ShippingDept project.
i. Right-click the ShippingDept project in the Project Tree view and select Edit Reference Group.

ii. Move the ShippingQuoteVocabulary project from "Available projects" to "Projects in reference group."
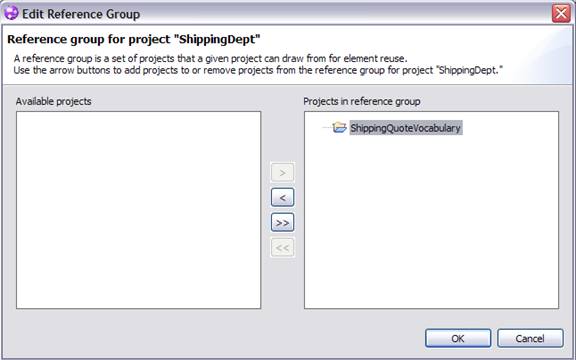
iii. Click OK.
2. Create the shipping departments process in the Process editor.
Tip: If the Process editor for the ShippingDept did not open after step 1, open it by double-clicking the ShippingDept process under ShippingDept > Processes in the Project Tree view.
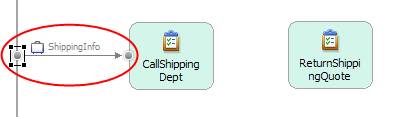
a. Add the input type of the ShippingInfo business item.
i. Right-click in the blank editor for the ShippingDept and select Input and Output > Create Input.
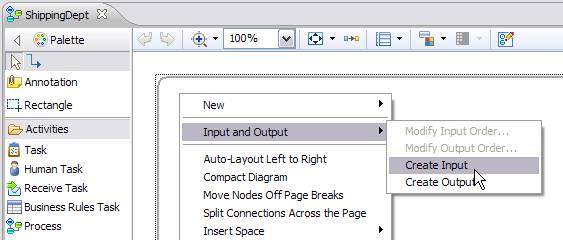
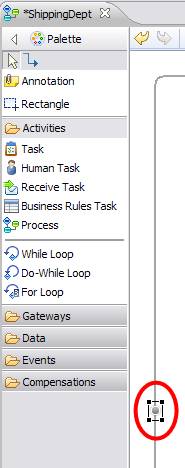
A new input is displayed on the left side of the editor. The input has a default data type of Text.
ii. Right-click the input and select Associate Data.
iii. Expand Complex type > ShippingQuoteVocabulary > Business items, select ShippingInfo, and then click OK.

The input type is now ShippingInfo.
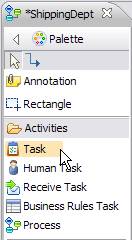
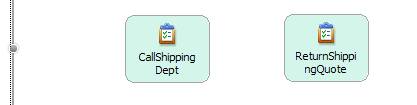
b. Add tasks to the process.
i. Select the Task activity from the palette.
ii. Holding the Shift key down, click in two different locations on the blank editor.
iii. Name the tasks CallShippingDept and ReturnShippingQuote
Tip: To rename the task, click it and then the default task name.
c. Connect the components of the process.
i. Click the input of the process and drag a wire to the CallShippingDept.
The data type for the wire shows a type of ShippingInfo.
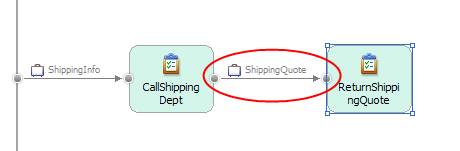
ii. Click the CallShippingDept task and drag a wire to the ReturnShippingQuote task.
There is no data type associated with this wire.
iii. Right-click the wire that you just created between the CallingShippingDept and the ReturnShippingQuote tasks and select Associate Data.
iv. Expand Complex type > ShippingQuoteVocabulary > Business items, select ShippingQuote, and then click OK.
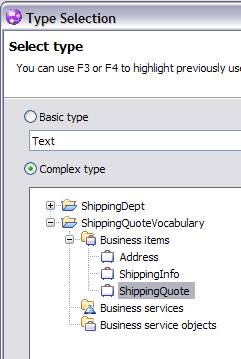
The data type that is associated with this wire is now ShippingQuote.
v. Right-click a blank part of the editor and select Compact Diagram.

You can now see both the input and output edges of the editor more easily.
vi. Select the ReturnShippingQuote task and draw a wire to the rightmost boundary of the editor. The data type associated with this wire is Text.
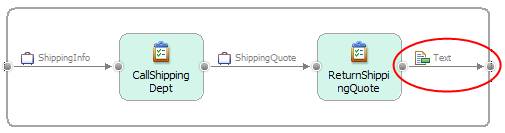
vii. Right-click the wire that you just created between the ReturnShippingQuote and the rightmost boundary of the canvas and select Associate Data.
viii. Expand Complex type > ShippingQuoteVocabulary > Business items, select ShippingQuote, and then click OK.
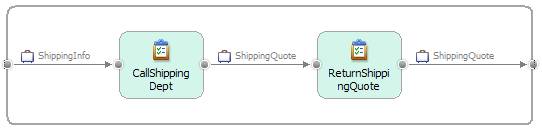
d. Save the ShippingDept process.
3. Create the ShippingInfo form that will be implemented by the IT department.
a. Select a blank area in the editor then select Window > Attributes View.
b. On the Attributes tab, select Forms.

c. Beside the Input form field, select New.
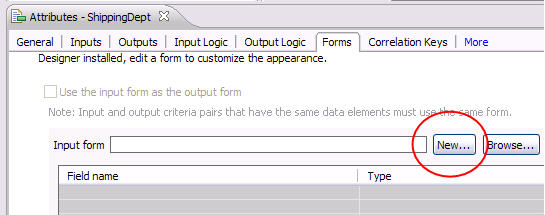
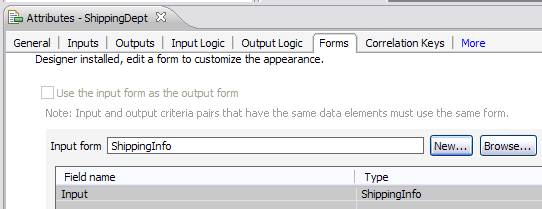
d. Name the form ShippingInfo and click Finish.
This ShippingInfo form will become the implemented verion of the Impact Shipping Department form that is described in the Overviews Scenario section.
e. Save the ShippingDept process.
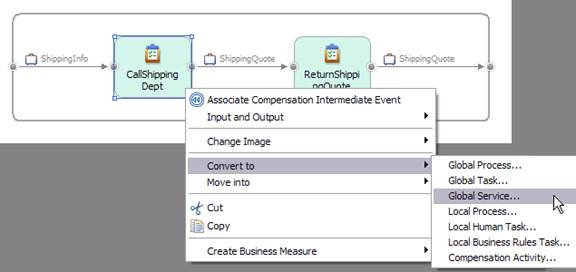
4. Associate the WebSphere Business Services Fabric dynamic assembler component with the CallShippingDept task.
The dynamic assembler component will select the appropriate variation (for example, shipping company) during run time.
a. Right-click the CallShippingDept task and select Convert to > Global Service and click Finish.
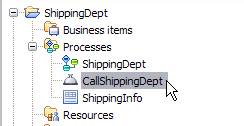
b. From the Project Tree view, expand ShippingDept > Processes and double-click CallShippingDept. The Specification editor opens.
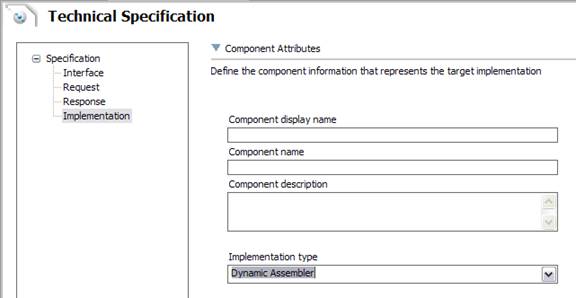
c. Select the Techinical Specification tab in the editor (located at the bottom of the screen).
d. In the tree on the left of the editor, select Implementation to display the implementation settings.
e. For the implementation type, select Dynamic Assembler.
f. Save the Specification editor.
g. Save the ShippingDept process.
1.Create the project for the process variations.
a. Select File > New > Project > WebSphere Business Modeler > Business Modeling Project and click Next.
b. In the "Create a new business modeling project" window:
i. Type CallShippingServices for the new project name.
ii. Clear the Create process check box.
iii. Keep all the other defaults and click Finish.
c. Make the business items in ShippingQuoteVocabulary available to the CallShippingServices project.
i. Right-click the CallShippingServices project in the Project Tree view and select Edit Reference Group.
ii. Move the ShippingQuoteVocabulary project from "Available projects" to "Projects in reference group."
iii. Select OK.
d. Move the CallShippingDept global service to CallShippingService.
i. Drag the CallShippingDept service from ShippingDept > Processes to CallShippingServices > Processes.
Tip: If you cannot drag the CallShippingDept service, close editor window of the CallShippingDept business item and then try again.
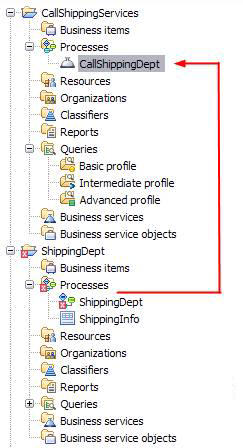
CallShippingDept is now under CallShippingServices.
ShippingDept now has errors.
ii. Right-click the ShippingDept project in the Project Tree view and select Edit Reference Group.
iii. Move the CallShippingServices project from "Available projects" to "Projects in reference group."
iv. Select OK.
The ShippingDept errors are resolved.
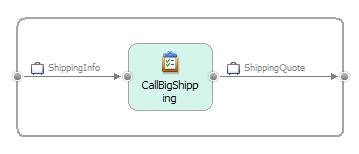
2. Create the CallBigShipping process flow.
a. In the Project Tree view, under CallShippingServices, right-click Processes and select New > Process.
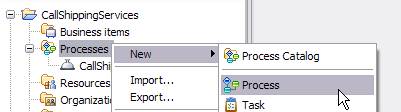
b. Name the new process CallBigShipping and click Next.
c. Use the default layout, which is the free-form layout, and click Next.
d. Beside the Service field, click Browse and select CallShippingServices > Processes > CallShippingDept. Click OK and then click Finish.

The CallShipingDept global service is now associated with this process flow.
e. Add a task to the process.
i. Select the Task activity from the palette.
ii. Click in a blank area of the editor.
iii. Name the task CallBigShipping.
f. Right-click a blank part of the editor and select Compact Diagram.
g. Draw a wire from the input on the left side of the editor to the CallBigShipping task.
The type of the wire defaults to ShippingInfo, which is the input type for CallShippingDept.
h. Draw a wire from the CallBigShipping Task to the rightmost boundry of the editor.
The type of the wire defaults to ShippingQuote, which is the output type for CallShippingDept.
i. Save the CallBigShipping process.
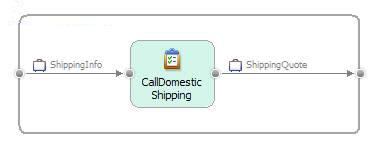
3.Create the CallDomesticShipping process flow.
a. In the Project Tree view, under CallShippingServices, right-click Processes and select New > Process.
b. Name the new process CallDomesticShipping and click Next.
c. Use the default layout, which his the free-form layout, and click Next.
d. Beside the Service field, select Browse and select CallShippingServices > Processes > CallShippingDept. Click OK and then click Finish.
The CallShipingDept global service is now associated with this process flow.
e. Add a task to the process.
i. Select the Task activity from the palette.
ii. Click in a blank area of the editor.
iii. Name the task CallDomesticShipping.
f. Right-click in a blank are of the editor and select Compact Diagram.
g. Draw a wire from the input on the left side of the editor to the CallDomesticShipping task.
The type of the wire defaults to ShippingInfo, which is the input type for CallShippingDept.
h. Draw a wire from the CallDomesticShipping task to the rightmost boundry of the editor.
The type of the wire defaults to ShippingQuote, which is the output type for CallShippingDept.
i. Save the CallDomesticShipping process.
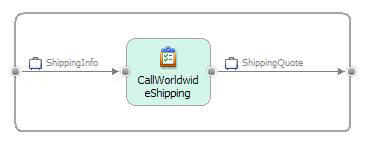
4. Create the CallWorldWideShipping process flow.
a. In the Project Tree view, under CallShippingServices, right-click Processes and select New > Process.
b. Name the new process CallWorldwideShipping and click Next.
c. Use the default layout, which is the free-form layout, and click Next.
d. Beside the Service field, select Browse and then select CallShippingServices > Processes > CallShippingDept. Click OK and then click Finish.
The CallShipingDept global service is now associated with this process flow.
e. Add a task to the process.
i. Select the Task activity from the palette.
ii. Click in a blank area of the editor.
iii. Name the task CallWorldwideShipping.
f. Right-click in a blank area of the editor and select Compact Diagram.
g. Draw a wire from the input on the left side of the editor to the CallWorldwideShipping task.
The type of the wire defaults to ShippingInfo, which is the input type for CallShippingDept.
h. Draw a wire from the CallWorldWideShipping Task to the rightmost boundry of the editor.
The type of the wire defaults to ShippingQuote, which is the output type for CallShippingDept.
i. Save the CallWorldwideShipping process.
The business details of the model are now complete. It is time to pass the shipping department process model to the IT department so that they can add the implementation. Because the IT department will use WebSphere Integration Developer for the implementation, you need to export your model as a Project Interchange (PI) file, which is the fileformat necessary for WebSphere Integration Developer.
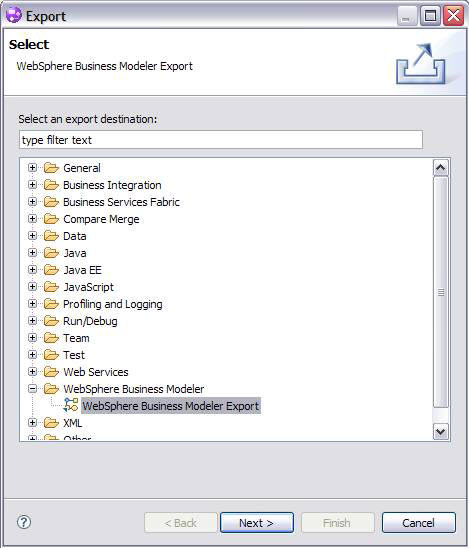
1. Select File > Export.
2. Select WebSphere Business Modeler > WebSphere Business Modeler Export and click Next.
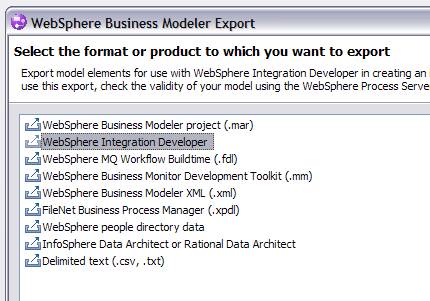
3. Select WebSphere Integration Developer and click Next.
4. Choose an export options.
a. Select a target directory.
b. Select Export specific elements and select all the projects and components. Click Next.
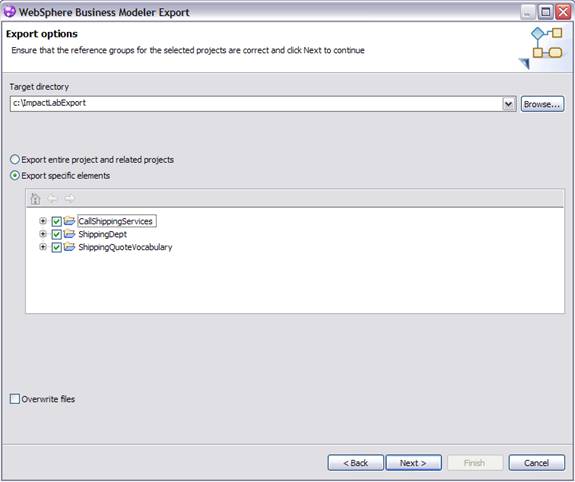
c. If you receive a message indicating that the target directory does not exist, select OK to create it.
5. Specify the following export details.
a. Select the Module + Library export option.
b. Select Export using the standard project interchange format for other environments.
c. Change the Project Interchange name to ImpactLabPI.
d. Select Create default forms for processes and human tasks.
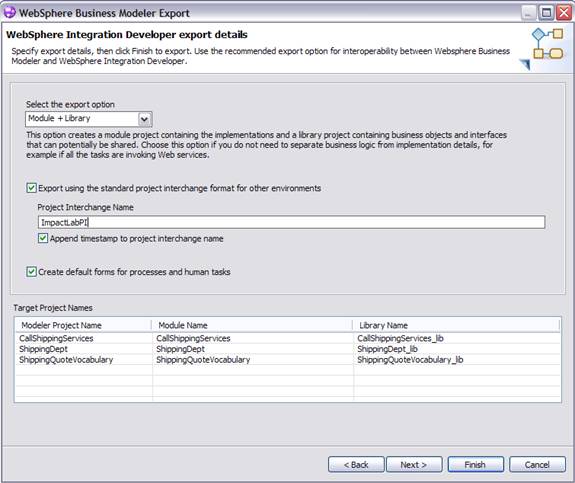
e. Click Finish.
f. A warning message appears indicating that the application requires WebSphere Business Services Fabric to run. Click OK.
You have now completed defining the abstract model by using WebSphere Business Modeler. Next, you will define the business logic for your model using WebSphere Business Services Fabric and Business Space powered by WebSphere.
To prevent conflicts during the testing section of this tutorial, the artifacts that you will create in this section will have slightly different names than what you used in the modeling phase. The following table shows maps the names used during the modeling phase and the names used in this section.

Business Space runs in your Web browser and provides a business user interface to multiple WebSphere products. There are pre-configured templates provided to get you started on different activities. Each type of activity is typically contained in its own business space and you can easily switch between the spaces. For example, you will use spaces to create the policies that the dynamic assembler needs and to change the policies during run time.
For this section of the tutorial, you will use a WebSphere Business Services Fabric authoring business space to define the vocabulary (terms necessary for the business service and application flow), the business service (building blocks for the application flow), the application flow, and policies for each shipping company.
Governance in Business Space
Governance is the decision-making processes in the administration of an organization. The rights and responsibilities of these processes are typically shared among the organization's participants, especially the management and stakeholders. In governance, rules are enforced around approving changes before they are published to a live system. WebSphere Business Services Fabric implements governance through change sets. As you create or edit items in the authoring space, the modifications are saved in a change set, and the change set must go through 4 states.

Before using Business Space, you need to start the WebSphere Dynamic Process Edition server from within WebSphere Business Modeler.
1. Right-click the server instance found on the Servers tab and select Open.
The Overview window will open.
Tip: If you do not see a Servers tab, select Window > Show View > Servers. If Servers is not there, select Windows > Show View > Other > Server > Servers

2. Expand the Timeouts
a. Change the Start (in seconds) value to 1200
b. Change the Stop (in seconds) value to 600
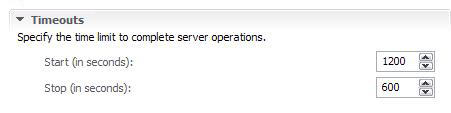
c. Save the changes and close the Overview window.
3. Right-click the server instance and select Start.
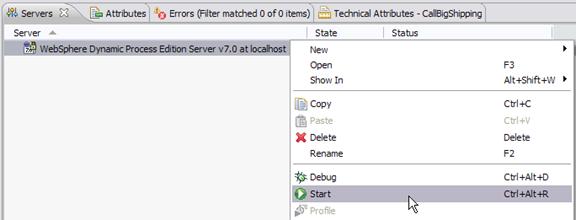
Wait until the server starts before proceeding to the next step.
Create the Business Services Fabric authoring business space so that you can create the vocabularies, business service, business application, and application policies.
1. Connect to Business Space.
a. Right-click the server instance and select Launch > Business Space.
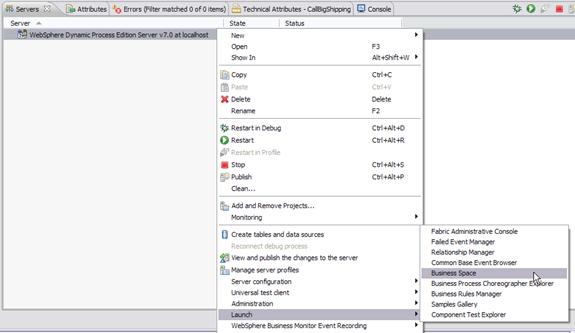
The Business Space login page opens in your default browser. Make sure your default browser is supported by WebSphere Dynamic Process Edition. Supported browsers are Microsoft® Internet Explorer 6, Microsoft Internet Explorer 7, and Firefox 3.0.
b. Log in using the user name admin and the password admin.
2. Create a WebSphere Business Fabric authoring space.
a. Near the top of the browser window, click Manage Spaces.

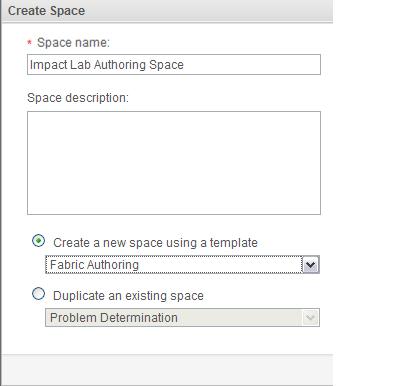
b. In the Space Manager window, click Create Space.
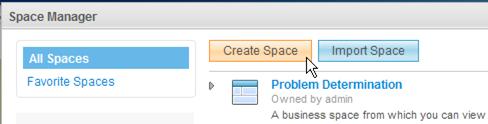
i. For the space name, type Impact Lab Authoring Space.
ii. Create a space using the Fabic Authoring template and click Save.
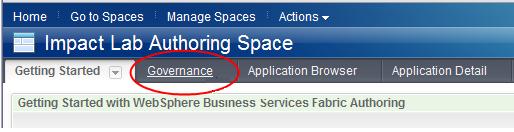
c. In the Space Manager window, select Impact Lab Authoring Space.

3. To track changes, create a Governance change set.
a. Select the Governance tab.
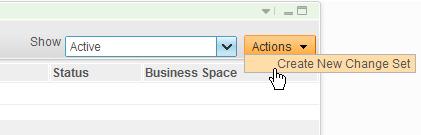
b. Click Actions and select Create New Change Set.
c. For the name, type Impact Lab Change Set and click OK.
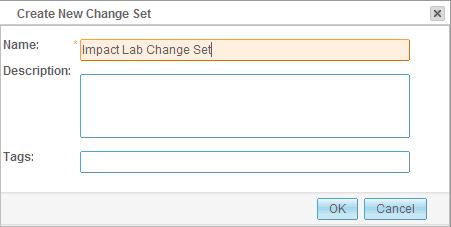
The Impact Lab Authoring Space and the Impact Lab Change Set are created.
The vocabulary defines the terms you use in your WebSphere Business Services Fabric application. Before you build any of the other types of artifacts, you must define a vocabulary. You will create two vocabulary types for this section of the tutorial: Channels and Business Concepts.
Messages are sent to the business service through channels. A business service can have more than one channel associated with it. For example, a request can be received through a Web page or through an Interactive Voice Response system. WWW and IVR are examples of channels. At least one channel is mandatory to create an application.
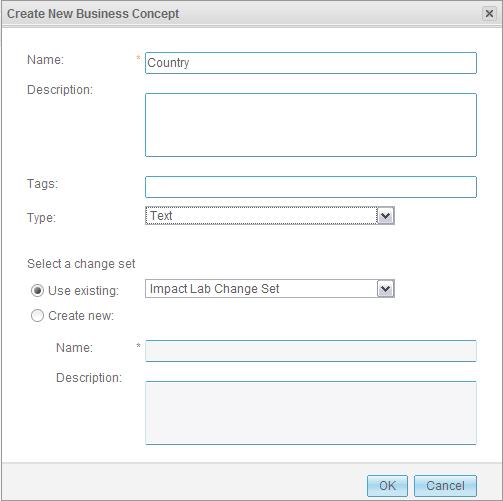
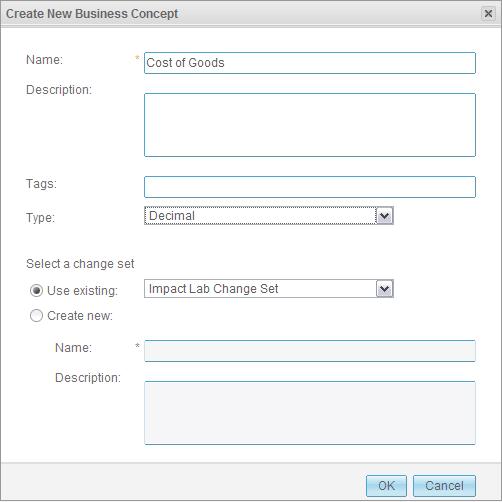
Business concepts consist of data items that are necessary to evaluate the policies for a process. Each business concept is given a type that can either be a simple type, such as text or integer, or a complex type. When a business concept is a complex type, it is a container that holds other business concepts. For this tutorial, you will create two business concepts: one for Country and one for Cost of Goods. Both of these concepts are used to determine which variation to call.
1. Create a vocabulary.
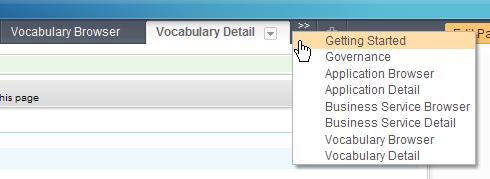
a. From the Impact Lab Authoring Space, select the Getting Started tab.
Tip: If you do not see the Getting Started tab, select the >> tab. The Getting Started tab might have been added to the overflow list.
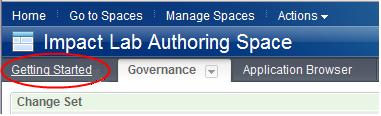
b. Click Start working with vocabularies.

The Vocabulary Browser opens.
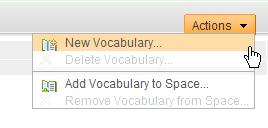
c. Click Actions and select New Vocabulary.
d. For the name, type Impact Shipping Quote Vocabulary. Use the default change set and click OK.
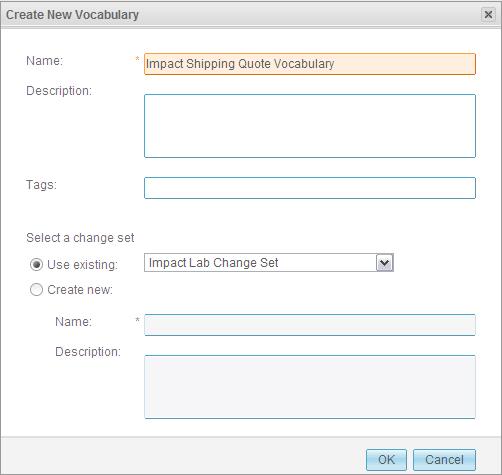
Impact Shipping Quote Vocabulary row is added.
e. Click Impact Shipping Quote Vocabulary.
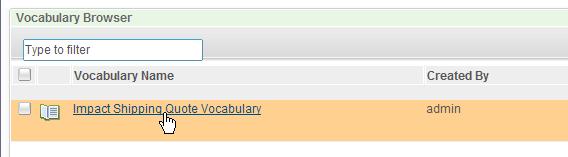
The Vocabulary Details page opens.
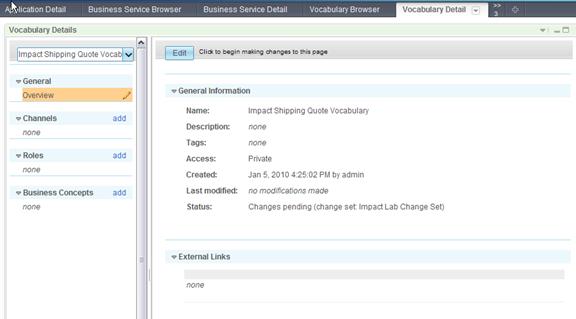
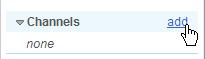
2. Add a channel to your vocabulary.
a. In the left column, next to Channels, click add.
b. Specify the following details and select OK.


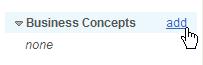
3. Add Country business concepts to your vocabulary.
a. In the left column, beside Business Concepts, click add.
b. Specify the following details and click OK.

4. Add Cost of Goods business concepts to your vocabulary.
a. Again,beside Business Concepts, click add.
b. Specify the following details and click OK.

The required vocabularies for the process are created.
A business service is an abstract representation of a business function, hiding the specifics of the function interfaces. Each business service is a building block in the application flow.
In this tutorial, the business function of determining the shipping cost is handled as a business service. There might be multiple ways to fulfilling the business function. Using a business service, you can define variations to represent each of the different options for fulfilling the business function. In this tutorial, each variation represents a call to one of the three shipping companies. Business services and variation do not necessarily have to represent external Web service calls. You can also define variations that represent a different process flow in the same company.
The business service for this section of tutorial is the Impact Shipping Service and the variations are Ship Big, Standard Shipping, and Worldwide Shipping.
1. Create the Impact Shipping Service business service.
a. From the Impact Lab Authoring Space, select the Getting Started tab.
b. Click Start working with business services.

The Business Service Browser opens.
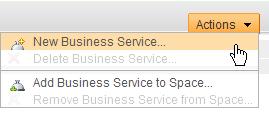
c. Click Actions and select New Business Service.
d. For the name, type Impact Shipping Services. Use the default change set and click OK.
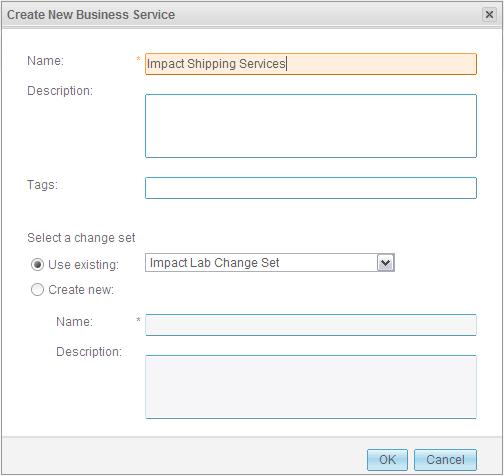
Impact Shipping Services row is added.
e. Click Impact Shipping Services.
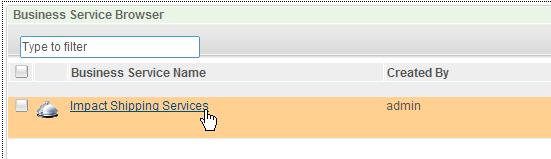
The Business Service Detail tab opens.
f. Click Edit.

g. Under Business Service Inputs and Outputs, add the following attributes:
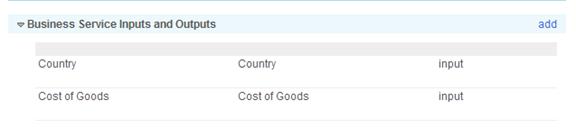
h. Save the Impact Shipping Services business service.
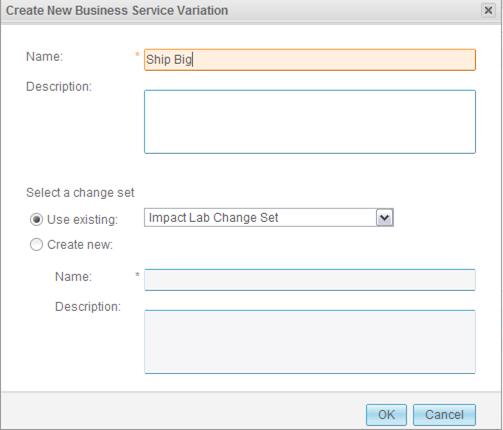
2. Add the Ship Big business service variations.
a. Again, beside Business Service Variations, click add.
b. For the name, type Ship Big. Use the default change set and click OK.
3. Add the Standard Shipping business service variations.
a. Again, beside Business Service Variations, click add.
b. For the name, type Standard Shipping. Use the default change set and click OK.
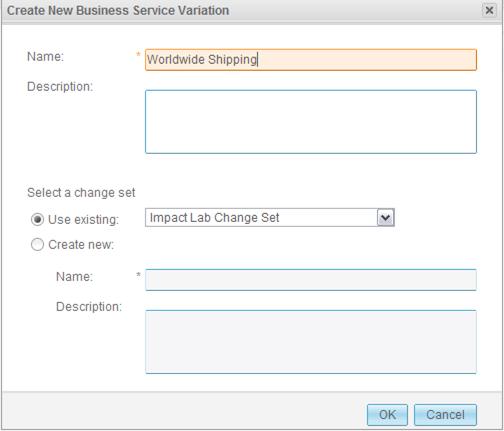
4. Add the Worldwide Shipping business service variations.
a. Again, beside Business Service Variations, click add.
b. Worldwide Shipping. Use the default change set and click OK.
The business service for the process is created.
A business application includes the combination of individual business services into a flow and the policies that are specific to the application. Policies control the behavior of the business service and can be modified at run time. In this tutorial, there is only one business service.
To create the application flow (model):
1. From the Impact Lab Authoring Space, select the Getting Started tab.
2. Click Start working with applications.

The Application Browser opens.
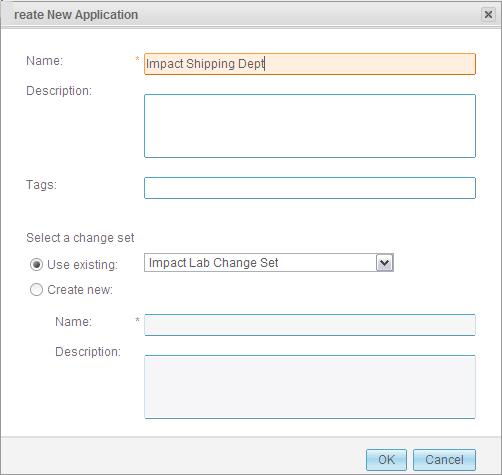
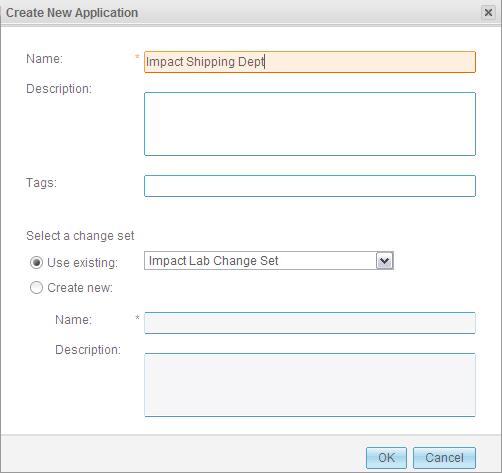
3. Click Actions and select New Application.
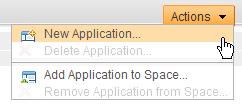
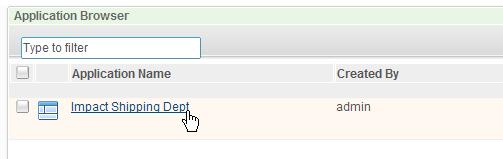
4. For the name, type Impact Shipping Dept. Use the default change set and click OK.
The Impact Shipping Dept row is added to the Application Browser.
5. Click Impact Shipping Dept .
The Application Detail tab opens.
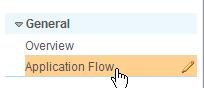
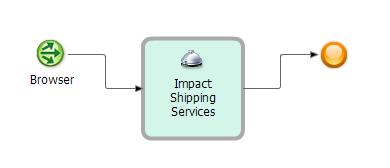
6. Under General, click Application Flow.
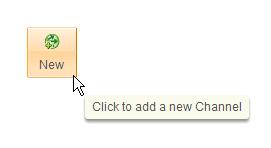
7.Click Edit, and then, in the middle of the editor, click New.
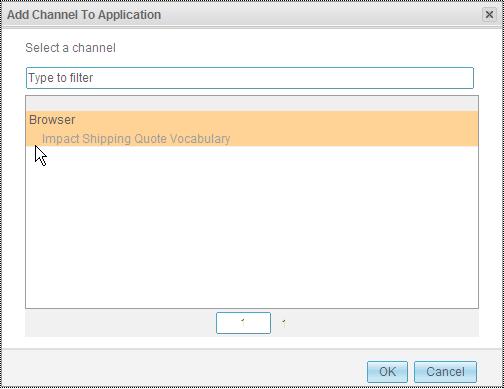
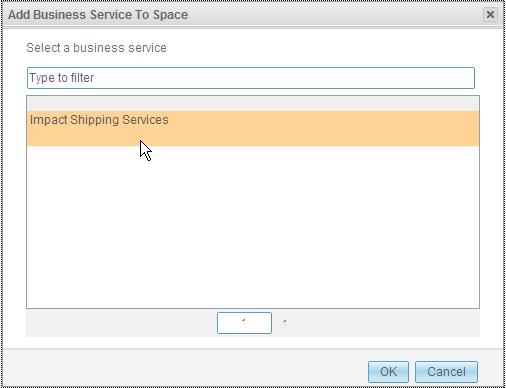
8. For the channel, select Browser and click OK.
9.Click the New Business Service icon.
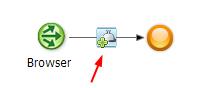
10. Select Impact Shipping Services and click OK.
11. Save the application flow.
The business application is created.
You might have noticed a section under Business Service Details where you can add policies. Policies that are defined under Business Service Details are the default policies for the variations and are not flexible at run time. For this tutorial, you will define the policies at the application level so that you can provide points of agility at run time.
To add the policy for the Standard Domestic Shipping Company:
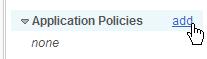
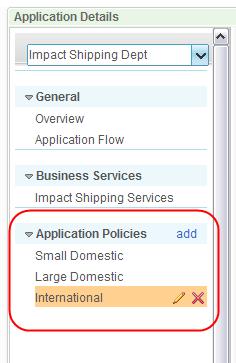
1. On the Application Detail tab, next to Application Policies, click add.
2. Specify the following details then select OK.

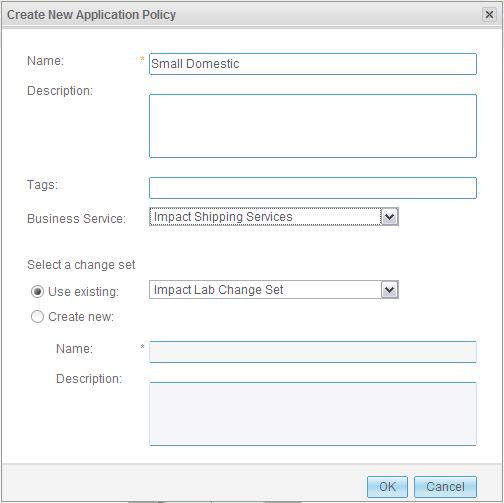
The service policy is now listed in the left column.
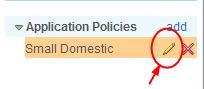
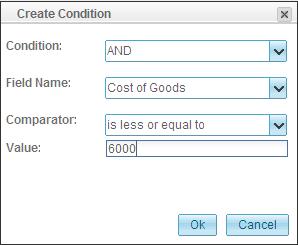
3. Click the pencil icon to edit the Small Domestic policy.
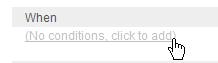
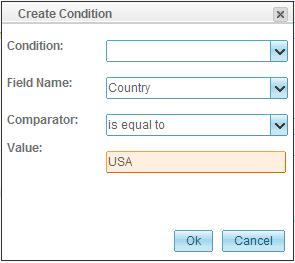
4. In the Policy Details section, click No conditions, click to add to add a condition.
5. Specify the following details and then select OK.

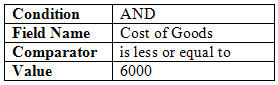
6. Highlight the row you just created and click the plus sign icon to add another condition.

7. Specify the following details and then select OK.
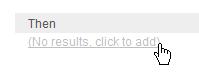
8. In the Policy Details section, click No results, click to add to add a result.
a. Select Select a process variation.
b. For the service variation, select Standard Shipping and then click OK.

9. Save the Standard Domestic Shipping Application Policy.
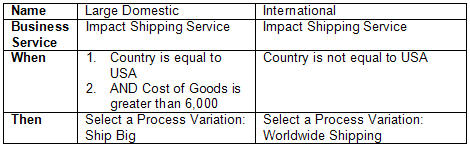
10. Add two more application policies.
The application policies are created.
Now that you have created the policies, you need to publish them to the server.
To submit, accept, and publish the governance change set:
1. From the "Impact Lab Authoring Space", select the Governance tab.
2. Select Impact Shipping Change Set.
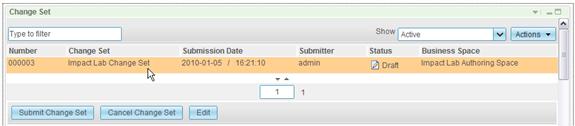
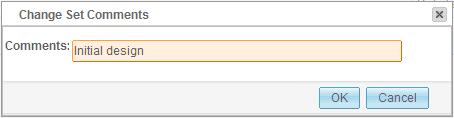
3. Click Submit Change Set.
4. For the comment, type Initial design and click OK.
The status changes from Draft to Pending.
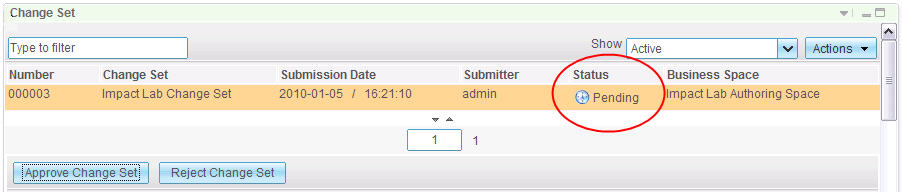
5. Click Approve Change Set.
6. For the comment, type Approving initial design and click OK. The status changes from Pending to Approved.
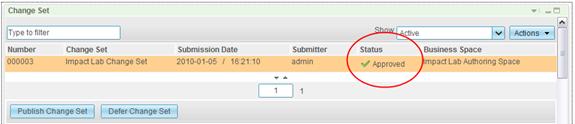
7. Click Publish Change Set.
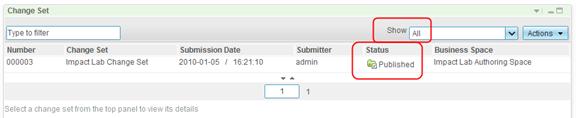
8. For the comment, type Publishing initial design and click OK. The status changes from Approved to Published.
You do not see the Impact Lab Change Set on the screen when it is published because the query is currently set to show only change sets that are active. To see the Impact Lab Change Set status, select All or Published in the Show field.
You have designed and defined a model using WebSphere Business Services Fabric and WebSphere Business Modeler.
At this point, you would hand the model to the IT department and they would complete the implementation and start running it on the WebSphere Dynamic Process Edition server.