This section describes how you can specify escalations for human tasks. It covers how you can
- Create an escalation,
- Add an escalation to an escalation chain,
- Add a parallel escalation,
- Set the escalation time dynamically (since Version 6.0.1.3),
- Specify a notification event handler.
Creating an escalation
To add an escalation to a human task, perform the following steps:
- Open the human task editor.
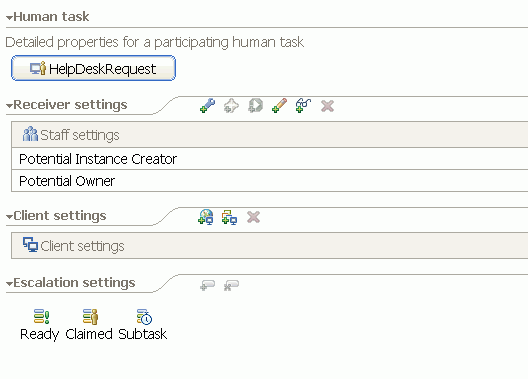
- In the Escalation settings section, click the state, for that you want to add an escalation.
- Click the add escalation icon
 .
.

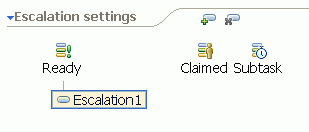
The escalation has been added:
To specify the escalation properties, perform the following steps:
- In the human task editor, click the escalation.
- Switch to the properties view.
- To edit the name and description of the escalation, click the Description tab.
- Optionally, edit Name, Display name, or Description.
- To customize the escalation, click the Details tab.
- To specify the Expected task state, click Claimed, Subtask finished, or Finished.
- In the Duration until escalated field, enter a time expression that is supported by the calendar which is specified for your task. For the default calendar, just specify the number and the units without a blank, for example "30minutes" or "1hours". You can find more details for this calendar in the the the InfoCenter.
- Select the appropriate Notification type. To create a work item for the escalation, leave the default value unchanged.
- Optionally, specify that the escalation will be repeated periodically:
In the Duration until repeated field, enter a time expression that is supported by the calendar. - Optionally, specify to increase the priority of the task for one time, or per repetition. That means the value is lowered by one for each escalation, down to a minimum of zero.
- To specify the escalation receivers, click the Verb tab.
- From the Verb drop-down list, select the appropriate staff verb.
- In the Parameters table, enter the values that are required for the selected staff verb.
- On the toolbar, click the Save button
 .
.


Adding an escalation to an escalation chain
To add an escalation to an escalation chain, perform the following steps:
- Switch to the human task editor.
- In the Escalation settings section, click the escalation after that you want to add the escalation.
- Click the add escalation icon
 .
. - Continue to specify the escalation properties as it is described in the Creating an escalation section.
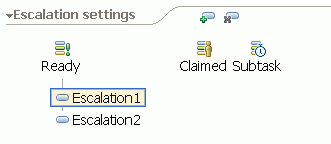
The escalation has been added:

Adding a parallel escalation
To add a parallel escalation, perform the following steps:
- Switch to the human task editor.
- In the Escalation settings section, click the state for that you want to add the parallel escalation.
- Click the add escalation icon
 .
. - Continue to specify the escalation properties as it is described in the Creating an escalation section.
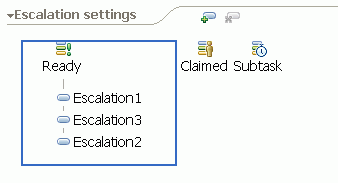
The escalation has been added:

Specifying the escalation time dynamically
Instead of specifying the time for an escalation as constant string at modeling time, for example 30minutes or 1hours, with WebSphere Process Server 6.0.1.3 and later versions you can instead use a variable which is evaluated at runtime. This variable is supposed to contain a valid time specification at the time where the escalation is evaluated (for repeated escalations: at the time where the escalation is evaluated the first time).
To specify the escalation time dynamically, perform the following steps:
- Add the variable containing the string is passed to the human task in the input message for the task. Make sure that the variable will contain a valid time specification at runtime.
In the following, it is assumed that in the interface for the human task, the variable is calledmyEscalationTime. - Click the escalation object and go to the Properties view.
- Click the Details tab.
- As the duration, enter
%htm:input.\yourVariableName%, in this example%htm:input.\myEscalationTime%. - Continue to specify the escalation properties as it is described in the Creating an escalation section.

Specifying a notification event handler
BPC offers a system programming interface that allows for plugging in custom notification event handlers. These event handlers must implement the com.ibm.task.spi.NotificationEventHandlerPlugin interface. A reference to this event handler must be declared at the task-level. This reference points to a file in the META-INF directory of your application, in which the implementation class is listed. This section will guide you through the steps you must perform to specify your own notification event handler.
Event handler implementation
You can package the implementation class of the com.ibm.task.spi.NotificationEventHandlerPlugin into the same application as your human task, or you can put it into a dependent utility project. This section describes, how you add the notification event handler implementation class to the same application as the human task.
To create a notification event handler implementation, perform the following steps:
- Switch to the Java perspective.
- In the Package Explorer, right-click Escalation.
- From the pop-up menu, select New > Class.
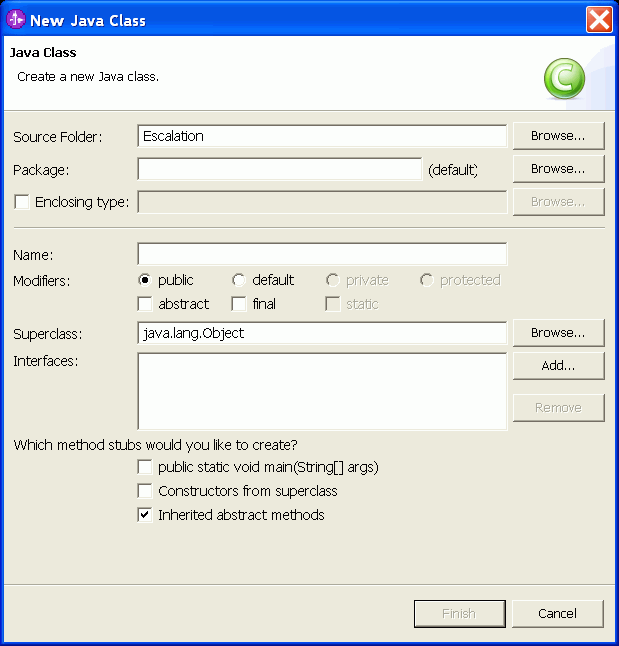
- In the Package field, enter the name of the package for your class.
- In the Name field, enter a name for your class.
- To add the required interface, click Add.
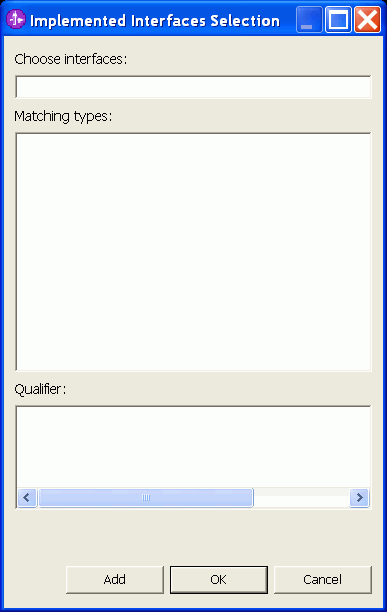
- In the Choose interfaces field, enter '
notif'. This activates the Matching types list. - Select NotificationEventHandlerPlugin.
- Click OK.
- Click Finish.
- Continue with the implementation of the
escalationNotificationmethod.
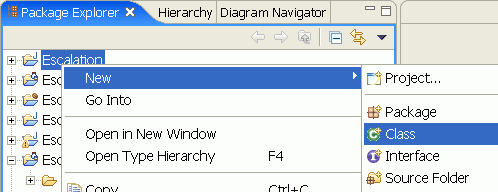
The New Java Class wizard opens:
The Implemented Interfaces Selection window opens:
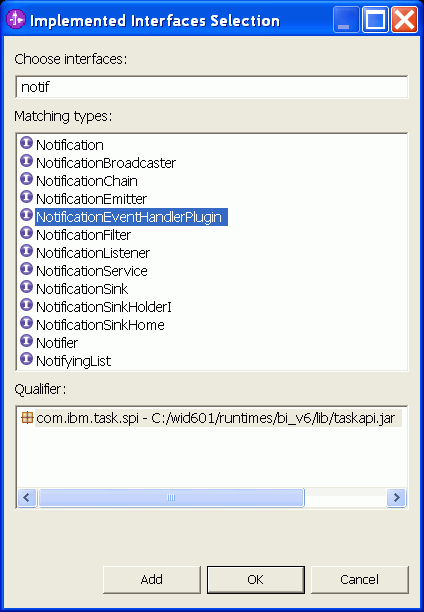
The NotificationEventHandlerPlugin interface has been added:

The following code snippet shows the implementation of the escalationNotification method for this sample:
public void escalationNotification(Task task, Escalation escalation) {
System.out.println("--- Notification event received: " + DateFormat.getDateTimeInstance().format( new Date(System.currentTimeMillis())));;
if(task != null)
{
System.out.println("Task template name: " + task.getTaskTemplateName());
System.out.println("Task name: " + task.getName());
System.out.println("Event handler name: " + task.getEventHandlerName());
System.out.println("Is escalated: " + task.isEscalated());
}
else
{
System.out.println("Task is null");
}
System.out.println("Notification event received.");
if(escalation != null)
{
System.out.println("Escalation name: " + escalation.getName());
System.out.println("Duration until escalated: " + escalation.getDurationUntilEscalated());
System.out.println("Duration until repeated: " + escalation.getDurationUntilRepeated());
}
else
{
System.out.println("Escalation is null");
}
System.out.println("--- End notification event");
}
Event handler declaration
To declare an notification event handler for your task, perform the following steps:
- Switch to the Business Integration perspective.
- Open the human task editor for your task.
- Click the properties button for the human task.
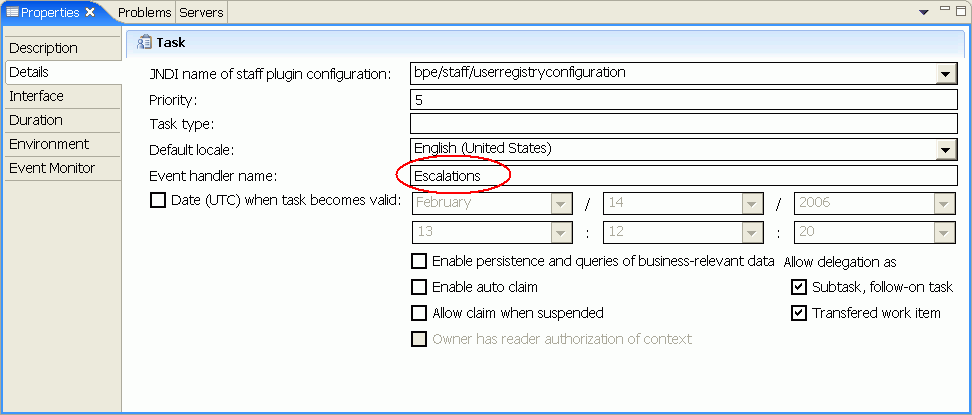
- Switch to the Properties view, then click the Details tab.
- In the Event handler name field, enter a name for your notification event handler.
Note: this name is not the name of the implementation class. - On the toolbar, click the Save button
 .
.

To add your plugin to your application, perform the following steps:
- Switch to the Resource perspective.
- In the Navigator, expand your business integration project.
- Browse to the META-INF folder.
- In the META-INF folder, create a new folder
'services'. - Browse to the services folder.
- Right-click the services folder.
- From the pop-up menu, select New > File.
- In the File name field, enter
com.ibm.task.spi.<EventHandlerName>NotificationEventHandlerPlugin.
Where<EventHandlerName>is the event handler name you have specified for your task. - Click Finish. The editor opens for the new file.
- In the editor, add a line with the fully qualified class name of your implementation class:
- On the toolbar, click the Save button
 .
.
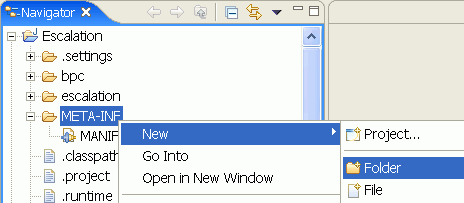

The New File window opens.


Escalation properties
To specify an escalation with a notification type 'Event', perform the following steps:
- Switch to the Business Integration perspective.
- Open the human task editor for your task.
- In the Escalation settings section, click the escalation.
- Switch to the Properties view, then click the Details tab.
- Specify the escalation properties as it is described in the Creating an escalation section.
- For Notification type, specify Event.
- On the toolbar, click the Save button
 .
.
