This sample is initiated by using the Business Choreographer Explorer. To run this sample properly, security has to be enabled for WebSphere Process Server.
To enable security for the integrated test environment of your WebSphere Integration Developer, this Technote may help you to do so.
Business Process Choreographer Explorer (BPC Explorer)
If you already know how to start a BPC Explorer session, you may proceed to the section Start the credit approval process.
To start the BPC Explorer in the integrated test environment of your WebSphere Integration Developer, follow these steps:
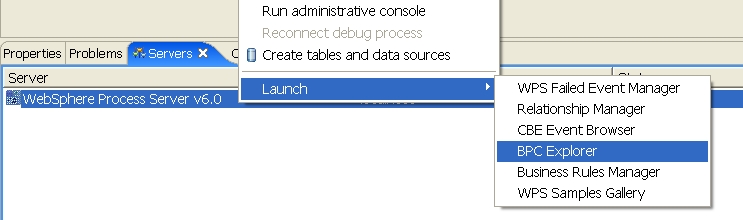
- In WebSphere Integration Developer, switch to the Servers view.
- In the table, right-click WebSphere Process Server v6.0.
- From the pop-up menu, select Launch > BPC Explorer.
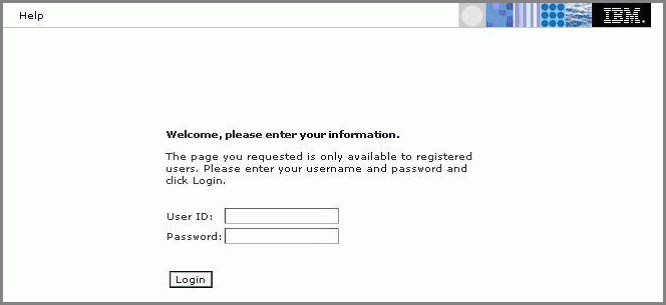
- The login page is displayed:
- Enter user ID and Password, then click Login.
Note: Enter the user ID in the proper case, since otherwise authorization may not function properly (although the login may seem to work fine when the wrong case is used).
To start the BPC Explorer on WebSphere Process Server, follow these steps:
- In a web browser, open URL
http://yourhost:yourport/bpc. - Enter user ID and Password, then click Login.
Note: Enter the user ID in the proper case, since otherwise authorization may not function properly (although the login may seem to work fine when the wrong case is used).
Note: Replace yourhost with your server's internet address and replace yourport with the port of your server's HTTP transport,
for example http://localhost:9080/bpc.
The login page is displayed:
Start the credit approval process
To start the credit approval process, follow these steps:
- Switch to the BPC Explorer.
- Log in with user ID sellerA. Be sure username is correctly entered in mixed case.
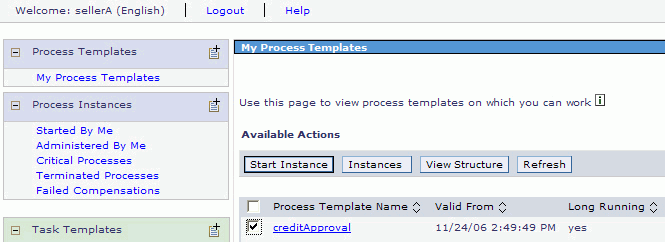
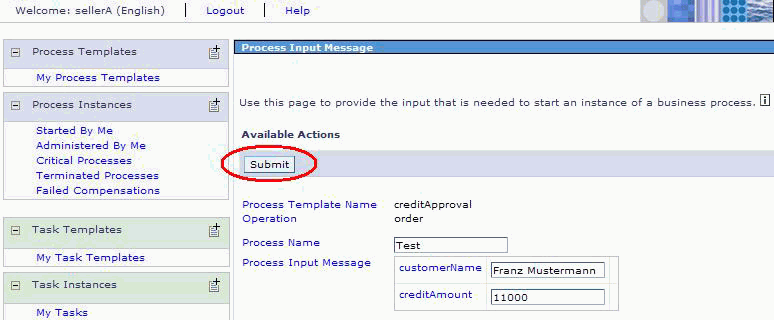
- In the Process Templates Section, click My Process Templates.
- Select creditApproval, then click Start Instance.
- In the Process Name field enter a string value. In this sample this value is used for clearly identifying the process instance so it is recommended to use a name which is easy to remember.
- In the customerName Field, enter a value of type string.
- In the creditAmount field, enter an integer value.
- Click Submit.
The My Process Templates view is displayed:
The Process Input Message View opens:
Call the custom client
To start the custom client, follow these steps:
- Install the EAR file delivered with this sample.
- In a web browser, open URL http://yourhost:yourport/spwSample .
- The first time you call this page your browser asks you for log in information. Log in with user name approverA. Be sure to enter the name correctly in mixed case.
Note: Replace yourhost with your server's internet address and replace yourport with the port of your server's HTTP transport,
for example http://localhost:9080/spwSample.
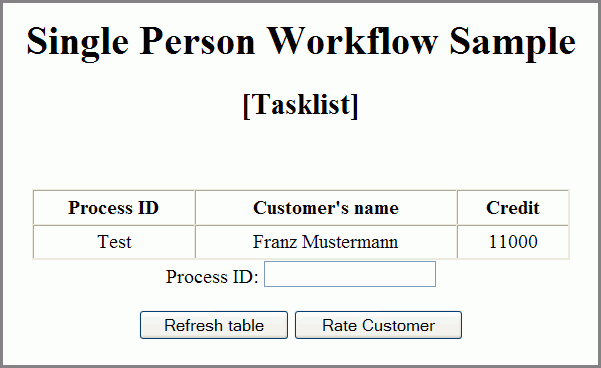
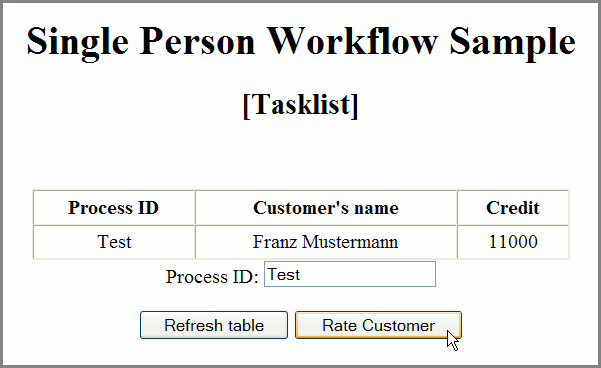
The welcome page [Tasklist] is displayed:
Enter the single person workflow sequence (which consists of [Page 1] and [Page 2])
- Switch to the welcome page of the custom client.
- In the Process ID field enter the ID of the Process for that you want to start a single person workflow.
- Click the Rate Customer button to start the rating process.
- In the Customers Rating field, optionally change the value.
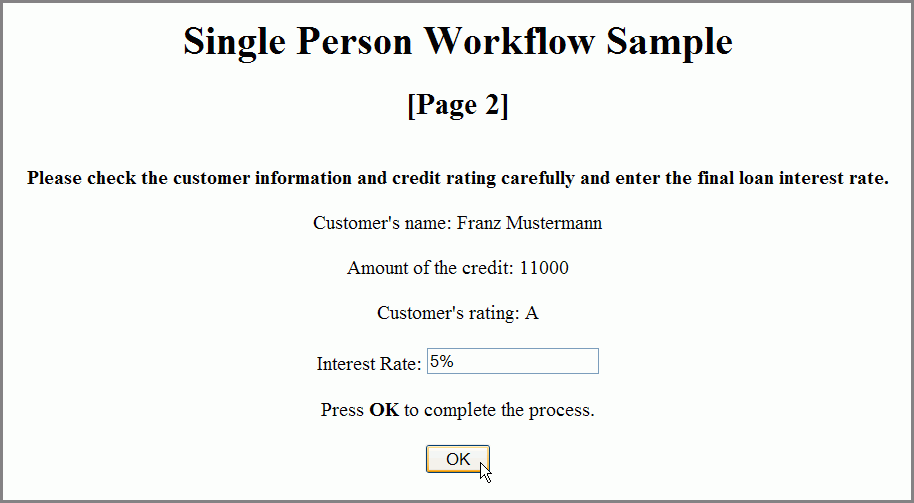
- Click on Complete Rating to proceed to the Finish Rating activity of the business process.
- Optionally, change the value in the Interest Rate field.
- Press OK.
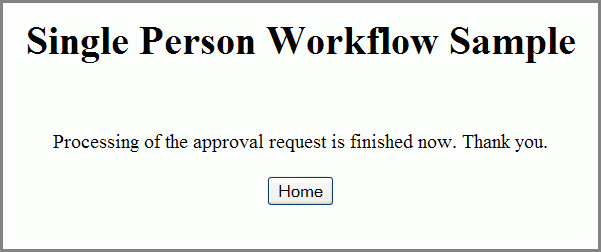
- You may click on the Home button to return to the welcome page.
The customers rating screen is displayed:

Note that the field on this screen is already filled with an automatically calculated value.
The acknowledgement screen appears:
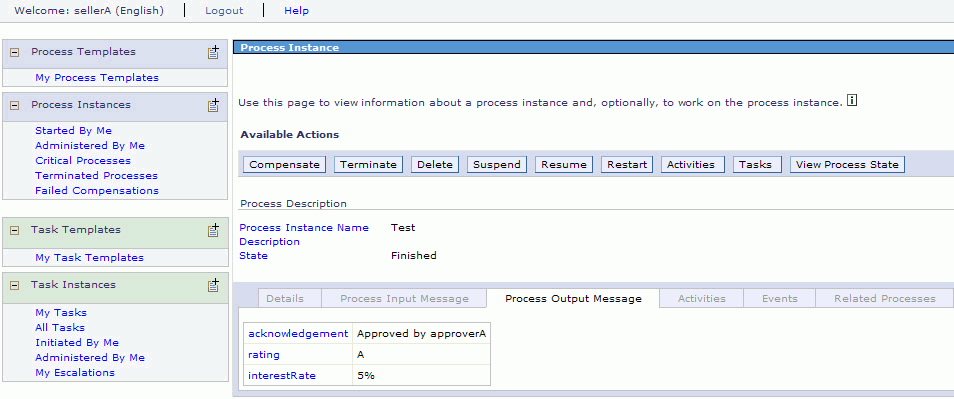
Check the results of the credit approval process
- Switch to the BPC Explorer.
- Log in with the user ID sellerA.
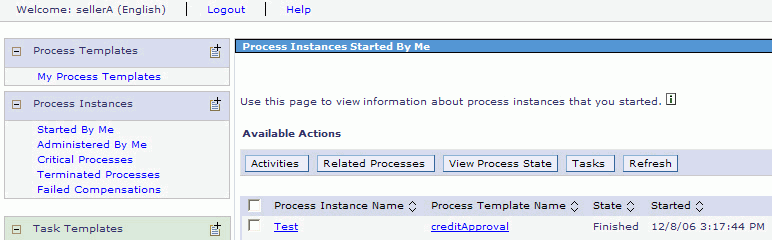
- In the Process Instances Section, click Started By Me.
- Click the Test link in the Process Instance Name column.
- Click on the Process Output Message tab.
The Started By Me view is displayed:
The Process Instance page is displayed.
The output message of the process is displayed. Note that the rating, the loan credit rate and the ID of the approver are displayed here.