Client application
To run this sample, use the client application that is delivered with this sample. It is able to display the contents of the query table that you specify. You can specify one of the predefined query tables for displaying the actual for instance data. Instead, you can specify a query table name of your choice; please enter the name in correct case because this is required, and future validators may issure errors on incorrect case (lower case or mixed case characters).
The queries used to get the results can then be customized by specifying a subset of columns, or by specifying a query condition to get a subset of rows.
Client application delivered with the sample
To start the client application on a WebSphere Process Server, follow these steps:
- In a Web browser, open the URL
http://yourhost:yourport/queryTablesSample. - When prompted, enter a valid userid and password. The default userid is admin.
- Select one of the predefined query tables and press Submit query.
Note: Replace yourhost with your server's internet address and replace yourport with the port of your server's HTTP transport,
for example http://localhost:9080/queryTablesSample.
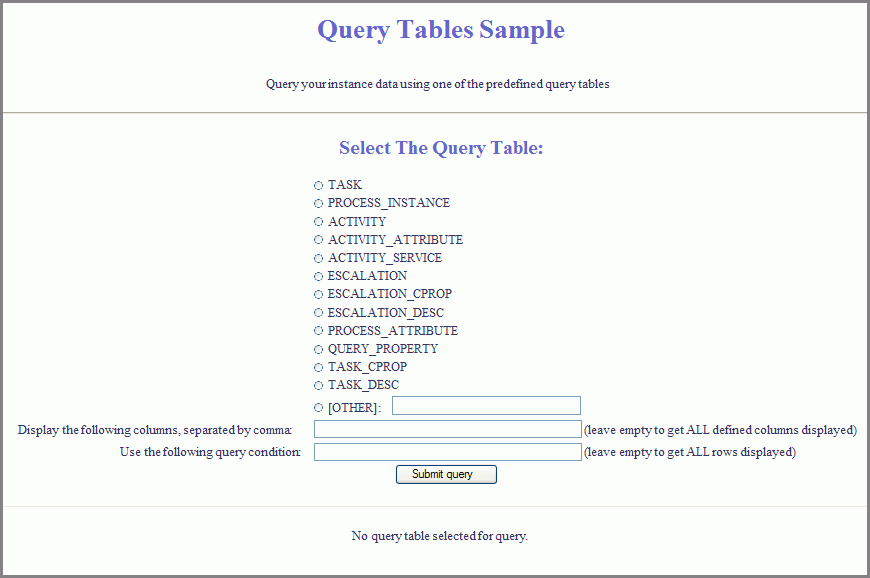
The client application is displayed:
The result of the query is rendered in the same window:
Notes:
- The client has only one main window for specifying the query and rendering both the results and the generated Java code.
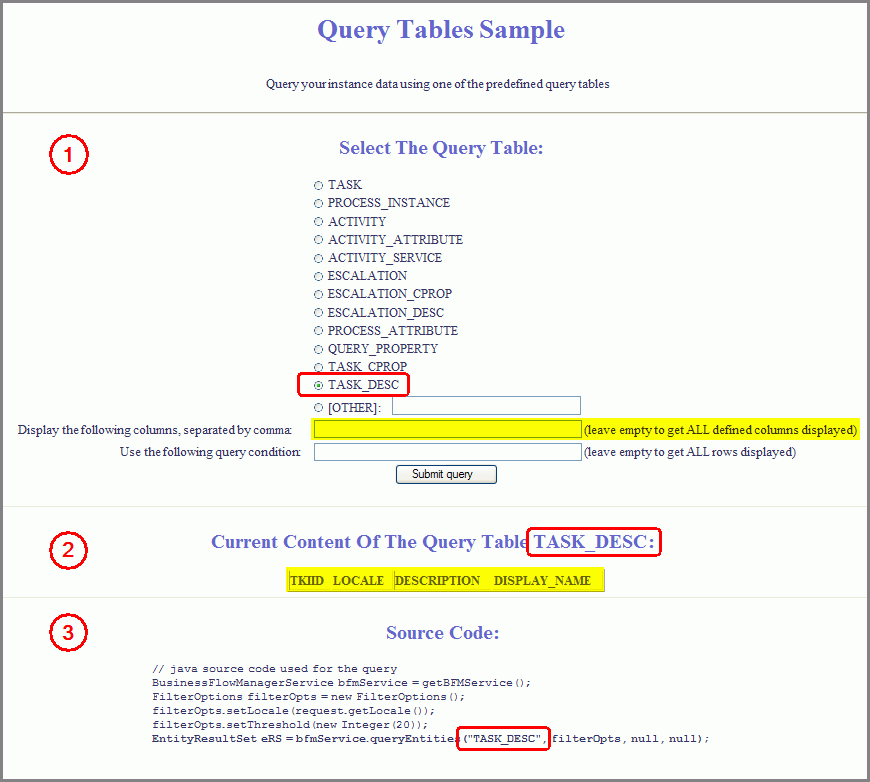
- The screen has three sections:
- The query specification section. Here, you can choose one of the predefined query tables (circled red) and specify constraints to restrict the number of columns and/or the number of rows that will be displayed. For example, the first input field (marked yellow) will determine the displayed columns.
- The content section. After pressing submit, the query result is rendered in this section; the setting specified in the query is reflected accordingly here (see red and yellow markups).
- The source code section. After pressing submit, for successful queries the Java source code used to launch the query is rendered in this section; the setting specified in the query is reflected accordingly here (see red markup). Any non-default column specicifation and/or query conditions will be reflected here as well (see more screenshots below).
- In case that a runtime error occurs, sections 2 and 3 are omitted and the error diagnostics is rendered instead.
Generate instance data
In the previous steps, just an empty table was displayed. This was because in this sample, there are no business processes and no human tasks included that could be instantiated. Therefore in the following, business process instance data and human task instance data are created using a different sample. Then we use the current client again to display those instance data.
Follow these steps:
- Download another sample: Human interaction and Business Space from the Getting started samples category as described in the Download tab of that sample. You can either use the Project Interchange version or the Enterprise Application Archive (EAR).
- Install the Human interaction and Business Space sample on your server. In case you need details for this step, refer to the sample Hello World in the Getting started samples category.
- Use the Business Process Choreographer Explorer (BPC Explorer) to start a process instance. This is described in detail in the Human interaction and Business Space sample, in the Run the Sample tab, under the heading "2. Using Business Process Choreographer Explorer for running the sample".
Now you have created instance data that we will display in the following steps.
Inspect the query tables and vary the parameters
You can now find the newly created instance data by using the client shipped with this sample.
Follow these steps:
- Switch to queryTables sample application
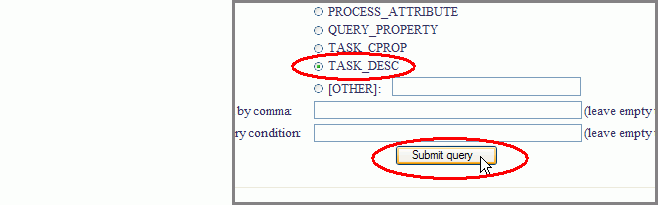
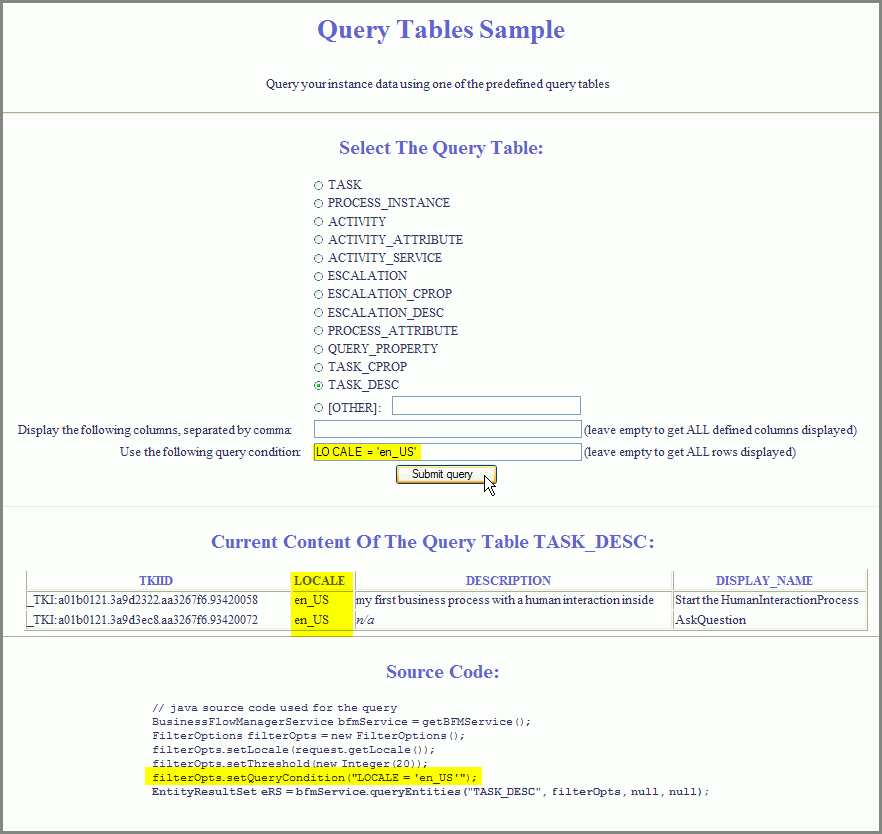
http://yourhost:yourport/queryTablesSamplethat resolves tohttp://localhost:9080/queryTablesSamplewhen using default settings for hostname and ports. - Select TASK_DESC as query table, leave the text fields empty and click Submit query.
- Now enter a query condition that restricts the number of displayed data rows.
For this, click the second text input field with the label Use the following query condition and enter
LOCALE = 'en_US'
and thereby make sure to use the case exactly as shown.
Due to the created task instances, the table is now populated with data, and your screen may look similar to this one (instance data marked yellow):
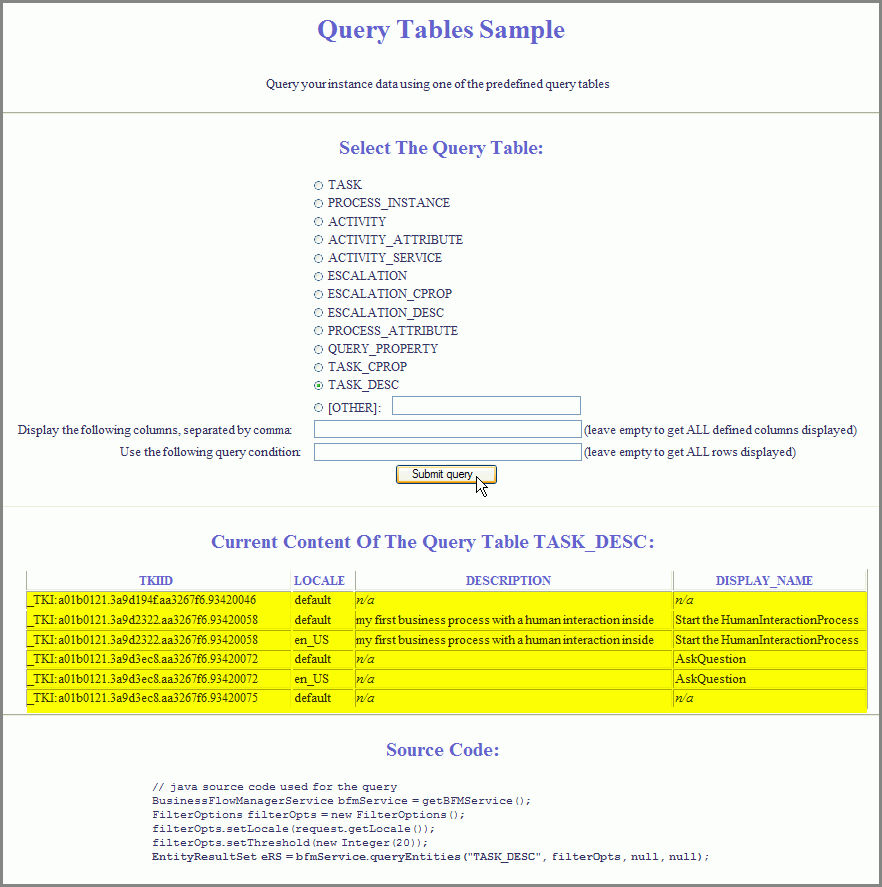
The constraints entered in the query specification (marked yellow below) are now reflected in both the content section and the source code section. The screen may look similar to this one:
Feel free to try your own queries and even to enforce error situations intentionally by entering invalid columns or query conditions.
Display Process instance data "Started by me"
Finally, we generate a table that contains process instance data in a format similar to the "Started by me" view of the BPC Explorer.
Follow these steps:
- Switch to the queryTables sample application.
- Select PROCESS_INSTANCE as query table.
- In the first text field, specify the following columns (separated by the comma symbol):
NAME,TEMPLATE_NAME,STATE,STARTED,PARENT_NAME,TOP_LEVEL_NAME
- In the second text field, specify the condition that restricts the selection to process instances started by the logged-in user.
For example, if the user is admin, enter the following string (case sensitive):
STARTER='admin'
- Click Submit query.
The screen may look similar to this one:
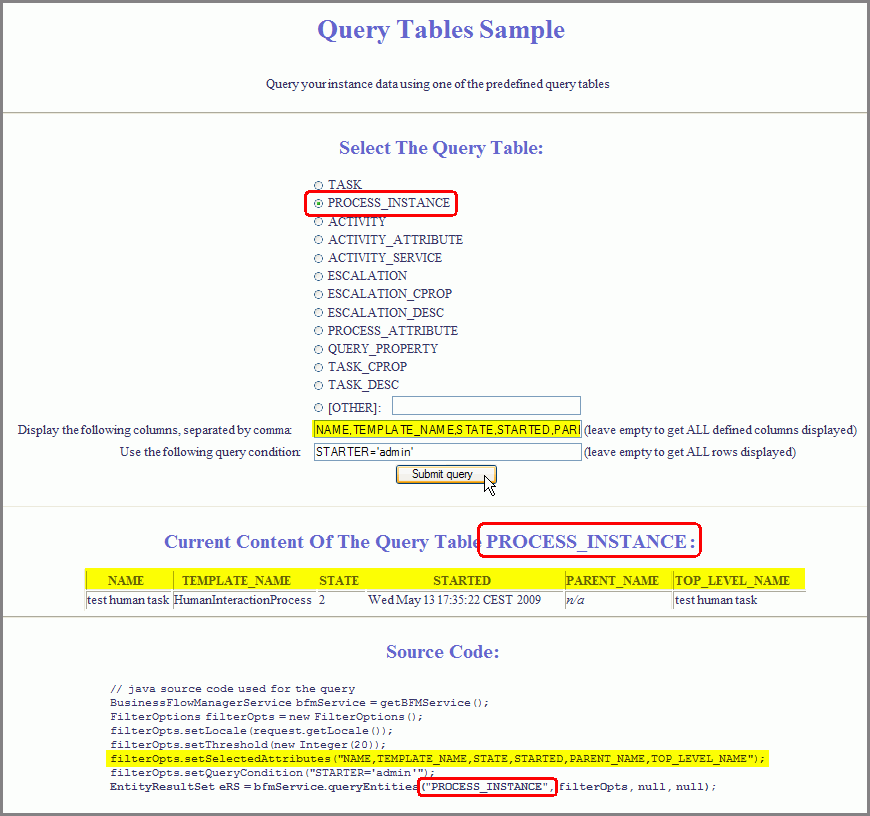
Note: In the column STATE, the raw integer value from the database is shown. In contrast, the BPC Explorer translates the raw values from the raw value (for example, 2) into the corresponding symbolic value (for example, Running). The mapping from the raw values to the symbolic values can be found in the documentation PROCESS_INSTANCE view, TASK view, etc. in the Information Center.
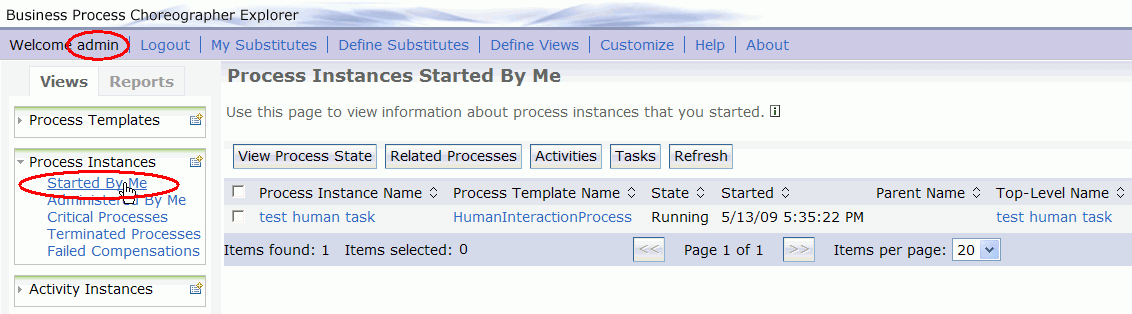
For comparison, the corresponding BPC Explorer view looks like this:
Template data
In addition to the predefined query tables for instance data, WebSphere Process Server is shipped with predefined query tables
for accessing the actual template data.
Note however that for accessing query tables containing template data, administrator privileges are required.
In other words, you can access the template data only if you log in as a user that is defined in the BPESystemAdministrator J2EE role
(by default, user id admin is such a privileged userid).
Examples for predefined query tables containing template data
are PROCESS_TEMPLATE and TASK_TEMPL.
The complete list of predefined query tables can be found in the Information Center
section Predefined query tables.
To work with those query tables, in the client application shipped with this sample you can select [OTHER]
and enter a query table name of your choice.
Java Code
As mentioned previously, a Java code snippet for lauching the query is rendered in the client application. Note that this code snippet is just for illustation purposes, thus you may want to use more setter methods and add error handling to produce reliable code. For a more detailed explanation of the source code, refer to the Code Review section of this sample.