Before running the sample, download and import the sample *.twx
published in the download section. The name of the sample is: LaptopOrder_-_COMPLETE3.twx
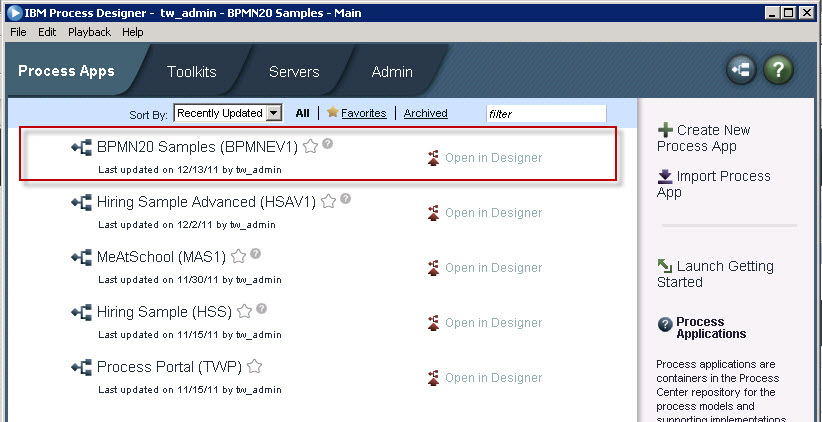
Select the sample and click on ‘Open in Designer’.
Before you start executing the process application, monitoring is
switched on for this process application. However you have to update the
performance warehouse to see the monitoring data in Process Portal.
Do the following the update the performance warehouse: In IBM Process
Designer, under File, click on UpdateTrackingDefinitions:
![]()
Now, let’s get started and run the process application. After opening the process application in Designer, the process application is opened showing the process application settings.
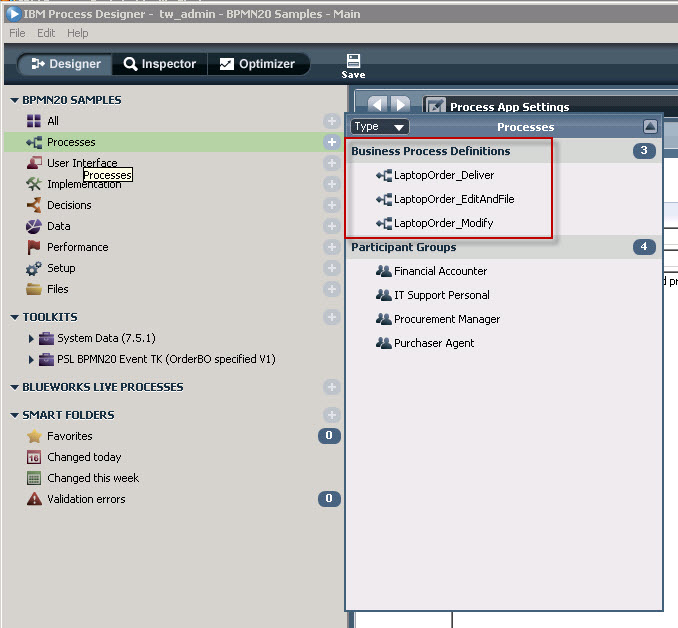
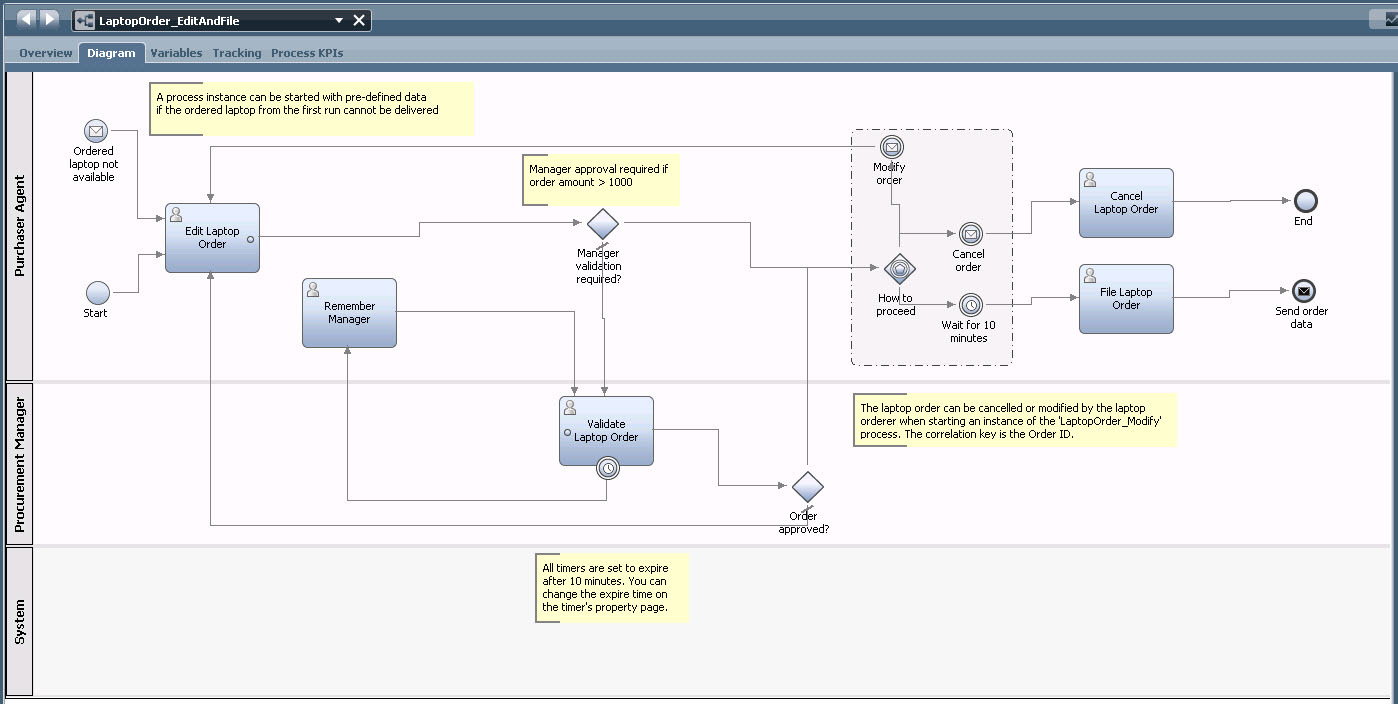
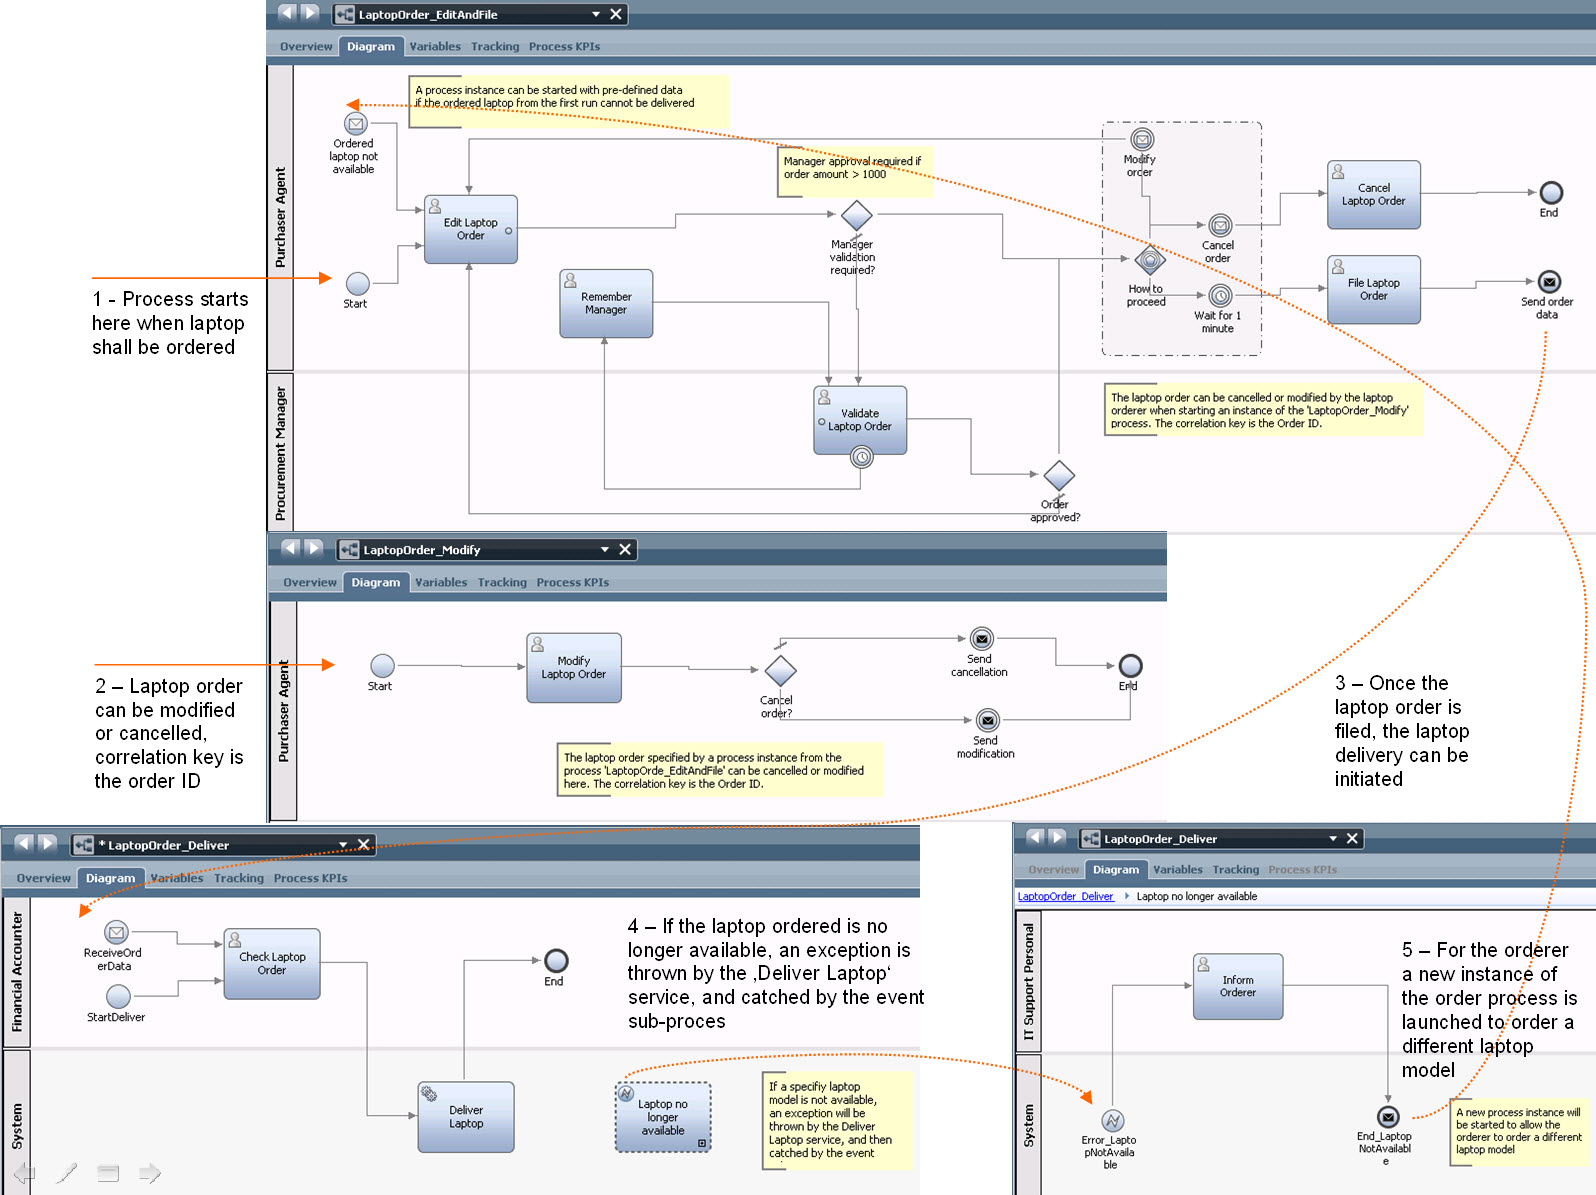
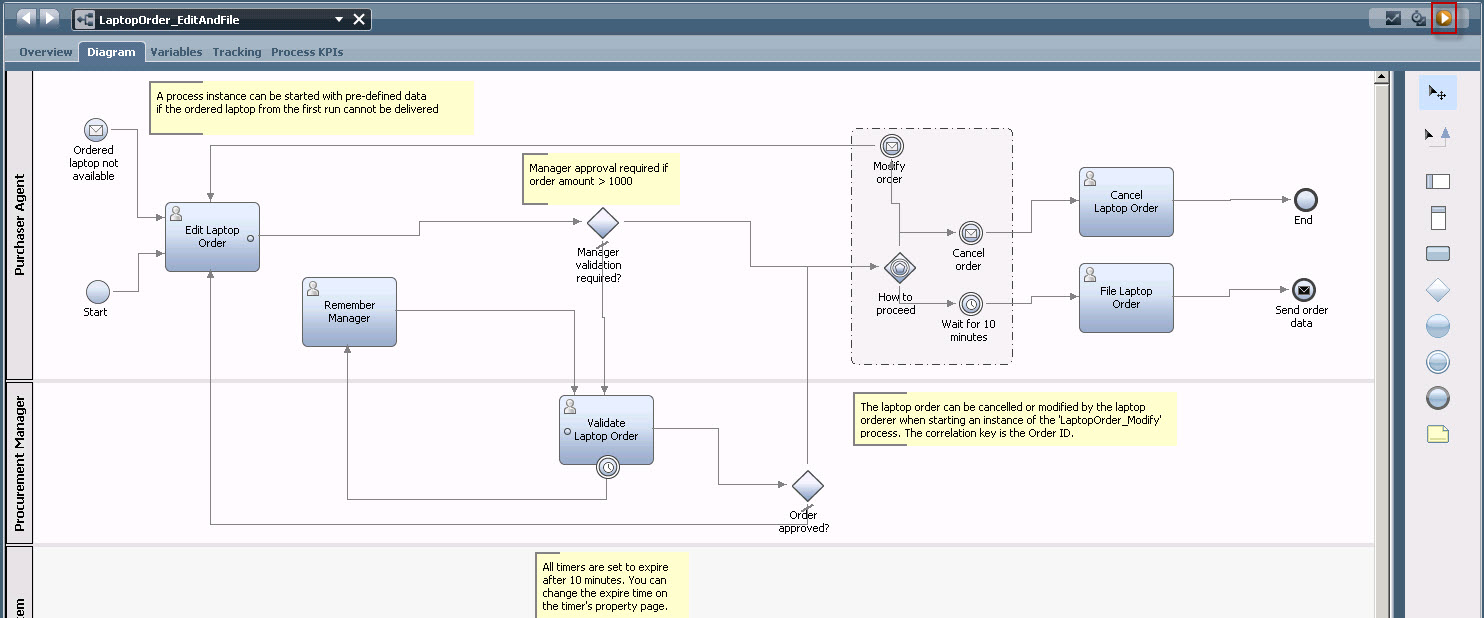
Process 1 – LaptopOrder_EditAndFile
This is the process to start the whole scenario. You have to start this
process manually, for example from Designer or Inspector perspective.
-
The first activity allows to order a specific laptop model. If you enter a price of more than 1000, then an additional manager approval is required. If you select to order the laptop type "IBM Thinkpad w300" then the delivery process will generate an exception because this laptop is no longer available
-
In any case, most important is to remember the Order ID, as the Order ID is used to correlate between this process an another process which does send either the order modify or order cancel event expected at the event gateway.
-
Every timer in this process is set to 10 minutes. Which means that the manager has 10 minutes time to approve the order, before the timer fires and another activity is made ready to remember the manager to approve the order. The second timer is part of the event gateway and will fire after 10 minutes once the process engine has navigated to the event gateway. This happens always unless the modify or cancel event is sent to the process instance, correlated using the Order ID.
-
Once the File Order activity completes, this process ends and sends a message to the Laptop_Deliver process to start the delivery of the ordered laptop
-
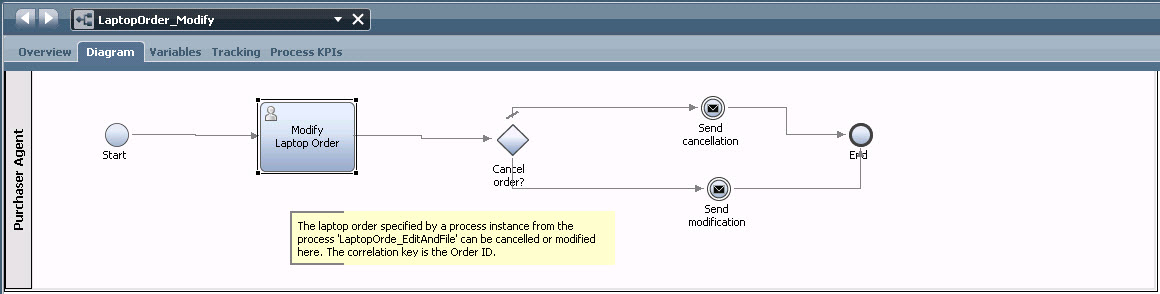
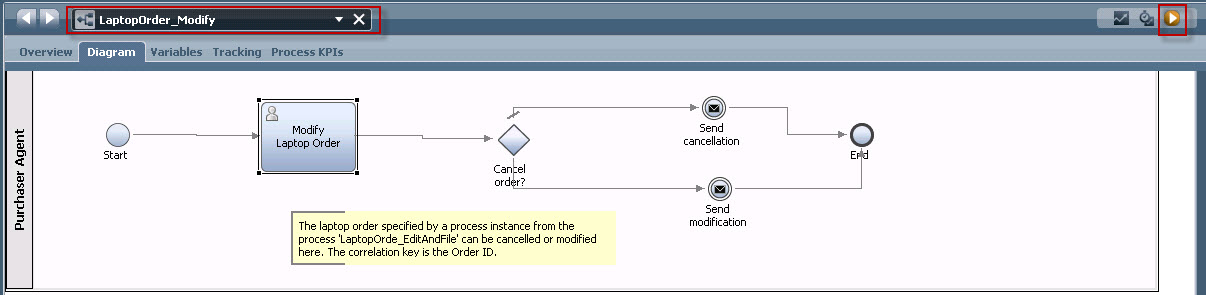
The first activity allows to define whether a specific laptop order identified with the Order ID should be modified, or cancelled. You have to know the Order ID for your laptop order edited in process 1.
-
Accordingly, the corresponding message is sent to the LaptopOrder_EditAndFile process.
This process is started via a process message start event sent from the
LaptopOrder_EditAndFile process once this completes after the File Order
activity.
Briefly, the process does the following:
-
The laptop order is presented to change the Employee Department Discount Factor, which however has no effect for the execution of the process instance
-
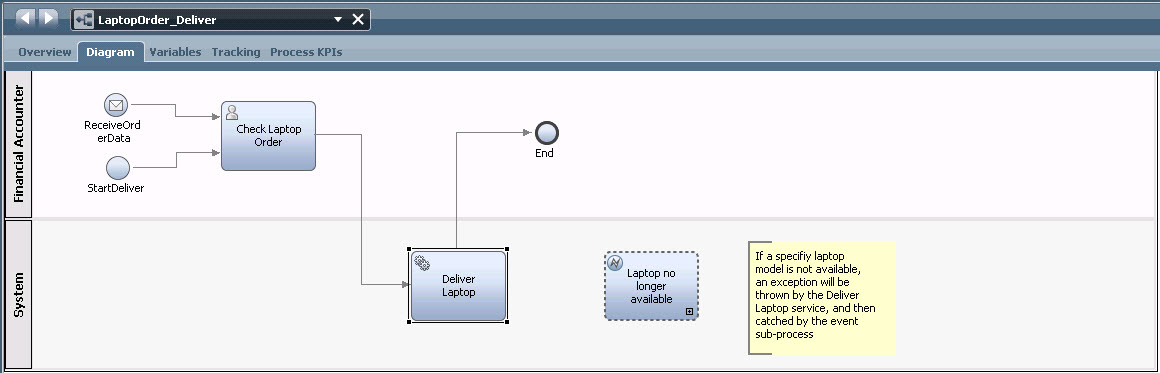
Then the delivery service is started which does trigger the delivery of the laptop unless the laptop type is not "IBM Thinkpad w300". In this case the service thrown an exception which is catched by the event subprocess.
-
The event subprocess presents the laptop order again, and once it completes, a process message end event is sent, which is received by the LaptopOrder_EditAndFile process, and the cycle starts again.
-
If the service works fine, then the process completes normally, and the scenario ends.
All together, the process application looks like this:
Now – let’s get started.
In the LaptopOrder_EditAndFile process, click on the start icon to run a
first instance of this process:
Click on the first activity and click start as well:

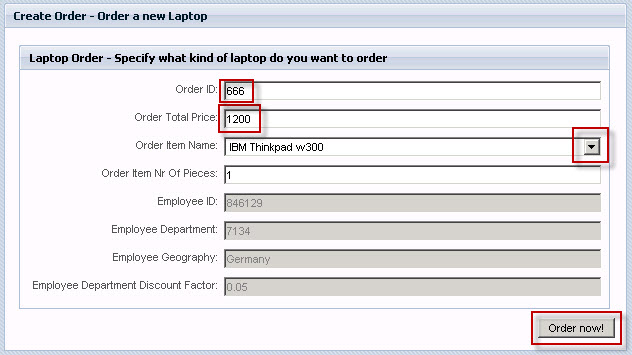
Select a price of more than 1000 to have the order to be approved by a
manager.
Select the "IBM Thinkpad
w300" to have the service used in the LaptopOrder_Deliver process to throw an
exception and to trigger the event subprocess. The LaptopOrder_Deliver process
however is started automatically.
Now, if you want to modify or cancel the process, start an instance of
the LaptopOrder_Modify process, either from the Designer or Inspector
perspective.

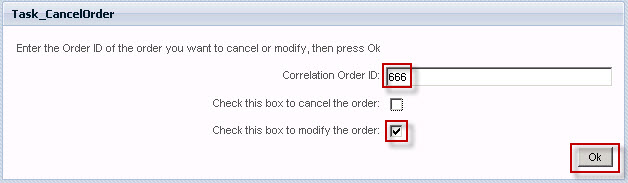
Then add the Order ID specified for your order, and decide whether to
cancel or modify the order. Click ok when done.
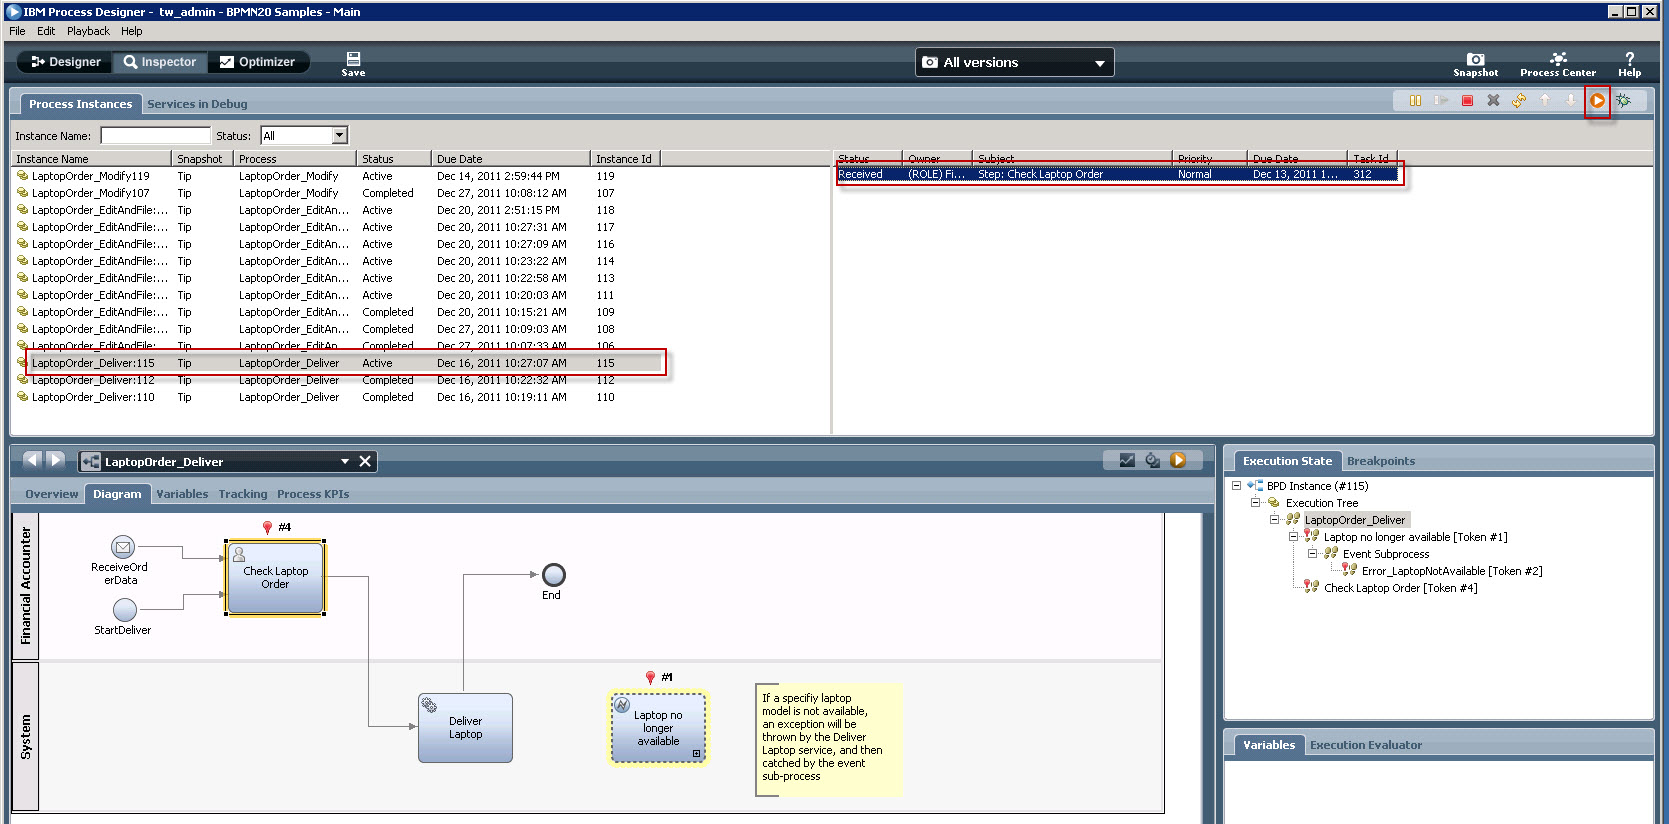
Now – in some cases, the LaptopOrder_EditAndFile process will reach the
File Order activity, complete this step, and trigger the LaptopOrder_Deliver
process to start. If this is the case, you will find the instance in the
process instance list in the Inspector perspective.
Select this instance, then select the activity that is made ready for
execution, and start this activity:

This describes the scenario.
You may or may not run several instances in parallel, to see various
execution paths of the process application.
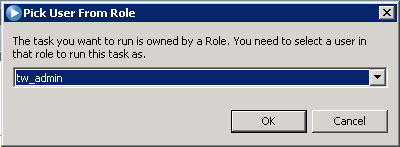
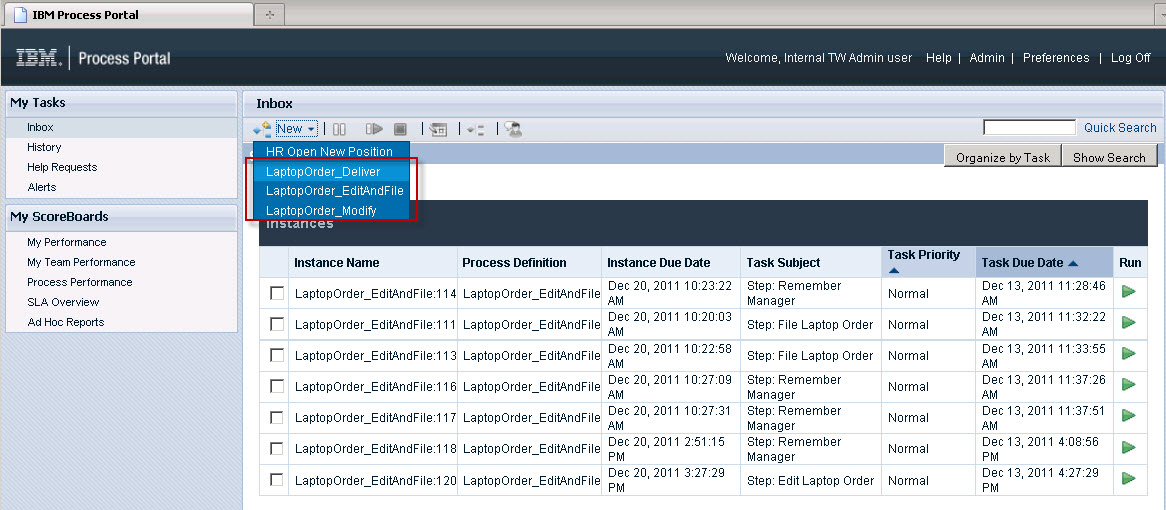
As mentioned in the beginning, monitoring is enabled, and instead of
running the samples in IBM Process Designer, you can do run the samples in IBM
Process Portal as well. Logon with userID and password ‘tw_admin’, create
process instances from there, and select the tasks you want to work on.
This is it.
There’s much more to explore in IBM Business Process Manager v751.
But for this time, this is the end of the sample.