This part describes how to reuse an existing implementation available in IBM Integration Designer (IID) for an Advanced Integration Service (AIS) newly created in IBM Process Designer (IPD).
In the 'Build it Yourself' section you have already learnt how to implement an AIS in IID which was created in IPD. Here we want you to investigate what we have done to reuse an existing BPEL process as an implementation for an AIS newly created in IPD. We are using the same Process Application (Hiring Sample Advanced), but have created a new process (HR Open New Position (List)). In this process, instead of only requesting and presenting just one candidate, the AIS does return a list of candidates, and this list is presented to the user to select one candidate for an interview. This AIS is implemented by a BPEL process which simulates to retrieve candidates from one or many backend systems, depending on the job requisition.
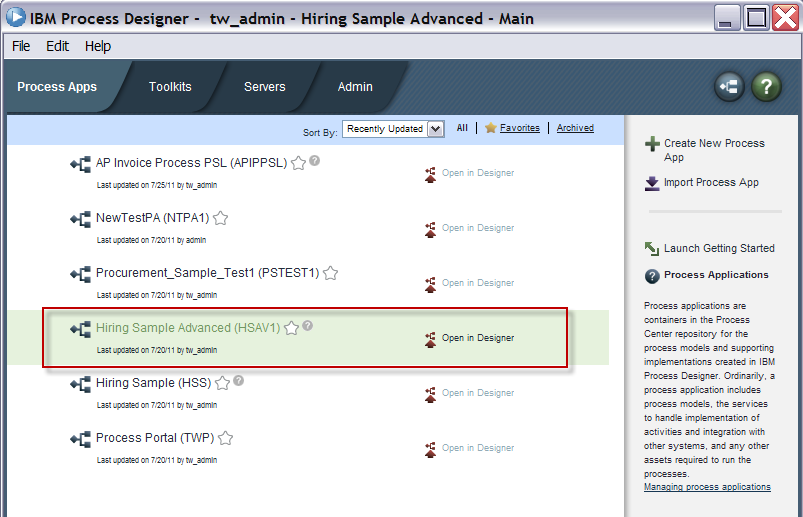
In order to follow the investigations described here, go to the download section, download the file 'advanced-hiring-sample-list.twx', and import it into IPD. The sample is ready to run, but have a look how the AIS is implemented following the descriptions outlined here.
Comment: In order to keep this section rather short, we will not further explain all the details of IBM Integration Designer.
- Investigate the BPD in IBM Process Designer
- Investigate the BPEL processes in IBM Integration Designer
- Investigate the mediation flow connecting the AIS to the BPEL processes
- Summary of this section
____ 1. Investigate the BPD in IBM Process Designer
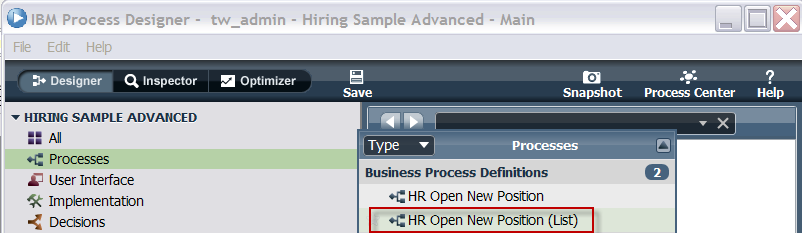
Select the processes folder, and click on the process named 'HR Open New Position':
Look at the process. Compared to the process which did retrieve one candidate only, there are two changes:
- The task named 'RetrieveCandidatesList' located in the automatic lane is implemented by an AIS which does reuse existing BPEL processes made available in IID
- The task named 'Find job candidate List' presents the retrieved candidates to the end user
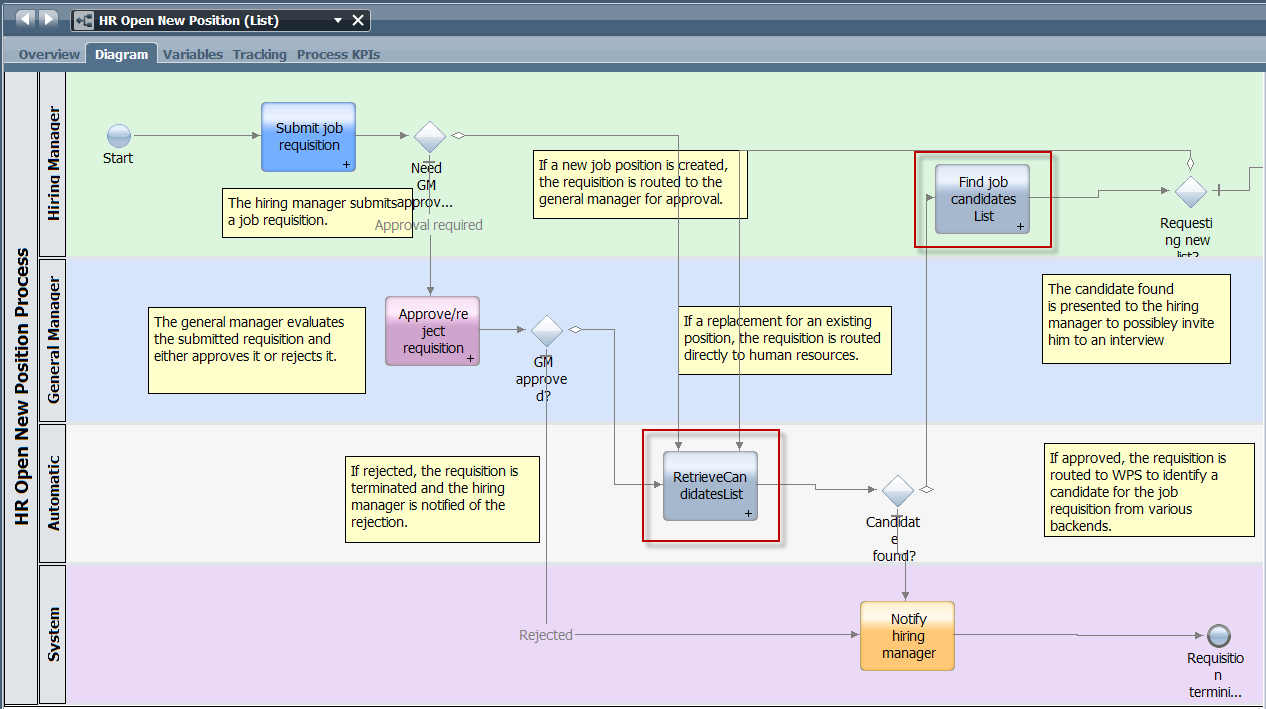
Doubleclick on the task named 'RetrieveCandidatesList' to see its implementation:
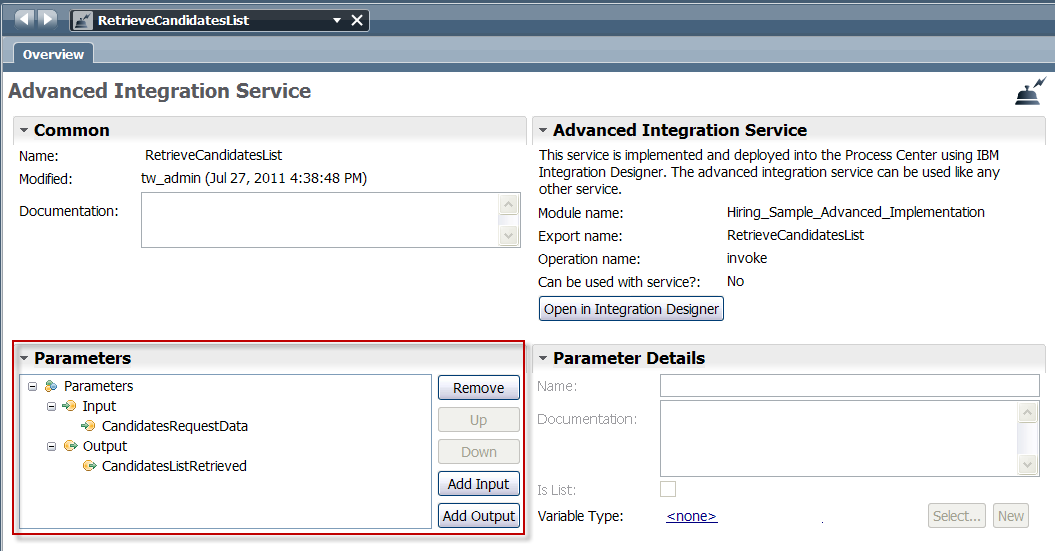
The AIS returns a list of candidates. Have a look at the list of candidates business object by selecting the 'CandidatesListRetrieved' output paramater, then click on 'CandidatesResultList':
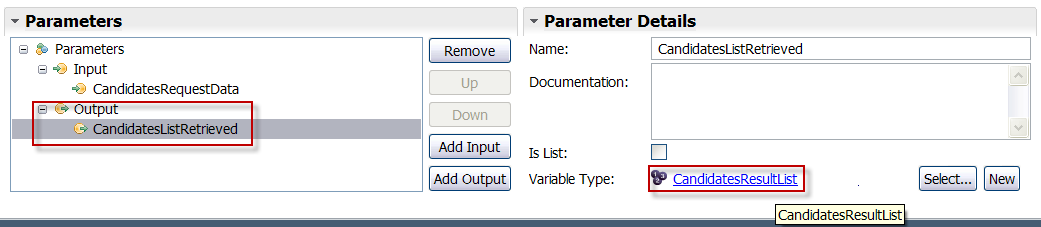
The business object is opened:

This is the list filled with candidates once the AIS completes, and this list is then presented to the end user in the next task.
Have a look at the task, and double click on the tasks named '' from within the process diagram:
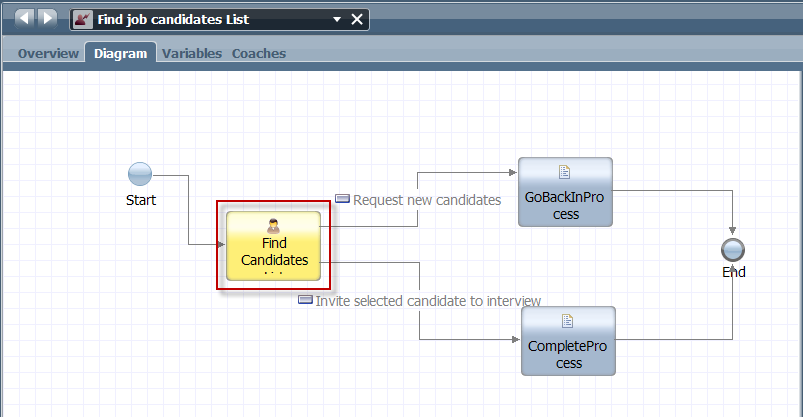
This shows the control flow of the human task, which allows to request a new list of candidates, or to complete the process. Now doubleclick on the yellow node to open the tasks' coach:
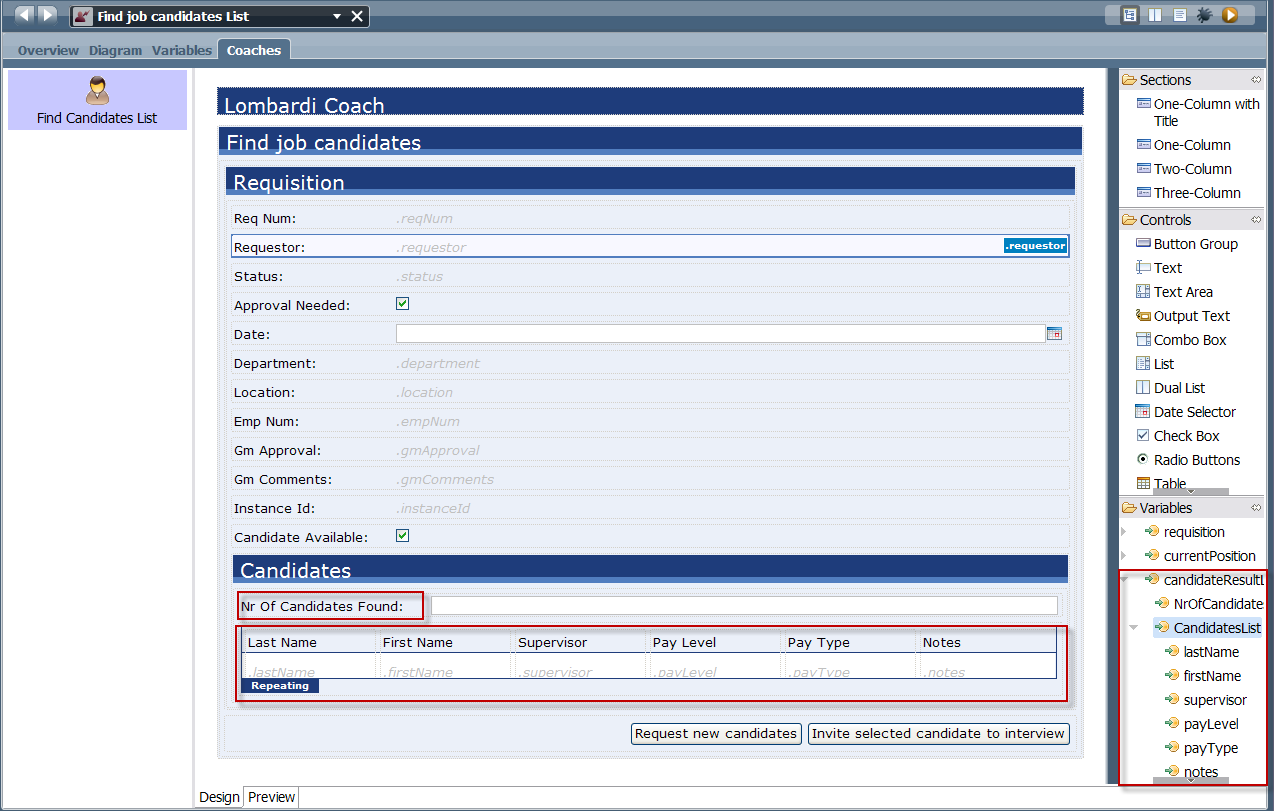
In the candidates section, all the identified candidates are presented in a list control, which was simply created by dragging and dropping the 'CandidatesList' object (marked in blue on the right hand side) into the section. Similarly, the 'NrOfCandidatesFound' data element is presented to the end user.
So, in order the enhance the sample to return a list of candidates, the following was done:
- Create a new BO that specifies a 'list of' candidates
- Create a new AIS that uses this BO as output parameter
- Create a new (human) task including its coach to present the list of candidates
- In the BPD, take care that all data mappings (in the new tasks) are done correctly
____ 2. Investigate the BPEL processes in IBM Integration Designer
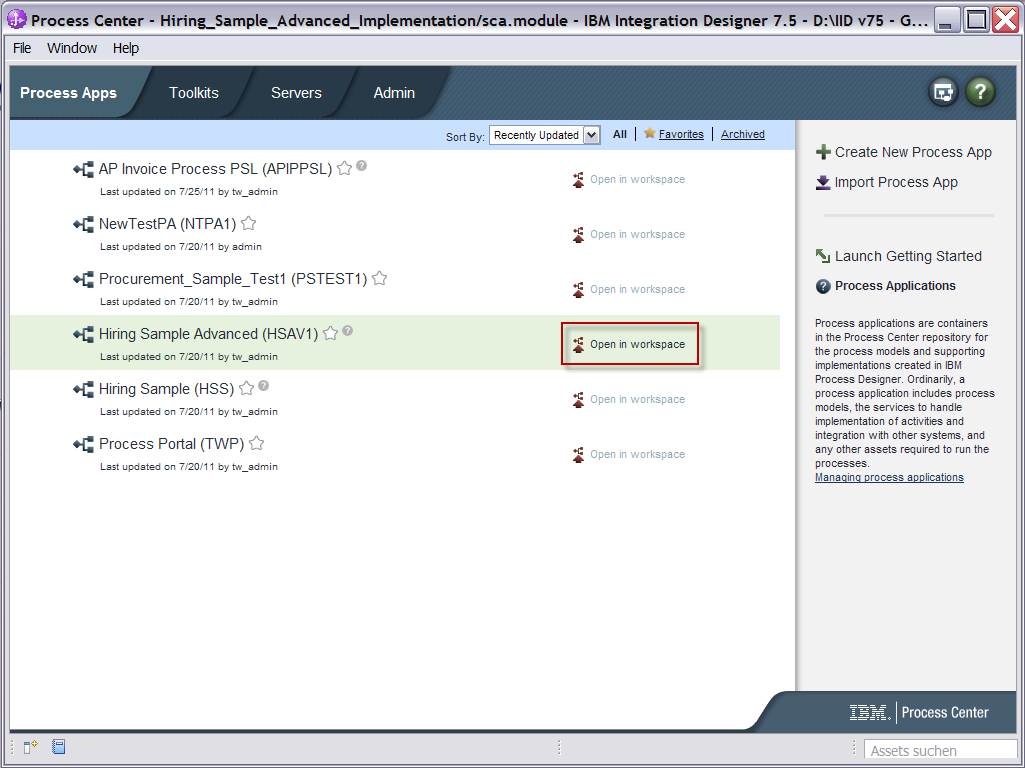
If IBM Integration Designer (IID) is not already opened, open it. (You may decide to open it in a new workspace...). IID might open in Business Integration perspective, and will be empty, simply because you have not yet connected to IBM Process Center. If this is the case, switch to Process Center perspective, by clicking on the 'Open Perspective' button and selecting 'Process Center':

In Process Center Perspective, select the 'Hiring Sample Advanced' Process Application and click on 'Open in workspace':
When the project 'Hiring Sample Advanced' is
opened, open the WPS_Project folder, open the 'Integration Logic'
folder, and doubleclick on the 'WPS_ProcessPerson' BPEL process as
shown below:
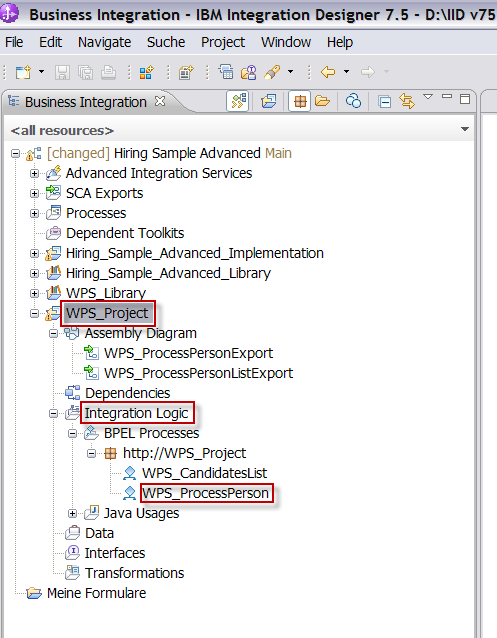
The BPEL process 'WPS_ProcessPerson'
identifies a candidate while connecting to various (simulated) backend
systems, depending on the 'Pay Level' information which was given to
the process as inout parameter. As you can see we are simulating three
systems: One is the internal HRSystem for a basic candidate search, the
second one goes to the internal HRSystem trying to find an expert
candidate, and the third option does invoke a request to an external
agency.
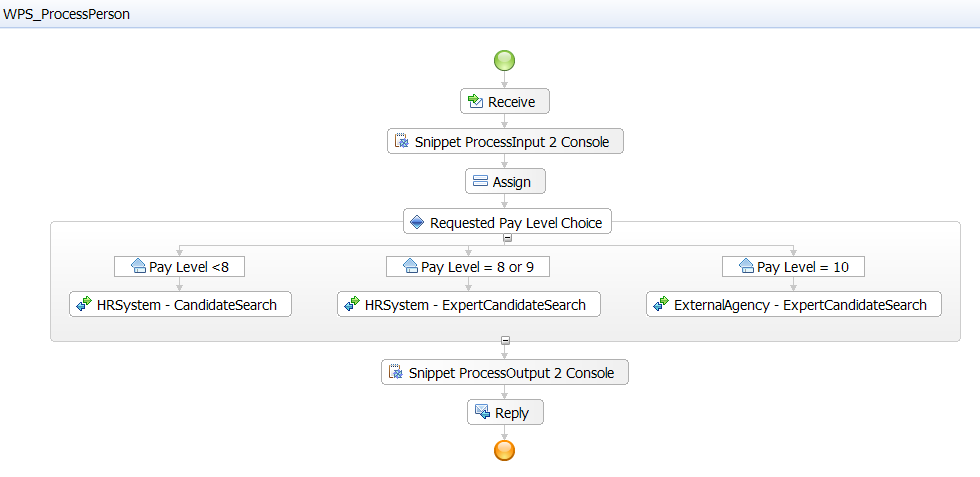
No matter what branch is followed, there is always one candidate returned as a result from this process' execution.
In order to send a list of candidates back the BPD (modeled in IPD,
as shown above), this process has to be executed a couple of times. In
the project tree, doubleclick on the second process named
'WPS_CandidatesList':
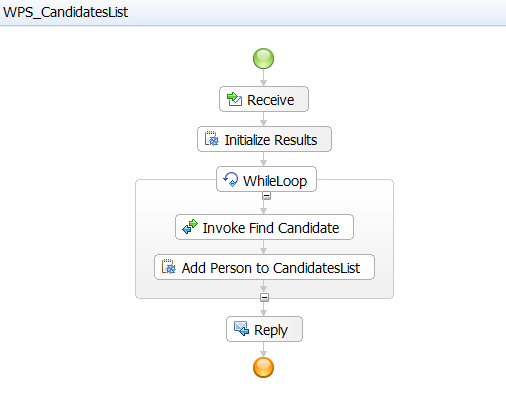
Here you can see that the process 'WPS_ProcessPerson' is called in a while loop, click on the 'Invoke Find Candidate' task to see the details.You may as well explore the java snippets to see how the candidate identified by the 'Invoke Find Candidate' process is added to the list of retrieved candidates.
Now, open the assembly diagram:

In the assembly diagram you can see how these two
processes can be accessed via their SCA bindings, and you can see what
components they need for execution.
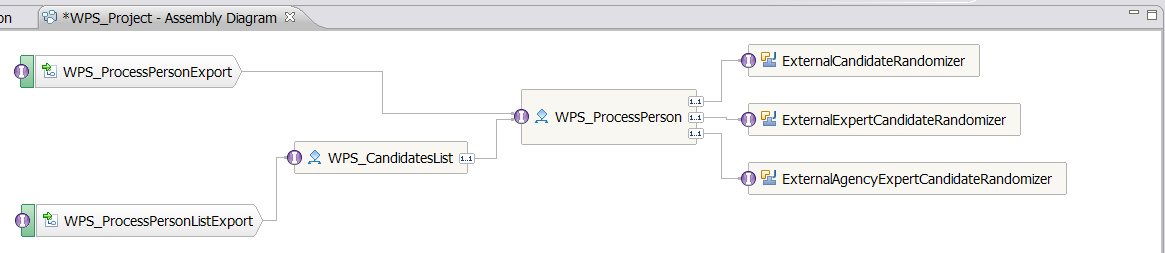
Now - the BPEL processes are completed and ready for execution.
The SCA binding named 'WPS_ProcssPersonListExport' is used to
implement the newly created Advanced Integration Service returning the
list of candidates to IPD.
Now, the new AIS was created in IPD, the BPEL processes are ready for execution, and the following steps have been performed to implement the new AIS with the exisiting BPEL implementation:
- In order to see the (unimplemented) AIS in IID, the command 'Refresh from Process Center was executed. Once refreshed, the unimplemented AIS named 'RetrieveCandidatesList' is listed in the folder named 'Advanced Integration Services'
- By selecting and right clicking the AIS, and executing the 'Implement' command, the implementation wizard is opened. (you have done all these steps in the 'Build it Yourself' section)
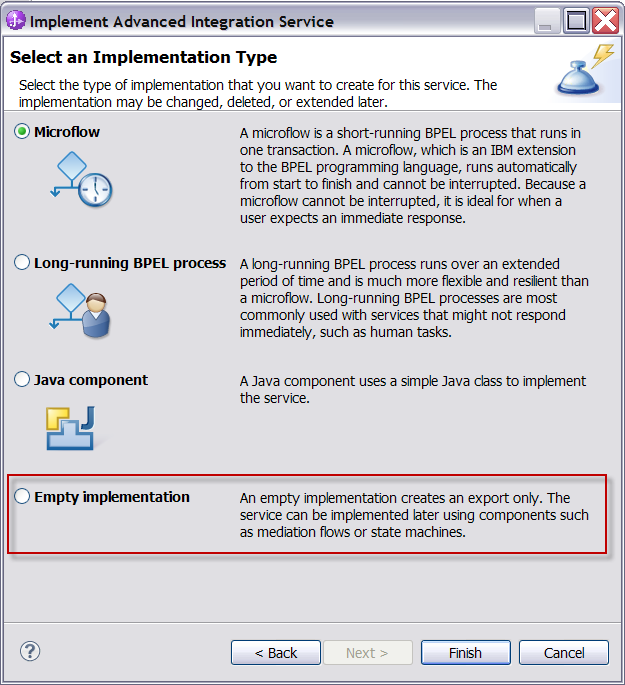
- The implementation type this time will be 'Empty implementation'. As the text states this creates an export only to allow either to implement the service later, or to use an existing service.
Here is a screenshot of the service implementation wizard:
Once this is done, in the Process Applications tree, the Advanced
Integration Service named 'RetrieveCandidateList' is no longer
'unimplemented', instead you can see an Export SCA named
'RetrieveCandidatesList'
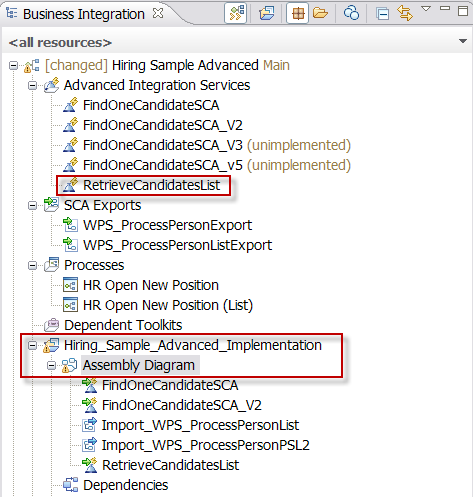
DoubleClick on the 'Assembly Diagram' folder to open the assembly diagram:


Now, both components are placed in the assembly diagram, however not yet linked.
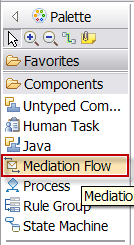
Unfortunately, the two SCA components cannot be linked directly, you have to perform some data mapping steps because the SCA components are using different business objects in its operations. In IID, mappings between business data objects are best done used mediations. Therefore, a mediation flow has to be used to link both SCA components. The mediation flow object is taken from the assembly diagram palette, dropped on the canvas, and then linked with the SCA components as shown above (completed) assembly diagram. (IID is smart enough to create the interface and reference for the mediation flow taken from the connected SCA components)
Now the assembly diagram is complete, however: The mediation flow still has to be defined.
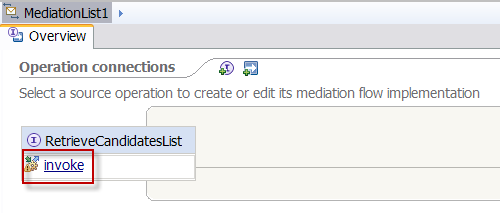
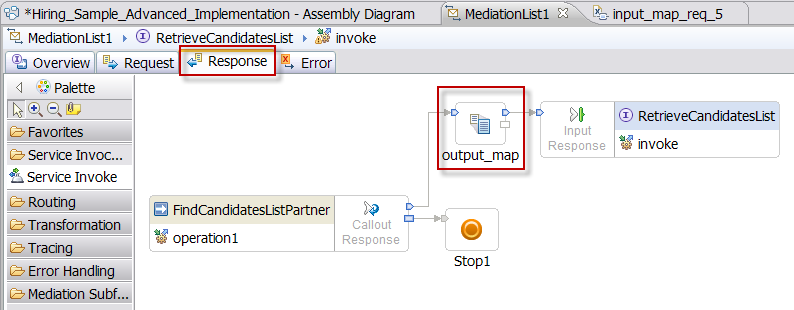
Explore the mediation flow by clicking on the mediation flow node named 'Mediation List1' - you will see the mediation flow's overview representation:
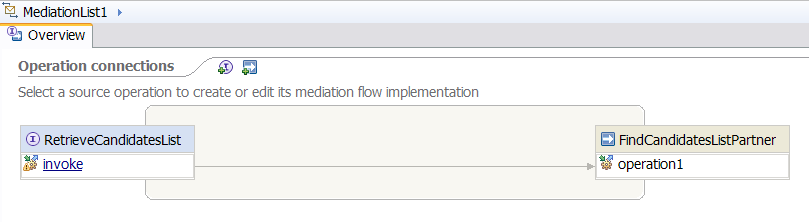
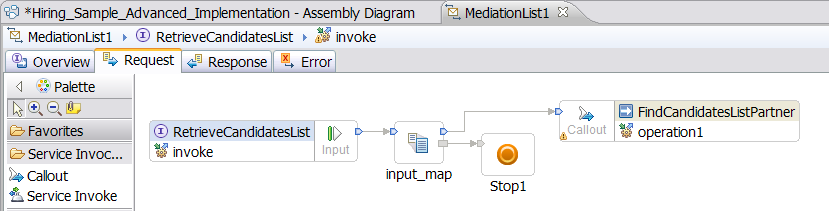
Now click on 'invoke' operation to see the details of the mediation flow:
Here in the details view you can explore how the mediation - or data mapping - is specified for both directions, namely the mediation flow for the 'invoke' request:
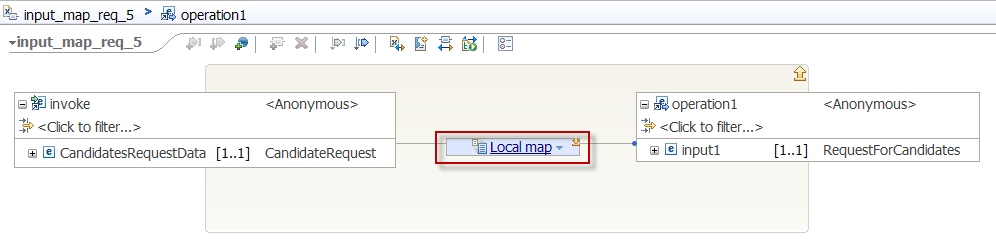
Click on the 'input_map' node to see the mapping overview:

From there, click on the 'Local map' node to see the operations mapping:
Click on local map again, to see how the single data elements are mapped:
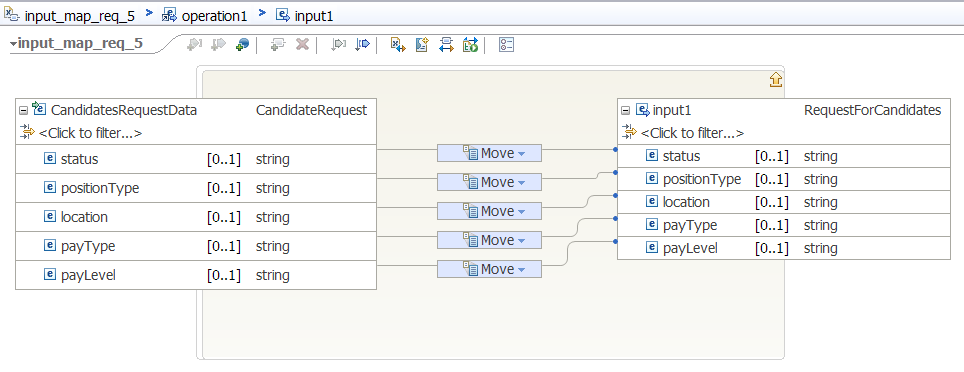
You can see the detailed data element mapping for the invoke request.
Now go back to the Mediation List1 'invoke' overview and select the 'Response' to see how the candidates list gathered by the two BPEL processes is sent back to the AIS. Click on the 'output_map' node, and from there, open the 'Local map' nodes similar to what you have done when exploring the 'inout_map':
At the most bottom level, again you can see the actual and detailed data element mapping:
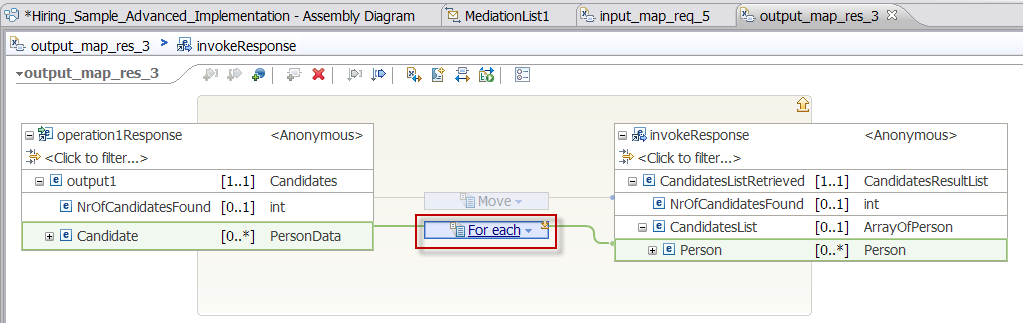
On the level shown in the illustration above you see how an identified candidate (from the BPEL processes) is mapped into the AIS output business object. You see that an 'ArrayOfPerson' is created, listing the various candidates identified by the backend systems, as invoked by the BPEL processes. Clicking on the 'For each' node shows how the single date elements of the business objects are mapped.
This completes the mediation flow performing the correct data mapping.
____ 4. Summary
In this chapter you have explored what has to be done to reuse an existing BPEL process as an implementation for a newly created Advanced Integration Service. In short, you've explored the following:
- Create a new AIS in IBM Process Designer
- Create a new human task able to present the data returned by the new AIS
- Use the new AIS and the human task in the process (includes to link the tasks and to perform the required data mappings in IBM Process Designer)
- Switch to IBM Integration Designer, refresh from IBM Process Center, and implement the new AIS by creating an 'Empty implementation'
- In the assembly diagram, connect the newly created SCA Export with the SCA Export of the existing component that comes with the BPEL processes
- Complete a mediation flow between both components to allow for correct data mapping
- Move on to the 'Run the Sample' section to see what you need to do to run the sample (follow all the instructions but use the 'HR Open New Position (List)')
- Try to repeat what you've explored here and combine it with the steps described in the 'Build it Yourself' section