Build it yourself
1. Import and familiarize yourself with
the BPEL process in the IID
Import the initial application artifacts to build the sample.
a. Import Project Interchange file
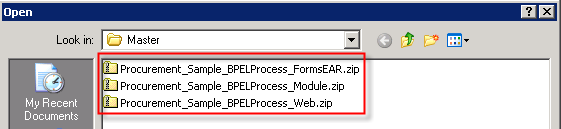
Download
the initial projects to build the scenario yourself, namely the Procurement_Sample_BPELProcess_Module.zip,
the web project named Procurement_Sample_BPELProcess_Web.zip,
and the Procurement_Sample_BPELProcess_FormsEAR.zip.
Save them it to a temporary directory.
Download the Procurement_Sample_BPELProcess_FormsEarFile.ear.
Make sure that the type of the saved file in the file system is ".ear".
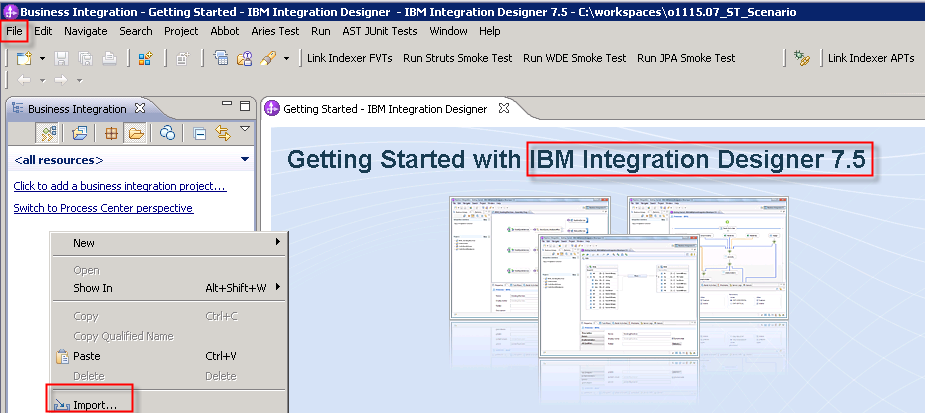
Start the IBM Integration Designer
(IID).
The IID, for a given workspace, opens in the Business Integration
perspective.
Select File > Import or right-click on the project
tree and select Import.
Select
Other > Project Interchange file and
navigate to directory where you saved your the WPS project files. Press
Open.
The Import Project Interchange Content window is opened.
Select the downloaded files one by one and import them.
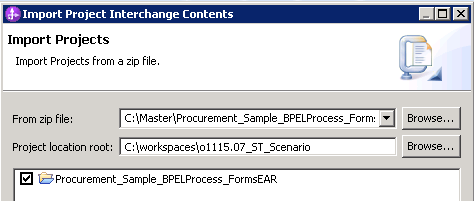
Press Finish. Wait until the import and
building
workspace has completed.
Note
You might be prompted that the workspace needs to be migrated. If
so,
confirm the corresponding steps with Next, Finish, and OK.
Repeat the same import step. Select the Procurement_Sample_BPELProcess_Web.zip
with the web application including an invocation task. Wait until the
import and build has completed.
Repeat the same import
step. Select and the
Procurement_Sample_BPELProcess_FormsEAR.zip with the forms
application.
Following resources have been imported.
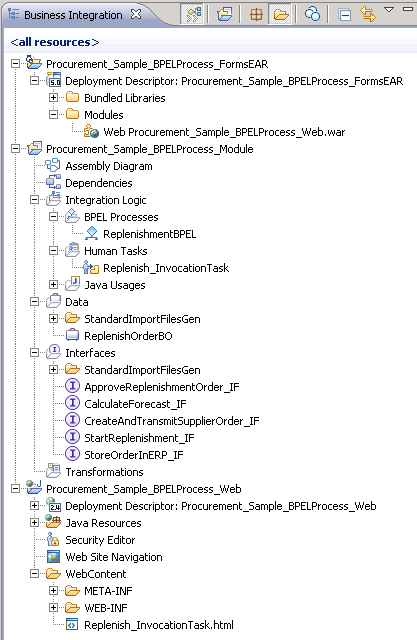
b. Familiarize yourself with the
assembly diagram
Expand the Procurement_Sample_BPELProcess_Module folder.
Double-click the Assembly Diagram.
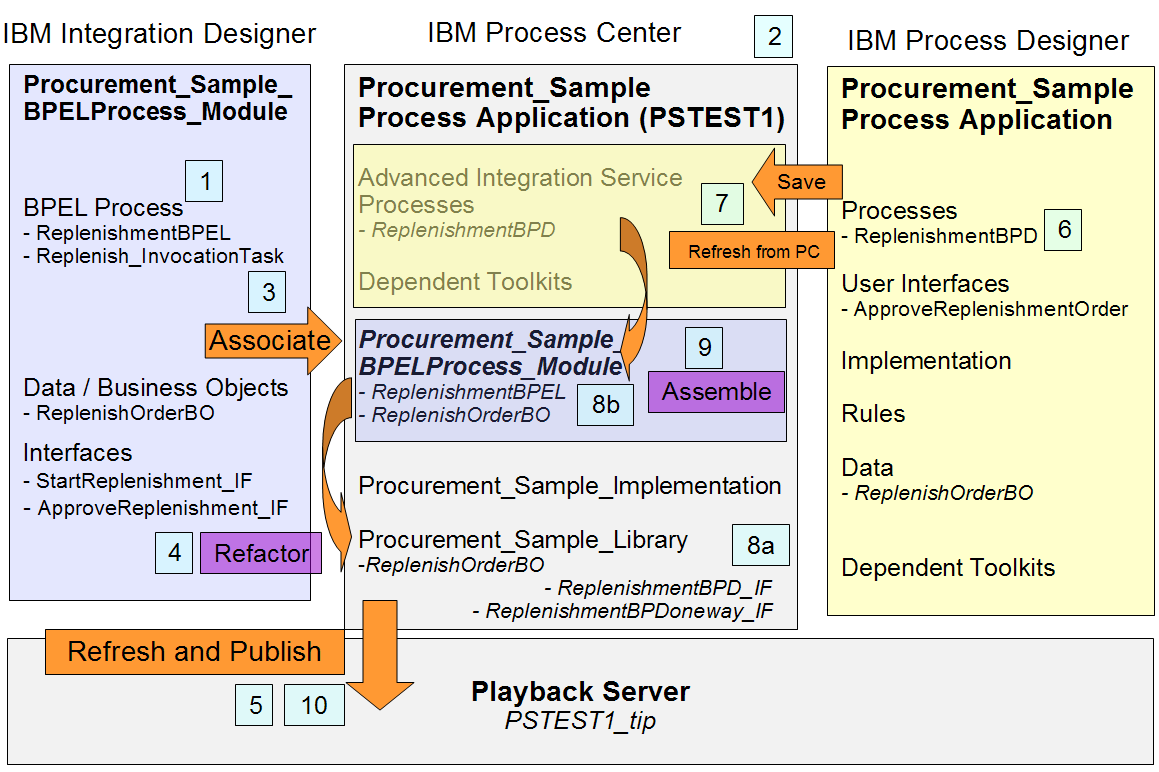
The diagram shows the BPEL process wired to four Java Implementation
Services. This process can be initiated by an invocation task.
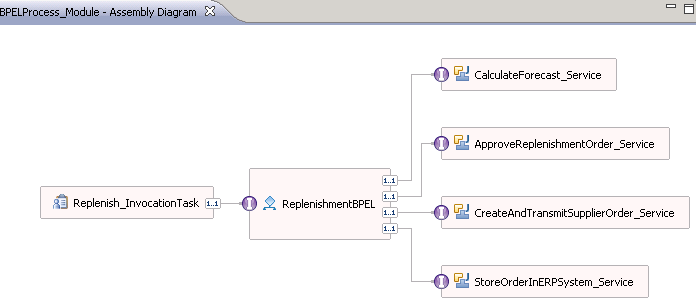
The automatic
ApproveReplenishmentOrder_Service will be replaced by a Business
Process Definition service including a human approval task in this
sample.
c. Familiarize yourself with the
BPEL process
Double-click the ReplenishmentBPEL process. The BPEL
process
editor opens.
The BPEL process includes four Invoke activities as explained in the
Business Scenario description.
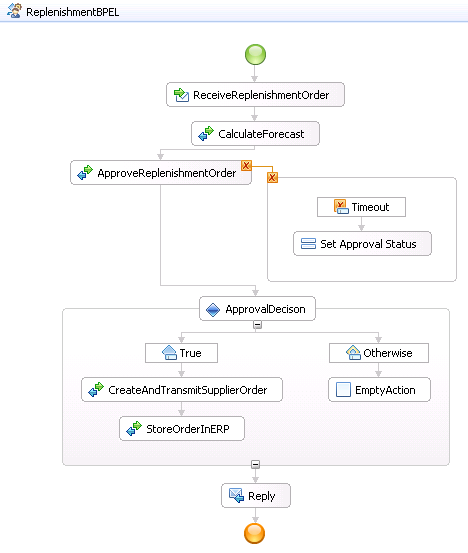
The ApproveReplenishmentOrder activity – if not completed by the
Approver of the replenishment order within 10 minutes – will
automatically expire. It will be adopted in this sample to cope with
the implementation by a WLE BPD service.
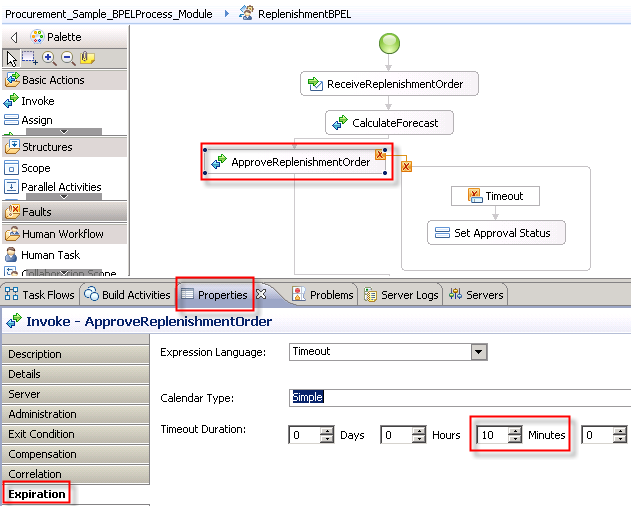
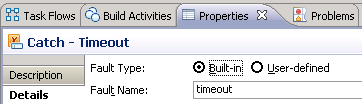
This error will trigger an Exception Handler with a
built-in
timeout fault type specified.
Subsequently the
ReplenishOrder
approved status is set to
True
as default.

Within the BPEL
process
a single business object ReplenishOrderBO
and following interfaces are provided.
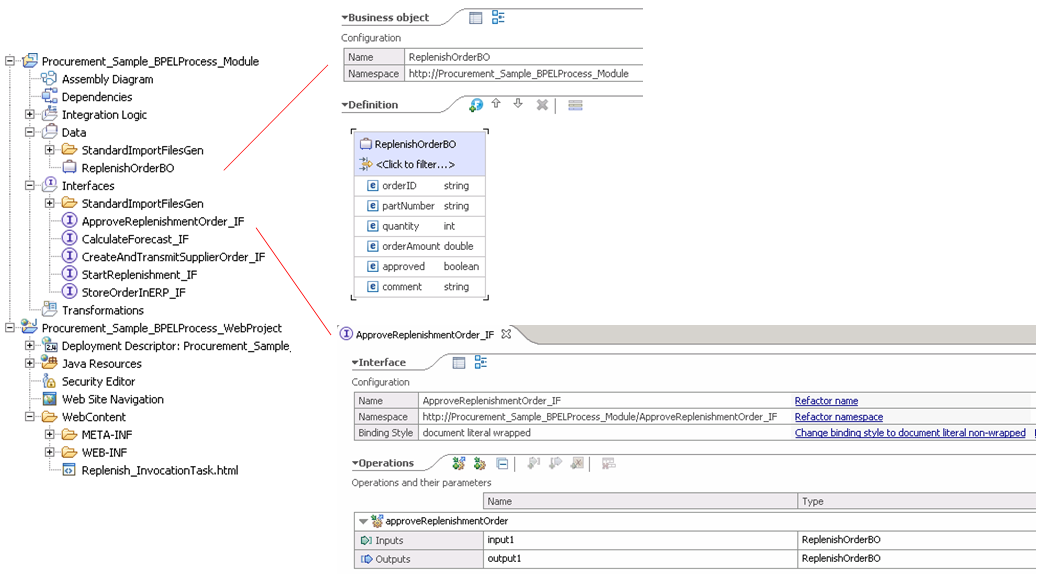
In the course of this sample the interface for the
ApproveReplenishmentOrder_IF
will be replaced by an interface generated for the SCA invocation of a
Business Process Definition (BPD).
d. Install and start the Web Application
Web projects are not "lifecycle aware". So if you want
multiple
snapshots of a Process Application to contain the same Web Project
you'll need to use a single separately deployed Web App. This is
directly deployed as a J2EE web application and, shared across the
Process Application snapshots.
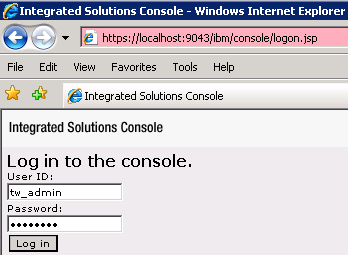
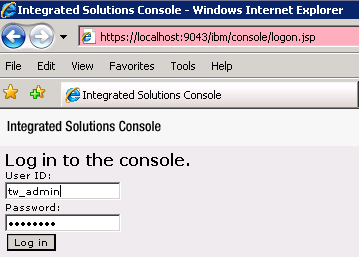
Open your preferred internet browser and enter the url for the
Administrative Console:
https://localhost:9043/ibm/console/logon.jsp
The login window opens. Enter the userid tw_admin and
password tw_admin. Press Log in.
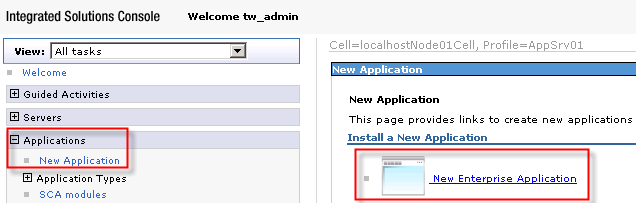
Within the Admin Console select
Applications > New
Application > New Enterprise Application.
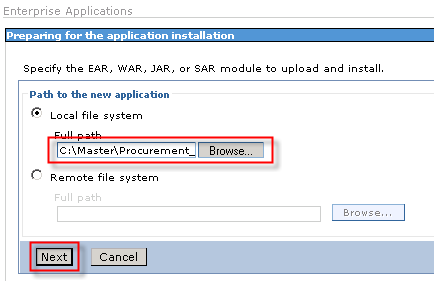
The Preparing for the application install window opens.
Browse
and navigate to the directory where you have stored the downloaded
resources. Select
Procurement_Sample_BPELProcess_FormsEARFile.ear.
Press
Open. Press
Next.
Stay with
Fast Path. Press
Next.
Keep the settings for
Step 1: Select installation options.
Press
Next.
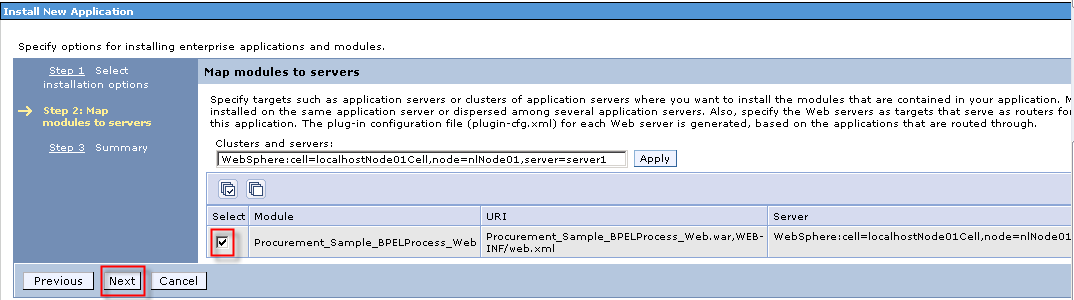
For
Step 2: Map modules to servers select the flag
for the
Procurement_Sample_BPELProcess_Web. Press
Next.
For
Step 3: Summary press
Finish.
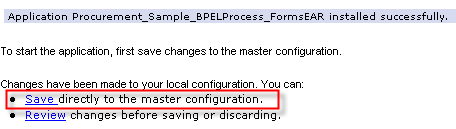
Wait for the EAR file being installed.
Press
Save after the application was successfully
installed.
Start the Web Application
The Procurement_Sample_BPELProcess_FormsEAR.ear was
installed but not automatically started. Navigate to Applications
> Application Types > Business Level Applications.
Select the flag for the FormsEAR application.
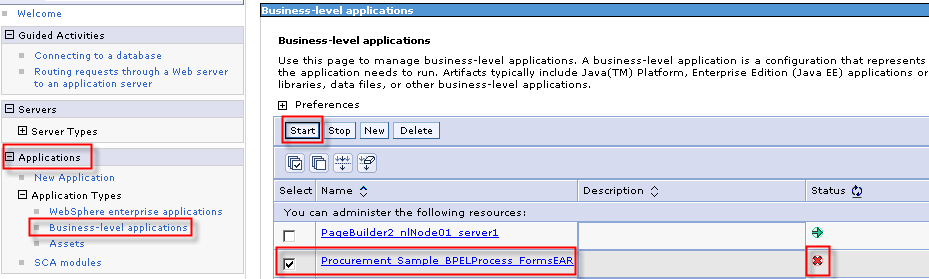
Press
Start.
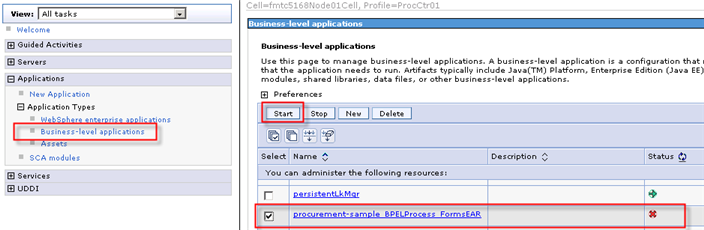
The window confirming the
Procurement_Sample_BPELProcess_FormsEAR
started successfully shows up.

2. Create a new empty process application in the IID Process
Center perspective
In WebSphere Integration Developer (WID) artifacts related to a
project
were part of a Module stored in a workspace on the Integration
Specialists computer. In Business Process Manager a process application
represents the project to store all artifacts created later on in IPD
and IID. This process application is centrally stored in the process
center repository and accessible by multiple users concurrently.
In this step you create a new process application as a
container for storage, deployment, and versioning of your application.
Notice that during the development in IID artifacts are still stored in
a workspace, but have to be retrieved, uploaded or synchronized with
the process application.
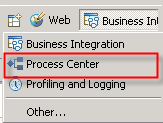
a. Switch from the Business
Integration perspective to the Process Center perspective
The Process Center perspective is a new perspective introduced with
the IBM Business Process Manager.
b. Connect and login to the Process
Center
For the Process Center Connection Details enter http://localhost:9080/ProcessCenter
or your server name and port. For userid enter tw_admin,
for password enter
tw_admin.
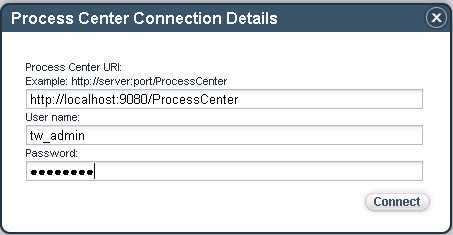
The
Process Center perspective opens.
c. Create a new process application
Press + Create New Process App.

Enter the
name of the process application, here
Procurement_Sample_Test1 and
for the acronym
PSTEST1.
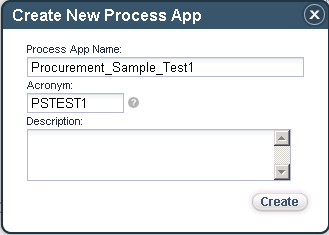
Click
Create.
Process Application is created.
d. Open in workspace
Select the newly created process application. Click Open in
workspace to open the process application in your workspace.

Wait for the operation to complete.
The Process Application is opened in the Business Integration
perspective.
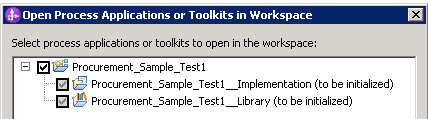
Click
OK to open the selected process applications and
toolkits.
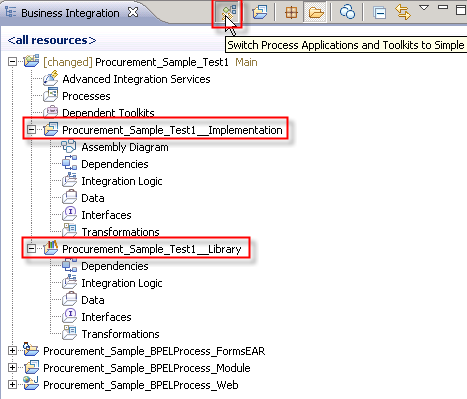
e. Familiarize yourself with the structure of the
process application in detailed mode.
Click the twisty to Switch between Simple or Advanced Mode.
See the ProcessApplicationName_Implementation and ProcessApplicationName_Library
folders created by default. All folders are currently empty.
3. Associate the BPEL process with the process application
within IID
In this step you move the imported module with the BPEL process
to
the process application.
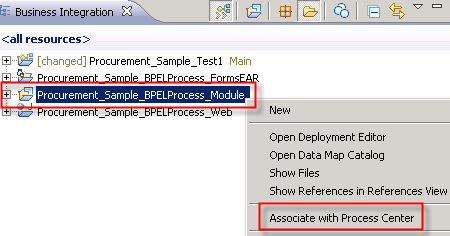
a. Associate application with a
process application
Associate your imported / existing application (Module)
including the
BPEL process with the process application. Right-click on Procurement_Sample_BPELProcess_Module.
Press Associate with Process Center.
b. Select process application to
connect with, here Procurement_Sample_Test1
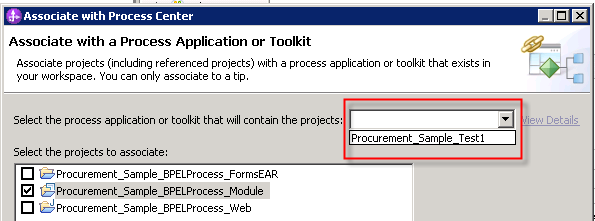
Press Next. The Confirm Changes window opens.
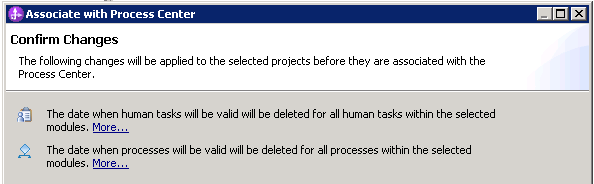
Press
Finish.
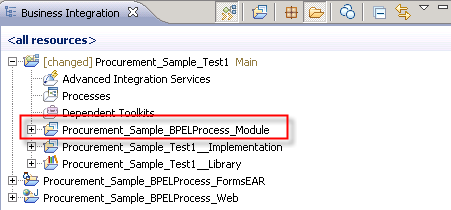
The Procurement_Sample_BPELProcess_Module became part of the process
application.
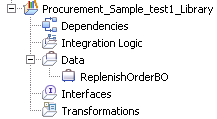
4. Move and refactor the business object to the
library folder of the process application
With the re-factoring of the business object from a Module to a
Process
Application Library it becomes known in the Data folder of the process
application in IPD. Re-factoring of the BPEL process interfaces is not
required, as WLE does not work with interfaces. In general, if you
wouldn’t do this, you would have to include a mediation flow component
(MFC) with a BO map into your assembly diagram.
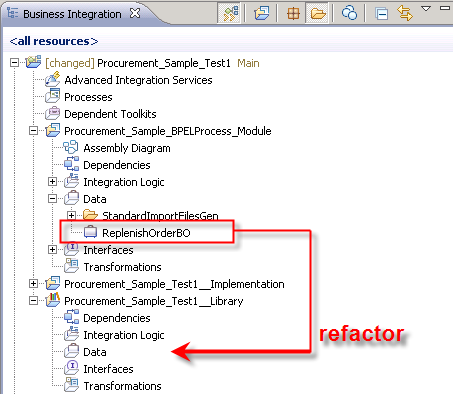
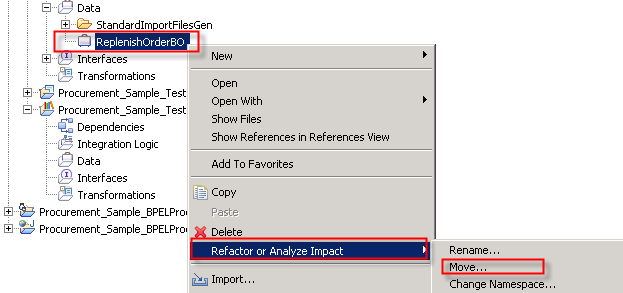
a. Initialize refactoring of the
business objects
Right-click the ReplenishOrderBO that came
with the provided Procurement_Sample_BPELProcess_Module. Select Refactor
or Analyze Impact > Move … .
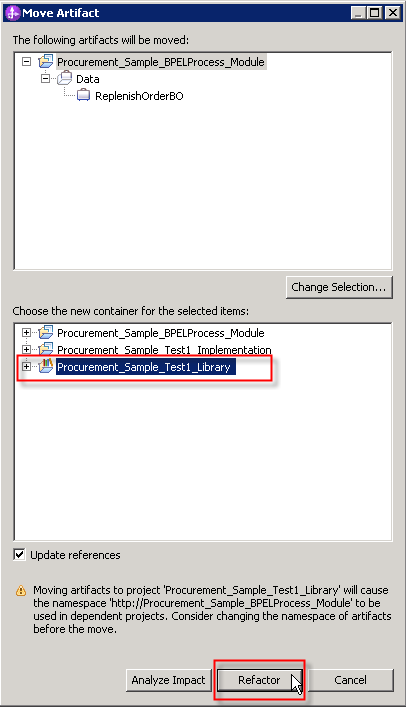
Select
the Procurement_Sample_BPEL_Test1_Library as
new container for the two business objects.
Press
Refactor.
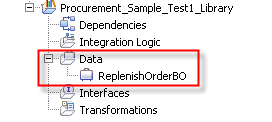
Wait for the workspace being created.
The ReplenishOrderBO appears under the Library generated for the
Process_Application_Name, here
Procurement_Sample_Test1_Library.
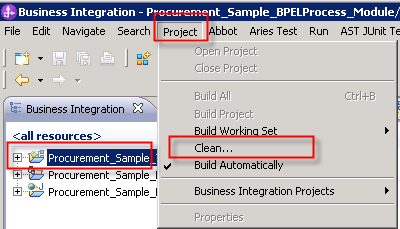
Select the
Procurement_Sample_BPELProcess_Module. In
the menu bar select
Project > Clean to clean your
project.
5. Refresh and publish the process application
and test BPEL process in isolation
The BPEL process, imbedded to a process application, is saved in
Process Center as central repository. With the Refresh and Publish
action the process also becomes deployed to the Playback Server.
To simulate the process instantiation
trigger indicating that the stock has been fallen below its limit you
will use the BPEL Process Choreographer Explorer to start an instance.
Note
Please notice that in IID you work with your local workspace.
However,
with the new approach and the central repository you shouldn’t forget
to synchronize to (Refresh and Publish) and synchronize from (Refresh
from Process Center) as you go along.
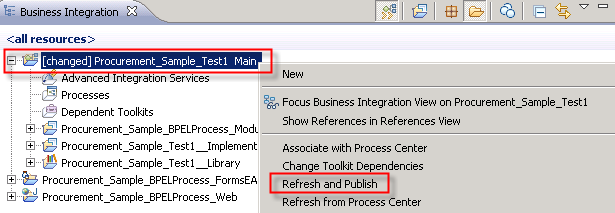
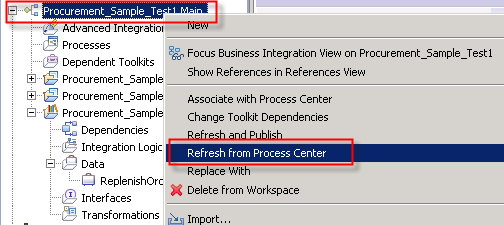
a. Publish modified process
application
Right-click the process application [changed]
Procurement_Sample_BPEL_Test1 Main and press Refresh
and Publish.
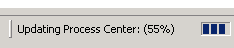
Wait for the Update with Process Center has finished.
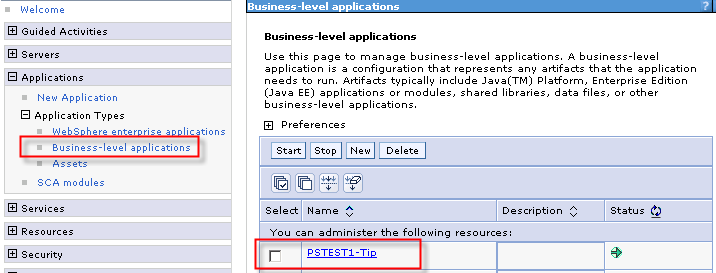
b. Verify the deployed snapshot in
the Admin Console
Start the Admin Console via the IID Server Properties window as shown
below or directly via your preferred Internet Browser using
https://localhost:9043/ibm/console/logon.jsp.

Login with
userid = tw_admin and
password = tw_admin.
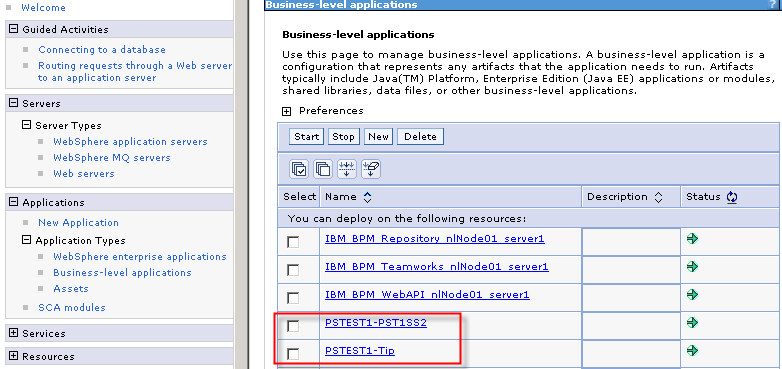
Open
Applications > Application Types >
Business-level
applications and navigate to your deployed process application
with acronym defined before
PSTEST1 and the suffix
–Tip
to indicate the process application most recently published based on
the content in the Process Center.
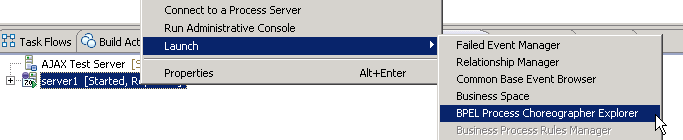
c. Verify BPEL process via BPEL
Process Choreographer Explorer
Launch the BPEL Process Choreographer Explorer, former BPC Explorer.
Open your internet browser and enter http://localhost:9080/bpc
or right-click on your server and press Launch > BPEL
Process Choreographer Explorer.
d. Logon with userid = tw_admin
and password = tw_admin.
The BPEL Process Choreographer Explorer opens.
In the navigation tree select Process Templates >
Currently Valid.
Flag the process template ReplenishmentBPEL and press Start
Instance.

Note
Optionally select Task Templates > My Task Templates.
Select the HTM invocation task Replenish_InvocationTask and press Start
Instance.

Note
In case the process of the deployed business-level application is
not shown you need to verify the SystemOut.log
e. Enter the Process Input Message
with
Process Name = Replenish_Test_111
orderID = OID_111
partNumber = PN_111
Quantity, orderAmount, etc. don’t have to be provided.
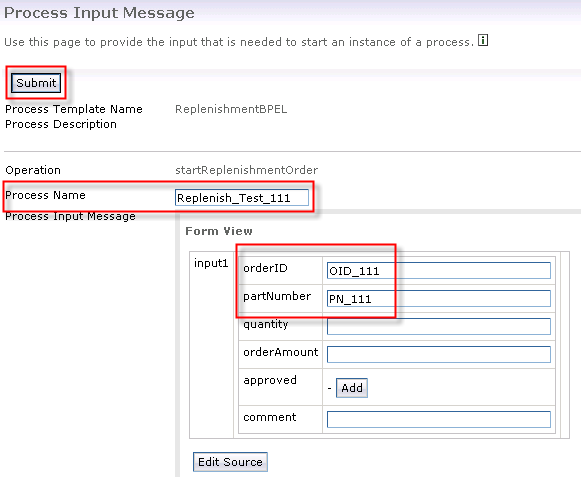
Press
Submit.
The process instance is started.
f. Follow the status of the process instance
accessing the instance via Process Instances > Started by me
Note
The process instance is not listed as it is specified for immediate
deletion on successful completion.
See the SystemOut.log or Console instead which lists a record with the
orderID for every automatic activity in the ReplenishmentBPEL process.

You successfully tested the
Procurement_Sample_Test1
process application, with the provided
Procurement_Sample_BPELProcess_Module
module and
ReplenishmentBPEL process in it.
In case of errors try to overcome them based on the error messages
listed in the Problems tab, Console tab, or SystemOut.log.
g. Testing using the WebSphere Test
Environment (WTE) - (optional step)
Another way to test the BPEL process using the WTE.
Right-click the process application Procurement_Sample_Test1. In case
in infront of this you see the term [changed] you first have to Refresh
and Publish to the Process Center repository.
Select Test > Test Process Application.
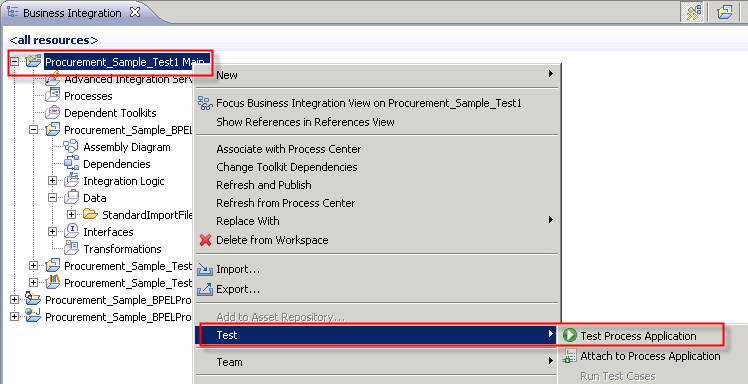
The Integration Test Client opens.
Under
Detailed Properties select as the
Component
ReplenishmentBPEL, the STP BPEL process to be verified. The
single, related interface and operation to start the process is
refreshed.
You might change the start parameters under
Initial Start
Parameters > Values.
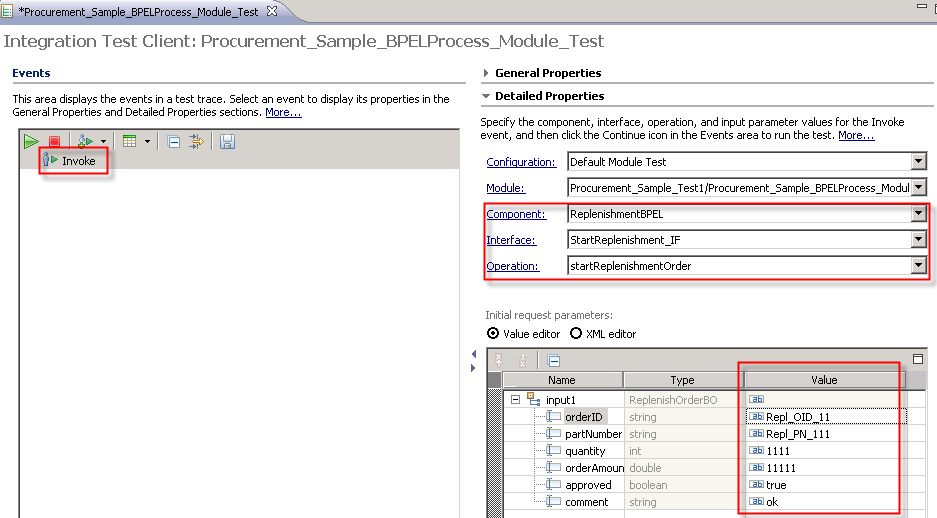
Press
Invoke to start the process instance.
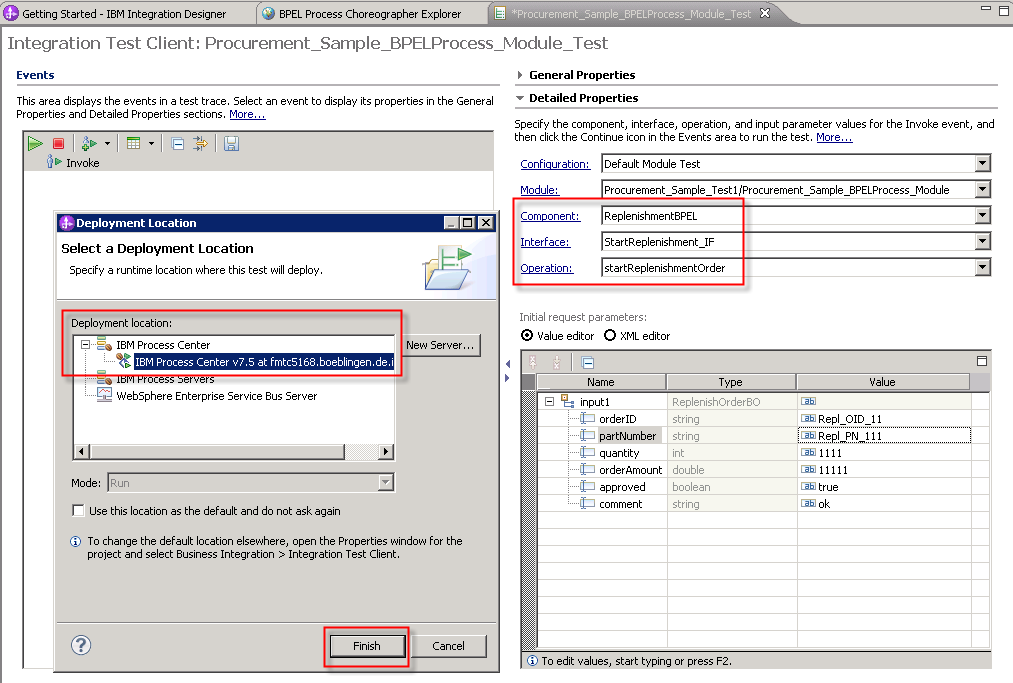
The Select a Deployment Location window opens. Select the
IBM
Process Center v7.5 at localhost. Press
Finish.
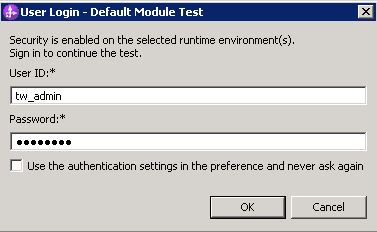
Press
Ok when the user login window with pre-filled
userid and password opens.
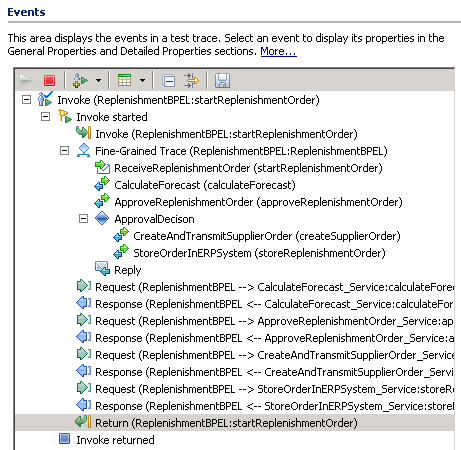
The integration test client is started.
The process is started and the automatic activities are executed. See
the list of events and output values for the executed process.
Exit from the
integrated test client by closing the
Procurement_Sample_BPELProcess_Module_Test window. It is not necessary
to save the test data.
Next you are developing the WLE Business
Process Definition with the human approval task to be called from the
BPEL process later on.
6. Create the BPD using
the IPD
In this step you create the business process definition, i.e. the
process with a human task in it, from scratch. You only use the
mutually shared business object that will be passed from the BPEL
Invoke activity when it calls this BPD at execution time.
a. Start the IBM
Process Designer (IPD) 7.5.
Logon with userid = tw_admin and password
= tw_admin.
The Process Designer opens in the Process Apps view.
Select the process application Procurement_Sample_Test1. Press
Open in Designer.

b. Create a snapshot
Snapshots record the state of library items within a process
application or track at a specific point in time. Create a snapshot to
save the current state of your process application.
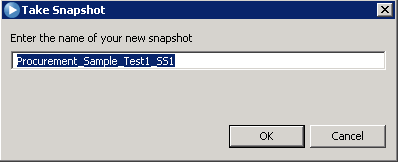
Stay in the Designer view of the IPD. Press the Snapshot icon.

Enter
Procurement_Sample_Test1_SS1 for the snapshot
name and press
OK.
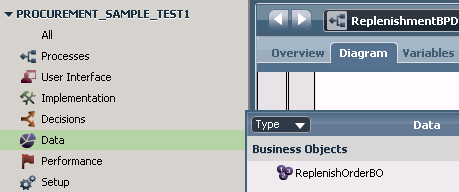
c. Access Data catalog
Click on Data catalog to see the business
object ReplenishOrderBO that was taken over from the
Procurement_Sample_Test1_Library library.
d. Create a new Business
Process Definition
Click the Process catalog. Select the + sign for the
highlighted catalog. Chose Processes > Business Process
Definition

and enter as new BPD name
ReplenishmentBPD.
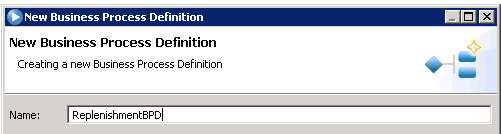
Press
Finish. The BPD is created.

e.Specify Variables
Select the Variables tab and press Add Input.
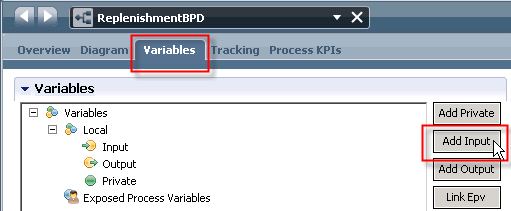
Under
Details > Name enter
ReplenishOrderData
and press
Select.
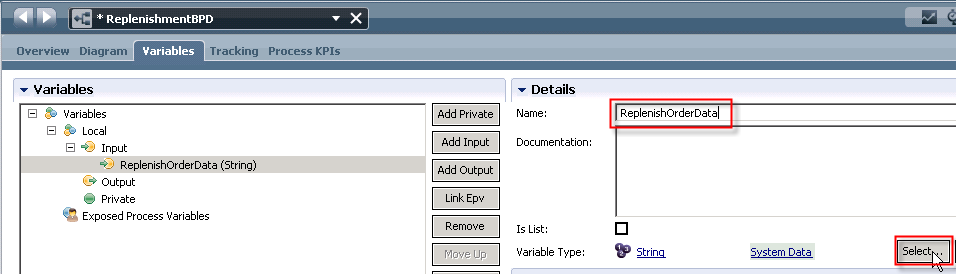
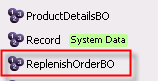
Double-click the
ReplenishOrderBO.
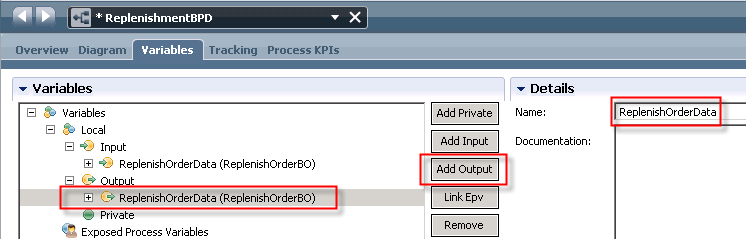
Repeat the same step to add the output data for the BPD. This results
in the specification of the in- and output data.
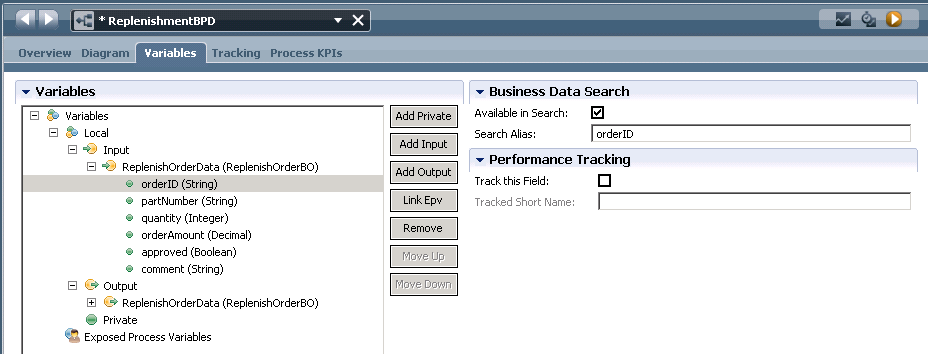
f. Specify data that can be used for
queries
Select the Variables tab. Under Variables
> Input expand ReplenishOrderData and select ordered
(String).
Under Business Data Search flag that the orderID will
become Available in Search. This provides for ordered
to be used as search element in the WLE Portal or in Business Space.
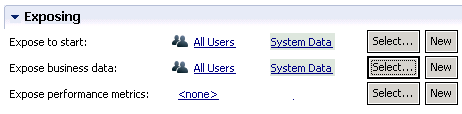
g. Specify potential process starters
Select the
Overview tab. Under
Exposing
see
Expose to start and press
Select.
Chose
All Users from the offered Participant Groups.

Do the same for Expose business data to specify the users
authorized to see business data.
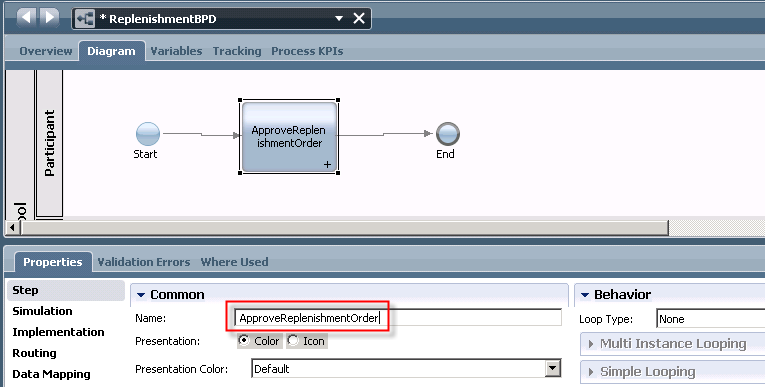
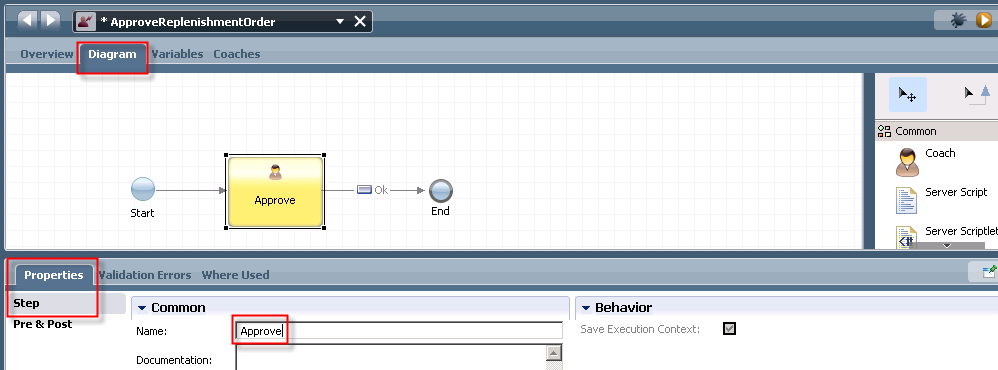
h. Model the human activity
Select the Diagram tab. Select the Activity
node from the palette, drag & drop it on the canvas into theParticipant
lane. Select the Sequence Flow symbol and connect
the Start with the Activity as well
as the Activity with the End nodes.

Within the activity or under
Properties > Step > Common
> Name enter the name of the activity
ApproveReplenishmentOrder.
Your BPD should look like this.
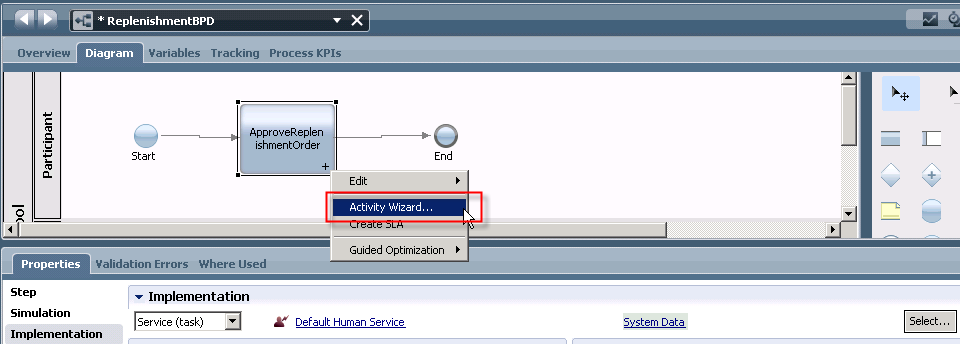
i. Specify the human task
Note
If human task services would be available already in your catalog or
toolkit you could select them via Properties > Implementation >
Service (task) > Select or even drag and drop it from the navigator
to the canvas.
Here we need to specify it via right-click on the activity and select Activity
wizard …
Stay with the default settings and values. Click
Next.
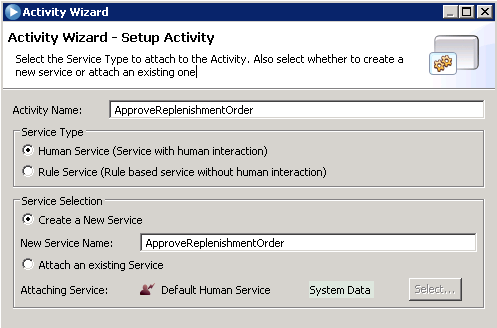
For the Parameters stay with true for the Input and Output. Press
Finish.
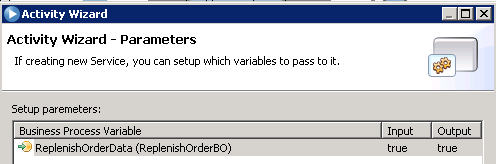
See the Data Mapping tap. The specification shows the mapping of local
process data for the BPD mapped to the data object for this human task.
As we used the same underlying business object named ReplenishOrderBO
no mapping on attribute level has to be specified.

j. Specify human task details
Double-click the human activity on BPD level. The Diagram
for the internals of the human task is opened. Change the name of the
coach from Coach to Approve within the Node or under
Properties > Step > Common > Name.
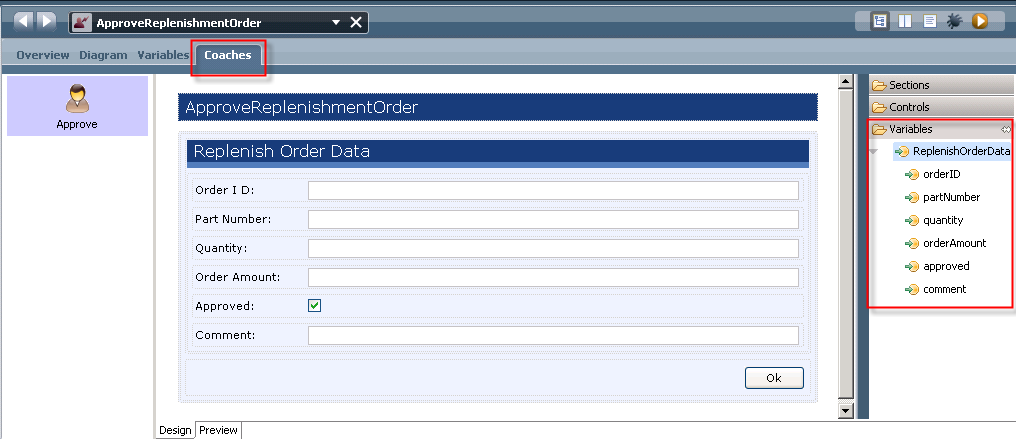
k. Specify the form
Double-click the Approve Coach or click the Coaches
tab on top. The coach with the generated form opens. This form will be
used in the Runtime Client called Process Portal at execution time.
Press the
Save icon or enter
Ctrl + S
to save the entire BPD.
7. Test the BPD in isolation using the Inspector
The person acting as Business Author or Process Designer has the
possibility to test the BPD on its own.
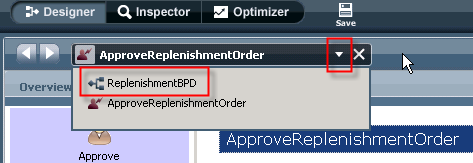
a. Select the ReplenishmentBPD process
via the drop-down list in the Designer > Diagram view.
b. Press Run the Process.
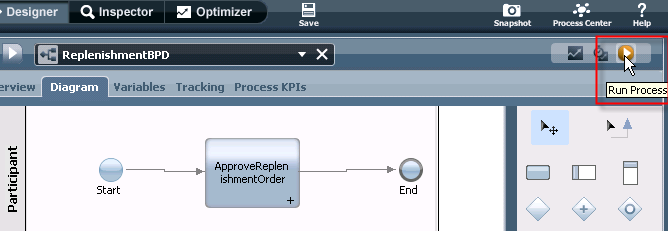
Press
Yes to switch to the Inspector perspective.

The inspector perspective is opened. The process is started on the
Playback Server.
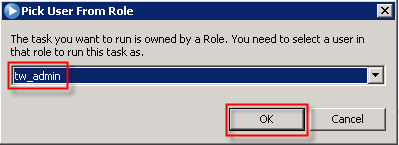
c. Select the task
ApproveReplenishmentOrder and press Runs the
selected.

When prompted for
Pick user from Role stay with
tw_admin.
Press
OK.
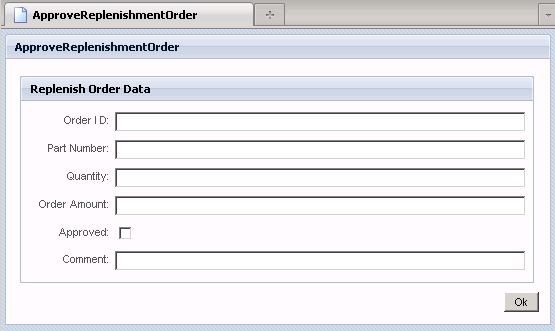
The ApproveReplenishOrder form is opened.
d. Press Ok on the form
without the need to enter any values.
The message
The service has finished appears.
Close
the browser window.
Press the
Refresh icon.

The status shows that the process instance has completed and the task
is closed.

Within IPD return to the Designer perspective.
8. Update
the BPEL process to use the interface of the BPD
The BPD created in IPD can be used as an SCA service. It could be
dropped into the BPEL process and would become an Invoke activity with
associated reference partner. It also can be dropped into Assembly
Diagram as an SCA Import for the service provided through the WLE BPD.
We do the later one in this step as the current
ApproveReplenishmentOrder activity is already extended and enhanced by
its Exception Handler which we don’t want to touch.
If we wouldn’t change the initial
interface ApproveReplenishmentOrder_IF we would have to add Mediation
with an interface - and BO map to the assembly diagram.
a. Return to the IID in the Business
Integration perspective.
Open the Procurement_Sample_Test1_Library which holds the
business
objects refactored in a preceding step, while the Interfaces folder is
empty.
The interfaces will be
generated based on the name of the BPD and its input/output data.
Therefore we now need to refresh from Process Center to download the
interfaces from the Process Center Repository.
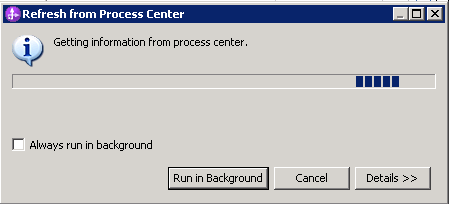
b. Right-click the process application, select
and double-click Refresh from Process Center.
Wait for the Refresh from Process Center
completes.
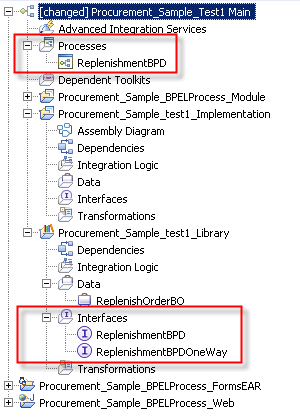
See the updates happened to the artifacts provided from the Process
Center: the BPD we created in the IPD is shown, as well as a one-way
and a two-way interface generated with the name of the BPD and invoke
as operation name.
c. Change the interface of the
Reference Partner for the ApproveReplenishmentOrder activity
i.e. replace by ReplenishmentBPD interface
Under Procurement_Sample_BPELProcess_Module expand the Integration
Logic > BPEL Processes folder and open the ReplenishmentBPEL
process.
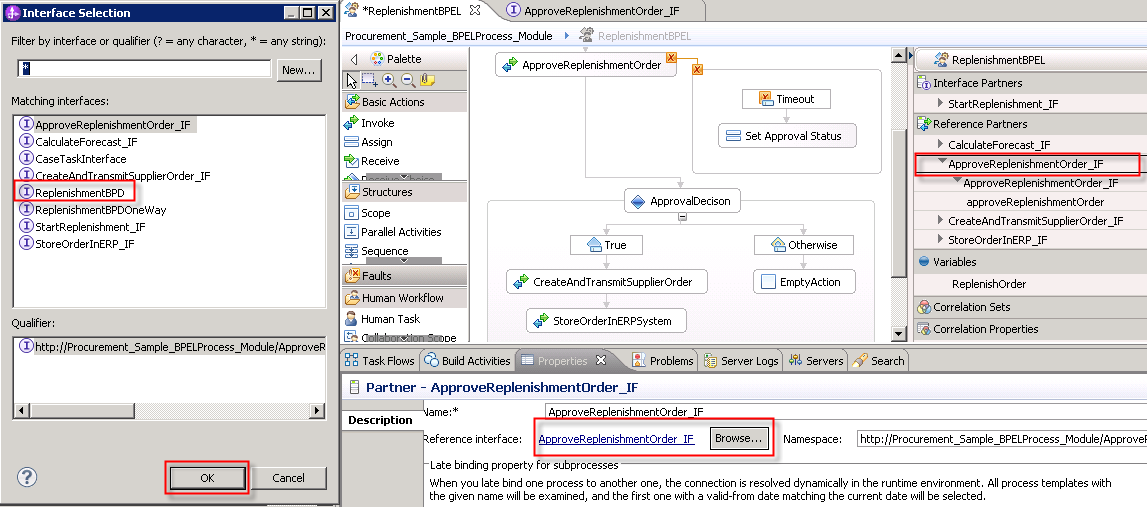
Under Reference Partners select the ApproveReplenishmentOrder_IF
used in the initial workspace and testing.
Under Properties > Description you find the Name and
Reference interfaces. Click Browse.
The Interface Selection window opens.
Select the ReplenishmentBPD interface of your developed BPD
process. Click OK.
d. Re-specify input and output
variables and replacement variable
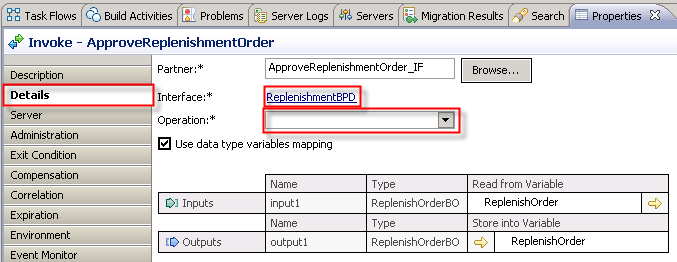
Select the ApproveReplenishmentOrder Invoke activity in
the BPEL process diagram which currently indicates an error.
Under Properties > Details the interface was replaced by
ReplenishmentBPD.
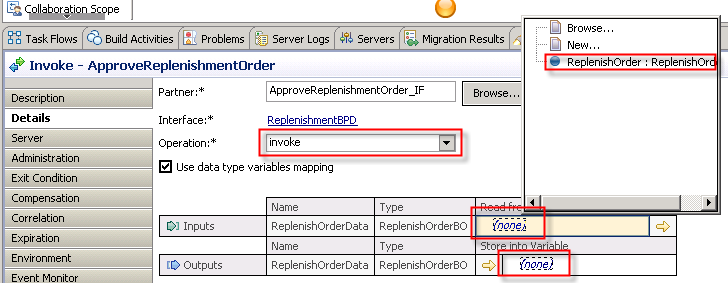
The Operation name is empty. Expand the drop down list and
select the available option invoke.
This will take off the variables ReplenishOrder.
Select under Inputs none under Read from Variable.
A selection window opens. Select ReplenishOrder.
Repeat this for Outputs. Select under Outputs none under Store
into Variable. A selection window opens. Select ReplenishOrder.
Specify replacement variable.
Open
Properties > Description.
Next to the
Description attribute press
Insert Variable …
. The
Select Replacement Variable window opens.
Select Default message and ReplenishmentOrderData
>
orderID.
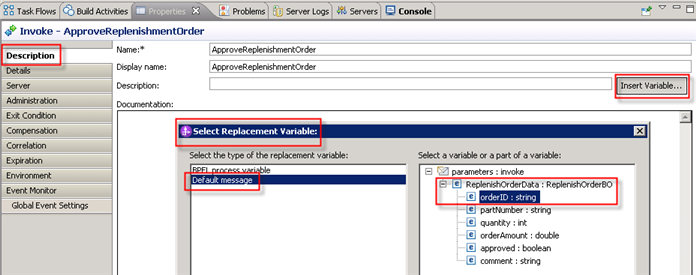
The replacement variable is inserted into the Description field.

Press
Ctrl + S to save the updates.
9. Update the
assembly
diagram with a SCA Import for the BPD
invocation
In this step we replace the current Java SCA component for the
ApproveReplenishmentOrder. Instead we drop the BPD onto the assembly
diagram. It will become a SCA Import calling the BPD and needs to be
wired with the updated BPEL process.
a. Drop the ReplenishmentBPD process
(SCA Service) onto Assembly Daigram
Expand the Procurement_Sample_BPEL_Process_Module. Double-click the
Assembly diagram to open it.
Drag and drop the ReplenishmentBPD onto the assembly diagram.
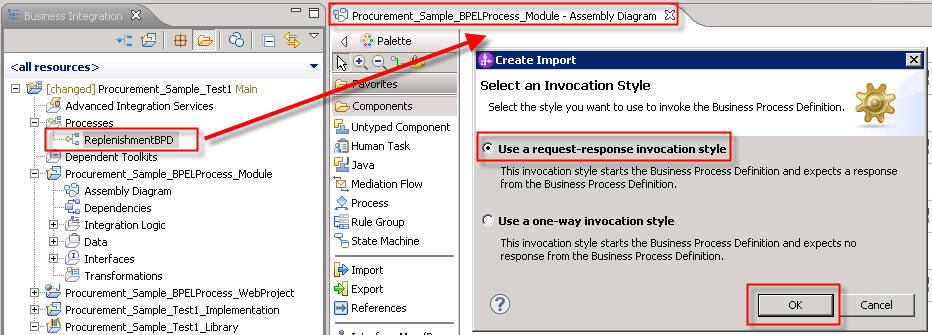
The Create Import window opens. For
Select Invocation Style
select the
Use a request-response invocation style. Press
OK.
The
ReplenishmentBPD is shown in the assembly diagram
as
a SCA Import.
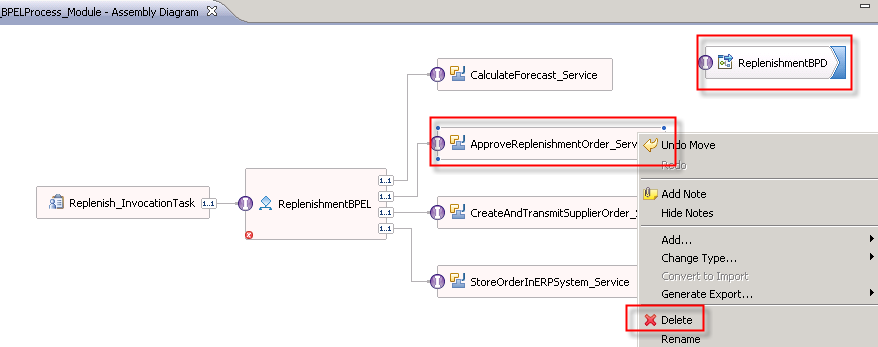
b. Replace current Java
implementation with the new BPD service
Right-click the existing Java SCA component ApproveReplenishmentOrder_Service.
Press Delete.
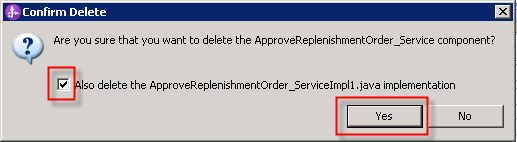
When prompted for
Confirm Delete select the flag for “Also
delete the ApproveReplenishmentOrder_ServiceImpl1.java implementation”.
Press
Yes.
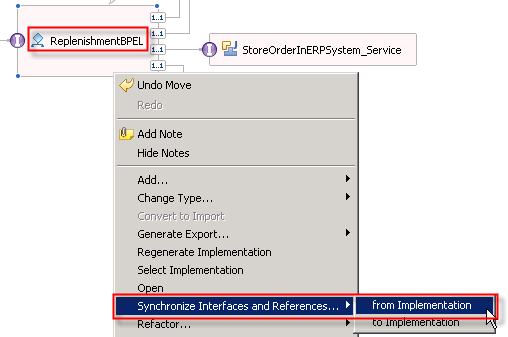
c. Synchronize from Implementation
The ReplenishmentBPEL process still holds internally the
ApproveReplenishmentOrder_IF as reference partner.
Right-click on the ReplenishmentBPEL process. Select
Synchronize References and Interfaces … > from Implementation.
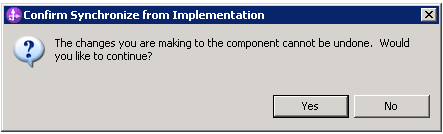
The Confirm Synchronize from Implementation window
pops up. Press Yes.
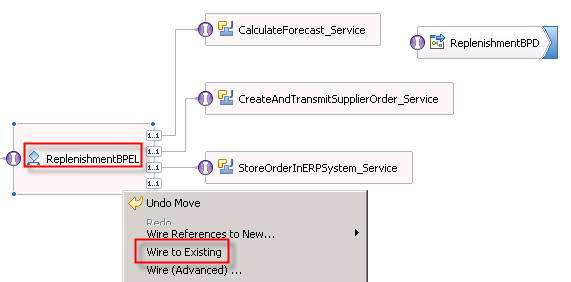
d. Wire the ReplenishBPD Import
Right-click the ReplenismenthBPEL process
component. Select Wire to Existing.
Press
Ctrl + S to save your work.
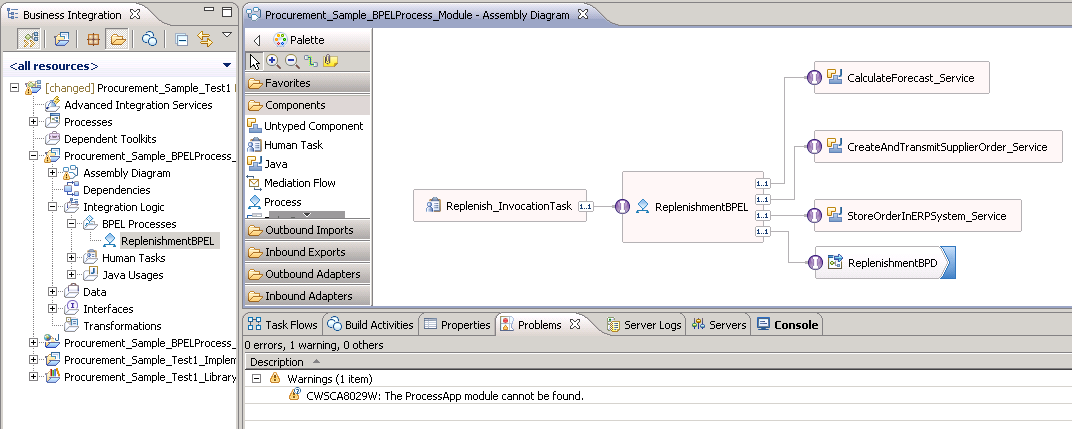
The final assembly diagram looks similar to this.
e. Refresh and Publish the process application
again and test entire process application
The changes you made to the assembly diagram, the BPEL process
and
your
project in general are not yet saved on the Process Center repository.
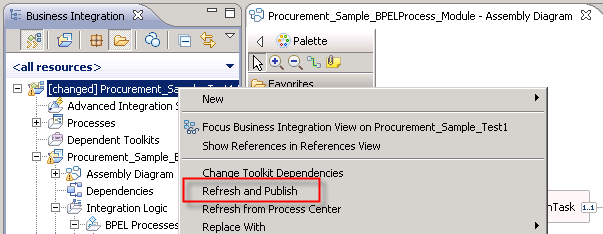
Right-click the [changed]Procurement_Sample_Test1 process
application. Press Refresh and Publish the process application
and re-deploy it at the same time as a Tip to the Playback Server.
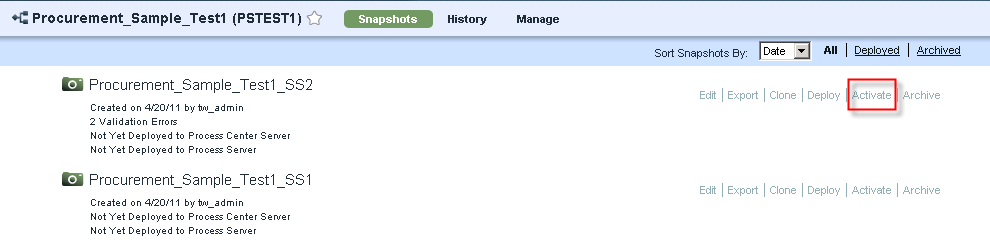
f. Create and activate a new snapshot
Switch to the Process Center perspective in
IID.
The Process Center view opens.

Double-click process application. Select
Create a New Snapshot.

Note
Some screenshots associated with snapshots might not reflect the
current snapshot.
Enter
Procurement_Sample_Test1_SS2. Press
Create.
The snapshot is created.
Select this snapshot and press
Activate to deploy with the
snapshot identifier it on the Playback Server.
Note
Pressing Deploy would deploy the process application on a Process
Server.
The Process Application is activated, when the screen is refreshed and
the potential action changed to Deactivate. Also the SystemOut.log file
would indicate that the snapshot was successfully deployed.

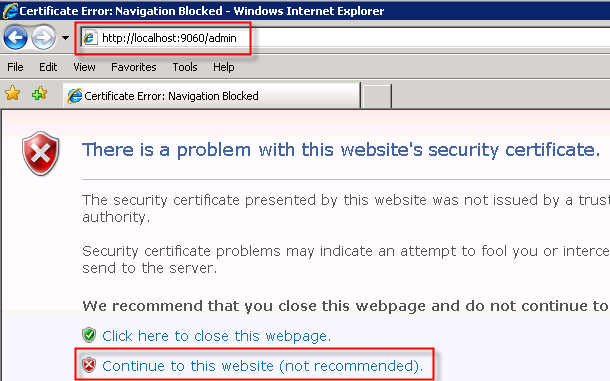
g. Verify re-deployed application in
the WAS Admin Console
You might be prompted about the website's security certificate.
Press Continue.
Enter userid tw_admin and password tw_admin. Press Login.
Open
Applications > Applications Types > Business Level
Applications. See that not only a PSTEST1-Tip is deployed but via
the
Activate the PSTEST2-PSTEST2S2 snapshot as well.
Note: Top-down approach – for information purposes only
The STP top-down approach starts with the development of the BPD
by
the
Business Analyst followed by the development of the BPEL process from
scratch. i.e., we start a WLE process application in the IPD. The
creates the interface for the BPD which subsequently is used within the
BPEL process that is directly created as part of the process
application.
Pre-requisite:
A process application with a BPD exists.
The steps to follow are:
a. Refresh from Process Center in the IID
b. Create a new BPEL process
c. Drop the BPD into the BPEL process which becomes an Invoke with
related reference partner.
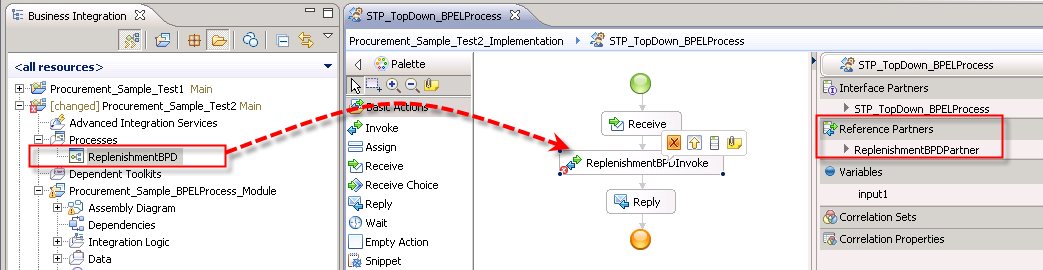
d. Develop the BPEL process.
e. Build the assembly diagram with the above BPD Import wired to the
BPEL process.
f. Refresh and Publish
This completes the development tasks. To run and test this STP
procurement sample is described in the section
Run the Sample.