Replacing the dedicated slotless RAID controller

Use this information to replace the dedicated slotless RAID controller.

The dedicated slotless RAID controller can be installed in the dedicated connector on the system board (see System-board internal connectors for the location of the connectors).

To replace the dedicated slotless RAID controller, complete the following steps:

  1. Read the safety information that begins on Safety and Installation guidelines.
  2. Turn off the server and peripheral devices and disconnect the power cords and all external cables, if necessary.
  3. Remove the top cover (see Removing the top cover).
  4. If you are installing a new or replacement controller, touch the static-protective package that contains the new controller to any unpainted metal surface on the server. Then, remove the new controller from the package.
  5. Align the controller so that the keys align correctly with the connector on the system board.
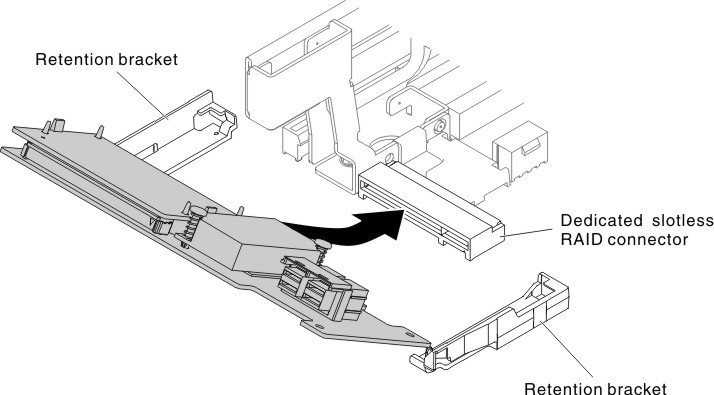
  6. Insert the controller into the RAID connector on the system board until it is firmly seated. The retention brackets secure the controller in place when the controller is firmly seated into the connector.
    Figure 1. Dedicated slotless RAID controller installation
    Dedicated slotless RAID controller installation
  7. Route the backplane signal cables. (See 2.5-inch hard disk drive cable connection and 3.5-inch hard disk drive cable connection).
  8. Connect the signal cables to the controller.
  9. Reconnect any cables that you removed.
  10. Replace the top cover (see Replacing the top cover).
  11. Slide the server into the rack.
  12. Reconnect the power cords and any cables that you removed.