This section describes how to develop, deploy and test the process with a parallel approval task included. It uses a predefined project and shows how to
Import the prepared project
A project has been prepared, which serves as the basis to build this sample. The project contains the BPEL process and human task implementations when executing the process using the Business Space. To import the prepared project interchange file, perform the following steps:
- Download the ECRequestSample_Start.zip file, and save it to a temporary directory.
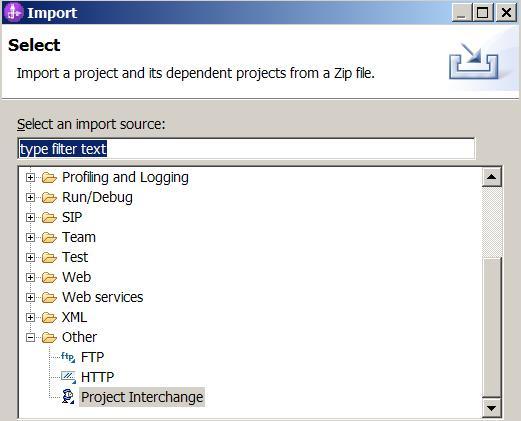
- In WebSphere Integration Developer, click File > Import. The Import window opens.
- Select Other > Project Interchange.
- Click Next. The Import Project Interchange Contents window opens.
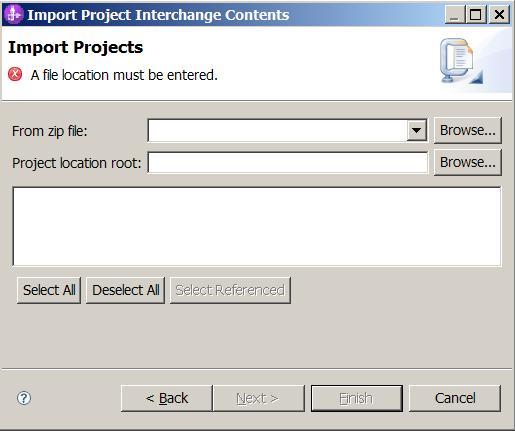
- Click Browse next to the From zip file field.
- Browse to the temporary directory and select the zip file you downloaded in step 1.
- Click Open.
- Select your workspace directory as your Project location root.
- Click Select All.
- Click Finish.
- Wait until the automatic build process has finished.
You may notice that there are several problems indicated. We will fix those in the following steps.
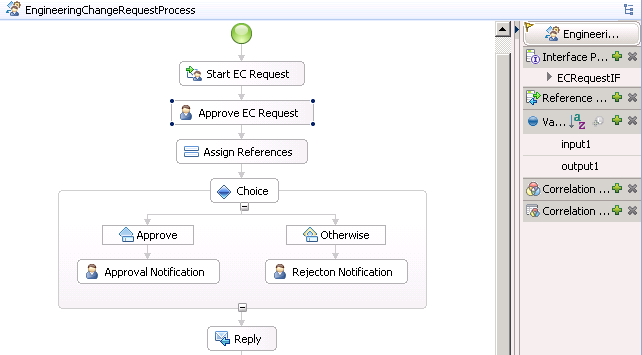
Engineering Change Request Process
Be sure to perform this exercise in 'Business Integration' perspective:
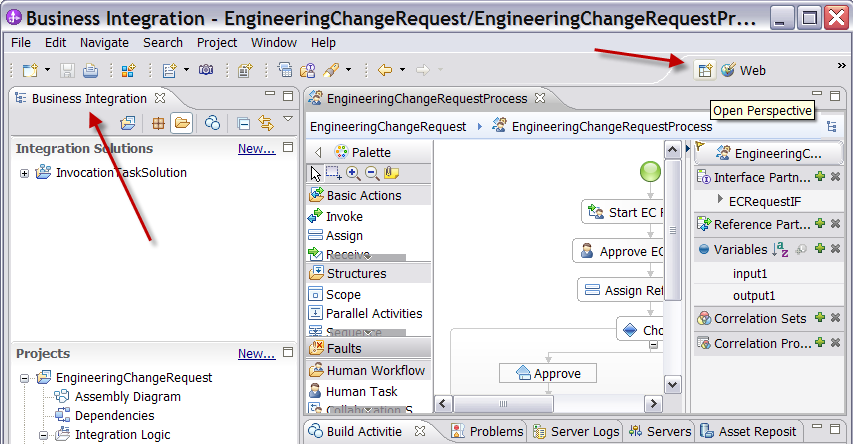
Expand the project and open the imported process model. Familiarize yourself with the process. Perform the following steps:
- Expand the project tree EngineeringChangeRequest > Integration Logic > Processes > EngineeringChangeRequest.
- Familiarize yourself with the process. It includes the Receive with Start EC Request, the Approve EC Request for parallel ownership to be defined, and depending on the vote a human task for notification on approval or rejection. The Assign node is used to create a business object that includes the aggregated variables as well as those context variables identifying the request.
Specify the Group Approvers
For the parallel approval sample we need several people to act as approvers. We define this group via the Admin Console, allocate members, and associate it with the Approve EC Request human task.
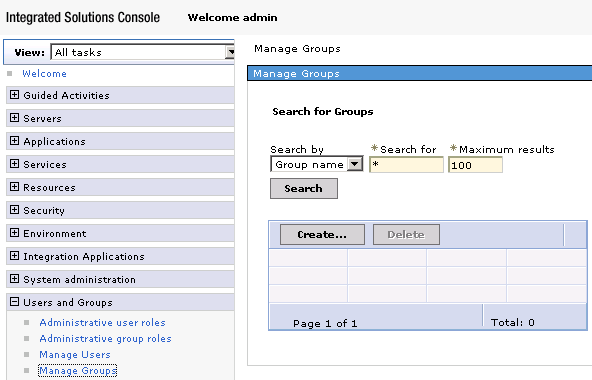
- Log in to the Admin Console of WebSphere Application server.
The default URL is - Select the sub menu Users and Groups > Manage Groups, the Manage Groups window opens.
- Click Create.
- Specify the Group name
Approversand any description you like.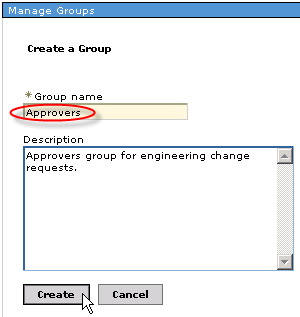
- Click Create. Click Close as we don't want to specify further groups.
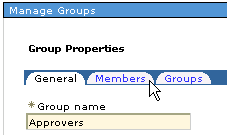
- Double click
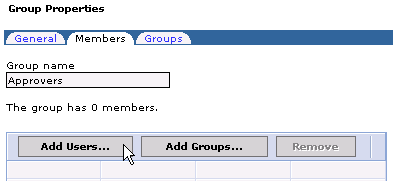
Approversthat opens the group properties window. Click Members to allocate existing users. - Click Add Users..., the Add Users to a Group window opens
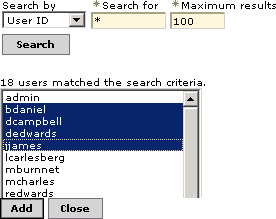
- Click Search to perform a wildcard search to select users.
Highlight the usersbdaniel, dcampbell, dedwards, jjames, click Add . The password of all provided userids is wid. - Click General. Click OK.
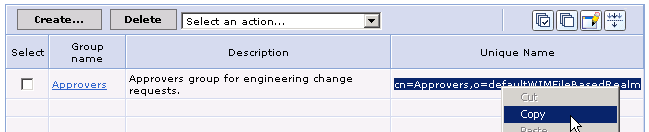
- Mark the Unique Name of the Approvers group, right click with your mouse and Copy the name to your the Clipboard
- Switch back to your process diagram. Double click the Approve EC Request
human task. The To-do task window opens.
Select the People Assignment (Receiver) > Potential Owners area. Open the Properties tab.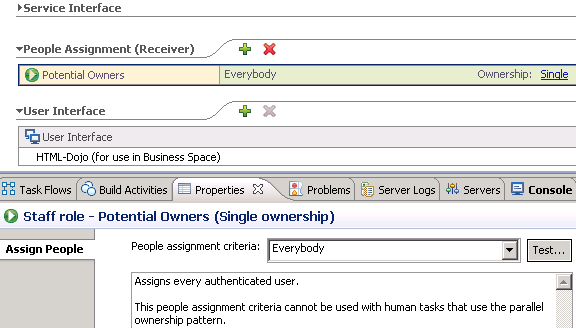
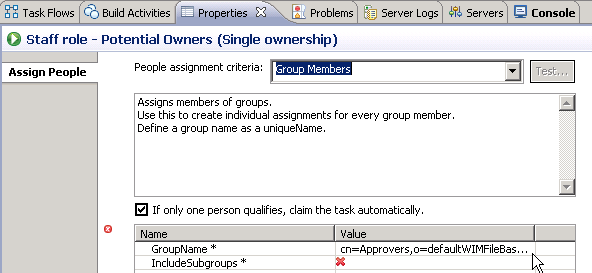
- Replace Everybody under Properties > Assign People > People assignment criteria by Group Members.
- Perform the people test search to verify that the access to the user registry and group resolution work properly.
Click Test.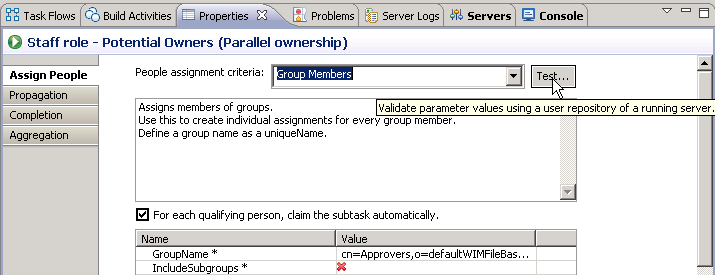
Click Search. The result in the the refreshed window shows the group members retrieved.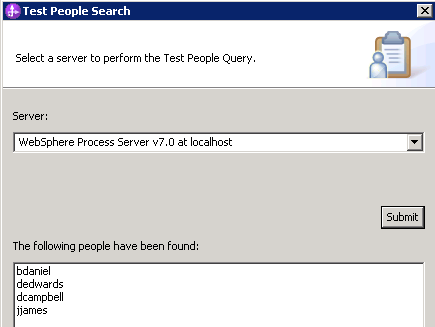
- Click OK. Click Ctrl + S to save your specification.

Paste the content of your clipboard
cn=Approvers, o=defaultWIMFileBasedRealm for the GroupName*
Value.
Specify the parallel approval task
The parallel approval is specified in detail by its propagation details, completion criteria, and aggregation functions.
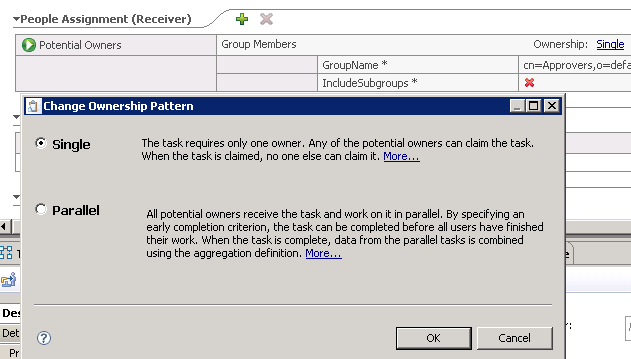
- Parallel ownership selection
Click People Assignment (Receiver)> Potential Owners > Ownership: Single. This opens the Change Ownership Pattern window. - Select Parallel and click OK. The Properties page opens and offers the
additional tabs.
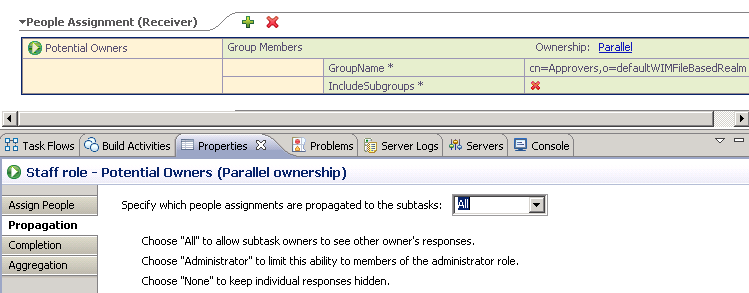
Note: The People Assignment (Receiver) area needs to be selected whenever you want to access the parallel approval settings. - Propagation
Subtasks are initially assigned with the default authorization for a main task. Owners of the subtasks will be able to see the results of other subtasks which might not be the right choice for ballot votes.- Select the Propagation tab
- Stay with All when specifying the people assignments propagated to the subtasks.
- Select the Completion tab.
- Completion
Specify conditions under which the main task ends before all owners have completed their subtasks. A task can be preemptively be completed based on the time that elapsed since it was created or when conditions defined by an expression are met. In the sample we specify a condition describing that 70 % of the subtask owners should have voted within and an elapsed duration of 5 minutes.- Set the field to End the task based on the time that elapsed since it was created.
- Keep Calendar type to Simple and set the duration to 5 Minutes.
- Set the field to End the task when the following condition is met and keep the setting of Simple condition.
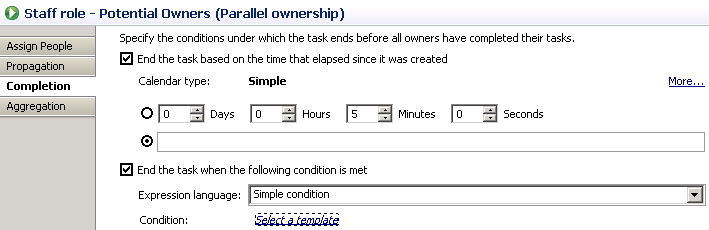
- Click Select a template.
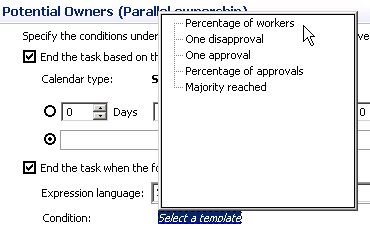
- Click Percentage of workers.

- Set Number to 70 %.
- Select the Aggregation tab.
- Aggregation
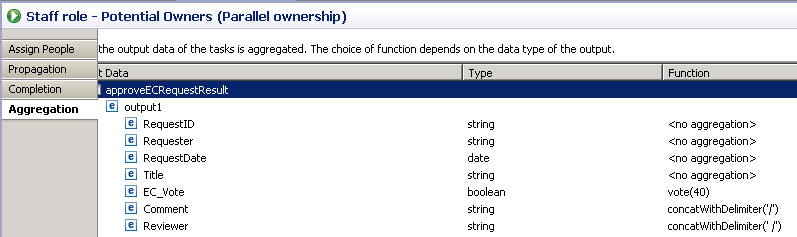
Select the business object fields with its data type to set the aggregation condition. Select the function that you want to use to aggregate the data. The choice of function depends on the data type of the selected business object field.- Select the business object field EC_Vote of type boolean and open the Aggregation Function Editor.
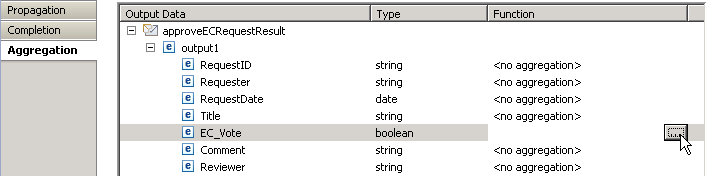
The editor to select and specify and aggregation function opens.

- Select Function equals vote.
Note: Aggregation function - vote in percentage.
This function aggregates the output messages for all of the subtasks of the parallel-ownership task and returns values of type Boolean. The output messages are converted to Boolean values according to the XPath Boolean function before the function runs.- This function returns the Boolean value that occurs most often if the occurrence is above the specified percentage, and if there is no tie. The result of the vote is determined in the following way: The specified percentage and the count of the subtasks result in a minimum value that must be exceeded by the occurrence of a single Boolean value.
- From the values that qualify from step 1, return the value that occurs most frequently. If no output messages exist or a tie occurs, false is returned.
- Specify the Value of approvals (EC_Vote equal true) to 40.
I.e. the engineering change request will be approved, if 40 percent of all potential subtask owners voted with true when the completion condition (5 minutes elapsed time or 70 % of workers completed their subtask) was reached.
Click OK.
- Repeat the previous step for the business object field Comment of type string and open the Aggregation Function Editor.
- Select Function equals concatWithDelimiter.
- Click OK.

- Repeat the same for the Reviewer variable.
- Click Ctrl + S to save the task specification.
- Select the business object field EC_Vote of type boolean and open the Aggregation Function Editor.
Export the enterprise application
- In the Business Integration view, right-click the EngineeringChangeRequest module.
- From the context menu, select Export.
- In the Export window, select Java EE > EAR file.
- Click Next.
- In the EAR project list of the EAR Export window, select EngineeringChangeRequestApp.
- In the Destination list, specify your destination directory.
- Click Finish.
Deploy your project in WID to the integrated test environment
- In WebSphere Integration Developer, switch to the Servers view.
- In the table, right-click WebSphere Process Server V7.0.
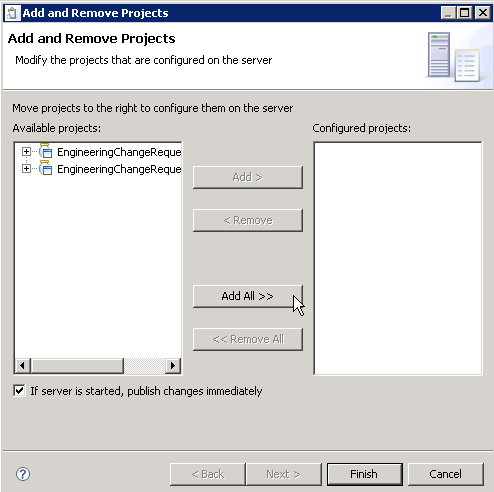
- From the pop-up menu, select Add and Remove Projects.
- Select Add All >> and click Finish.
Wait until the project has been successfully deployed.

Continue on with Run the sample.