Before you run this sample, make sure that:
- the group Approvers including the four users
bdaniel, dcampbell, dedwards, jjamesas described in the in the Specify the Group Approvers section has been created. - the sample application EngineeringChangeRequestApp.ear has been deployed to WebSphere Process Server and is started. To view the application design and create the application EAR in WebSphere Integration Developer, you can download the project interchange file ECRequestSample_Final.zip
To run this sample, use the Business Space.
Login and Setup Business Space
If you prefer you can run the sample in Business Process Choreographer Explorer (BPC Explorer). To start the Business Process Choreographer Explorer (BPC Explorer) in the integrated test environment of your WebSphere Integration Developer, perform the following steps:
- In WebSphere Integration Developer, switch to the Servers view.
- In the table, right-click WebSphere Process Server.
- From the pop-up menu, select Launch > Business Process Choreographer Explorer.
However, we want to use the Business Space. It is assumed that you are familiar with the Business Space to some extend.
To start the Business Space in the integrated test environment of your WebSphere Integration Developer, perform the following steps:- Via the Admin Console you might verify that the following applications are running:
- In WebSphere Integration Developer, switch to the Server view. In the table, right-click WebSphere Process Server V7.0.
- In a web browser supported by Business Space, open URL
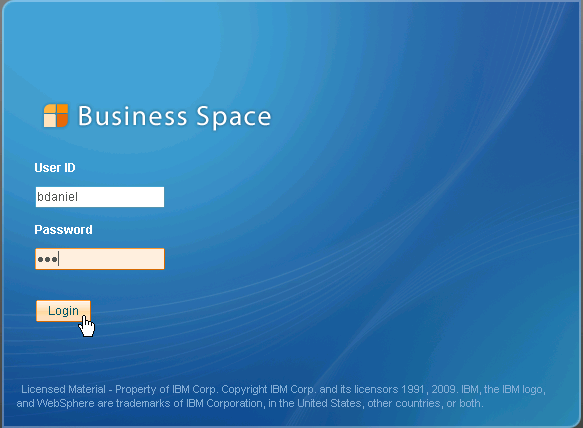
http://yourhost:yourport/mum/resources/bootstrap/login.jsp. - Enter the User ID
bdanieland Passwordwid.
Click Login. - Create a new space
Click Manage Spaces.
Click Create Space.
The Create Space window opens.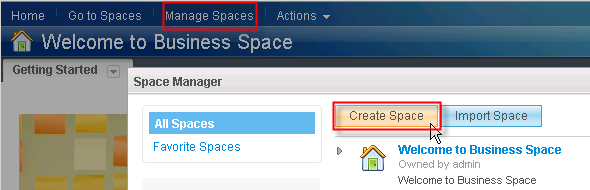
- Create Space
Enter for the Space name:Engineering Change Request Spaceand select theAdvanced Managing of Human Tasks and Workflowstemplate from the drop down list of Create a new space using a template.
Click Save.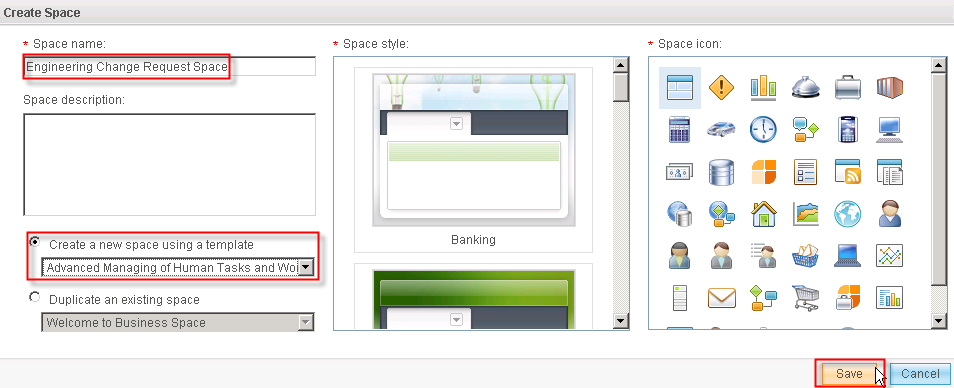
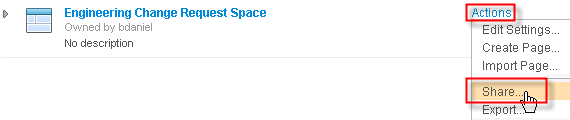
The new Engineering Change Request Space is created. - Share Space
- Click Actions. Click Share ...
- Enter a wildcard * as search criteria and click the Search button.
- Within the Search Result list select the userids of
admin, dcampbell, dedwards, jjamesand drag and drop them to the Edit Space list pressing the Add to Edit to allow these users not only to view put also to edit this new space.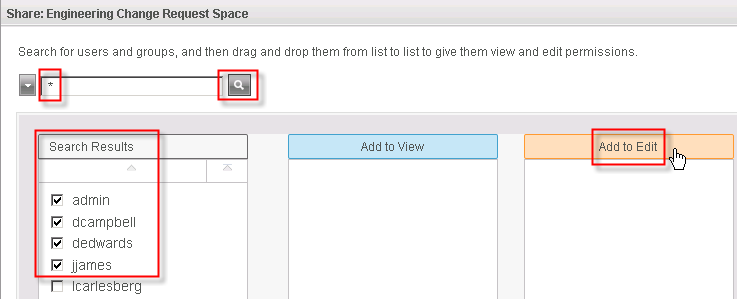
- Click Save. Click Done. The Welcome window opens.
- Click Go to Spaces.
- Double click the Engineering Change Request Space.
The Engineering Change Request Space opens for the logged on user bdaniel.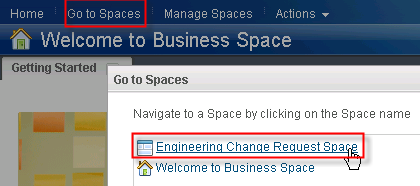
- Click Actions. Click Share ...
From the pop-up menu, select Launch > Business Space.

Optionally start the Business Space on WebSphere Process Server, perform the following steps:
Note: Replace yourhost with your server's internet address and replace yourport with the port of your server's HTTP transport,
for example
Start the Process
To start a Engineering change request process to demonstrate the effect of the parallel ownership of human task, follow these steps:
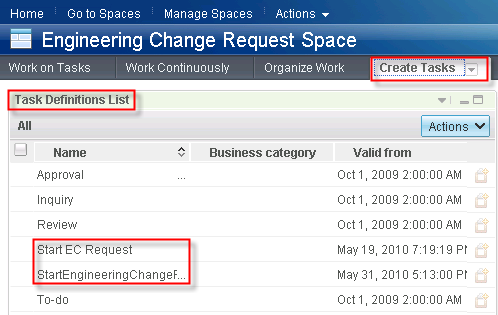
- Switch to Create Tasks. The Task Definitions List opens.
Note: In Business Space processes are started via invocation tasks, processes are not instantiated from process templates.The Task Definitions List shows the inline invocation task Start EC Request as well as the standalone invocation task StartEngineeringChangeRequest.
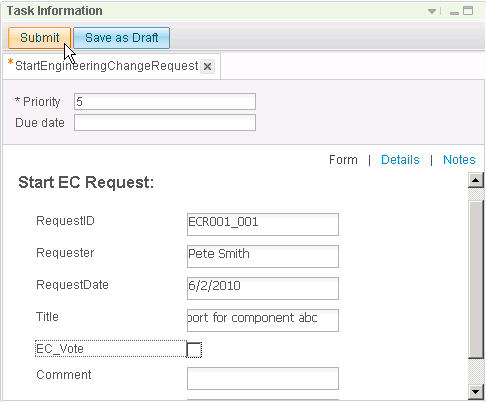
- Select the Start EC Request invocation task and click the Action button on the right to create and instance from this task definition.
The Task Information Window opens to start a new process instance via this invocation task.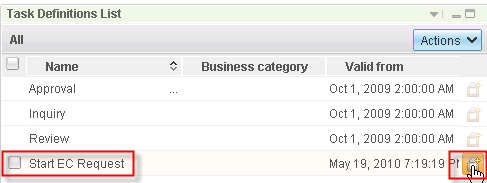
- Enter process start parameters and click Submit.
Perform workitems to approve the EC Request
The parallel approval task named Approve EC Request
is performed. Each group member of the Approvers group has received a
task and should now perform the assigned subtasks. This needs to be
done until 70 % of the approvers have voted or the time period of 5
minutes has passed. For task execution perform the following steps:
- Switch to the Work on Tasks page.
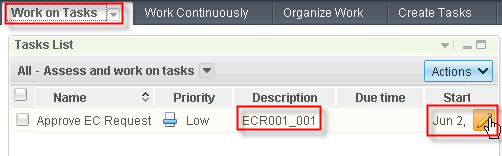
Identify the right workitem based on the Description. Click the Action Button to start the workitem. The Task Information Widget opens.
- Set the flag for the EC_Vote and add any Comment.
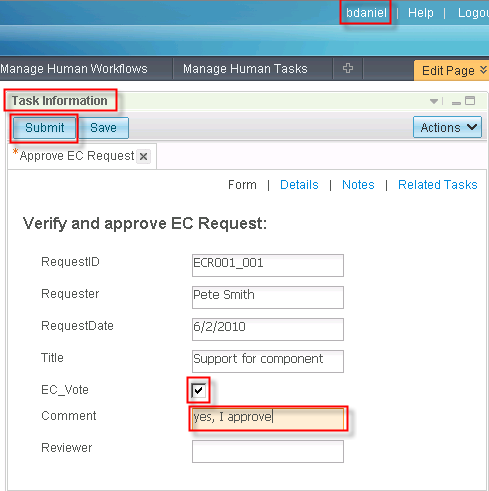
Click Submit to complete the workitem. - Logout as
bdaniel. Repeat the same steps as usersdcampbellanddedwards. Password iswid. Select, start and work on the Approve EC Request workitem from the Work on Tasks page. - See what happens once the third of the four
approvers completes his vote, which means that more than 70% have
voted now meeting the completion criteria. Depending on the entries of
the users and whether it was done in time the process will continue
with navigation to the Approval or Rejection Notification.
See the EC_Vote and concatenated Comments field for the opened task.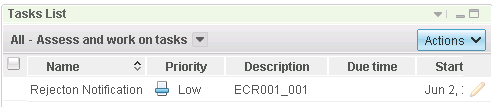
This completes our exercise! You have successfully completed the sample.