This section describes how to use the Query Table Builder to create and define a composite query table. It covers how to:
- Create a project.
- Create a composite query table.
- Specify the primary query table filter.
- Specify the authorization filter.
- Add attributes from the primary query table.
- Attach predefined query tables and add attributes.
If you encounter any problems while following the instructions in this section, please refer to the Troubleshooting information at the end of this section.
Create a project
A query table definition file can be created and edited in any type of project. For this sample, a simple project will be used. Follow these steps to create the project:
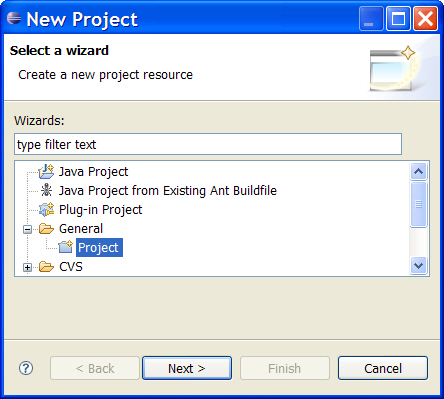
- Go to the Menu and select File > New > Project.... The New Project window opens.
- Select General > Project and click Next.
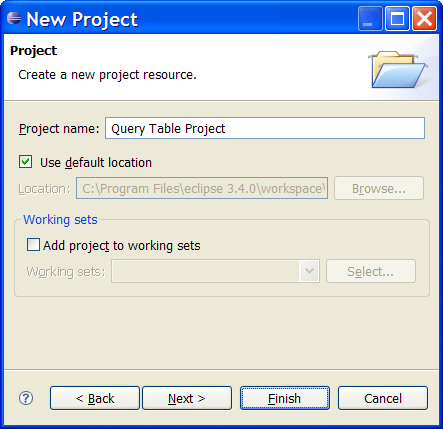
- In the Project name field, enter
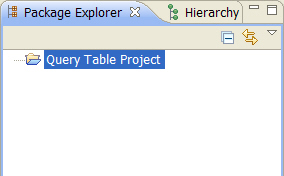
Query Table Project. - Keep all other settings and click Finish. The project is created and visible in the Package Explorer:
Create a composite query table
The Query Table Builder provides the capabilities to create a composite or a supplemental query table. In this sample, a composite query table has to be created. Perform the following steps to create the query table:
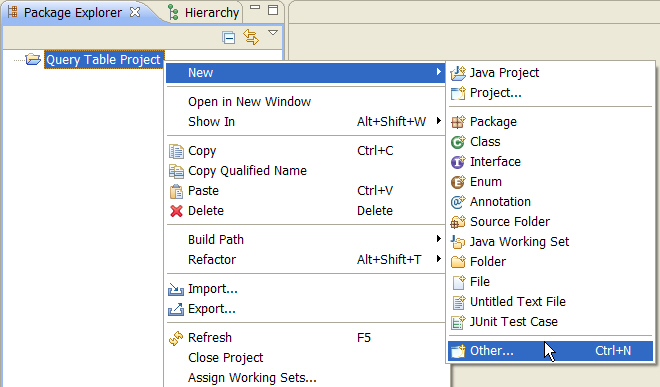
- Go to the Package Explorer.
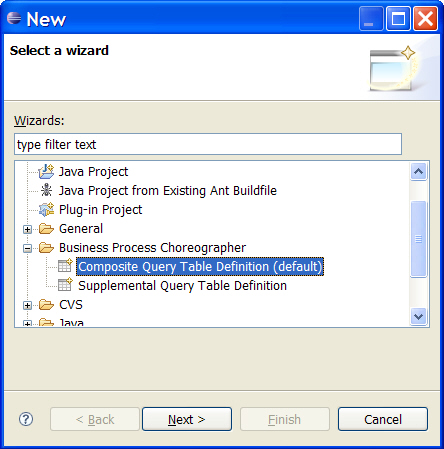
- Right-click Query Table Project and select New > Other... from the context menu.
- Select Business Process Choreographer > Composite Query Table Definition (default) and click Next.
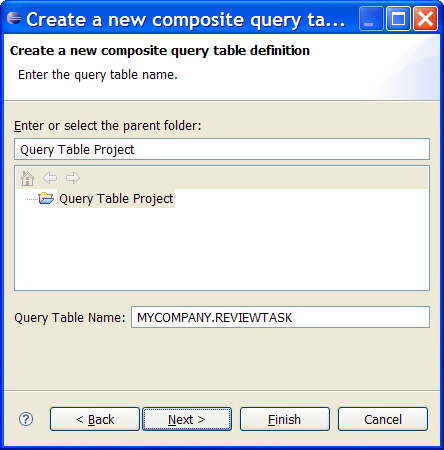
- In the Query Table Name field, specify
MYCOMPANY.REVIEWTASKas the name of the new query table. - Click Next.
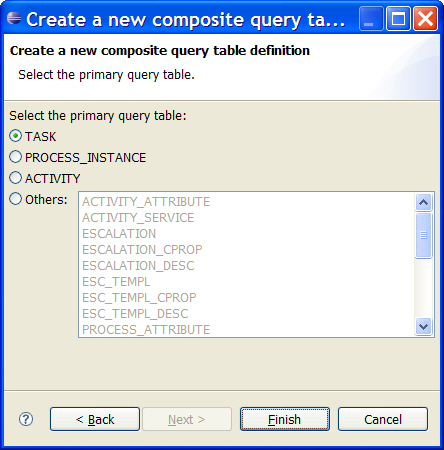
- The default setting for the primary query table is TASK. Do not change this setting and click Finish.
The New window opens.
 Note:
Note:
The name of a query table always has to consist of a prefix, a '.', and a name.
All characters have to be upper case, and the total length of the query table name may not exceed 28 characters.
Although the prefix and the name may contain numbers, they may not start with one.
Be aware that the name of the query table cannot be changed once the query table definition file has been created.
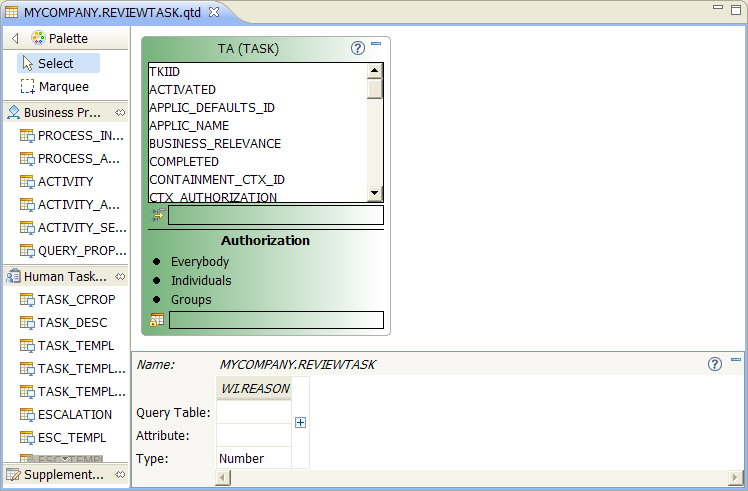
The new query table definition file MYCOMPANY.REVIEWTASK.qtd is created in the project and the editor opens:
Note:
The new query table consists currently only of the primary query table TA. The primary query table of a
query table definition is by default always shown in the upper left corner, and the color of its figure is green.
Click on the help button  in the upper right corner of the figure to open the online description of this predefined query table
in the WebSphere Process Server Information Center.
in the upper right corner of the figure to open the online description of this predefined query table
in the WebSphere Process Server Information Center.
Specify the primary query table filter
The query table should contain only those task instances that are in the state ready and that are participating tasks. Therefore, the filter on the primary query table has to be set accordingly. Follow these steps to do so:
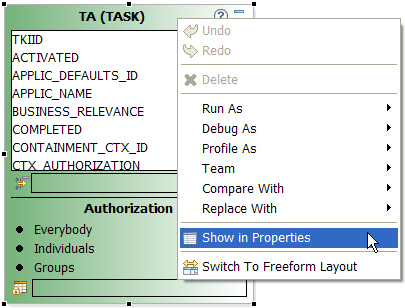
- In the editor, right-click on the title of the primary query table TA and select Show in Properties from the context menu.
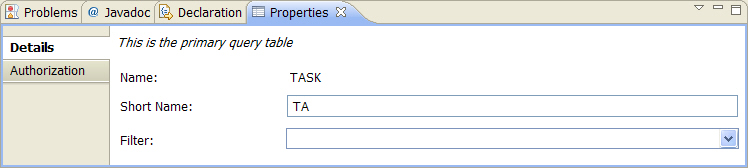
- In the Filter field, enter
STATE=STATE_READY AND KIND=KIND_PARTICIPATING. - On the toolbar, click the Save button
 .
.
The Properties view of the primary query table opens.
Note:
The query table definition is validated whenever it is saved. At this point in the sample,
a validation warning  is visible in the editor:
The description of the validation problem can be shown by hovering with the mouse over the validation warning icon.
This validation warning exists due to the fact that the query table does not yet contain any
attributes.
Specify the authorization filter
The employee is only interested in those task instances for which he or she is a potential owner, and the query table therefore has to contain an according authorization filter on the primary query table. Perform the following steps to specify this authorization filter:
- Click on the primary query table TA and go to the Properties view.
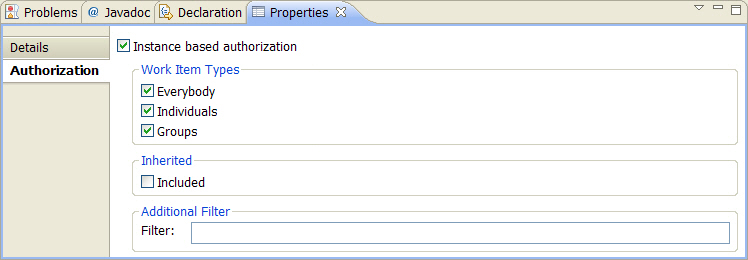
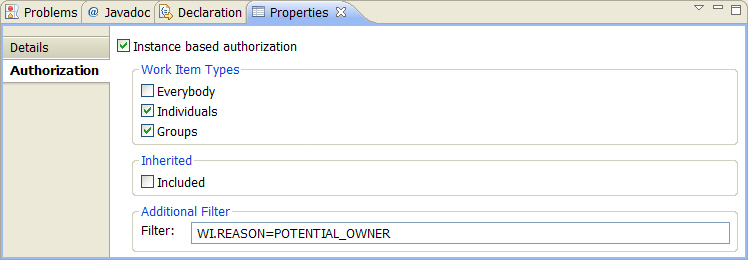
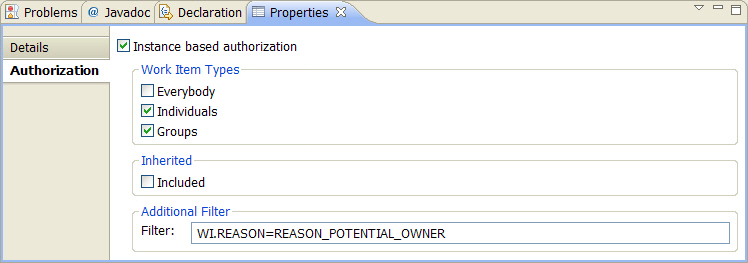
- Select the Authorization tab. The authorization properties are shown:
- Deselect the checkbox Everybody.
- In the Filter field, enter the authorization filter
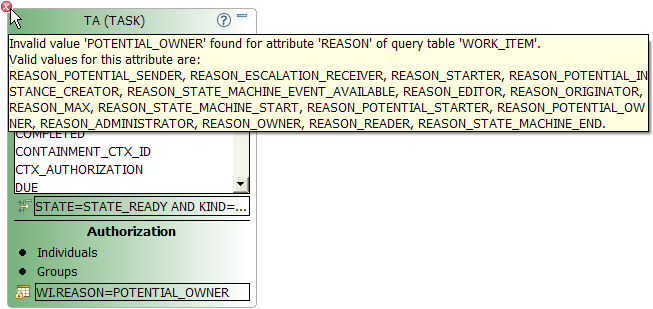
WI.REASON=POTENTIAL_OWNER. - On the toolbar, click the Save button . The editor displays two
 error markers,
one on the figure of the primary query table, and one in the Authorization tab of its properties:
error markers,
one on the figure of the primary query table, and one in the Authorization tab of its properties: - In the Properties view, replace the current value of the Filter with
WI.REASON=REASON_POTENTIAL_OWNER. - On the toolbar, click the Save button . The validation error no longer exists:
Hint:
Any of the attributes that are defined in the predefined query table WORK_ITEM can be included in this filter.
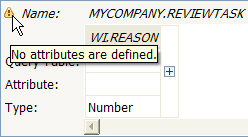
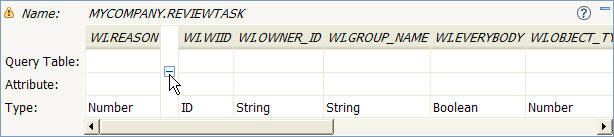
If authorization is enabled for the query table (the checkbox Instance based authorization is selected),
these attributes are implicitly available when defining queries and are therefore visible in the attributes
table of the query table definition:
These attributes have the prefix "WI.", and they cannot be moved, changed, or deleted.
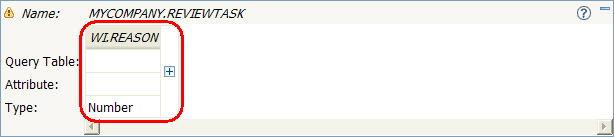
Because the most commonly-used work item attribute is WI.REASON, all other attributes are hidden by default. To display
all existing work item attributes, click on the  symbol next to WI.REASON.
To hide these attributes again, click the  symbol.
If authorization is disabled in the properties of the primary query
table, then none of the work item attributes are available.
symbol.
If authorization is disabled in the properties of the primary query
table, then none of the work item attributes are available.

 Troubleshooting:
If the wrong properties are shown in the Properties view, please refer to the Troubleshooting section.
Error marker number 1 in the left upper corner of the primary query table TA visualizes that this query table contains a validation error. Error marker number 2 next to the input field of the Filter property informs the user that this property is the cause of the validation error. The tooltip of the error marker contains the validation error message. In this example, the attribute value POTENTIAL_OWNER is invalid:
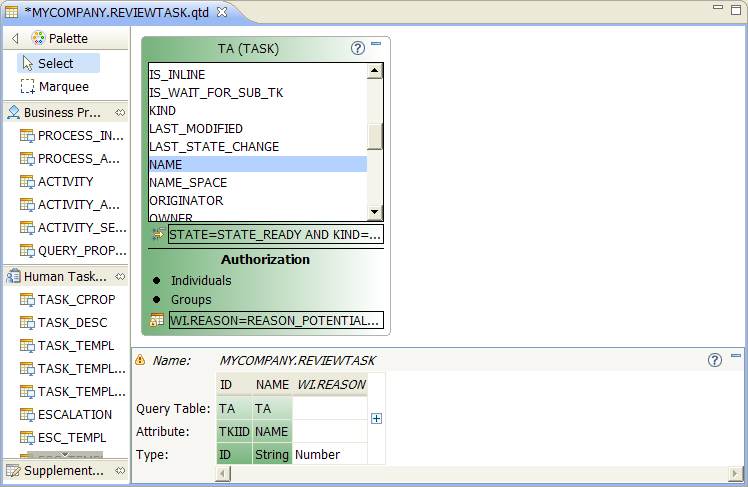
Add attributes from the primary query table
The query table has to contain the ID and the name of each task, both of which are attributes of the primary query table TA. Perform the following steps to add these attributes to the query table:
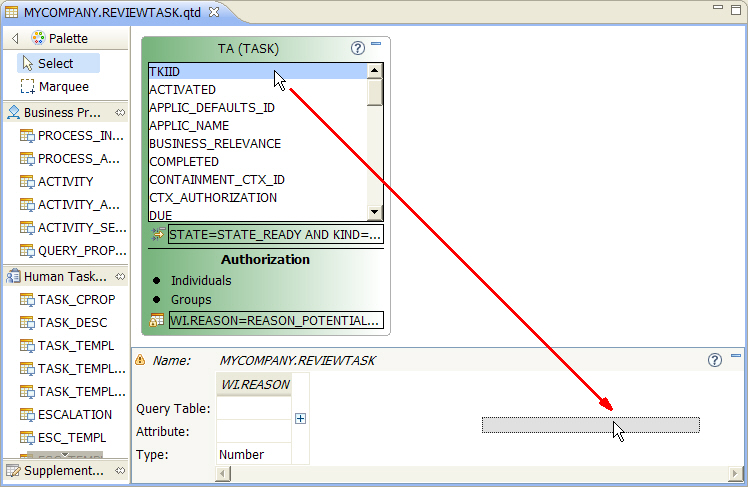
- Go to the list of attributes in the primary query table TA.
- Select the attribute TKIID, drag it to the attributes table at the bottom of the editor, and drop it anywhere in this table.
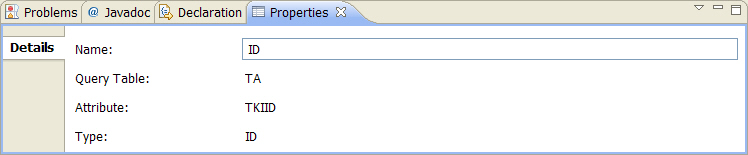
- Go to the Properties view to edit the properties of the new attribute.
- In the Name field, replace TKIID with
ID. - Go to the list of attributes in the primary query table TA.
- Scroll down in the list of attributes until the attribute NAME is visible.
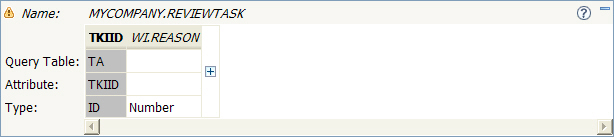
- Double-click NAME. The attribute is added to the query table, right next to the ID attribute:
- On the toolbar, click the Save button .
The attribute is added to the query table:
Hint:
The added attribute is selected automatically so that its properties can be edited directly after it has been added.
The attributes in this list can be reordered and deleted at will.
At query time, the order of the attributes that are returned is the same as specified in this list.
Note:
This way of adding an attribute differs from the drag-and-drop method only slightly: The added attribute is not selected automatically.
This method is therefore useful if multiple attributes have to be added back-to-back.
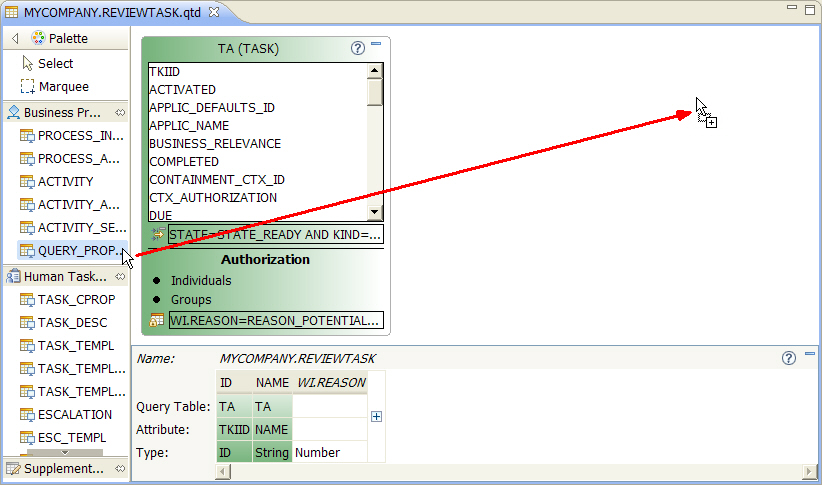
Attach predefined query tables and add attributes
In order to provide the information described in the Overview section, it is necessary to attach several predefined query tables. The table at the end of this paragraph describes the attached query tables that have to be added. The screenshots in the following instructions show how to attach the predefined query table QUERY_PROPERTY.
To attach a predefined query table and to add one or more of its attributes, perform the following steps:
- Go to the Palette and select the predefined query table that has to be attached.
- Drag the selected predefined query table to the canvas of the editor, and drop it anywhere on the empty canvas.
- If predefined selection criteria exist that have to be customized, select the attached query table and go to the Properties view.
- In the Selection Criteria field, customize the predefined selection criteria.
- To add an attribute of the attached query table, select the attribute, drag it to the attributes table below the canvas, and drop it.
- If the name of the added attribute has to be changed, select the attribute and go to the Properties view.
- In the Name field, enter the new name of the attribute.
- On the toolbar, click the Save button .
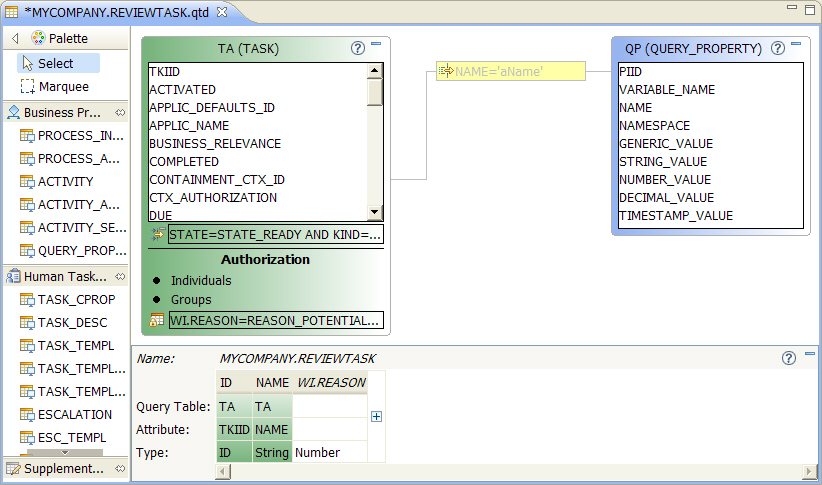
The selected predefined query table is added as an attached query table, which is joined to the primary query table:
Note:
In this example,
the predefined query table QUERY_PROPERTY is added as the attached query table QP.
Attached query tables are positioned by default in a
column next to the primary query table, and the color of their figures is blue.
The join of the attached query table to the primary query table has the predefined selection criteria NAME='aName',
visualized as the yellow box on the join connection line. Such predefined selection criteria
exist only for some of the predefined query tables. It may be necessary to customize these predefined selection criteria before they are useful.
In this example, the predefined selection criteria has to be changed by replacing 'aName' with the name of the query property.


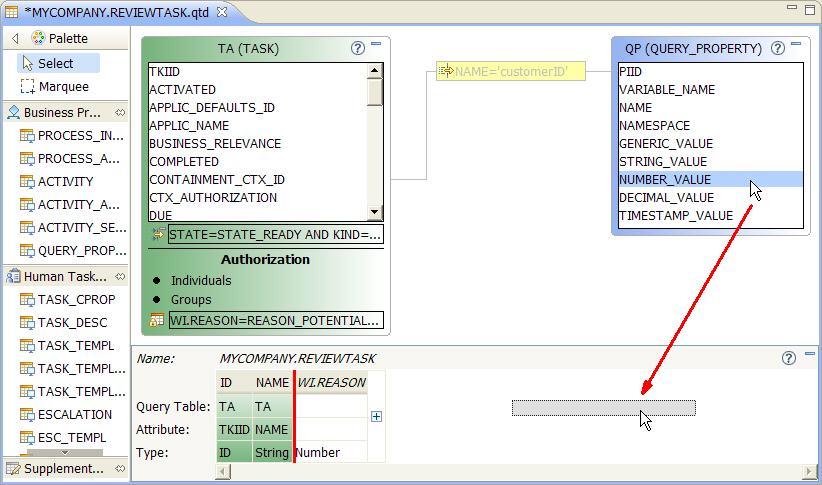
Hint:
The position in which the attribute will be added to the table is marked with a red line.
This is useful if you want to add an attribute at a specific position.
The attribute is added:


Troubleshooting:
If the color of the input field changes to red and the name is not changed in the attribute's figure, please refer to the Troubleshooting section.
Attach the following predefined query tables, and set their selection criteria if necessary. Moreover, add the specified attributes and set the name of the added attributes:
| Predefined Query Table | Selection Criteria | Attribute | New Attribute Name |
|---|---|---|---|
| TASK_DESC | LOCALE='default' | DESCRIPTION | - Attribute will not be renamed - |
| PROCESS_INSTANCE | - No selection criteria - | PIID | PROCESS_ID |
| NAME | PROCESS_NAME | ||
| QUERY_PROPERTY | NAME='customerID' | NUMBER_VALUE | CUSTOMER_ID |
| QUERY_PROPERTY | NAME='claimDescription' | STRING_VALUE | CLAIM_DESCRIPTION |
| QUERY_PROPERTY | NAME='claimAmount' | NUMBER_VALUE | CLAIM_AMOUNT |
The completed query table looks like this:

Hint:
In this example, all attached query tables except one have been minimized in order to get a better
overview of the whole query table definition. The primary and the attached query table figures as well as the attributes table below the canvas can be minimized
by clicking the  symbol in the upper right corner of their figures. To maximize them again, click
the
symbol in the upper right corner of their figures. To maximize them again, click
the  symbol.
The query table definition is complete and can now be deployed and tested on a local WebSphere Process Server as described in the Run the Sample section.
Troubleshooting
-
Symptom:
The Properties view does not show the correct properties.
Possible Solution:
The Properties view always shows the properties of the element (e.g. an attribute) that is currently selected in the editor. Select the element for which you want to see or edit the properties by clicking on it. The Properties view will adapt and show the properties of the selected element.
-
Symptom:
The renaming of a primary or attached query table was not successful and the color of the input field in the Properties view has been changed to red:

Possible Solution:
The short name of each primary and attached query table has to be unique within the query table definition. Therefore, if the short name is changed to a value that already exists, then the change will not be accepted. The Query Table Builder visualizes such a problem by changing the color of the input field to red. If this happens, the last valid input value for the short name will be kept, and the short name will not be changed to the new given value. As soon as a new valid (i.e. unique) short name is specified, the color of the input field will be restored and the new short name will be set.
-
Symptom:
The Palette does not contain a specific predefined query table.
Possible Solution:
The Palette only provides those predefined query tables that may be attached to the primary query table of the current query table definition. Therefore, if the Palette does not contain a certain predefined query table, then this is being done on purpose because it would not be a valid attached query table. The only possible solution to this problem is to create a new query table definition with a different primary query table to which the required predefined query table may be attached. Please refer to the references in the Download section for information about which predefined query tables may be attached to a given primary query table.
-
Symptom:
The primary query table cannot be deleted.
Possible Solution:
Due to the fact that the whole query table definition is based on its primary query table, the primary query table may not be deleted once the query table definition file has been created. If a different primary query table is required, a new query table definition has to be created.