To run the sample, you must deploy the FlowMark® Definition Language (FDL) file and run instances to emit events. Use the WebSphere MQ Workflow client to run the loan request business process and emit events.
First, you will run four instances using the use case in the Overview to verify that the Business Monitor model is using the WebSphere MQ Workflow Clent.
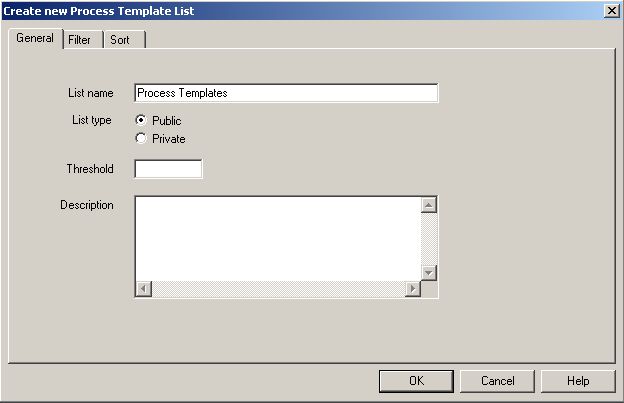
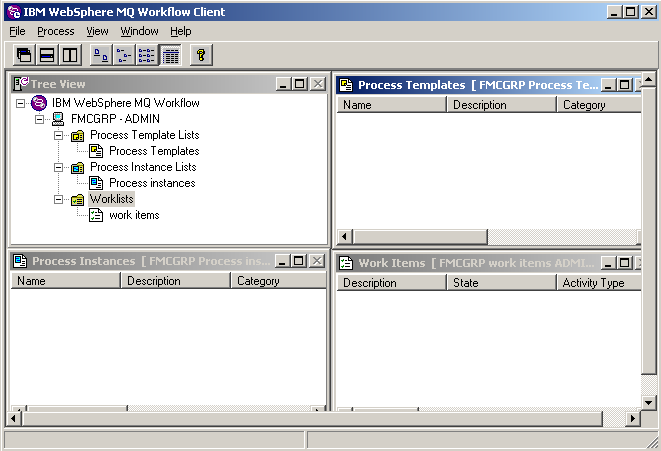
Create Process Template Lists
- Log in to the WebSphere MQ Workflow Client.
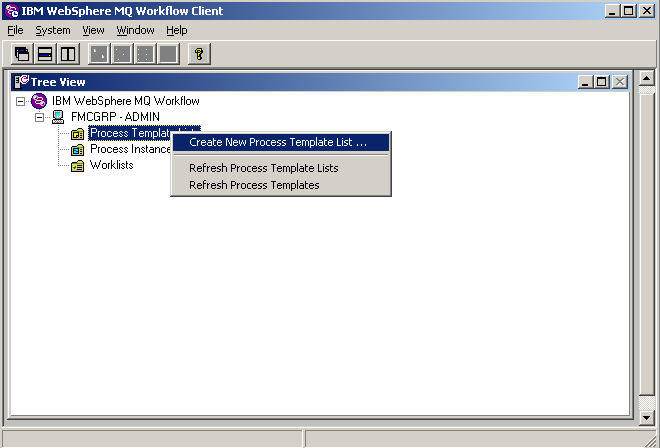
- Click IBM WebSphere MQ Workflow > FMCGRP - Admin > Process Template Lists > Create New Process Template List.
- On the Create new Process Template List page:
- In the List name field on the General tab, enter
Process Templates. - In the List type field, select Public and then click OK.
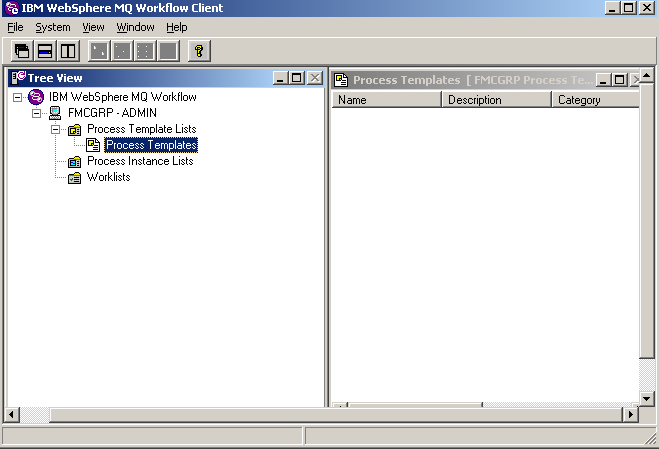
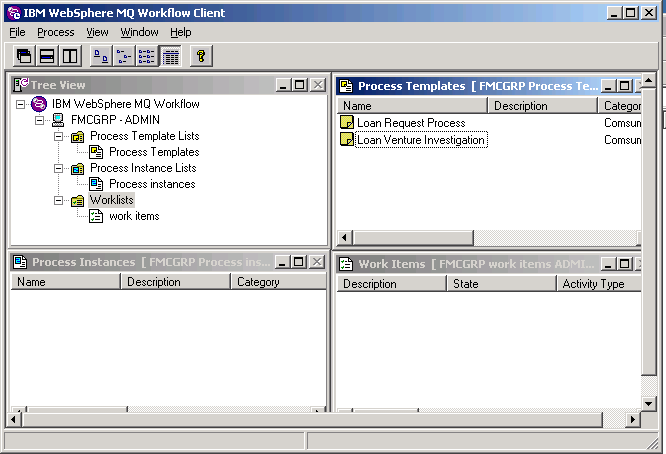
The new process template appears in the navigation panel as shown below:
- In the List name field on the General tab, enter
Create Process Instance Lists
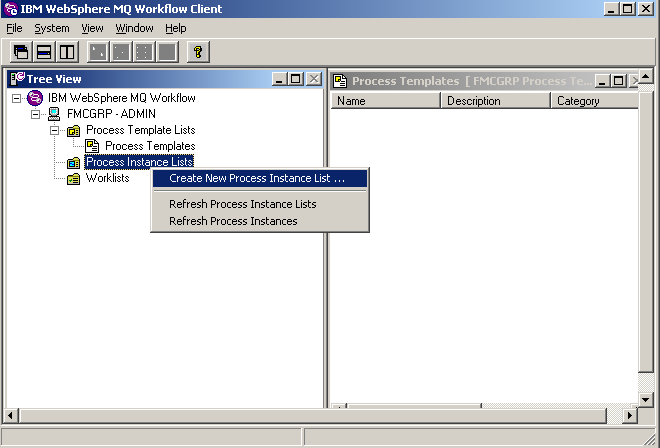
- In the Tree View, click IBM WebSphere MQ Workflow > FMCGRP - Admin > Process Instance Lists > Create New Process Instance List.
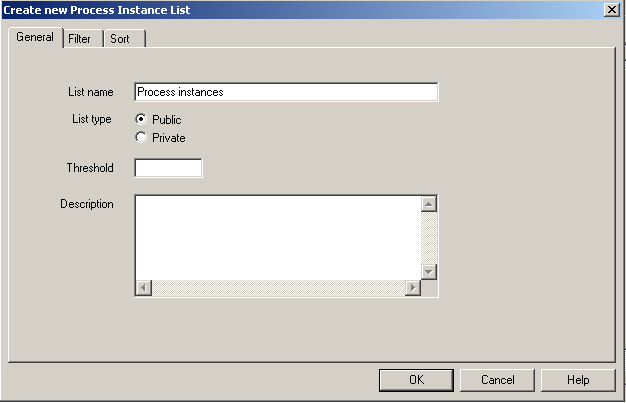
- On the Create new Process Instance List page:
- In the List name field on the General tab, enter
Process instances. - In the List type field, select Public and then click OK.
The new process instances list appears in the navigation panel as shown below:
- In the List name field on the General tab, enter
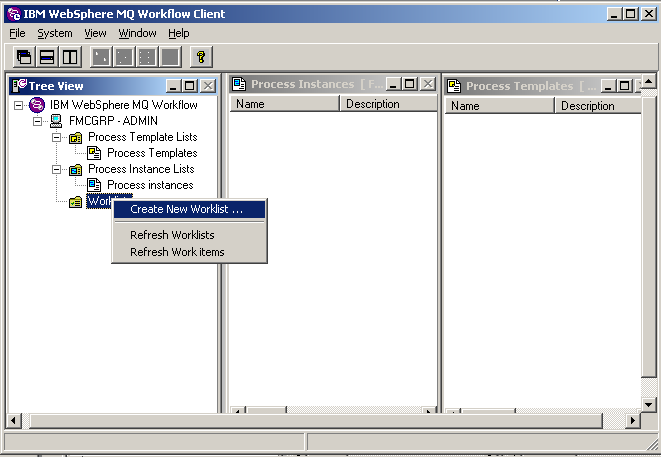
Create Worklists
- In the Tree View, click IBM WebSphere MQ Workflow > FMCGRP - Admin > Workflow > Create New Worklist.
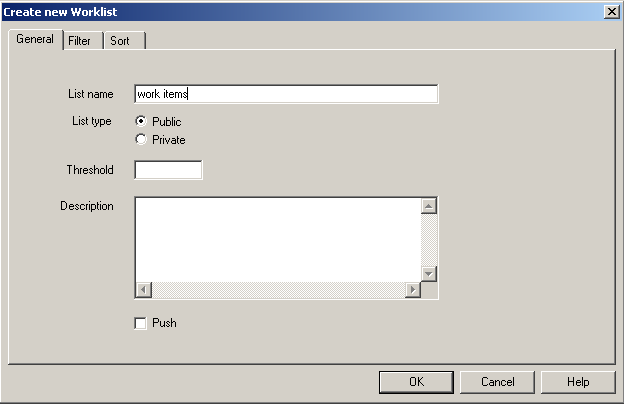
- On the Create new Worklist page:
- In the List name field on the General tab, enter
work items. - In the List type field, select Public and then click OK.
The new work items page appears in the navigation panel as shown below:
- In the List name field on the General tab, enter
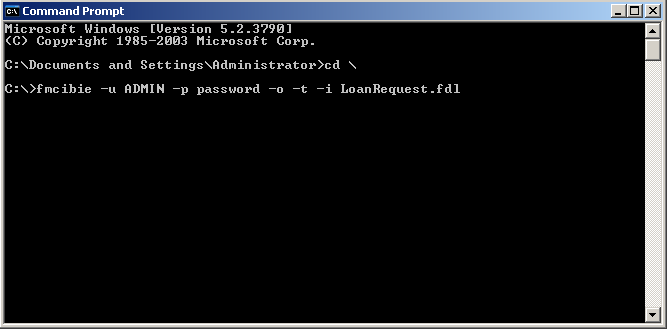
Deploy the FDL file to WebSphere MQ Workflow runtime
- Open a Command Prompt window:
- Change directories to the one that contains the FDL file.
- Enter the command,
fmcibie -u ADMIN -p password -o -t -i LoanRequest.fdl, and press Enter.
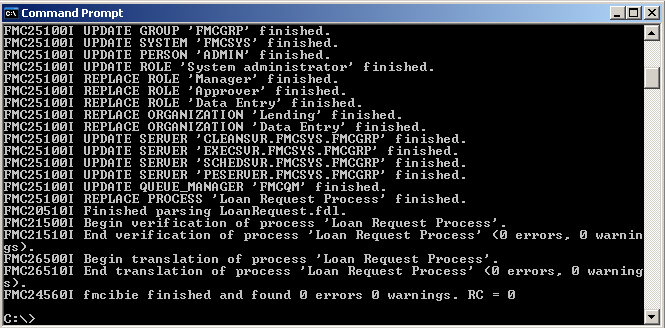
After the FDL file is imported, you should see a new row in the Process Template Lists as shown below:
Run instances
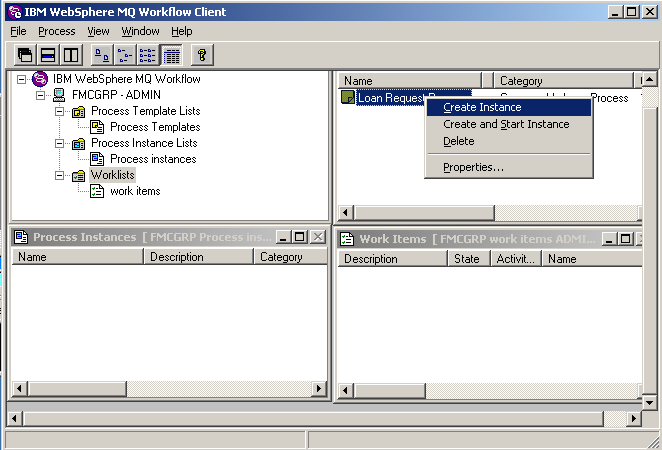
- On the Process Templates List, right-click Loan Request Process and then select Create and Start Instance.
- Right-click the process instance, Loan Request Process, and select Start.
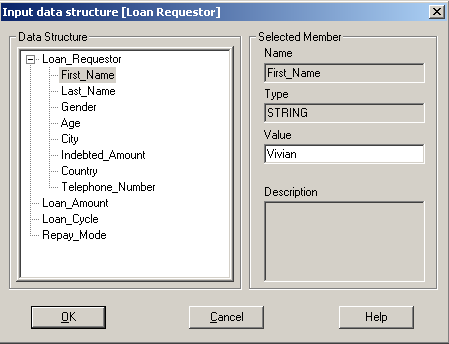
- On the Input data structure (Loan Requestor) window, enter any loan requestor information and then click OK.
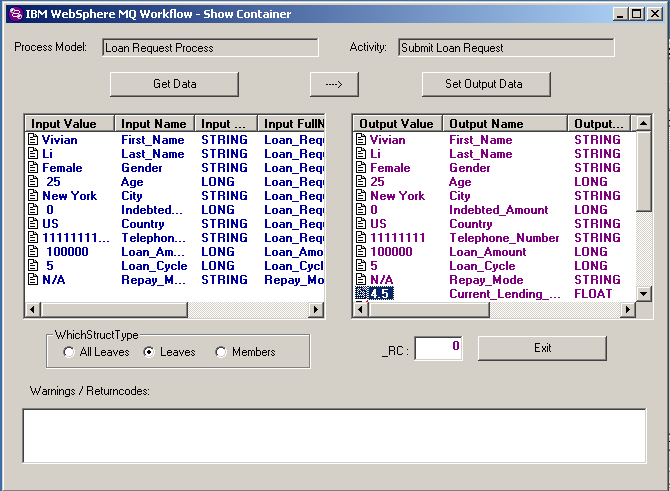
- Right-click the work item and select Start. The window shown below appears. Use this window to set output data for activities.
- Set the output data for activities as described below. For different use cases, you will set different values of output data for some data members.
- For use case 1:
Audit By Business Director - set the data member Business_Director_Audit_Result to Approve.
Audit By Business Manager - set the data member Business_Manager_Audit_Result to Approve.
Commit Loan Request - set the data member LoanRequest_Committed_Result to Successfully.
- For use case 2:
Audit By Business Director - set the data member Business_Director_Audit_Result to This request is rejected for some reason....
- For use case 3:
Submit Loan Request - set the data member Loan_Amount to a value less than 500000.
Audit By Business Director - set the data member Business_Director_Audit_Result to Approve.
Audit By Business Manager - set the data member Business_Manager_Audit_Result to Need venture investigation.
Approve By Venture Manager - set the data member Venture_Investigate_result to Approve.
Commit Loan Request - set the data member LoanRequest_Committed_Result to Successfully.
- For use case 4:
Submit Loan Request - set the data member Loan_Amount to a value greater than 500000.
Audit By Business Director - set the data member Business_Director_Audit_Result to Approve.
Audit By Business Manager - set the data member Business_Manager_Audit_Result to Need venture investigation.
Investigate By Up Level Bank - set the data member UpLevelBank_Investigation_result to either High Venture or Low Venture.
Approve By Senior Manager or Approve By Venture Manager- set the data member Venture_Investigate_result to Approve.
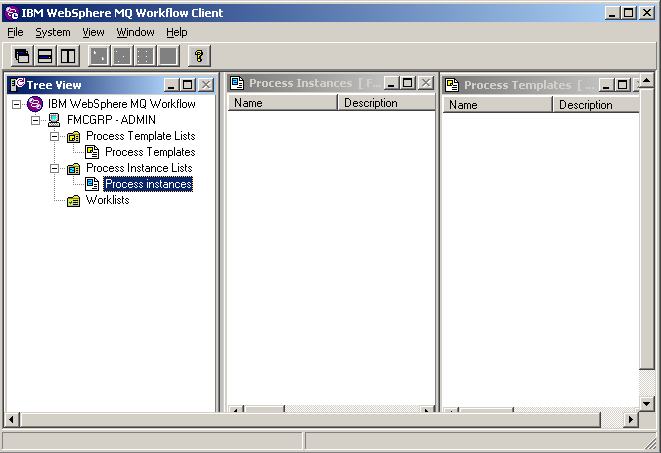
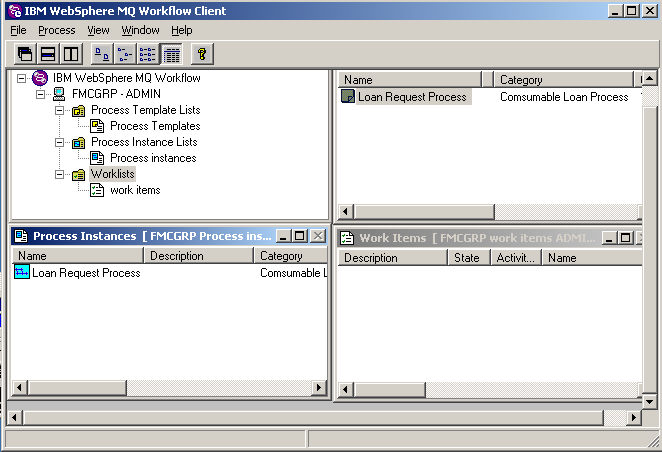
The following image shows the new instance on the Process Instance List.

The following image shows the new item on the worklist.

Create a dashboard
In this section, you will build a dashboard on a Web-based dashboard to display the monitor result.
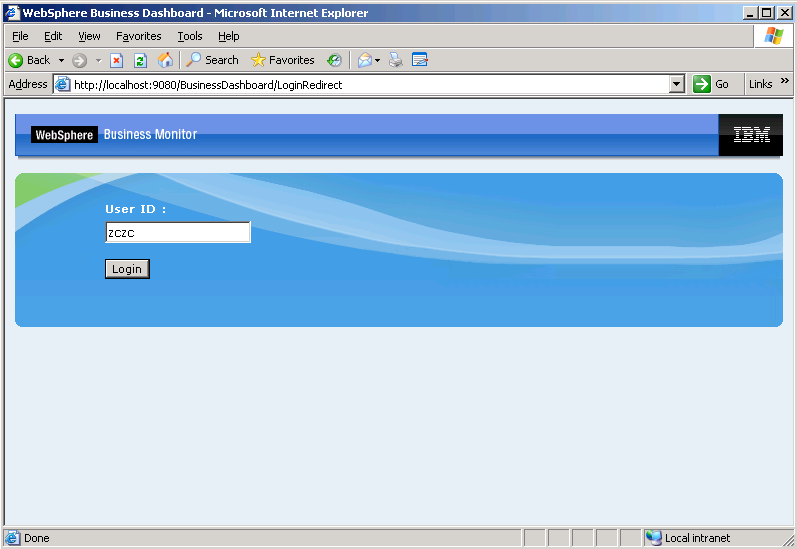
- Open the Web-based dashboard page, http://localhost:9080/BusinessDashboard, as shown below.
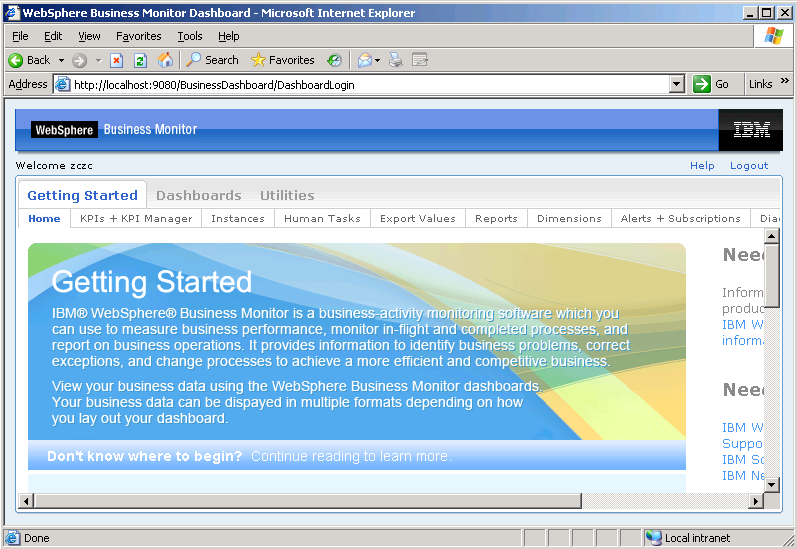
- Enter a User ID and then click Login. The Welcome page opens.
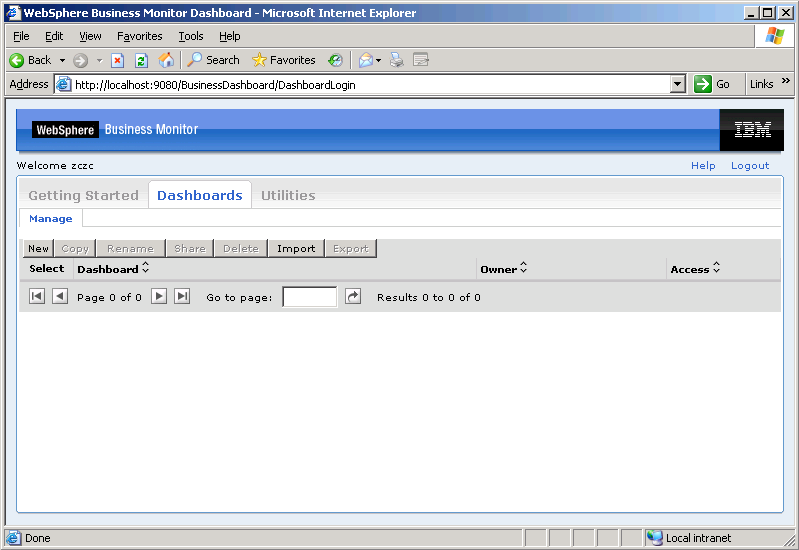
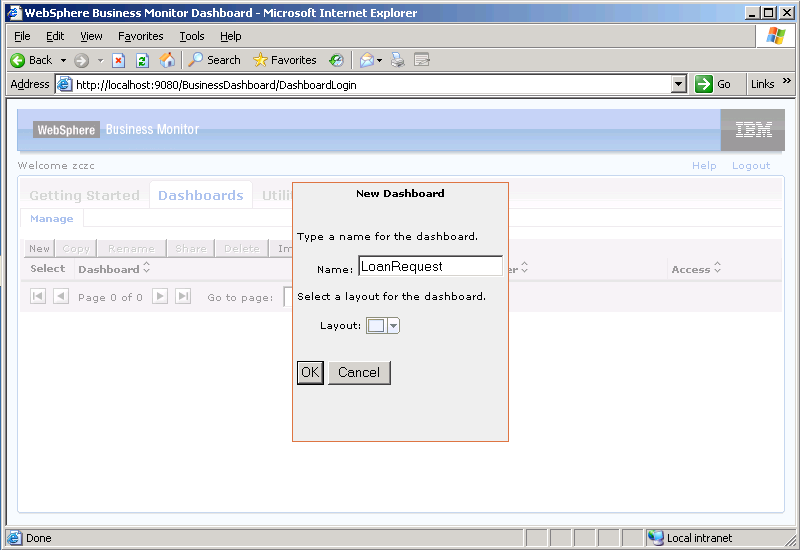
- Click the Dashboards tab.
- On the Dashboards page, click New.
- On the New Dashboard dialog box, in the Name field, enter
LoanRequestand then click OK.

Create an instance view
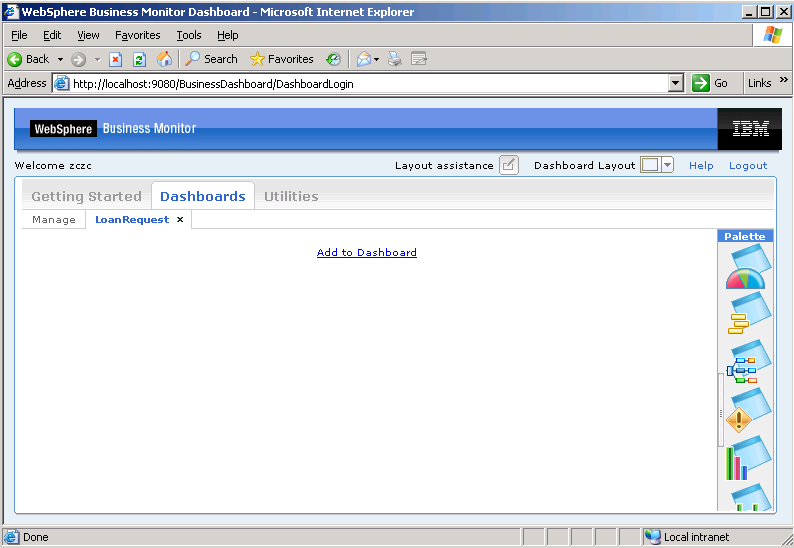
- Click Add to Dashboard.
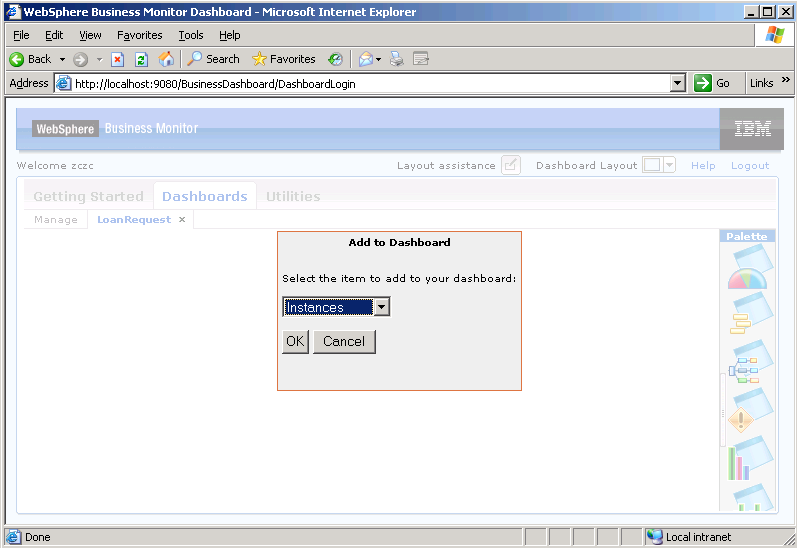
- On the Add to Dashboard dialog box, select Instances from the drop-down list, and click OK.
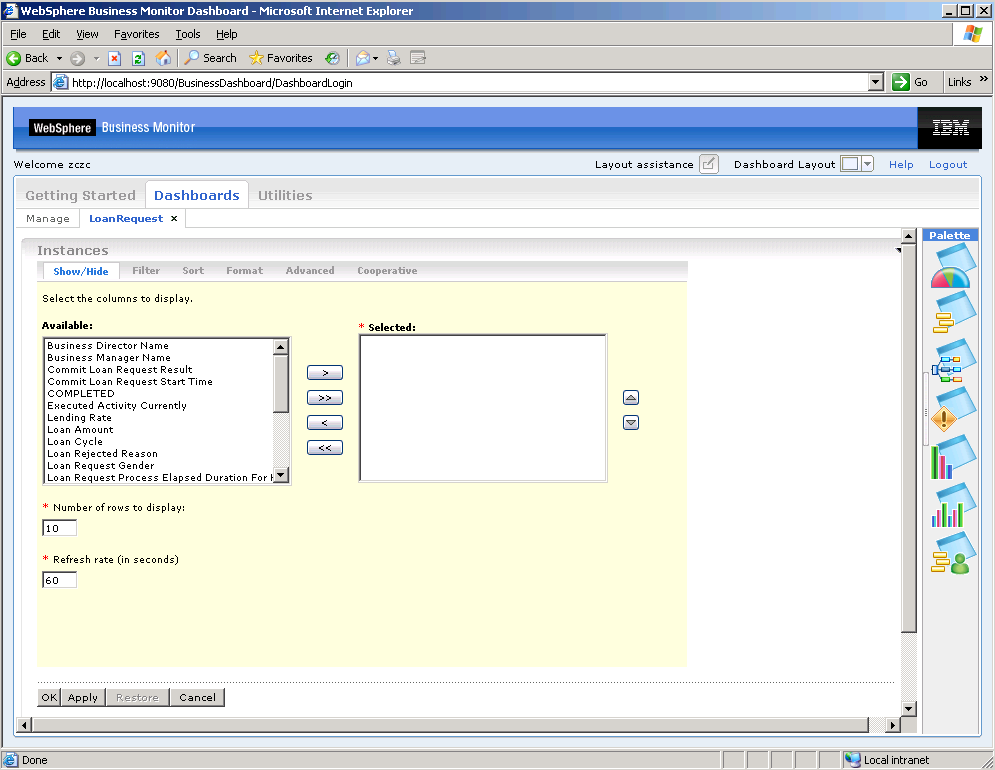
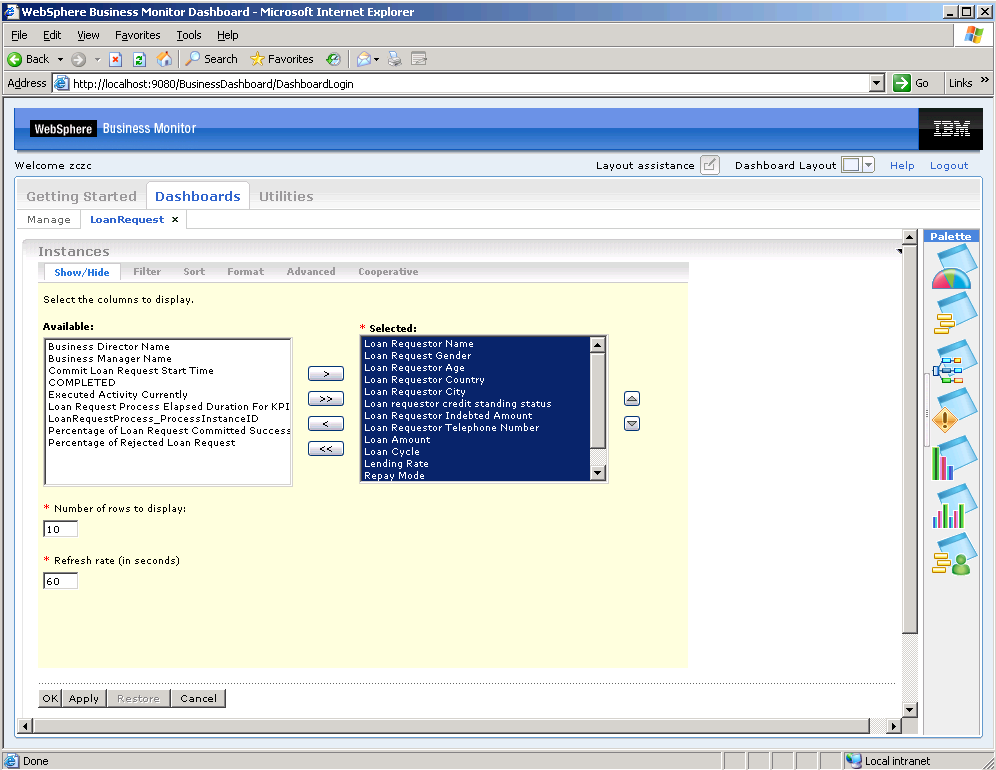
- Click Personalize to open the property page of the instance view.
- From the Available list, select the metrics that you want to monitor and click > to move them to the Selected list.
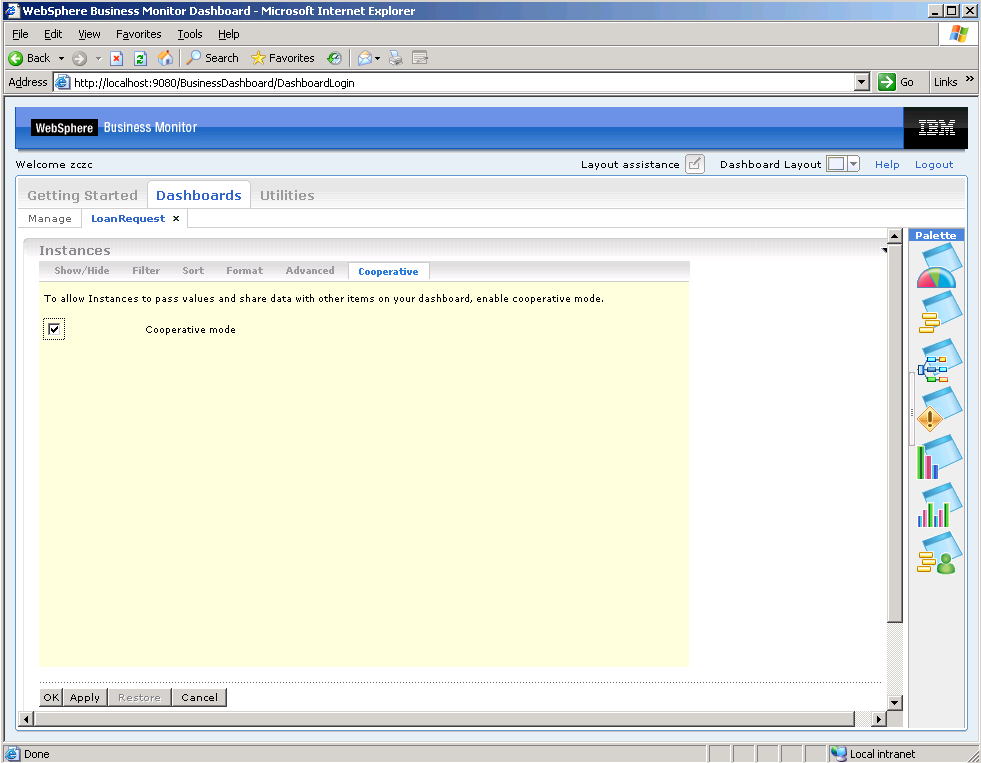
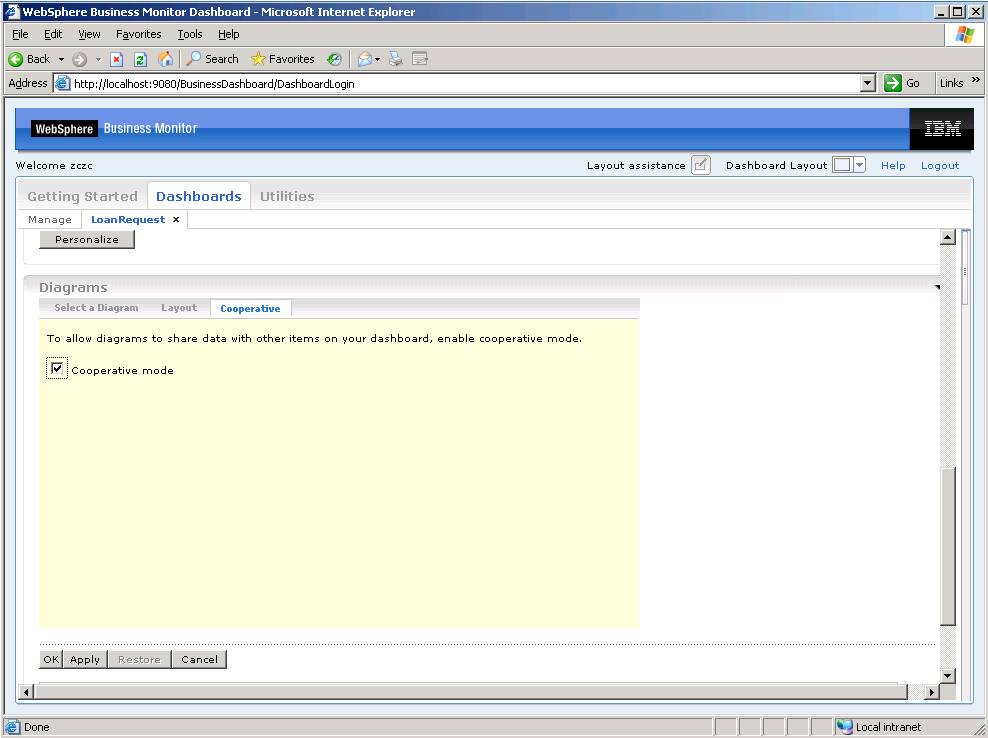
- Click the Cooperative tab, select the Cooperative mode and then click OK.
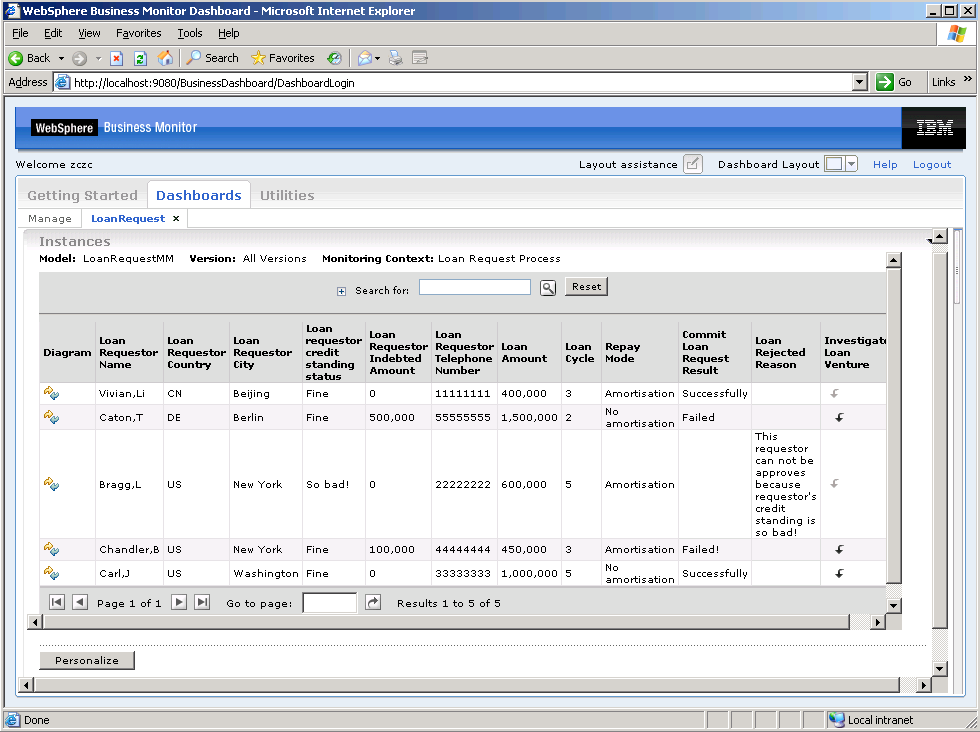
A new frame is added to the dashboard as shown below.
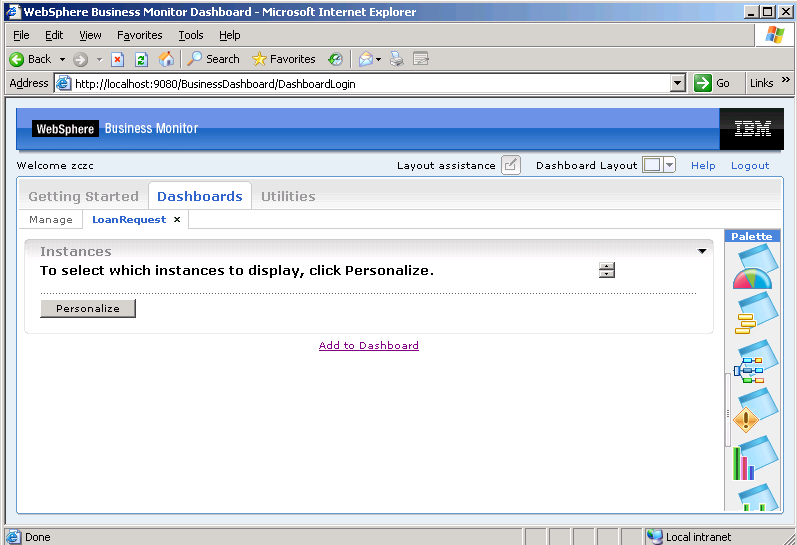
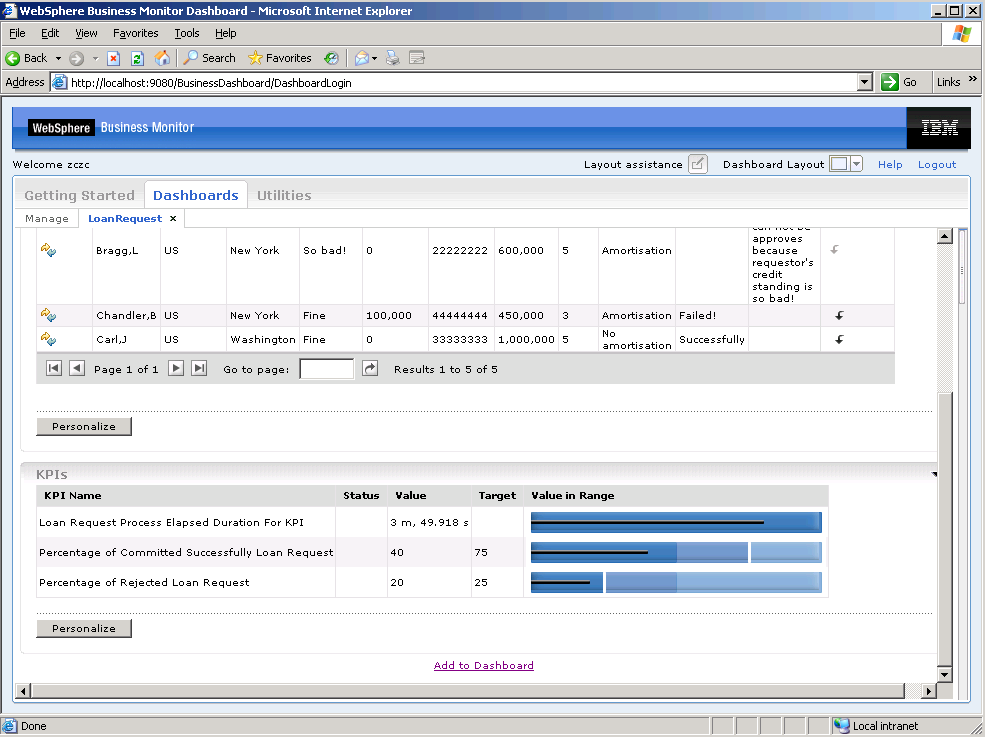
The image below shows an example instance view.
Create a KPI view
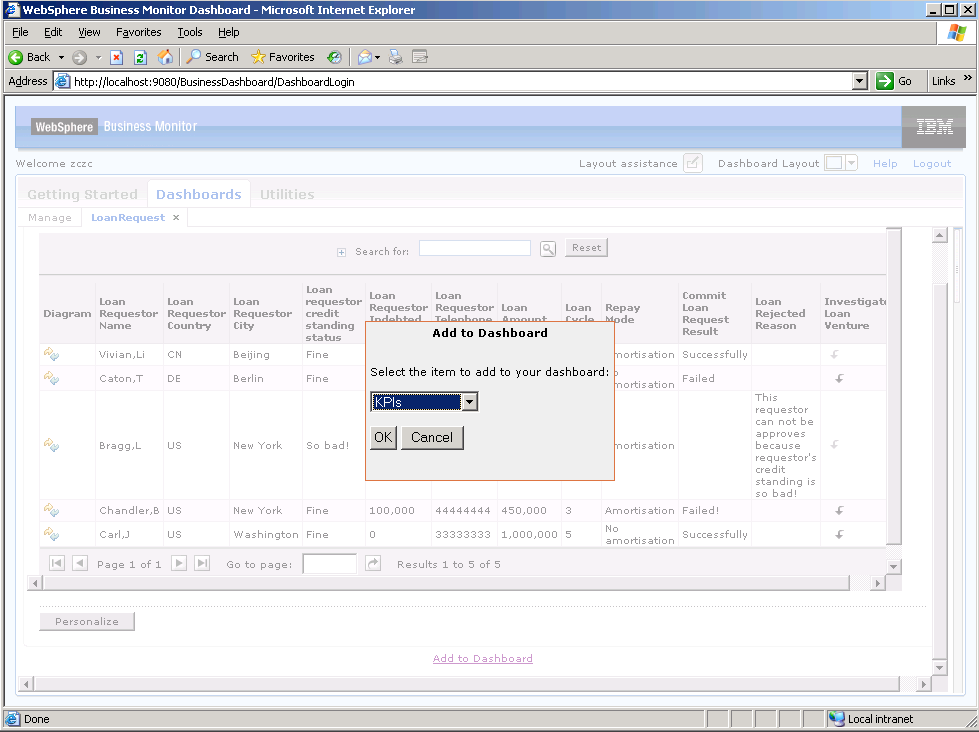
- Click Add to Dashboard.
- On the Add to Dashboard dialog box, select KPIs from the drop-down list and then click OK.
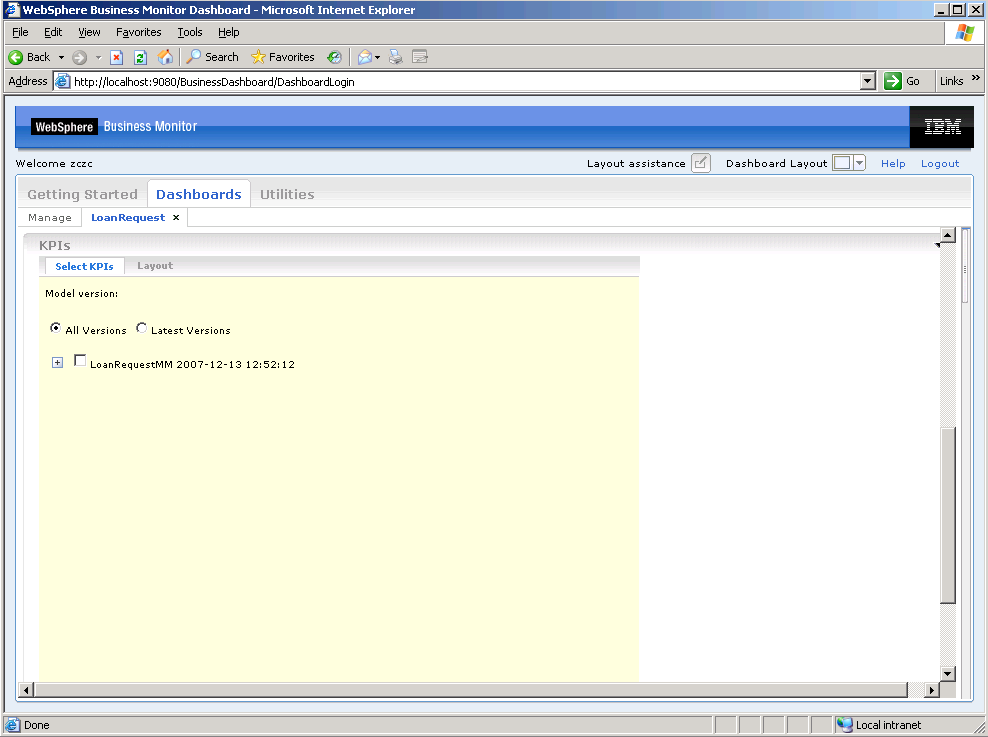
- Click Personalize to open the property page of the KPI view as shown below.
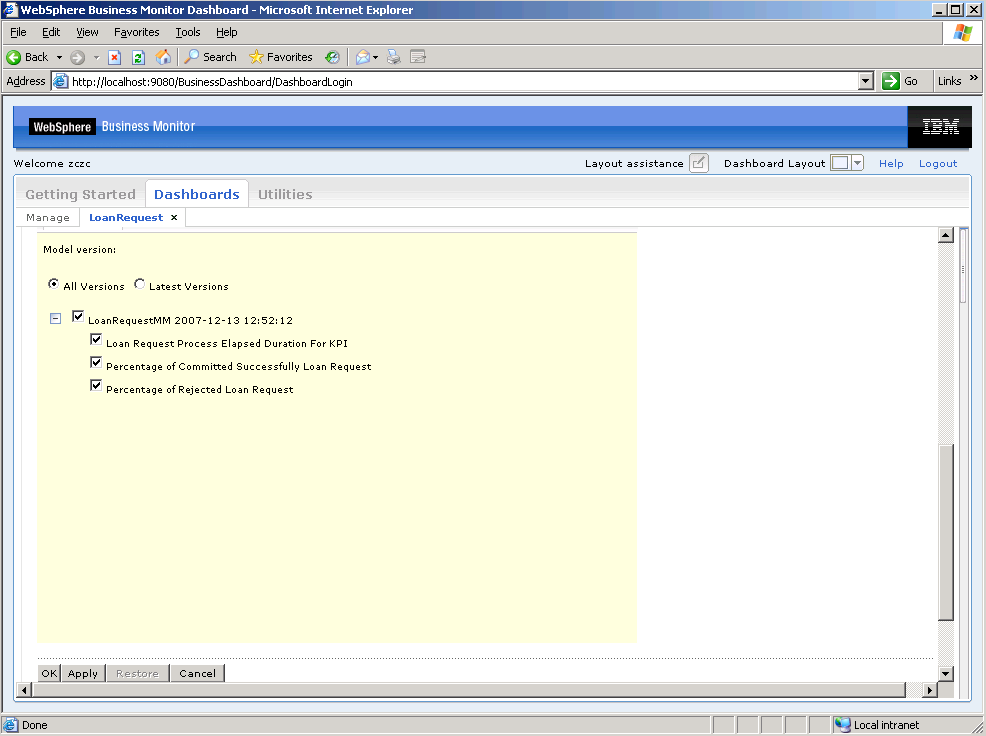
- Select the KPIs that you need to monitor and then click OK.
A new frame is added to the dashboard under the instances view as shown below.
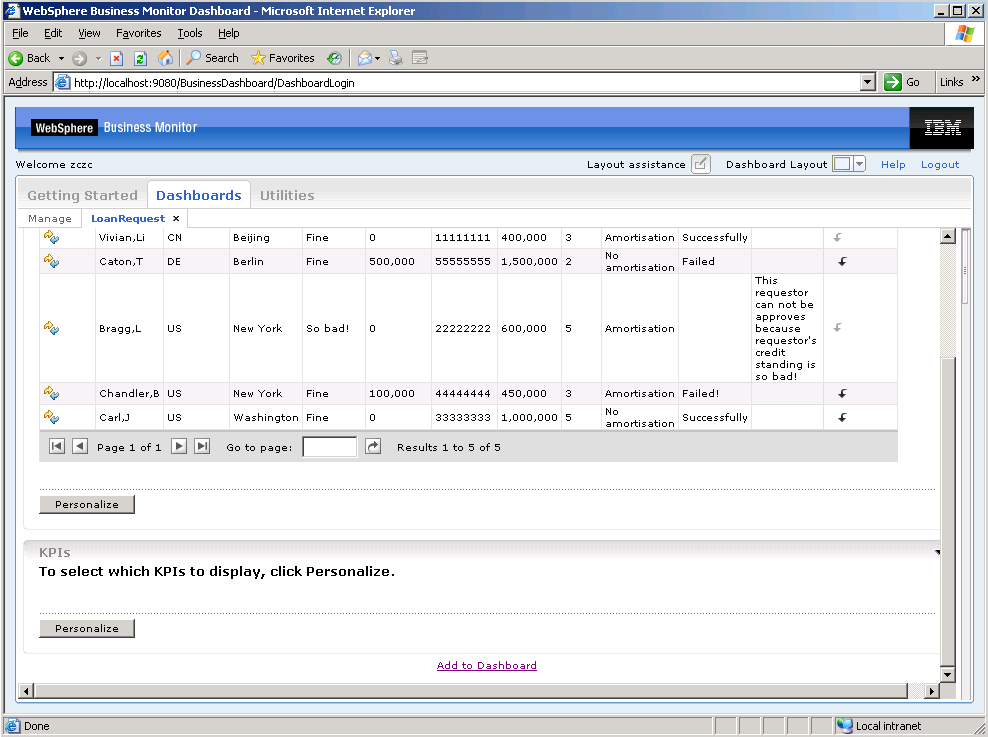
The image below shows an example KPIs view.
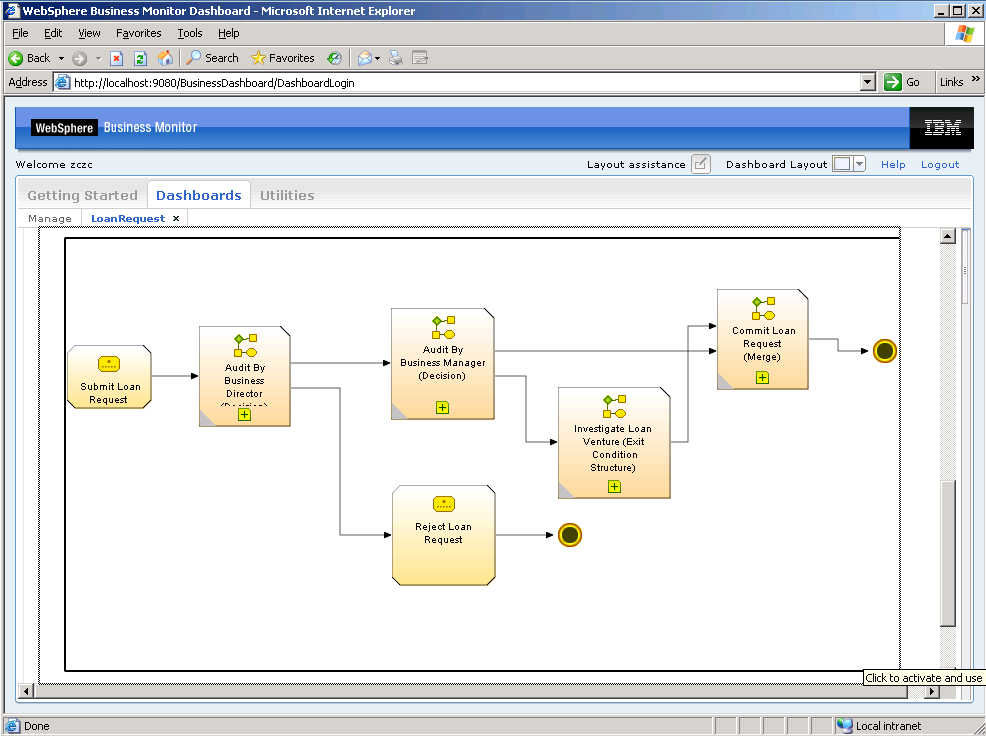
Create a diagram view
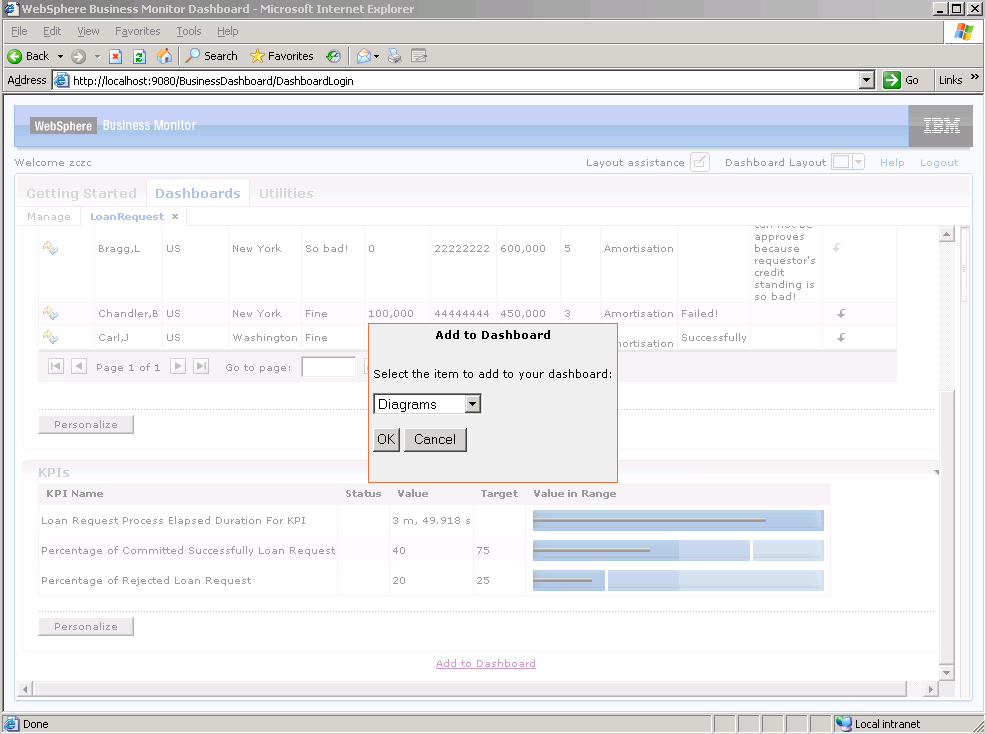
- Click Add to Dashboard.
- On the Add to Dashboard dialog box, select Diagrams from the drop-down list and then click OK.
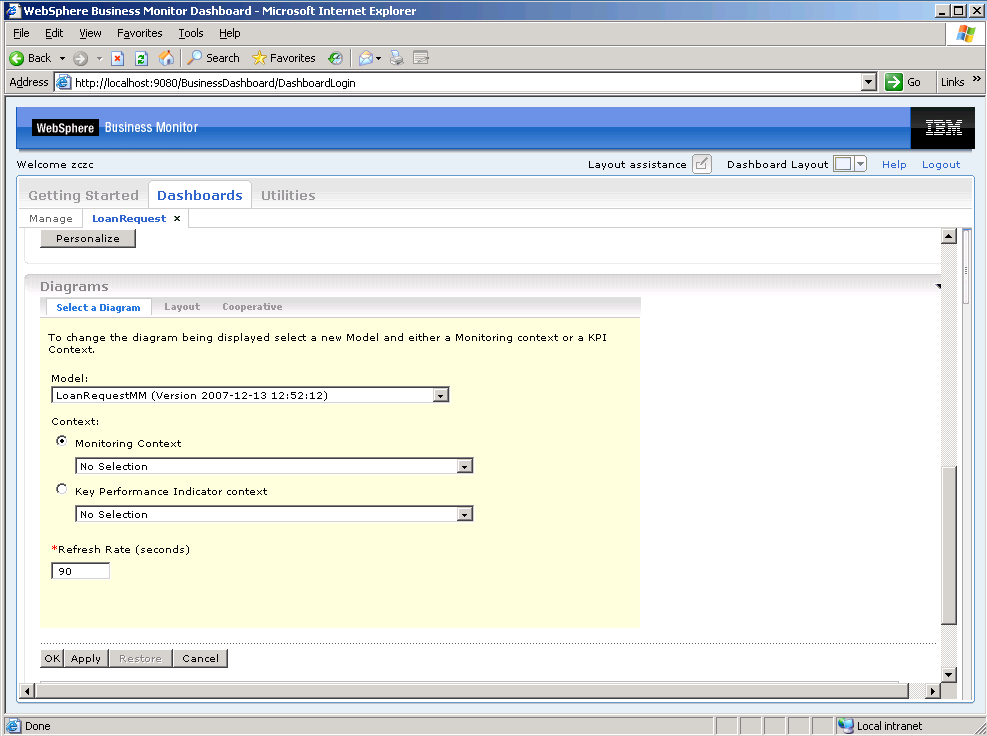
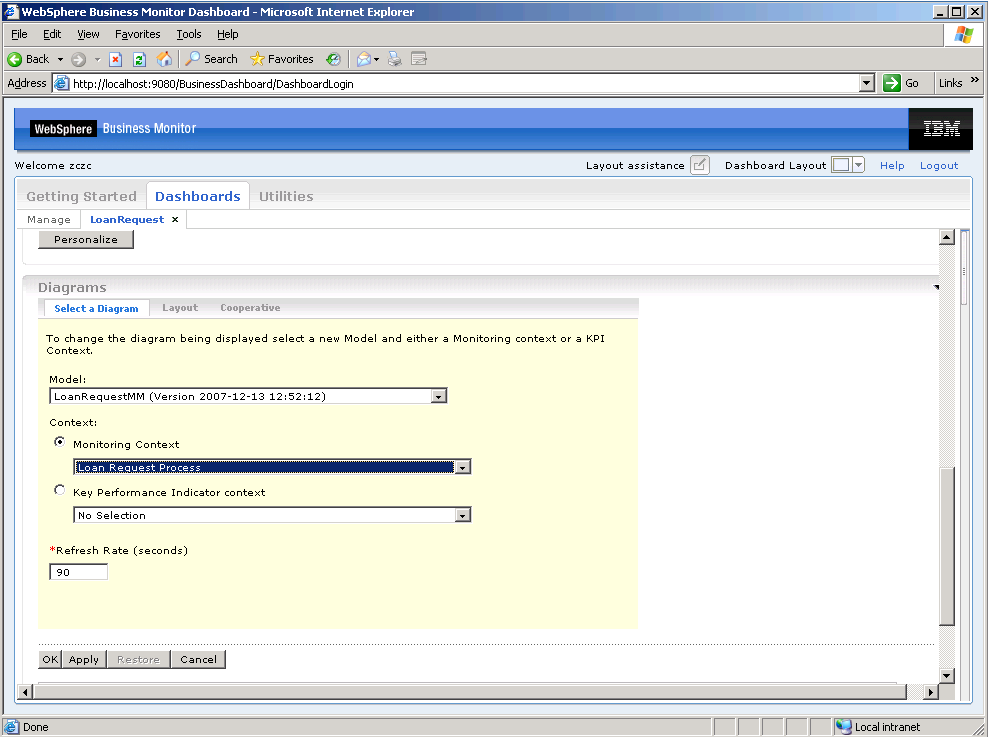
- Click Personalize to open the property page of the diagram view.
- Select the diagram that you want to display.
- Click the Cooperative tab and select Cooperative mode.
- Go to the Instances view, and click the button under the Diagram column (shown highlighted in red in the image below) for the instance that have not been completed. The Diagram view displays the diagram for the instance selected. The current executed activity is shown in green.
A new frame is added to the dashboard under the KPI view as shown below.

The image below is an example of a Diagram view.

Create a dimensions view
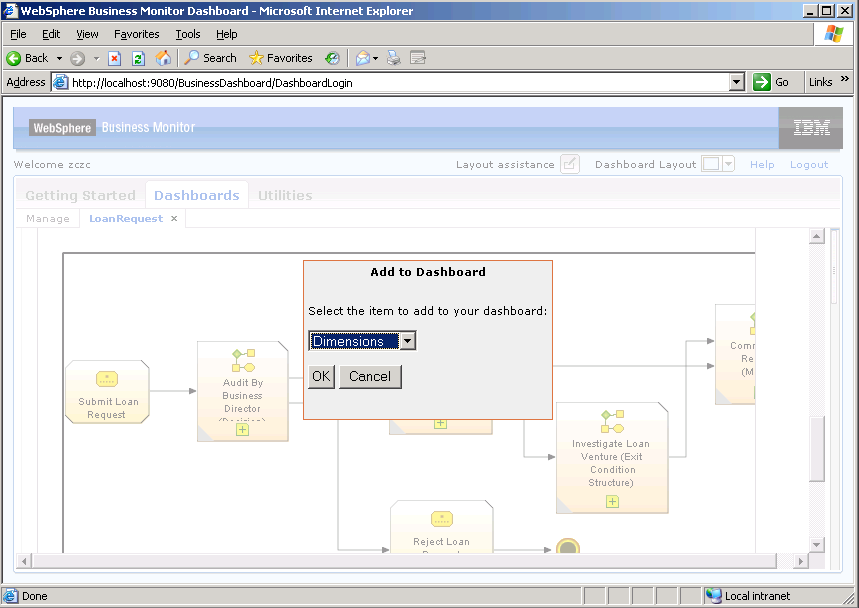
- Click Add to Dashboard.
- On the Add to Dashboard dialog box, select Dimensions from the drop-down list and then click OK.
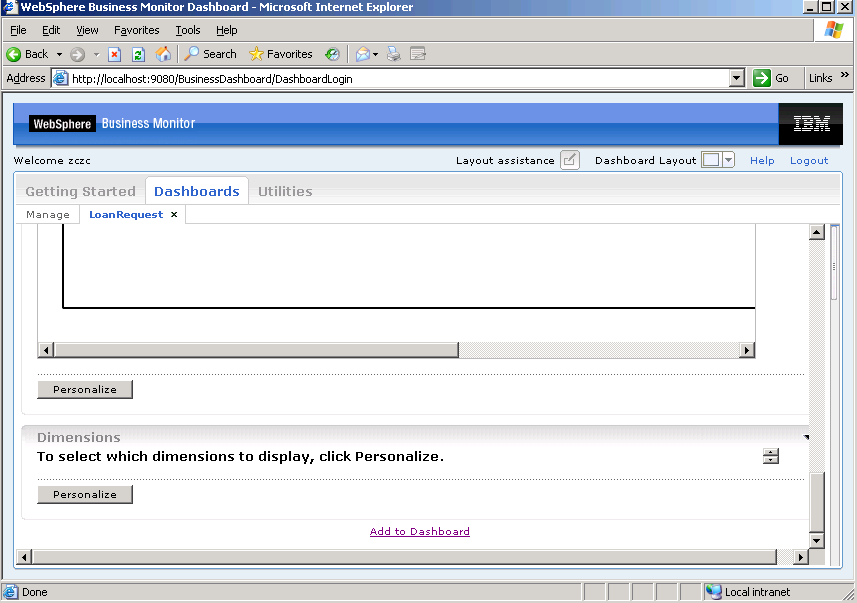
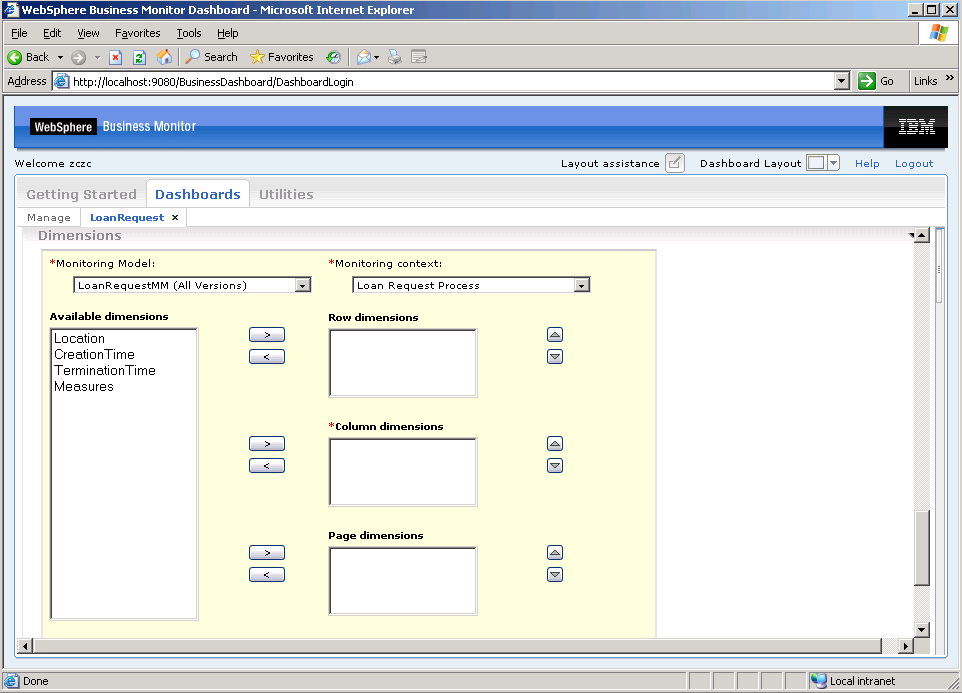
- Click Personalize to open the property page of the dimensions view as shown below.
- From the Available dimensions list:
- Select Location and click > to move it to the Row dimensions list.
- Select Measures and click > to move it to the Column dimensions list.
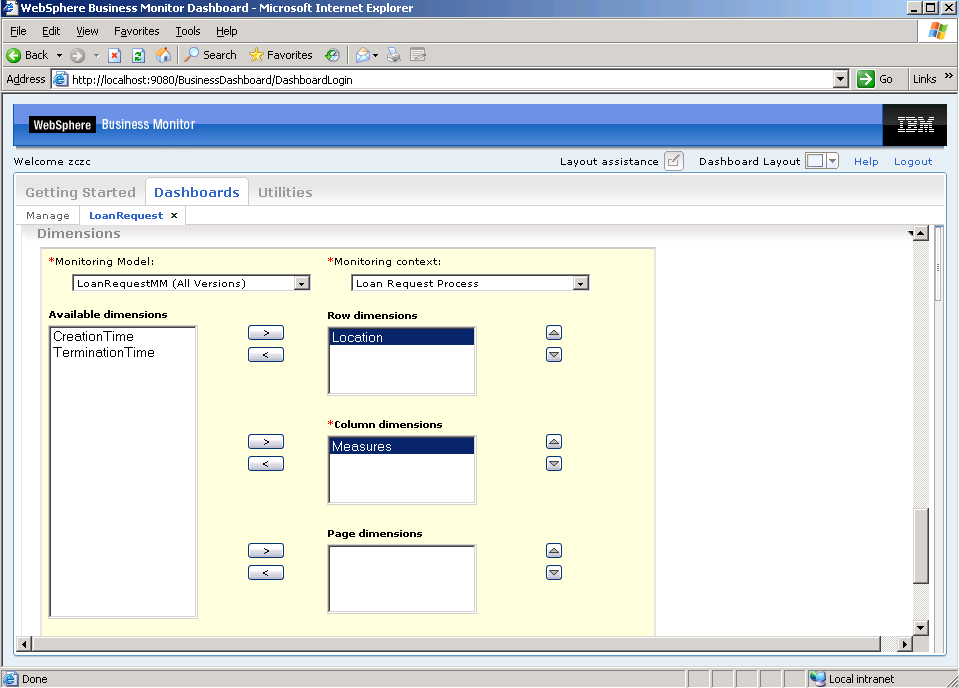
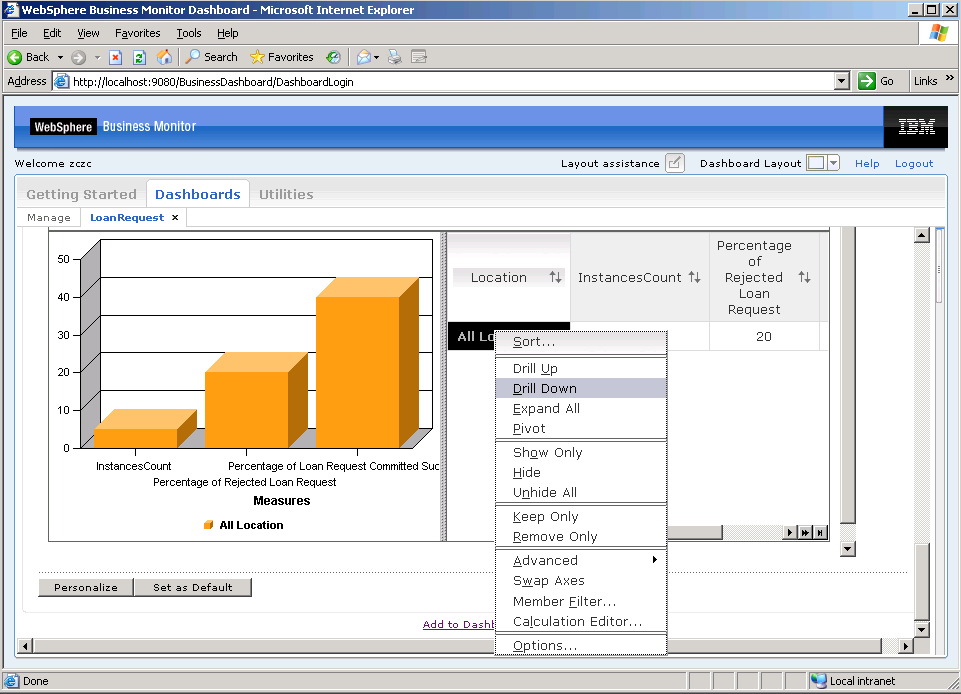
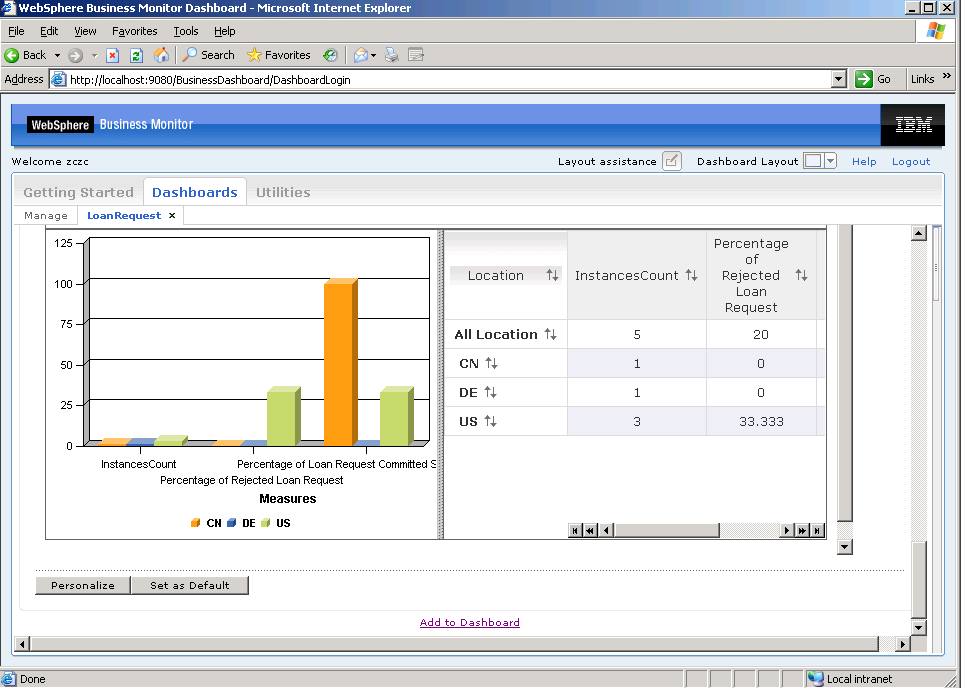
The image below shows an example Dimensions view.
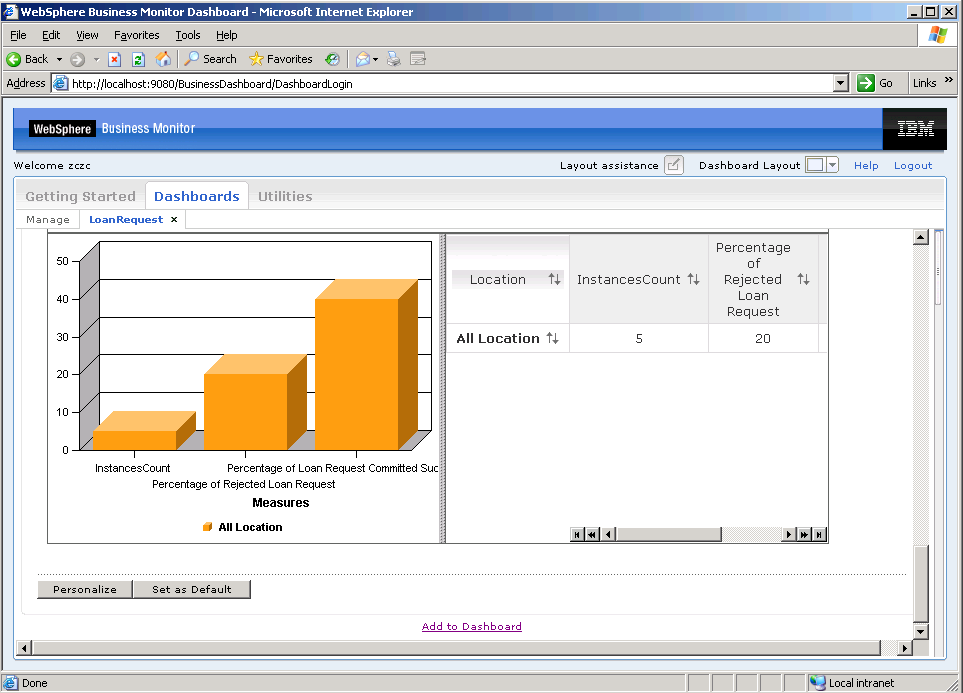
- Right-click All Location, and select Drill Down as shown below.
A new frame is added to the dashboard.
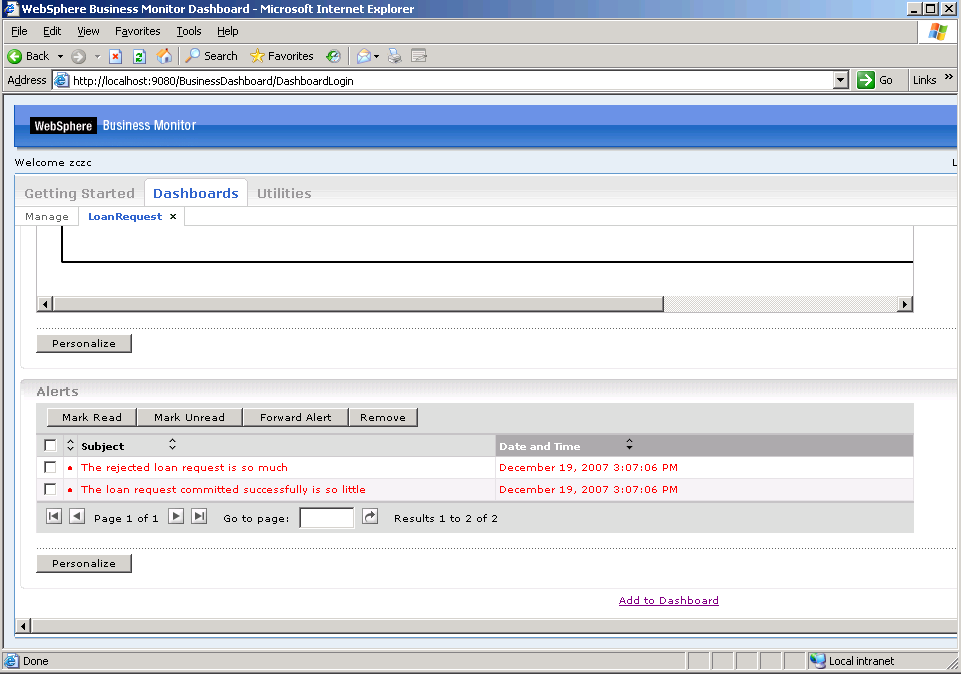
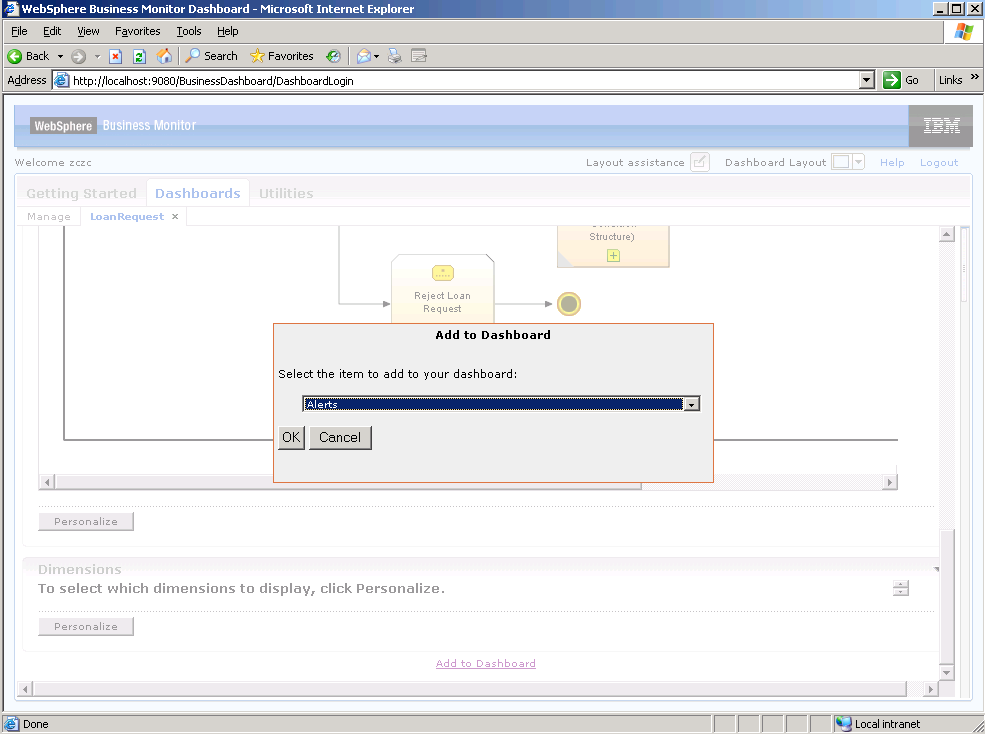
Create an alerts view
- Click Add to Dashboard.
- On the Add to Dashboard dialog box, select Alert from the drop-down list and then click OK.
A new frame is added to the dashboard under the Dimensions view as shown below.
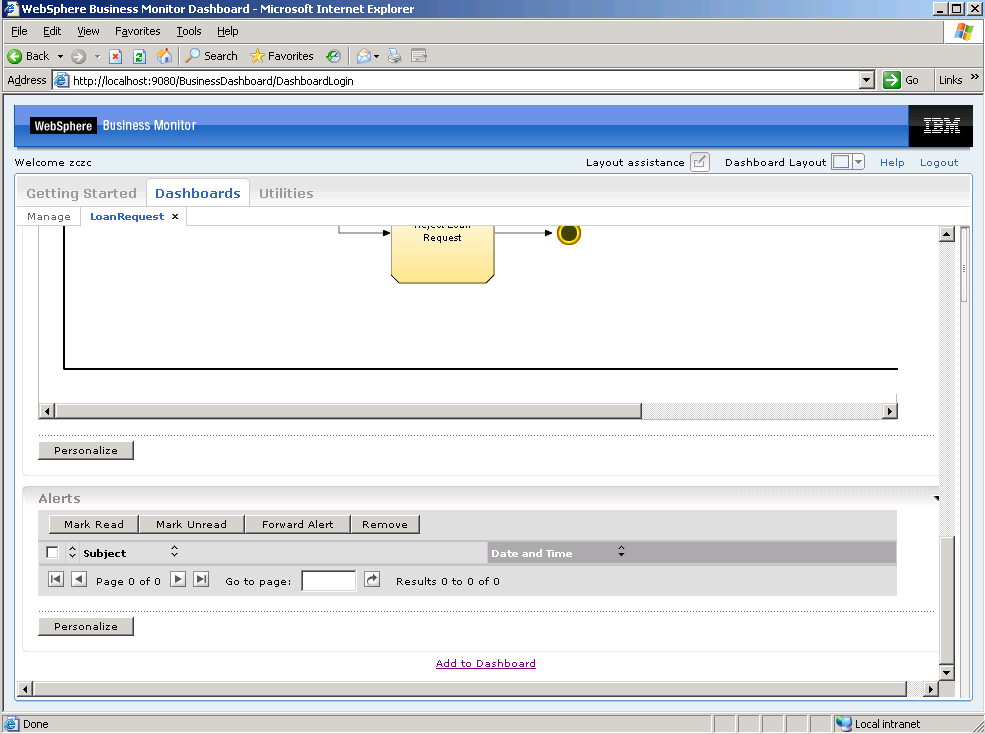
When an alert condition occurs, an alert is displayed.