In this lesson, you will configure WebSphere® Business Monitor to create alerts by configuring Action Services to send notifications when business situation events are received.
The situation events are defined in and sent by the monitor
model as outbound events. The notifications are visible as alerts
in the Alert view on your dashboard.
- Add an alert template for when the percentage of shipped
orders needs attention.
- In the administrative console, select and click New.
- For the template name, enter AlertShip, and then enter any description.
- Select Dashboard Alert. This indicates an alert is sent to the business dashboard's alert view.
- Select User id.
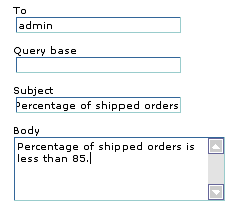
- In the To field, enter admin. This user ID is the user logged into the business dashboard that receives the alert. You must log into the business dashboard with this user ID.
- In the Subject field, enter Percentage of shipped orders. This is the title of the alert in the dashboard.
- In the Body field, enter Percentage of shipped orders is less than 85.
- Click OK.
- Add the binding from the situation event to the action
type of the alert template for shipped percentage situations:
- In the administrative console, select and click New.
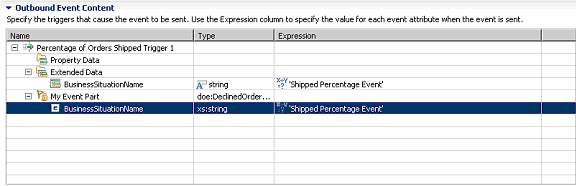
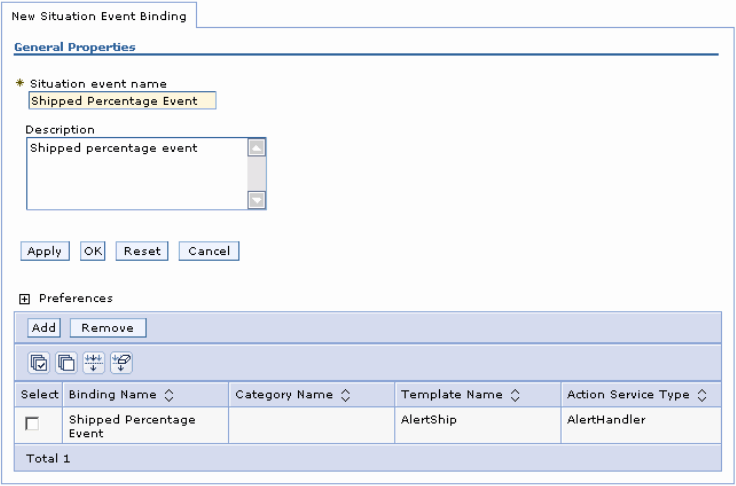
- Enter the situation event name you defined in the model.
You named the business situation Shipped Percentage Event.
The name must match the value in the BusinessSituationName field in
the outbound event. You might want to copy the name from the monitor
model (without the quotation marks).
- Enter any description and then click Apply.
- In the table under Preferences, click Add.
- Enter a binding name, for example Shipped Percentage Event, and then select the template AlertShip.
- Click OK. Notice you now have one action defined
for this situation event. If you had other action templates defined,
then you could add more actions to this event and you could send a
notification for this situation event to multiple destinations using
e-mail, alerts, and Web services.
- Click Ok.
- Add the binding from the situation event to the action
type of the alert template for action processing time situations.
- In the administrative console, select and click New.
- Enter the situation event name that you defined in the model. You named the business situation Order Fulfillment Event. The name must match the value in the BusinessSituationName field in the outbound event. You might want to copy the name from the monitor model (without the quotation marks).
- Enter any description and then click Apply.
- In the table under Preferences, click Add.
- Enter a binding name such as Order Fulfillment
Event, select the template AlertTime,
and then click OK.
- Click OK.
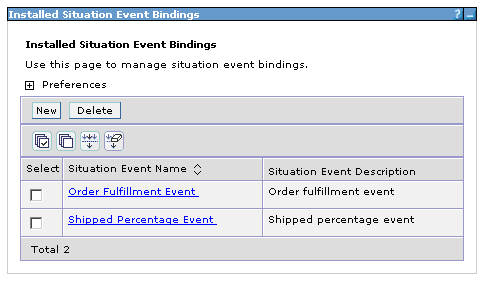
- In the administrative console, select . You
see the two bindings you created.