This end-to-end tutorial introduces you to IBM® business process management (BPM) functionality by showing you how to build and deploy a business process using IBM® WebSphere® Business Process Management Version 6.2. No prior knowledge of the BPM products is required to complete the steps in this tutorial.
Printable version of this tutorial
This tutorial focuses on the technical details that are related to building, running, and monitoring the sample application. One Lotus® form is used throughout the process to convey information from one user to the next. You will use WebSphere® Business Modeler to model the sample and WebSphere Integration Developer to complete the development. You will use WebSphere Business Services Fabric to select the best shipping service endpoint based on policies, WebSphere Process Server and WebSphere Business Monitor Server to run the completed sample and WebSphere Business Monitor to monitor the business process and view business performance using a dashboard. The dashboard is created in Business Space powered by WebSphere, which provides an integrated visual environment.
In addition to this introduction, the tutorial has four major sections:
- Overview
- Explains the scenario used in this tutorial, the data model, and the human tasks that are involved.
- Build it yourself
- Contains step-by-step instructions to build the sample from scratch.
- Run the sample
- Explains how to run the sample using either the artifacts that you download or the artifacts that you created in the Build It Yourself section.
- Download and import the sample
- Explains how to install the downloaded pre-built solutions for this sample
Time required
This tutorial could take approximately four to five days to complete, depending on your familiarity with the products.
Skill level
This tutorial-style sample is designed for new users. Step-by-step instructions are provided to guide you through the process development life cycle, from the beginning to setting up a test runtime server, to designing and developing a process, to finally monitoring the process. You are expected to have some familiarity with the eclipse environment.
System requirements
The sample that is included with this tutorial runs on Microsoft® Windows® operating systems.
Prerequisite software
Before you build the sample, you must install the following products. For the tutorial steps, it is assumed that the products are installed according to the instructions provided in the Installation Details section. Any deviation from the specific versions or instructions may result in differences from the tutorial steps or screenshots. You are advised to follow the installation instructions exactly.
- WebSphere Business Modeler Advanced V6.2.0.1
- WebSphere Integration Developer V6.2.0.1
- WebSphere Business Monitor development toolkit V6.2.0.1
- WebSphere Business Services Fabric tool pack V6.2.0.1
- Lotus® Forms Designer V3.5
- Lotus Forms Viewer V3.5 Fix pack 1
- Lotus Forms Server V3.5
For more information about the products that are involved in this tutorial, refer to the product documentation.
Installation Details- Install the WebSphere V6.2 products
There are two options for installing the required WebSphere products, choose the appropriate option for your environment.
- WebSphere Dynamic Process Edition (WDPE) Installation
Use this option if the machine you are installing on does not have any other products installed with IBM Installation Manager. Check in your Start > Programs menu for IBM Installation Manager. If you see this entry, skip this step and continue at step 1b: Individual Product Installation
- Extract the files of the WDPE V6.2 installer. This will create the following directory structure:
- Download the files for each product and extract them into the appropriate subdirectory in WDPEInst
- Run installers/install_wdpe_win.exe and follow the instructions in the installer
Continue at Step 2: Update the WebSphere Products to V6.2.0.1
- Extract the files of the WDPE V6.2 installer. This will create the following directory structure:
- Individual Product Installation
Run this installation procedure only if you did not install the WebSphere Dynamic Process Edition in step 1a.
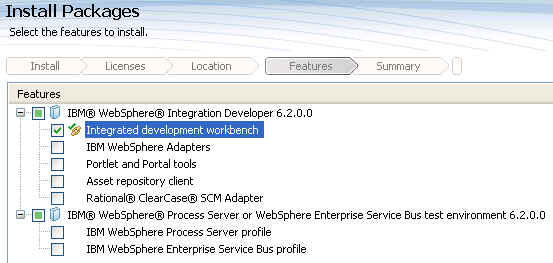
- Install WebSphere Integration Developer with the following features:
- Integrated development workbench (selected by default)
- The test environment without a profile. Be sure to uncheck the profile
 Note: IBM Installation Manager will install or upgrade with the first product that is installed from the IBM WebSphere Dynamic Process Edition suite. In this sample, the IBM Installation Manager will be installed when WebSphere Integration Developer is installed.
 - Install WebSphere Business Modeler Advanced V6.2
- Install into the WebSphere Integration Developer package group
- Use default installation features:
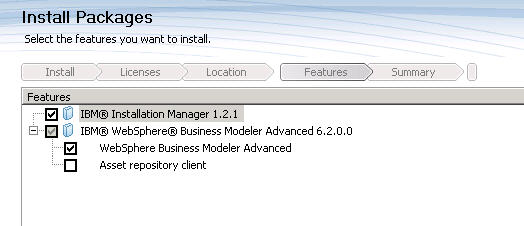
- Install into the WebSphere Integration Developer package group
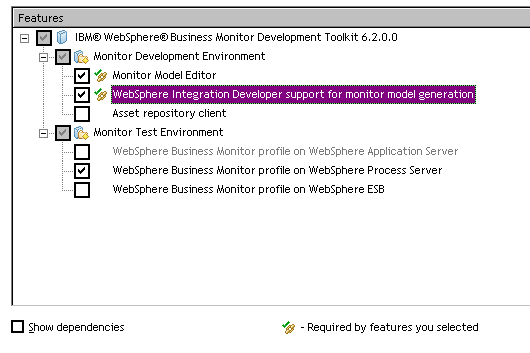
- Install WebSphere Business Monitor Toolkit
- Install into the WebSphere Integration Developer package group as you did for WebSphere Business Modeler
- Select features:
- Monitor Development Environment: Monitor Model Editor
- Monitor Development Environment: WebSphere Integration Developer support for monitor model generation
- Monitor Test Environment: WebSphere Business Monitor profile on WebSphere Process Server
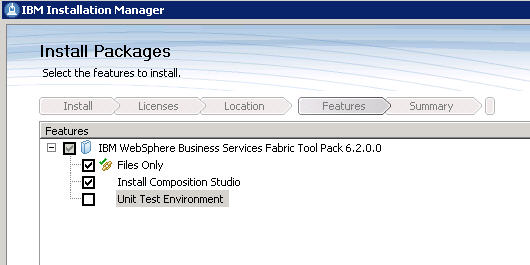
- Install WebSphere Business Services Fabric tool pack V6.2 into WebSphere Integration Developer with the Files Only and the Install Composition Studio features selected.
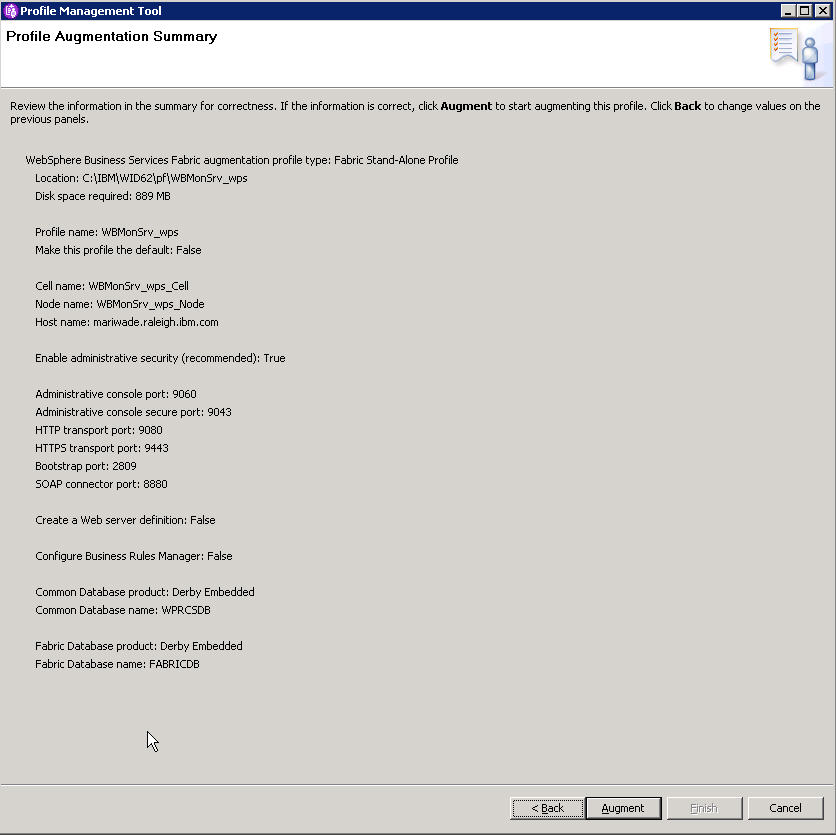
- Augment the Monitor server profile with Fabric functionality.
- In order to start the augmented monitor profile without exceptions the OSGi cache needs to be flushed. Delete all folders starting with org.* in <WID62_Install>\pf\WBMonSrv_wps\configuration.
- Run the Profile Management Tool (PMT). This can be found at: <WID62_Install>\runtimes\bi_v62\bin\ProfileManagement\pmt.bat .
- Click Augment to augment the existing monitor profile. If the defaults were used this will be named WBMonSrv_wps.
- Select WebSphere Business Services Fabric as the augment to apply to the monitor profile.
- Select Typical profile augmentation as the profile augmentation option.
- Enter the user id and the password for the monitor profile created during the installation of the WebSphere Business Monitor toolkit. The default username is admin and the default password is also admin.
- Review the summary and then click Augment
- Validate that the augment was successful by reviewing the log. The log is located at <WID62_Install>\bi_v62\logs\mangeprofiles\WBMonServ_sps_augment.log. Near the end of the log, there should be a message Profile augmentation succeeded.
- Install WebSphere Integration Developer with the following features:
- WebSphere Dynamic Process Edition (WDPE) Installation
- Update the Websphere Products to V6.2.0.1
- Use IBM Installation Manager to update the products to V6.2.0.1. All products are installed into the WebSphere Integration Developer package, so this is the only package that needs to be updated.
- On the next screen, select Show All and select Version 6.2.0.1 for each productNote: Other versions may be recommended and highlighted, however the steps and screenshots in this tutorial are for Version 6.2.0.1 and are not guaranteed to be the same in later versions.
 Note: You may receive a message informing you that you need to update the IBM Installation Manager. If this is your first time using the IBM Installation Manager to update an installed package. Select yes.
Follow the prompts for the remainder of the update installation.
- Use IBM Installation Manager to update the products to V6.2.0.1. All products are installed into the WebSphere Integration Developer package, so this is the only package that needs to be updated.
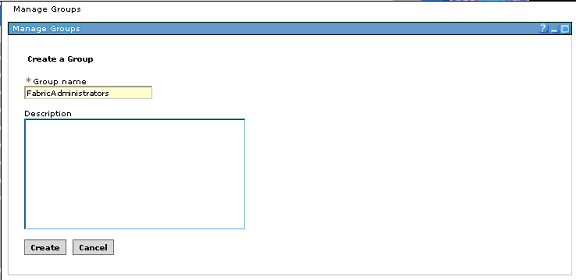
- Create the FabricAdministrators group and add the admin user to that groupNote: Even though there is a user created by the installer that has WebSphere Process Server administrative privileges, this user does not automatically have Administrator privileges to do Governance in Business Space. To grant this user Administrator privileges, a group called FabricAdministrators must be created and the admin user (or other users) must be added to the group. In this sample, which uses the default VMM, this can be done in the WebSphere Process Server administrative console. If you were using LDAP, Local OS, etc. you would create this group in the appropriate system.
- Start WebSphere Integration Developer with the default workspace
- In the Servers view, right click the server WebSphere Business Monitor Server and select Start. (This will take a few minutes)
- When the Server status is Synchronized, right click the server again and select
- Log into the WebSphere Monitor Server admin console. Navigate to "Users and Groups/Manage Groups". Create a new group with name FabricAdministrators.
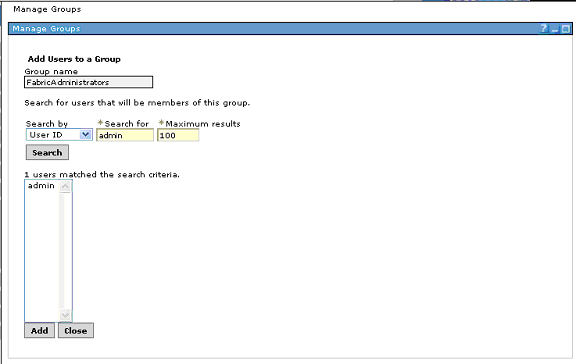
- Add user ID admin to the FabricAdministrators group.
- Close the Administrative console.
- In the servers view, right click the WebSphere Business Monitor server and select stop.
- After the server status changes to stopped, exit WebSphere Integration Developer.
- Install Lotus Forms Designer V3.5 into WebSphere Integration Developer. This will also enable it in WebSphere Business Modeler.
- Create a directory called forms_designer in the same parent directory where you extracted the Websphere Integration Developer installation files. This directory should now contain 3 directories: disk1, disk2 and forms_designer.
- Extract the Lotus Forms Designer V3.5 files in the new forms_designer directory.
- Run the WebSphere Integration Developer launchpad and select the option to Install Lotus Forms Designer
- During the installation you will be prompted for a valid installation directory where an IBM Software Development Platform package is installed. This is the WebSphere Integration Developer directory. For example, if you installed using the WDPE installer, the default directory is C:\ProgramFiles\IBM\WDPE\WID62. If you installed the WebSphere products individually, the default directory is C:\ProgramFiles\IBM\WID62
Refer to Installing Lotus Forms software in the WebSphere Integration Developer product documentation for full install information.
- Install Lotus Forms Viewer V3.5 Fix pack 1 into WebSphere Integration Developer. This will also enable it in WebSphere Business Modeler.
Because this is a fix pack, You must use a different install procedure, not the launchpad. To install IBM Lotus Forms Viewer 3.5 fix pack 1 perform the following steps:
- In your Web browser, go to http://www.ibm.com/support/fixcentral.
- Download IBM Lotus Forms Viewer 3.5 fix pack 1.
- Double-click the downloaded file.
- Follow the instructions in the installation wizard.
- When prompted for the install location, enter the WebSphere Integration Developer installation directory.
Refer to Installing Lotus Forms software in the WebSphere Business Modeler product documentation for full install information.
- Install Lotus Forms Sever into WebSphere Integration Developer.
Refer to Installing Lotus Forms software in the WebSphere Integration Developer product documentation for full install information.
- Create a directory called forms_server in the same parent directory where you extracted the Websphere Integration Developer installation files. This directory should now contain 4 directories: disk1, disk2, forms_designer and forms_designer.
- Extract the Lotus Forms Designer V3.5 files in the new forms_designer directory.
- Run the WebSphere Integration Developer launchpad and select the option to Install Lotus Forms Server - API
- When prompted for the install location, enter the WebSphere Integration Developer directory.
- Install the SDK version of the server
- Select the checkbox for deploy to WebSphere Process Server
- For the location of the server, use <WID62_Install>\runtimes\bi_v62