In "Build in yourself" we already completed the execution of the
customer management solution executed by the Case Manager and the
BPM System. For the handling of human tasks we used the Case Manager
Client for the ACM - and the BPM Portal for the BPM human tasks. In
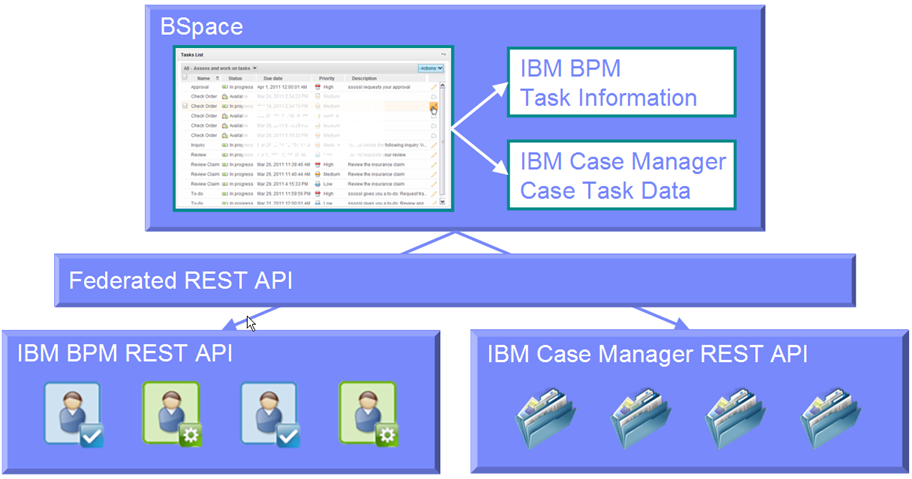
this chapter we will use the Unified Client to display and work on
tasks from a common Task List widget.
From an installation and configuration point of view we need to
have following pre-reqs as part of the cross-cell setup and solution
installation available:
- Add a LDAP repository to the ICM Server. For more information
refer to Integrating
with IBM Business Process Manager.
- Add a LDAP repository to the BPM Server.
- Configure single-sign on; share LTPA keys between servers, i.e.
establish it on the ACM as well as BPM Server. For more information
refer to Exporting
the LTPA key from Content Engine.
- Register BPM Widgets in the Case Manager Server. For details see Registering
BPM Widgets.
- Create a Federation Domain - see below.
- Import and deploy the BPM process application.
You need to do this if you just want to run the sample, but not to
"Build it yourself".
See Import
the BPM Process if familiar already and Create
and activate a snapshot and make it the default on this.
- Import and deploy the ACM solution.
You only need to do this if you just want to run the sample, but not to
build it.
See Import
the ACM Solution if familiar already and Extend
case to create and test a case task that runs a BPM process on this.
1.1 Create a
Federation Domain
To create federation domains in IBM BPM, the
AdminTask
createBPMApiFederationDomain is provided. It was introduced in
BPM
Version 7.5. The command is documented in the BPM InfoCenter.
Here are the sample commands to add federation domains on cell level
using cell targets. The domain ICM will only contain IBM Case Manager,
the domain BPM_ICM will contain both IBM Case Manager and IBM BPM.
- Open a wsadmin prompt using
PROFILE_HOME/bin/wsadmin -lang jython
- Create a federation domain that contains the IBM Case Manager
system
AdminTask.createBPMApiFederationDomain('[-name
ICM -addTarget [[ICM_CELL NAME "" "" ""]]]')
- Create a federation domain that contains both the IBM Case
Manager and the IBM BPM system
AdminTask.createBPMApiFederationDomain('[-name BPM_ICM -addTarget
[[BPM_CELL NAME "" "" ""][ICM_CELL NAME "" "" ""]]]')
where BPM_ICM is your
federated domain name.
- Save the configuration
AdminConfig.save()
Let's collect the info we need for this setup:
BPM user name
tw_admin
/ password
tw_admin, the BPM cell name
fmtc5168Node01Cell and ICM cell name
P8Node01Cell.
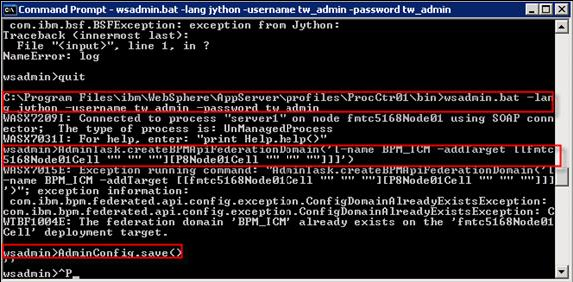
The resulting wsadmin command for this test environment: .
- On BPM server (fmtc5168), navigate to
C:\IBM\WebSphere\AppServer\profiles\ProcCtr01\bin
wsadmin.bat -lang jython -username admin
-password admin AdminTask.createBPMApiFederationDomain('[-name BPM_ICM
-addTarget [[fmtc5168Node01Cell "" "" ""][P8Node01Cell "" "" ""]]]')
- Save the configuration
AdminConfig.save()
The result should look like similar to this:
Verifying federation domains
Use the listBPMApiFederationDomains command to list
all federation
domains for your environment. This command lists all federation domains
that exist for a server or a cluster. The Federation API allows you to
display processes and tasks created in Process Designer and Integration
Designer in the same task list. The Federation API is automatically
configured with your product as part of the REST Services Gateway
application. If you want to change that configuration for your
environment with multiple deployment targets, use wsadmin commands to
create and manage federation domains.
If the application server is not running, supply the -conntype NONE
option when running this command.
Jython example for listing a server's federation domains:
AdminTask.listBPMApiFederationDomains('[-nodeName
myNode -serverName myServer]')
Since we want to see the server scope, we need to omit all parameters.
The resulting wsadmin.sh command for this test environment:
On BPM server (fmtc5168), navigate to
C:\IBM\WebSphere\AppServer\profiles\ProcCtr01\bin. Enter
- wsadmin.bat -lang jython -username admin
-password admin
- AdminTask.listBPMApiFederationDomains()
The result should look something like this for a BPM_ICM and a BPM_ACM
Domain:

In the task list of the unified client we want to display business
attributes for endusers to organize their workitems. In ACM Case
Manager this is done via attributes of the inbasket, in BPM we use
Business Data Search variables.
2.1 Identify business attribute for BPM- and ACM human tasks
Open the Process Designer and access the process application
CustomerManagementAirLine [CSMAL]where these business attributes are
defined.
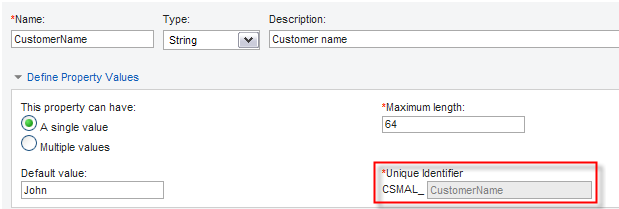
- Select the ComplaintAnalysis_BPD > Variables >
Details: CustomerName.
- Under Business Data Search
check Available in Search, and
define the Search Alias as CSMAL_CustomerName.
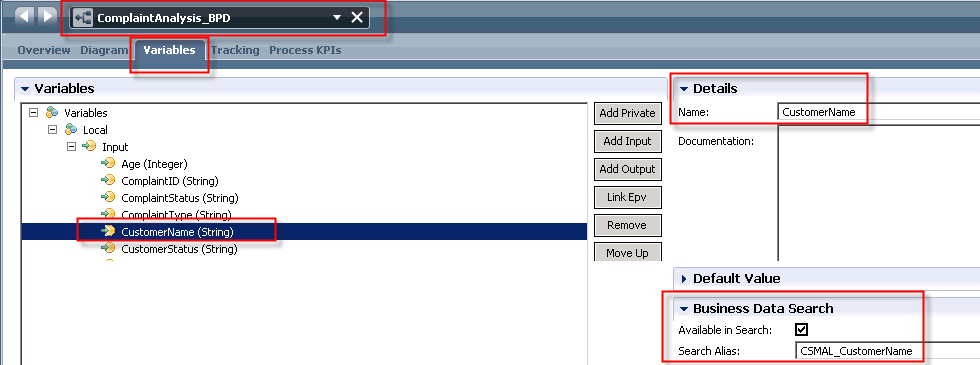
In a similar way is the ComplaintID, ComplaintStatus, and
ComplaintType defined.
- The corresponding variable name of the BPM attribute CustomerName is CSMAL_CustomerName
which can be retrieved from the Case Properties in the Case Manager
Builder.
2.2 Define the structure of the Task List of the Unified Inbox
To display the same attributes in the unified ACM and BPM task list we
need to define the structure of the columns to be displayed.
Verify ACM Inbasket
The Case Manager Client columns for the Role Agent specified are
shown in the screenshot below.

Create and share a Saved Search (BPM query)
As you will likely want to provide the same customized business
space to many users, you need to share the saved searches. Only
administrators can share saved searches using the BPM Portal. Complete
the
following steps to create and share a saved search which filters
process apps for the acronym CSMAL and display of the business
CustomerName, ComplaintID, and ComplaintStatus.
- Login to BPM Portal using the url http://localhost:9080/portal/
using a userid
tw_admin and
password tw_admin.
The My Tasks page and the Inbox opens. The default column
names are shown below.

- Click Show Search on the far right.

The Search Condition Window opens.
One Search Condition with Task
Status - Equals - New or Received is listed.
- Define Saved Search to filter on all task that belong to the
process app with acronym CSMAL.
Press the Add New Condition
and
Replace << Choose One >> by Process App, keep Equals as comparison
parameter and enter CSMAL as
acronym name
for the process app to be used in this filter.

Press More
to show the available columns.
The search conditions that you specify
here are applied as filters in Business Space. You can specify
additional filters using the column headers in
the list widgets.
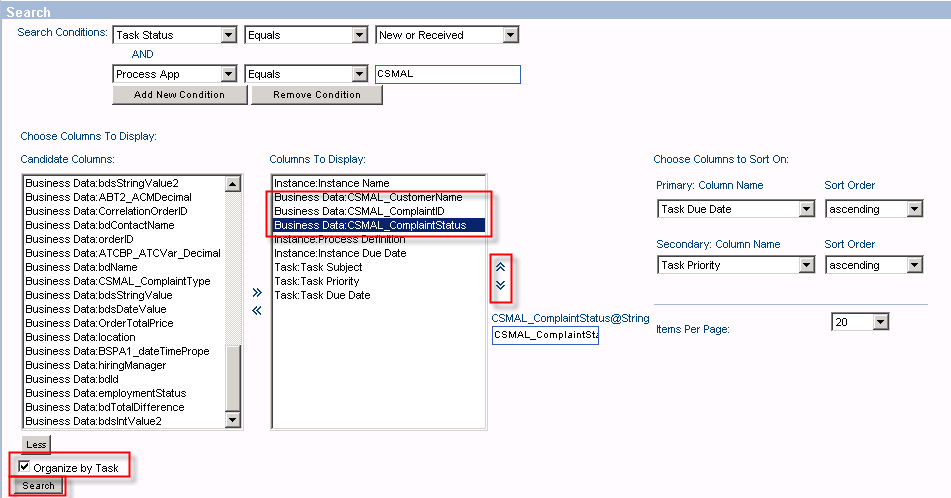
- Select the business attributes of interest previously identified as search parameters. Identify them in the Candidate Columns list.
Select Business Data:
CSMAL_CustomerName, CSMAL_ComplaintID, and CSMAL_ComplaintStatus.
Press the ">>" to move
these attributes to the Columns to
Display area.
Afterwards move them up according to the sequence below following the
Instance:Instance Name.
Note
Although you can define default
sorting
criteria and number of items per page for the saved search, these are
not used in Business Space but in Process Portal. However, the number
of items is
automatically fitted to the view by default.
- Set the flag for Organize
by Task.
This property
determines whether the saved search is available in the Tasks widget or
in the Processes widget (flag not set).
Specify Chose Columns to Sort On
with Primary: Column Name: Instance
Name and Sort Order: ascending.
Currently you can't save this search. After you have executed this
search (query) the first time and you are satisfied with the results
the Save Search is displayed again.
- Press Search to run the
search and check
the
result.
Modify the search until your are satisfied with the result set
and arrangement of columns.

- Click Save Search to save the search.
An Explorer prompt pops up.
Enter the name of the search (query table) using a
prefix and name, everything in capital letters. Enter the name CSMAL.ACMBPMTASK_QT.
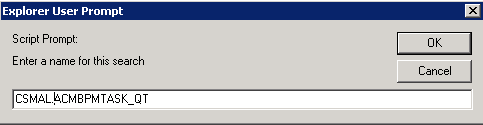
Press OK.
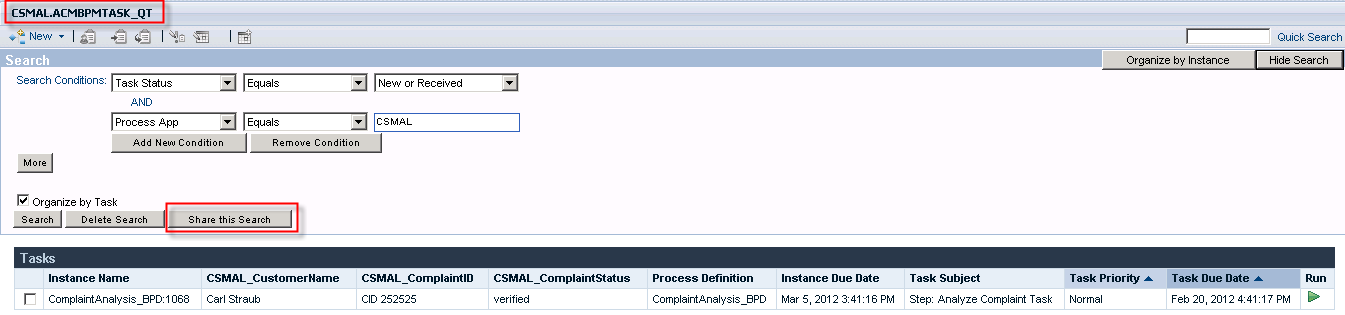
- Share the search with other endusers.
Click the CSMAL.ACMBPMTASK_QT.search
shown in the
Navigator again.
Click Show Search.
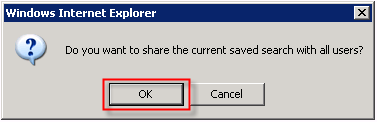
When you are satisfied with the search results and specification click Share
this Search to make it
available to all users.
Confirm to share the saved
search with all users.
To use the Saved Search in Business Space you will have to update
the Tasks List widget settings. This is covered in section Configure
Unified Inbox. Before we do this we have to configure the Inbasket
in the ACM
Server to link with the BPM process application.
3 Configure the
Inbasket and Unified Inbox
Under pre-reqs we registered the BPM widgets to the ACM server, as
Business Space in this setup runs on the ACM Server.
3.1 Configure the Inbasket
Configure the in baskets of the ACM solution for usage with the ICM
REST
API.
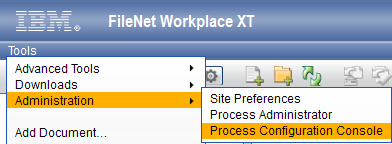
- Login to WorkplaceXT (context
root is /WorkplaceXT) as P8Admin using the url http://localhost:9080/WorkplaceXT
- Select Tools >
Administration > Process Configuration Console
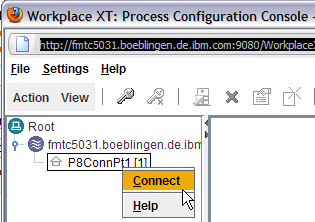
- Select your connection point and click the icon for Connect (is a key icon in the
palette)
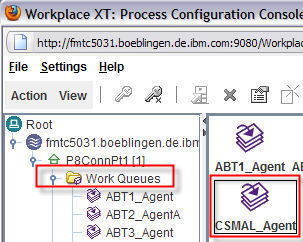
- Under Work Queues click CSMAL_Agent
- In the dialog switch to In-baskets.
- Select ICM Role In-basket AgentInBasket.
Switch to Custom Attributes.
- Enter the new attribute OneBPMQuery
to string and CSMAL.ACMBPMTASK_QT.
Enter a second new attribute OneBPMSolution
to string and CustomerManagementAirLine.
Configure_the_Inbasket_and_Unified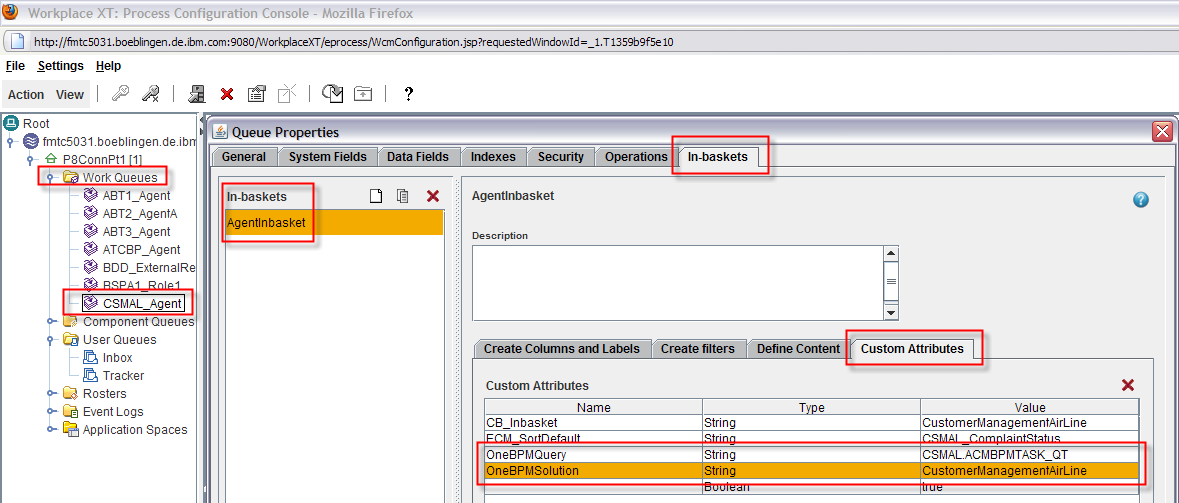
Press OK.
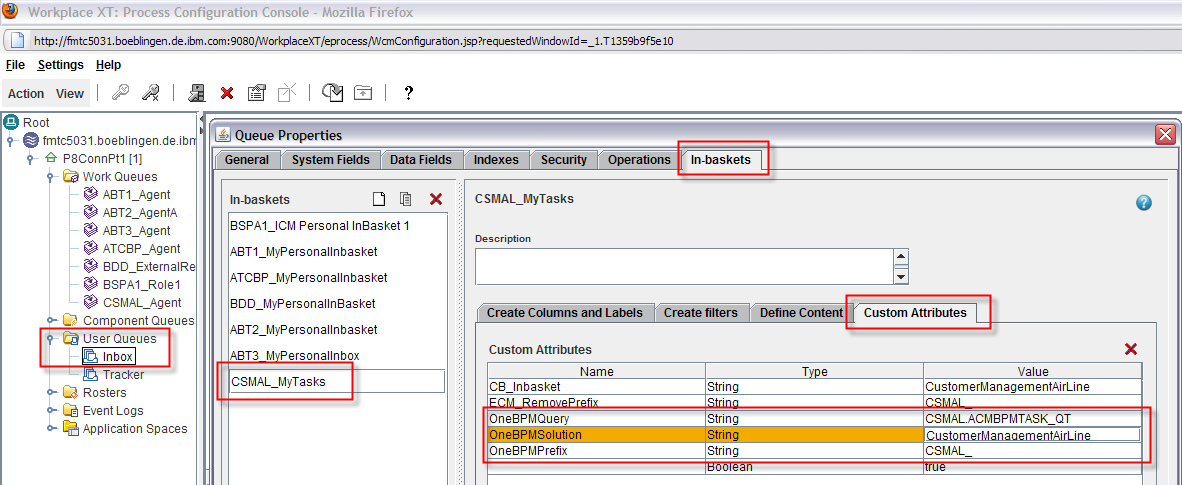
- Under User Queues
click Inbox.
- In the dialog switch to In-baskets.
- Select the ICM Personal InBasket CSMAL_MyTasks.
Switch to Custom Attributes.
- Enter the new attribute OneBPMQuery
to string and CSMAL.ACMBPMTASK_QT.
Enter a second new attribute OneBPMSolution
to string and CustomerManagementAirLine.
Enter a third new attribute OneBPMPrefix
to string and CSMAL_.
Press OK.
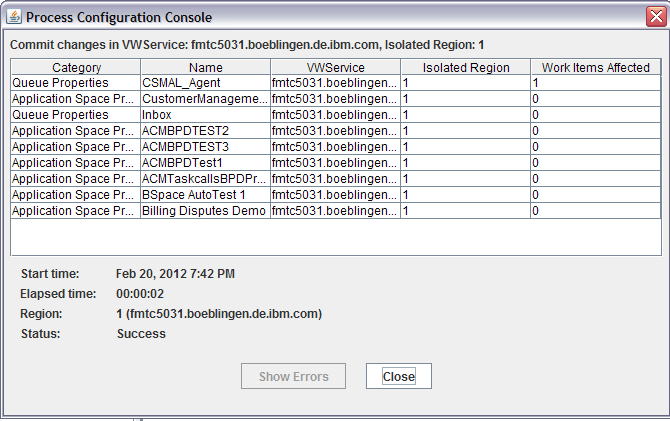
- In the palette click the icon to commit the changes.
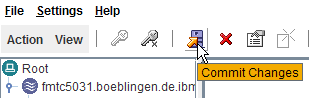
Confirm to Commit Changes
and wait for successful completion.
Manage Roles
Finally we need to assign users to the solution role Agent as described
in
Manage
Roles. (Might have been done already when you performed the "Build
it yourself").
- Login to Case Client (context root is /BusinessSpace) as P8Admin.
- Click Go to spaces.
Click CustomerManagmentAirLine.
- Click Manage Roles.
- Click Add Members.
- Search for users in our shared
LDAP directory. Click Add, then
OK and OK.
3.2 Configure Unified Inbox
The ACM system automatically configures a space called
CustomerManagemenAirLine, with the same name as the solution, but for
the display of case task only. Therefore we want to create a new space
based on the Unified Inbox Template.
- Logon to the ACM Case Client (BSpace
http://localhost:9080/CaseClient) as a user with administrative rights,
in our case buser1.
Note
P8admin is not registered to shared LDAP, same as the tw_xxxx users in
the BPM System.
- Press Manage Spaces > Create
Space.
- Enter your own name, here Unified
Inbox ACM-BPM and create a new space using the template Integrated Inbox.
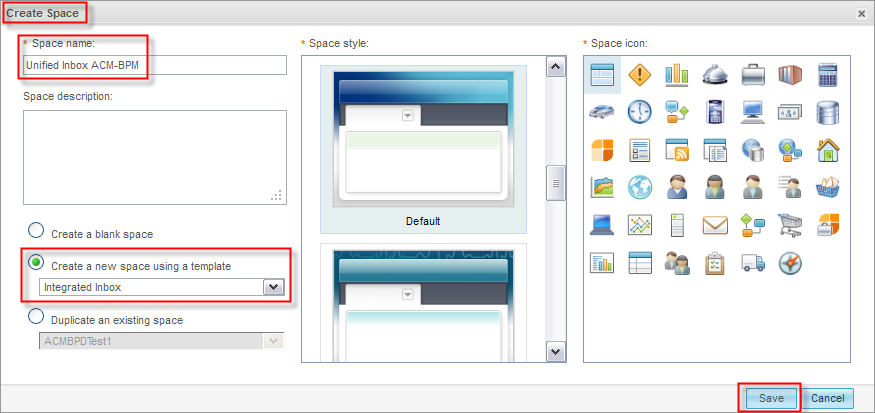
Press Save.
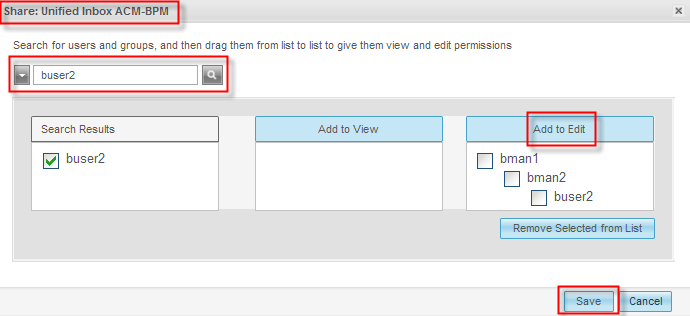
- Share the new Space with other users.
Next to the Unified Inbox ACM-BPM select Actions > Share.

- Search for and select the
users you want to allow to edit the setting.
Press Add to Edit. Press Save.
- Click the new space to edit it.
Press Edit Space.
For the page Inbox open the small
arrow for the drop-down list, i.e. not Actions.
Select Edit Settings.

- The Inbox window with Content tab opens.
From Select list to display chose the federation domain, which
restricts the list of potential task list / query filters.
Press Add… .
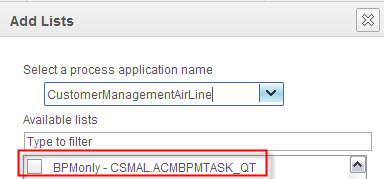
The Add Lists window opens.
From the drop-down list select the process application CustomerManagementAirLine.
The Available Lists (Type of filter) shows the ones
applicable for this federation domain.
Select BPM_ICM.CSMAL.ACMBPMTASK_QT.
Note
Select the federation name BPM_ICM as created under Create a Federation Domain
and not default as shown below.
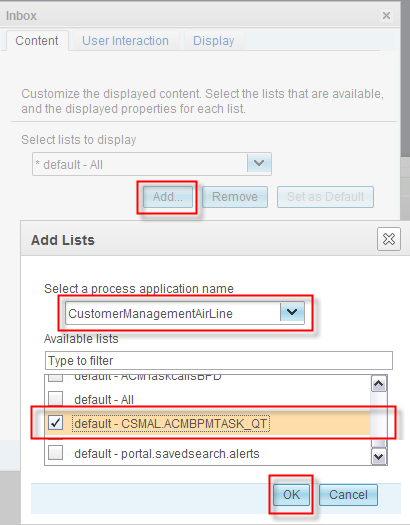
Press OK. Press OK.
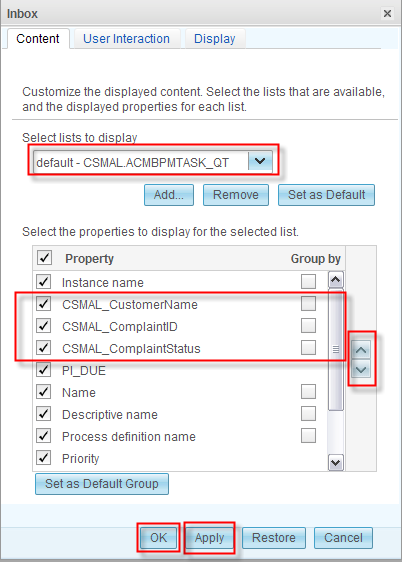
- Ensure that the list to display in the BPM_ICM.CSMAL.ACMBPMTASK_QT.
Arrange your custom properties in such a way that they are in
front of the list, i.e.
move the attributes
CSMAL_CustomerName,
CSMAL_CompaintID, and
CSMAL_ComplaintStatus up and down in a similar way than shown
below.
As a result of this, when you see the Inbox of the Business Space
managed by the ACM Server you see the unified task list in a similar
way than the saved search in the BPM Portal.
Press the twisty next to All and select the CSMAL.ACMBPMTASK_QT BPM query (saved
search).

- Select and start any task that you have in the Inbox.
BSpace' page navigation switches to the Work on Tasks page and displays
e.g. the Analyze Complaint Task Coach.
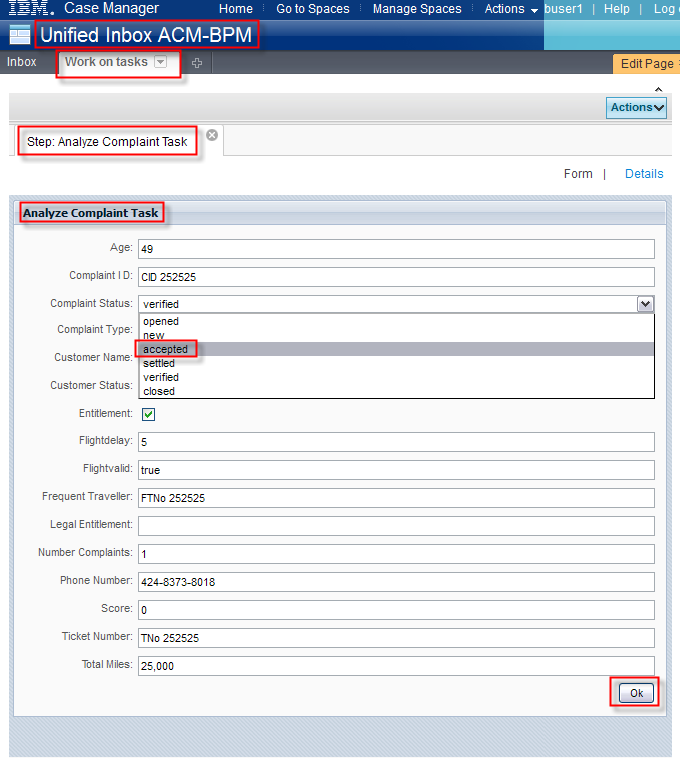
Verify the data and set the ComplaintStatus
from verified to accepted.
Press Ok.
- Press Save. Press Finish Editing
to save your settings.
Congratulations !!! You have successfully performed this sample on the federated or unified client !!!