Part 1: Inbound
Integration
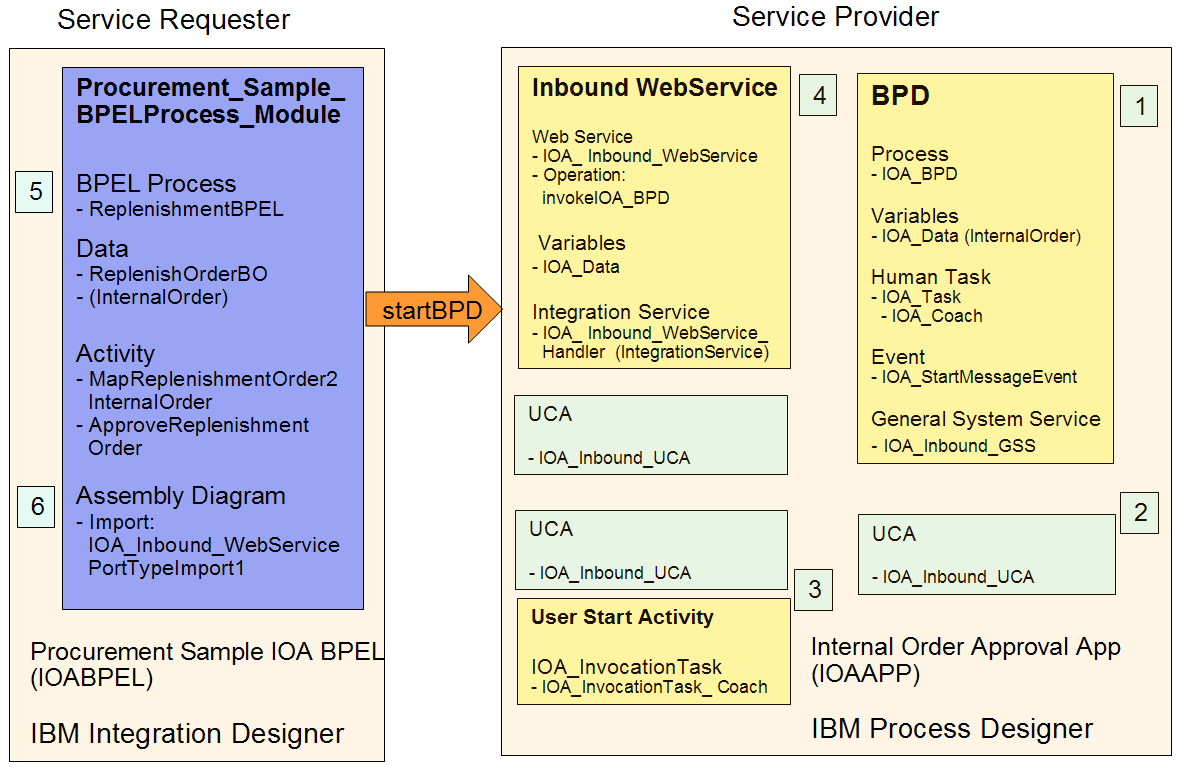
The
Web Service Integration between the BPEL process and a BPD uses an SCA
Import on the BPEL side and a Web Service inbound integration including
an Under Cover Agent (UCA) on BPD side. The development step including
the stepwise verification of the developed artifacts is shown in the
figure below.
Develop inbound web service integration
1. Create BPD
- Create a Process Application named Internal Order Approval App .
Open the PD. Press Create New Process App. Enter Internal Order
Approval App for the name and IOAAPP
for the acronym. Press Create.
The Process App is created. Press Open
in Designer.

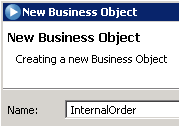
- Define a data object InternalOrder
In the project tree highlight Data and then click the plus sign
(+). Create New > Business Object.

Enter the new business object name Internal Order.
Press Finish.
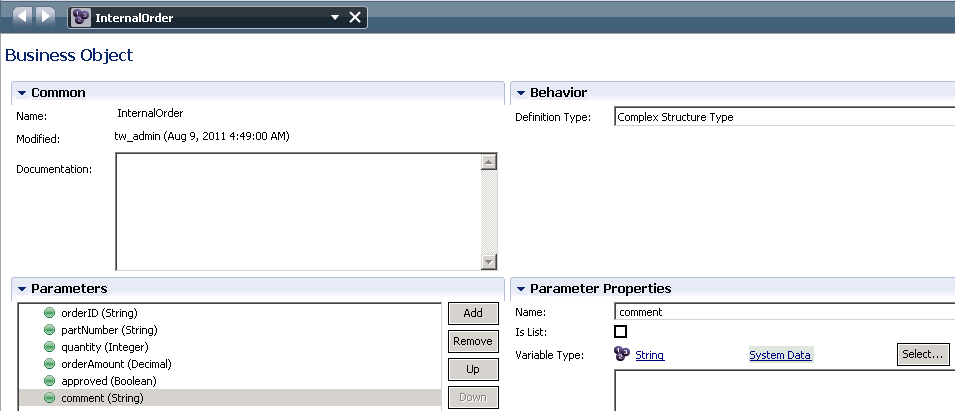
Add following the Parameters and
Variable Types listed in
the screenshot below.
- Define a BPD IOA_BPD
In the project tree select the + sign next to Processes.
Create New Business Process Definition.
Enter the new business process definition name IOA_BPD.
Press Finish.
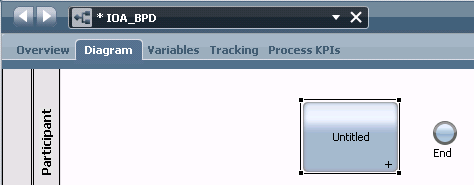
Drag an Activity from the tools palette on the right into to
Participant lane.
Delete the Start node.
Note:
When a BPD is initiated via a Start node you should expose
starting of the BPD to All users or the user group to be authorized.
See the Exposing section under the overview tab. When the BPD, however,
is started via a Start Messsage Event using an UCA, than you shouldn't
expose the start to anyone.
Open the Variables tab. Press Add Private. For the Name enter IOA_Data.
Select Variable Type and
chose InternalOrder.
Press Ctrl + S to save the
BPD.

- Define Internal Order Approval Task IOA Task
Specify the name of the Human Task in the participant lane under
Properties to IOA Task.
Right-click the human task and select Activity
Wizard ...
Stay with the Service Type as Human Service and Create a New Service
with the above task name. Press Next.
Stay with the parameter selection with IOA_Data (InternalOrder) as Input and
Output equals to true. Press Finish.
- Double-click the IOA Task
which shows the service implementation details of it. Rename the coach
to IOA Coach.
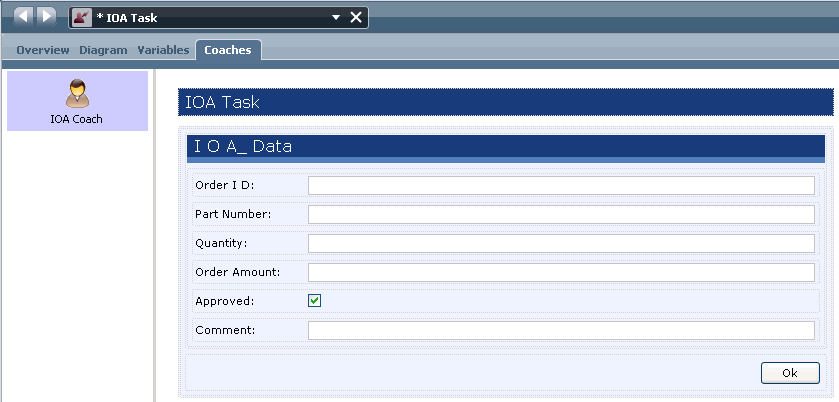
Double-click the coach which opens and allows to verify the associated
form. Save the IOA Task.
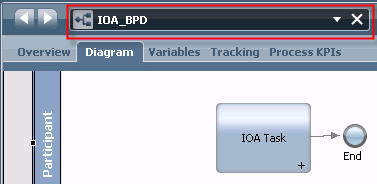
- Return to the IOA_BPD. Wire the human task IOA Task with the End
Node using the Sequence Flow connector.
Press Ctrl + S to save your
work.
2. Create and test the Undercover Agent (UCA)
When
you include a Message Event in a BPD, you must attach a UCA to the
event to call the service that you specify. For example, when a message
event is received from an external system, a UCA is needed to invoke
the appropriate service in response to the message.
The UCA that you attach to the message event
needs a handler service (General System Service) to pass the parameter
values from the run-time message to the BPD
a. Create a Global System Service
- Highlight Implementation and then click the plus sign (+). Select
General System Service an
name it IOA_Inbound_GSS.
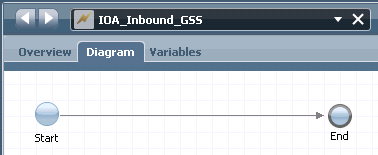
When the diagram is opened connect the Start and End Node via Sequence
Flow.
Under Variables press Add
Input called IOA_Data of
Variable Type InternalOrder.
Under Variables press Add
Output called IOA_Data of
Variable Type InternalOrder.

Press Ctrl + S to save your
work.
b. Create the UCA
- Create the event based InternalOrder Approval Inbound Undercover
Agent (UCA) named IOA_Inbound_UCA
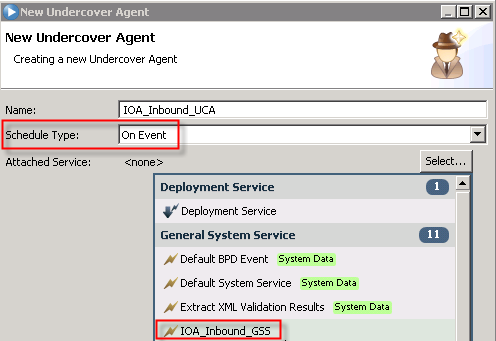
Highlight Implementation and then click the plus sign (+). Create a new
UCA named IOA_Inbound_UCA.
For Schedule Type select On Event .
For Attached Service select General System Service > IOA_Inbound_GSS. Press Finish.
You don't need to specify any Parameter Mapping. Press Ctrl + S to save your work.
c. Add a start message event to the BPD
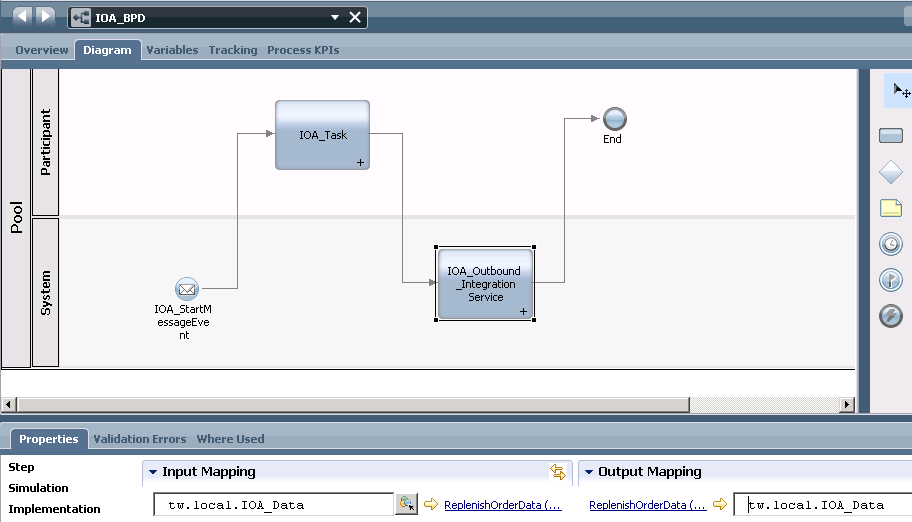
- Return
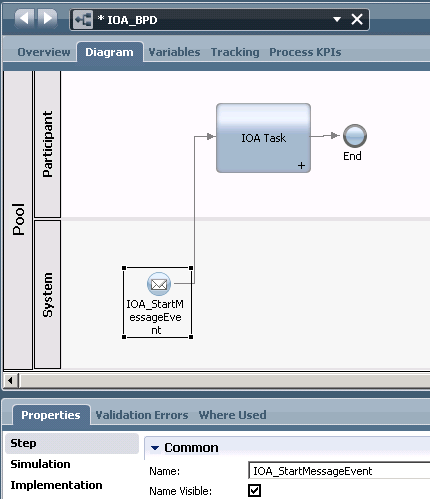
to the IOA_BPD and drag a Start Message Event to the System Lane.
Connect the message event via a Sequence Flow to the human task. Rename
the message event under Properties > Step to IOA_StartMessageEvent.
- Attach the UCA to the message event
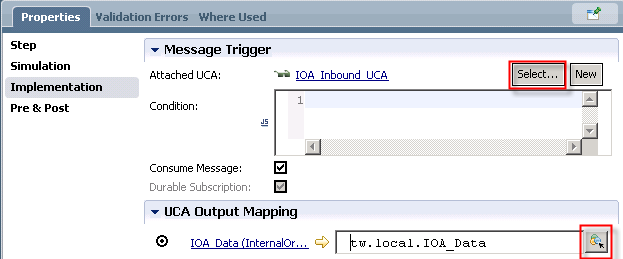
Under Properties > Implementation > Message Trigger > Attached UCA select the
IOA_Inbound_UCA.
Under Properties > Implementation > UCA Output Mapping select the
Local > IOA_Data. Press Ctrl + S.
d. Run and test the UCA
- For the above Start Message Event double-click the
IOA_Inbound_UCA. The UCA Properties opens.
Press Run now.

Confirm with OK that the UCA has been scheduled for
immediate execution.
- Switch to the Inspector perspective
and see that a new BPD instance. Select the BPD instance and click
Refresh. The new IOA Task is displayed. Press the arrow Runs the selected.

The fact that the BPD instance was instantiated demonstrates that the
UCA successfully triggered the BPD.
Return to the Designer perspective.
3. Develop and test the Invocation Human Task
With the invocation task developed in this section we test the UCA and
the initiation of the BPD a second time.
a. Create Invocation Task
- Highlight User Interface and then click the plus sign (+). Create
new Human Service named IOA_InvocationTask.
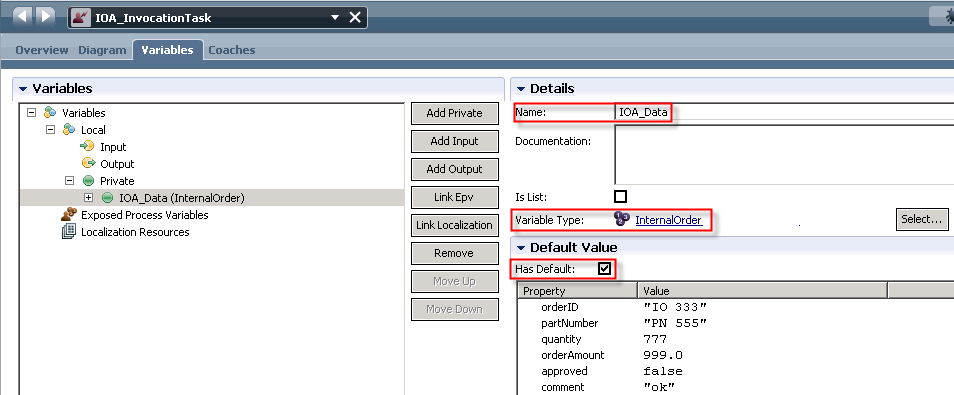
- Define Variables for that task via the Variables tab > Add Private with Details > Name to IOA_Data
and Variable Type selected as
InternalOrder.
For Default Value set the flag Has
Default and specify your own values.
- Select the Diagram tab. From the palette on the right drag a
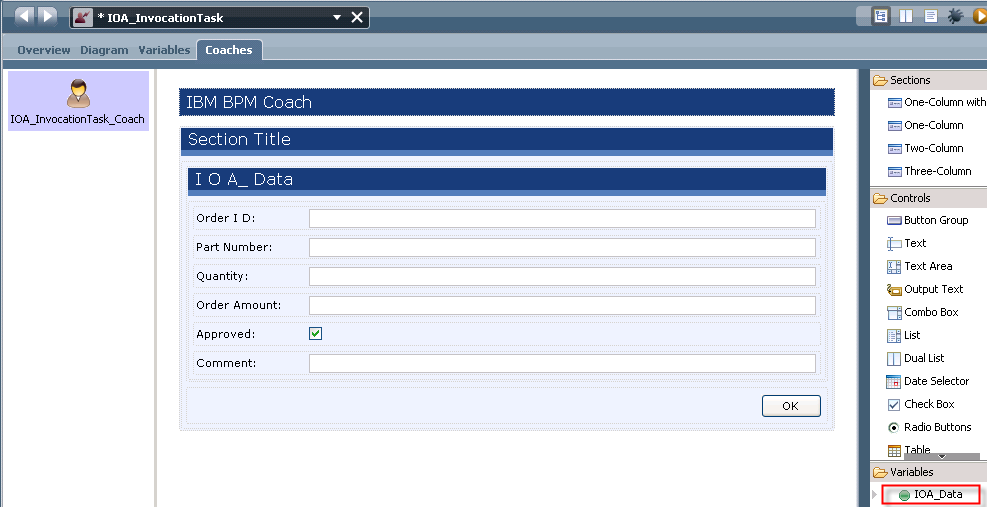
Coach to the canvas. Name the Coach IOA_InvocationTask_Coach.
Right-click on that Coach itself or the Coach tab. Verify the form. If
the IOA_Data fields are not shown drag them from Variables at the
bottom right underneath the Section Title.
Return to the Diagram tab.
- From Implementation > Undercover Agents select and drag
the IOA_Inbound_UCA to the
canvas in between the IOA_InvocationTask_Coach and the End node.
Connect all artifacts via a Sequence
Flow from Start node - IOA_InvocationTask_Coach -
IOA_Inbound_UCA - End node.
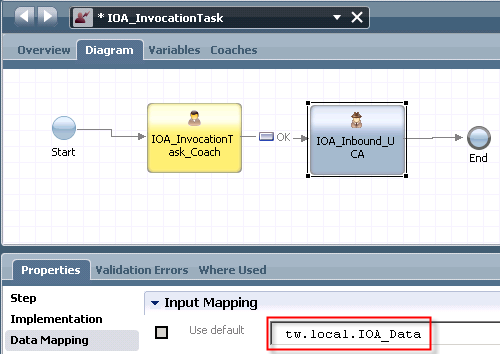
- Under Properties > Data Mapping select Input
Mapping > Local > IOA_Data (InternalOrder).
Press Ctrl + S to save your
work.
b. Test the UCA with Invocation Human Task
- While the IOA_InvocationTask
is still open in the Diagram tab press the arrow Run Service on the far top right
of the diagram.
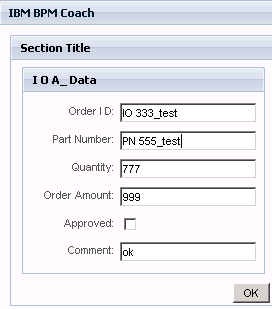
- This launches a Browser to access the input form of the Invocation Task. Change some of the
parameters and press Ok.
- Close your Browser. Select the Process Designer. Click the
Inspector tab and see / refresh the new IOA_BPD instance and which
offers the IOA_Task.
Select the IOA_Task
which is in the Received status and press the arrow Runs the selected task on far top
right.

- You are asked to Pick User From Role. Select any user e.g.
tw_admin and press Ok.
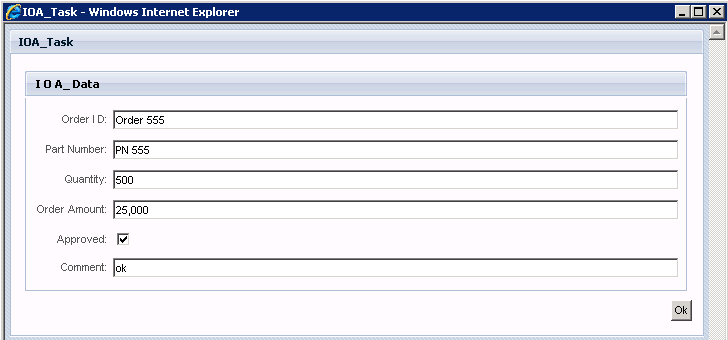
The form with the updated parameters is displayed.
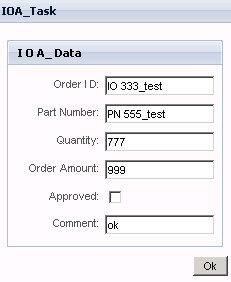
Press Ok. The IOA_BPD was
successfully started by the Invocation Task.
If you encounter any errors re-verify all your data mappings and repeat
the test.
If the updated parameters still don't show up stop and re-start your
Process Center Server.
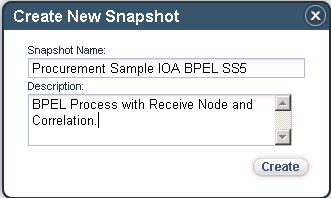
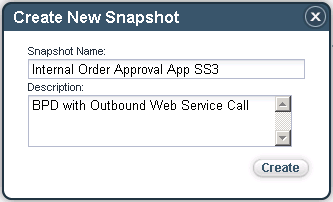
Create a Snapshot
- Return to the Designer perspective.
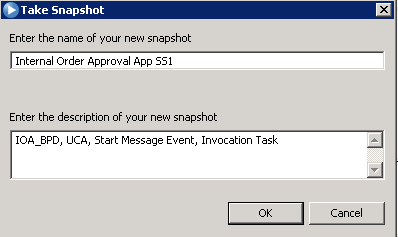
- Press Snapshot in the
upper right.
- Enter the name of the snapshot: Internal
order Approval App SS1 .
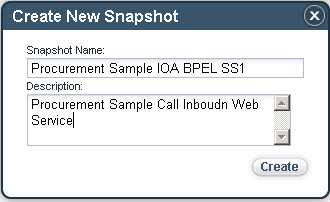
You might add some description. Press OK.
4. Creating the Inbound Web Service
The
next step in completing this sample inbound integration is to create an
Integration service to call the UCA to send the event when the inbound
Web Service (that you create in the following section) is called.
a. Create the Web Service Handler in form of an Integration Service
- Create an Integration Service and name it IOA_Inbound_WebService_Handler
Being in the Designer perspective open Implementation > Integration
Service. Create new one named IOA_Inbound_WebService_Handler.
Press Finish.

- Switch to the Variables tab.
Under Variables press Add Input called
IOA_Data of Variable
Type InternalOrder.
Under Variables press Add
Output called IOA_Data of
Variable Type InternalOrder.

- Return to the Diagram. From the Navigator select Implementation
> UCA and drag the IOA_Inbound_UCA
on the canvas. In the WS Handler we use this UCA to
trigger the IOA_BPD as we did for the IOA_InvocationTask.
Place the UCA it between the Start Event and End Event in the service
diagram.
- Use the Sequence Flow to connect the service components on the
diagram.
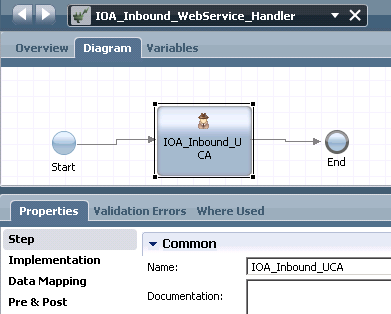
- Click the IOA_Inbound_UCA component in the diagram.
Step > Common > Name is already defined.
Implementation > Undercover Agent is already defined as
IOA_Inbound_UCA.
Data
Mapping > Input Mapping > select Local > Input > IOA_Data
(InternalOrder). This maps the Input of the WS Handler with the input
of the underlying service component, here the UCA.

- Press Ctrl + S to save
your work.
b. Create the Inbound Web Service
Now
you need to provide a way for an external system or application to call
into process engine to start the BPD. The recommended method for
accomplishing this is to create and publish a Web Service so that
external applications can initiate a particular service or set of
services. By invoking a SOAP call, external applications can call the
Web Service.
- Create a Web Service called IOA_Inbound_WebService
.
Select the plus sign next to the Implementation category and then
select Web Service.
Enter the name IOA_Inbound_WebService .
Press Finish.

- In the Operations section,
click the Add button and select the IOA_Inbound_WebService_Handler Integration
Service.
- In the Operation Detail section,
change Untitled in the Operation
Name field to invokeIOA_BPD.
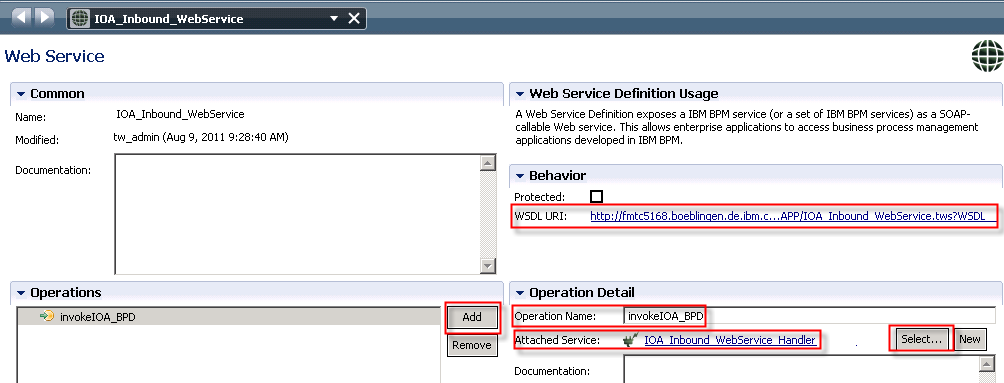
- Notice the WSDL URI in the Behavior section. You can use this URI
to test the sample integration.
- Press Ctrl + S to save
your work.
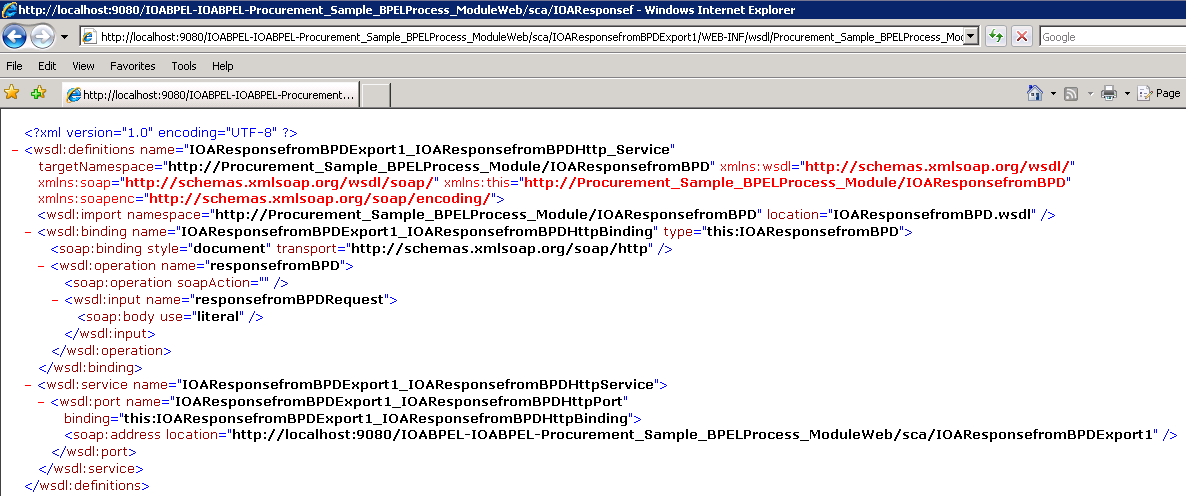
c. Export the Inbound Web Service WSDL
Double-click the WSDL URI to see the details of the WSDL in your
browser.
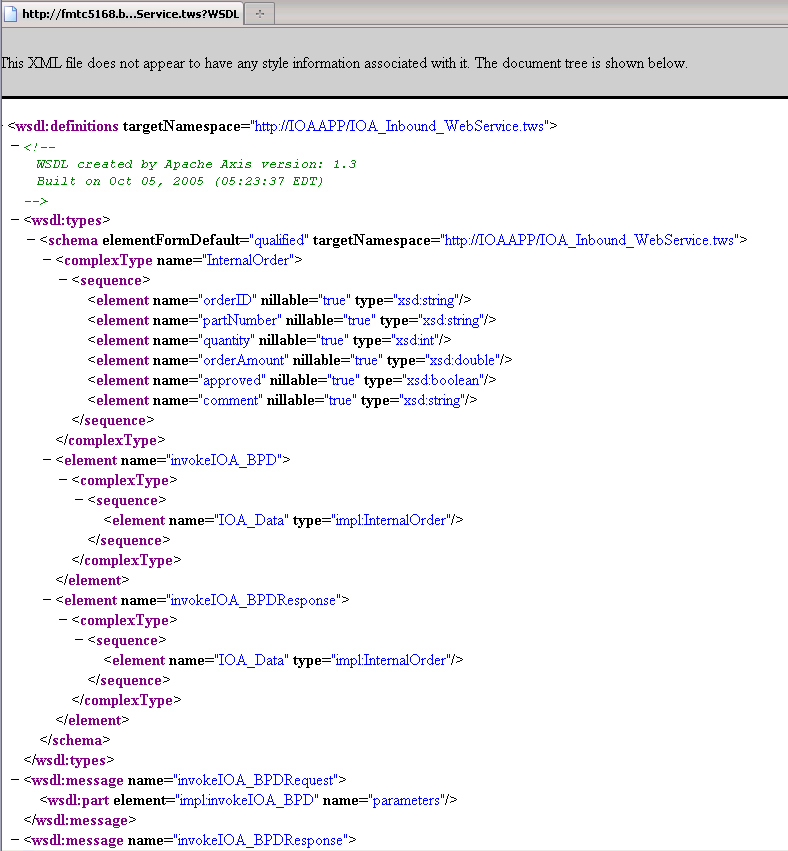
Press File > Save as and save
the WSDL as
IOA_Inbound_WebService.wsdl
to a temporary directory.
d. Test the Inbound Web Service WSDL via soapUI
One of the most popular Web Service testing tools on the Internet is
called soapUI. It can be found at the following web address:
http://www.soapui.org/
This tool/package can be used to exercise calls to IBPM that are
exposed as Web Services. The following is the recipe used to achieve
this task.
- Launch the soapUI tool and select File > New soapUI Project and enter InternalOrderApproval_Inbound_WebService.
Give the new project a name InternalOrderApproval_Inbound_WebService and click OK to complete.
- Right click the new project and select Add WSDL
- In the WSDL location text box, enter the URL for the WSDL
describing the Web Service. This can be obtained from the IBPM PD Web
Service definition in the "Behavior" section of the previous step. In
our case it is the url:
http://fmtc5168.boeblingen.de.ibm.com:9080/teamworks/webservices/IOAAPP/IOA_Inbound_WebService.tws?WSDL
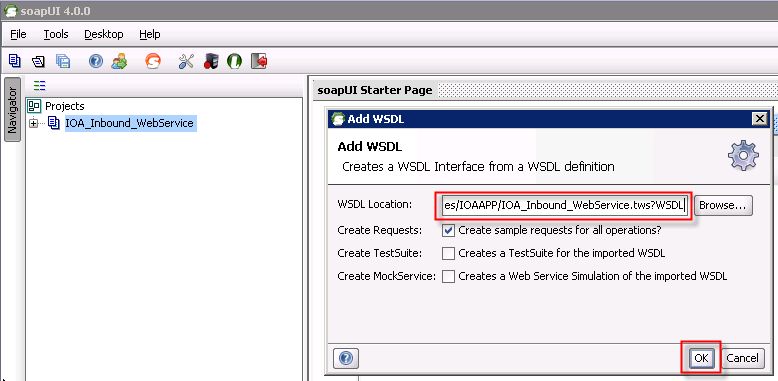
- When completed, soapUI will retrieve the WSDL description and
parse it. From the WSDL, a sample request message will be built. This
request message is a SOAP message that, if sent to IBPM, will cause the
service to execute. Drilling down into the request will show the
details of the SOAP message which can be modified, e.g. the values be
specified.
Define your own values for all attributes of the IOA Data object. Press the Submit button (Submit request to specified endpoint URL).
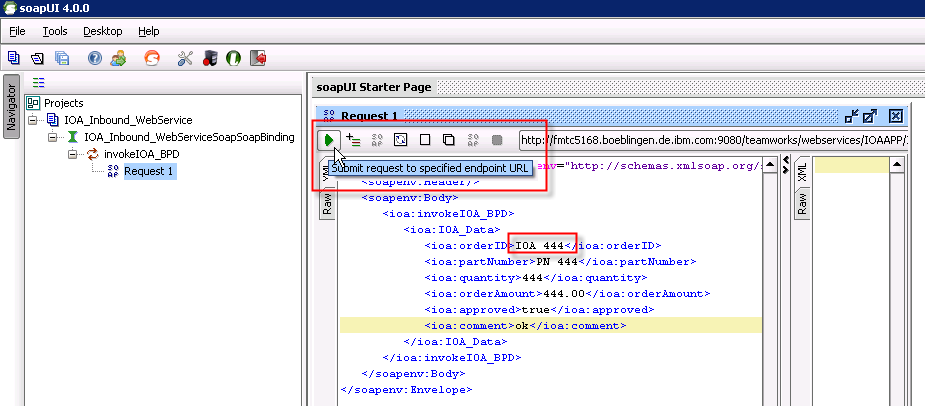
- Switch to the Process Designer, open the Inspector perspective
and press the Refresh button. See that a new process instance
IOA_BPD:xxx and a new task with Subjct: Task: IOA_Task is available. Ru
this task to verify that the web services was successfully started with
above values.
5. Create BPEL Process as Service Requester
In
this chapter you will use an existing Module with a BPEL process. The
process will be adopted to use an Invoke with a Web Service binding to
call the inbound Web Service of the BPD created in the preceding
chapter. So the BPEL process will act as the Service Requester.
a. Import and familiarize yourself with the BPEL process
- Download the initial projects to build the
scenario yourself, namely the Procurement_Sample_BPELProcess_Module.zip,
the web project named Procurement_Sample_BPELProcess_Web.zip,
and the Procurement_Sample_BPELProcess_FormsEAR.zip.
Save them it to a temporary directory.
Download the Procurement_Sample_BPELProcess_FormsEarFile.ear.
Make sure that the type of the saved file in the file system is ".ear".

- Start the IBM Integration Designer (IID) and import projects
The IID, for a given workspace, opens in the Business Integration
perspective.
Select File > Import or right-click on the project
tree and select Import.

Select Other > Project Interchange file and
navigate to directory where you saved your the WPS project files. Press
Open.
The Import Project Interchange Content window is opened. Select the
downloaded files one by one and import them.

Press Finish. Wait until the import and
building workspace has completed.
Note
You
might be prompted that the workspace needs to be migrated. If so,
confirm the corresponding steps with Next, Finish, and OK.
Repeat the same import step. Select the Procurement_Sample_BPELProcess_Web.zipwith
the web application including an invocation task. Wait until the import
and build has completed.
Repeat the same
import step. Select the Procurement_Sample_BPELProcess_FormsEAR.zip
with provides a forms application.
Following resources have been imported.

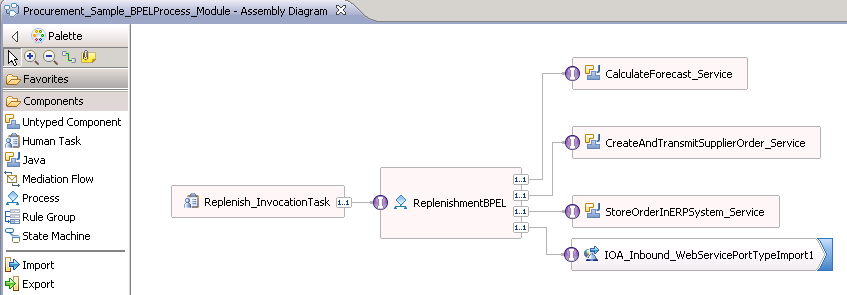
- Familiarize yourself with the assembly diagram
Expand the Procurement_Sample_BPELProcess_Module folder.
Double-click the Assembly Diagram.
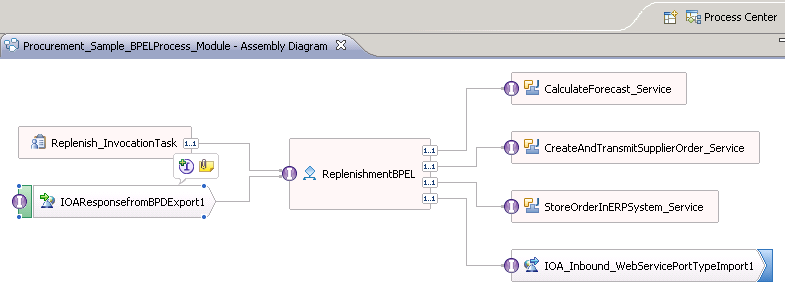
The
diagram shows the BPEL process wired to four Java Implementation
Services. This process can be initiated by an invocation task.

The
automatic ApproveReplenishmentOrder_Service will be replaced by an
Import to call a Business Process Definition service including a human
approval task in this sample.
- Familiarize yourself with the BPEL process
Double-click the ReplenishmentBPEL process. The BPEL process editor
opens.
The BPEL process includes four Invoke activities as explained in the
Business Scenario description.

The
ApproveReplenishmentOrder activity – if not completed by the Approver
of the replenishment order within 10 minutes – will automatically
expire. It will be adopted in this sample to cope with the
implementation by a WLE BPD service.

This error will trigger an Exception Handler with a built-in
timeout fault type specified.

Subsequently the ReplenishOrder
approved status is set to True
as default. 
Within the BPEL
process a single business object ReplenishOrderBO and
following interfaces are provided.

In the course of this sample the interface for the ApproveReplenishmentOrder_IF
will be replaced by an interface generated for the SCA invocation of a
Business Process Definition (BPD).
- Install and start the Web Application
Web
projects are not "lifecycle aware". So if you want multiple snapshots
of a Process Application to contain the same Web Project you'll need to
use a single separately deployed Web App. This is directly deployed as
a J2EE web application and, shared across the Process Application
snapshots.
Open your preferred internet browser and enter the url for the
Administrative Console:
https://localhost:9043/ibm/console/logon.jsp
The login window opens. Enter the userid = tw_admin
and password = tw_admin. Press Log in.

Within the Admin Console select Applications > New
Application > New Enterprise Application.

The Preparing for the application install window opens. Browse
and navigate to the directory where you have stored the downloaded
resources. Select Procurement_Sample_BPELProcess_FormsEARFile.ear.
Press Open. Press Next.

Stay with Fast Path. Press Next.
Keep the settings for Step 1: Select installation options.
Press Next.
For Step 2: Map modules to servers select the flag
for the Procurement_Sample_BPELProcess_Web. Press Next.

For Step 3: Summary press Finish.
Wait for the EAR file being installed.
Press Save after the application was successfully
installed.

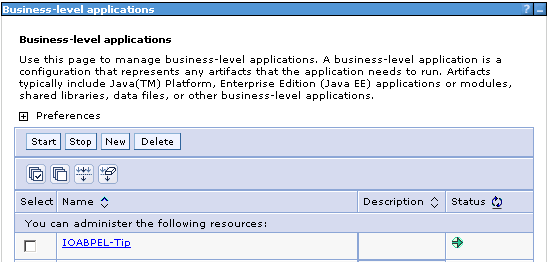
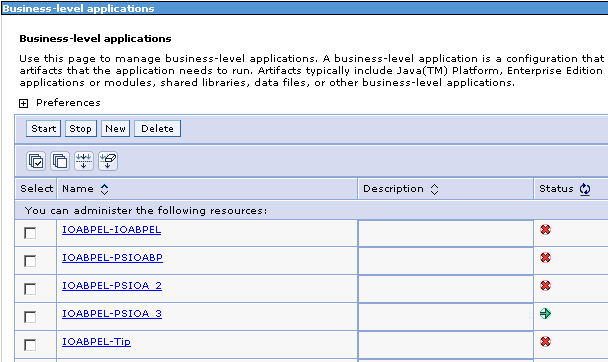
- Start the Web Application
The Procurement_Sample_BPELProcess_FormsEAR.ear was
installed but not automatically started. Navigate to Applications
> Application Types > Business Level Applications.
Select the flag for the FormsEAR application.

Press Start.

The window confirming the Procurement_Sample_BPELProcess_FormsEAR
started successfully shows up.

b. Create a new empty process application in the IID Process Center
perspective
You have several options to deploy and test a Module / BPEL process.
- In
WebSphere Integration Developer (WID) artifacts related to a project
are part of a Module stored in a workspace on the Integration
Specialists computer. With the WebSphere Test Environment (WTE) you
directly could "Add or remove projects" and test them.
- If you don't have installed the WTE
together with the IBM Integration Developer might export your
application as EAR file and install and start it via the Administrative
Console.
- A further option is to associate the Module with a Process
Application and activate or install that Process App.
The last option in used in this document.
In
Business Process Manager a process application represents the project
to store all artifacts created later on in IPD and IID. This process
application is centrally stored in the process center repository and
accessible by multiple users concurrently.
In this step you create a new process application as a
container for storage, deployment, and versioning of your application.
Notice that during the development in IID artifacts are still stored in
a workspace, but have to be retrieved, uploaded or synchronized with
the process application.
- Switch from the Business Integration perspective to the Process
Center perspective
The Process Center perspective is a new perspective introduced
with the IBM Business Process Manager.

- Connect and login to the Process Center
For the Process Center Connection Details enter http://localhost:9080/ProcessCenteror
your server name and port.
For userid enter tw_admin, for password enter tw_admin.

The Process Center perspective opens.
- Create a new process application
Press + Create New Process App.
Enter the name of the process application, here Procurement Sample IOA BPEL and
for the acronym IOABPEL.

Click Create.
Process Application is created.
- Open in workspace
Select the newly created process application. Click Open in
workspace to open the process application in your workspace.

Wait for the operation to complete. The Process Application is opened
in the Business Integration perspective.

Click OK to open the selected process applications and
toolkits.
- Familiarize yourself with the structure of the process
application in detailed mode.
Click the twisty to Switch between Simple or Advanced Mode.
See the ProcessApplicationName_Implementation and ProcessApplicationName_Library
folders created by default. All folders are currently empty.

c. Associate the BPEL process with a process application within IID
In this step you move the imported module with the BPEL process to
the process application.
- Associate application with a process application
Associate your imported / existing application (Module) including the
BPEL process with the process application.
Right-click on Procurement_Sample_BPELProcess_Module.
Press Associate with Process Center.

- Select process application to connect with, here
Procurement_Sample_IOA_BPEL.
Flag the FormsEAR, Module as well as Web applications.

Press Next. The Confirm Changes window opens. Press Finish.

The Procurement_Sample_BPELProcess_Module became part of the process
application.
d. Update the BPEL Process to use the BPD Inbound Web Service
interface
In this step we modify the BPEL process so it uses the WSDL
Interface of the BPD that we generated and exported in step 4.
- Import the Inbound Web Service Interface of the BPD
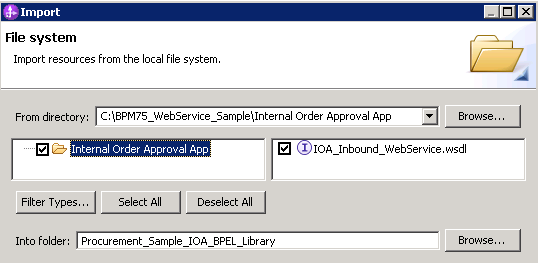
Right-click the Procurement_Sample_IOA_BPEL_Library and select Import.
Expand and select General > File
System. Press Next.
Browse
to your temporary directory where you saved the
IOA_Inbound_WebService.wsdl file. Ensure that you import it into the
correct Library.
Press Finish.
- Add the Procurement Sample IOA BPEL Library to the
ProcurementSample_BPELProcess_Module
The
IOA_Inbound_WebService.wsdl was added before to the Library of the
Process App. Add a dependency of this Library to the Module of our BPEL
process.
Open ProcurementSample_BPELProcess
Module > Dependency.
Click Add... and Select the
Procurement_Sample_IOA_BPEL_Library. Press Finish.
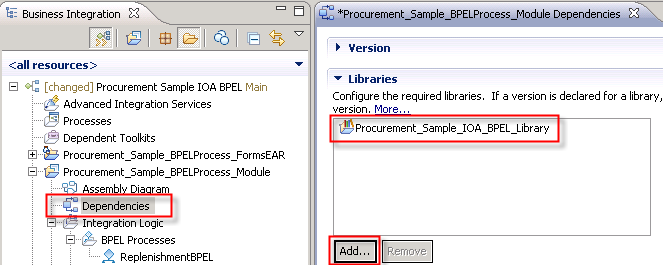
Press Ctrl + S to save and
afterwards close the Dependency window.
- Update the BPEL process to use the interface of the BPD
We
could use a Mediation Flow Component (MFC) to specify and interface and
BO map to mediate between the interface of the existing
ApproveReplenishmentOrder and the BPD Inbound Web Service interfaces.
However, this ApproveReplenishmentOrder activity is already extended
and enhanced by its Exception Handler which we don’t want to touch.
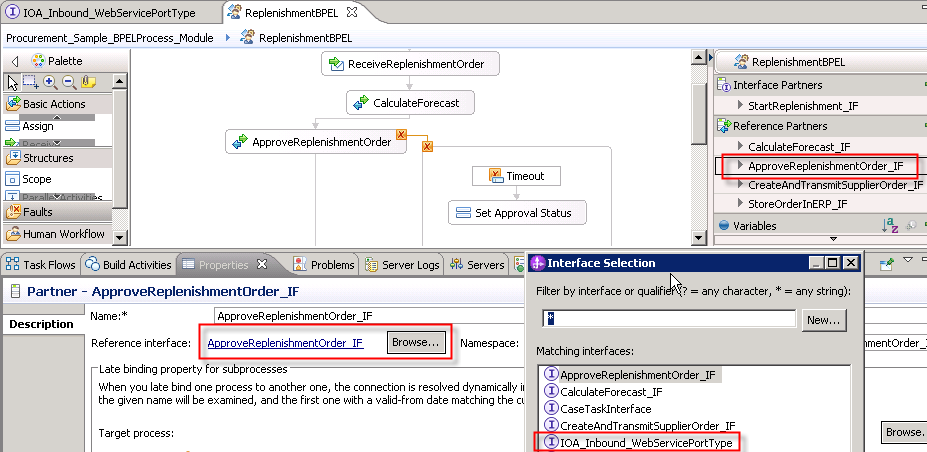
Change the interface of
the Reference Partner for the ApproveReplenishmentOrder activity, i.e.
replace by IOA_Inbound_WebServicePortType
Under Procurement_Sample_BPELProcess_Module expand the Integration
Logic > BPEL Processes folder and open the ReplenishmentBPEL
process.
Under Reference Partners select the ApproveReplenishmentOrder_IF
used in the initial workspace and testing.
Under Properties > Description you find the Name and
Reference interfaces. Click Browse.
The Interface Selection window opens.
Select the IOA_Inbound_WebServicePortType interface
of your developed BPD process. Click OK.
- Create Variable Input Order
The IOA_Inbound_WebServicePortType
interface comes with a business object InternalOrder which
might be different to the current Variable ReplenishOrder.
Press Variables "+ " to add a
new variable.
The Add a Variable window opens. Enter InternalOrder
for the Name and select InternalOrder from the list of Matching data
types.
Press OK.

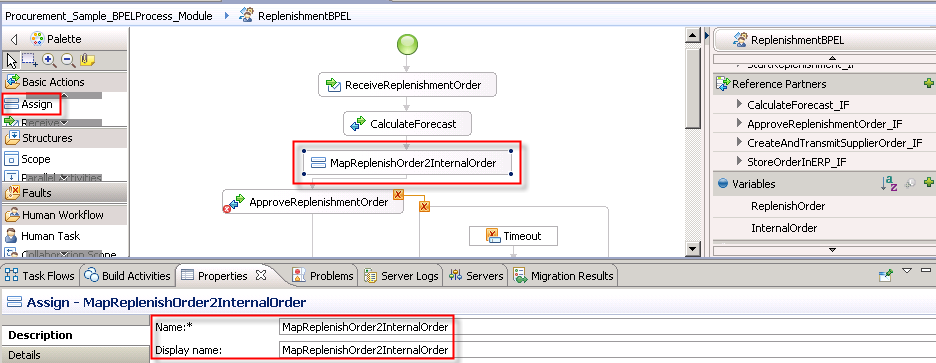
- Create Map to associate the ReplenishOrder object with the
InternalOrder object
Drag an Assign node from the
palette to the BPEL process, in between the CalculateForecast and
ApproveReplenishmentOrder activities.
Under Properties > Description > Name and ... Display name enter MapReplenishOrder2InternalOrder .
- Specify the mapping
Under Details map all ReplenishOrder - attributes via the Assign From with Assign To to the corresponding
attributes of the Internal Order.

Press Ctrl + S to save the
mapping.
- Re-specify input and output variables
Due to the changes of the interface and business data shows the ApproveReplenishmentOrder
Invoke activity errors.
in the BPEL process diagram which currently indicates an error.
Under Properties > Details the interface was replaced by
ReplenishmentBPD.
The Operation name is empty. Expand the drop down list and
select the available option invokeIOA_BPD.
This will take off the variables ReplenishOrder.
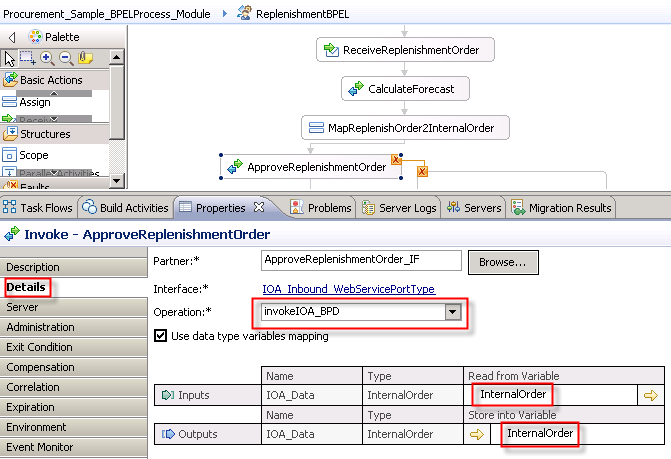
Select under Inputs none under Read from Variable.
A selection window opens. Select InternalOrder.
Repeat this for Outputs. Select under Outputs none under Store
into Variable. A selection window opens. Select InternalOrder.
Press Ctrl + S to save the
BPEL process.
All
errors should have gone, while the
Procurement_Sample_BPELProcess_Module Assembly Diagram still has some
errors. This is corrected in the next step.
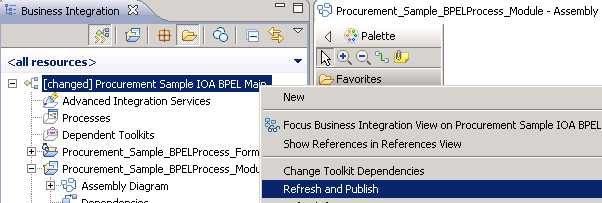
6. Update the assembly diagram and test the Web Service integration
Part 2: Outbound
Integration
In
Part 2 we enhance the scenario by an outbound web service call. The BPD
is invoked in a one-way operation. Therefore the response has to be
accomplished by an outbound call. This message has to be received and
correlated by the BPEL process that acts as the Service
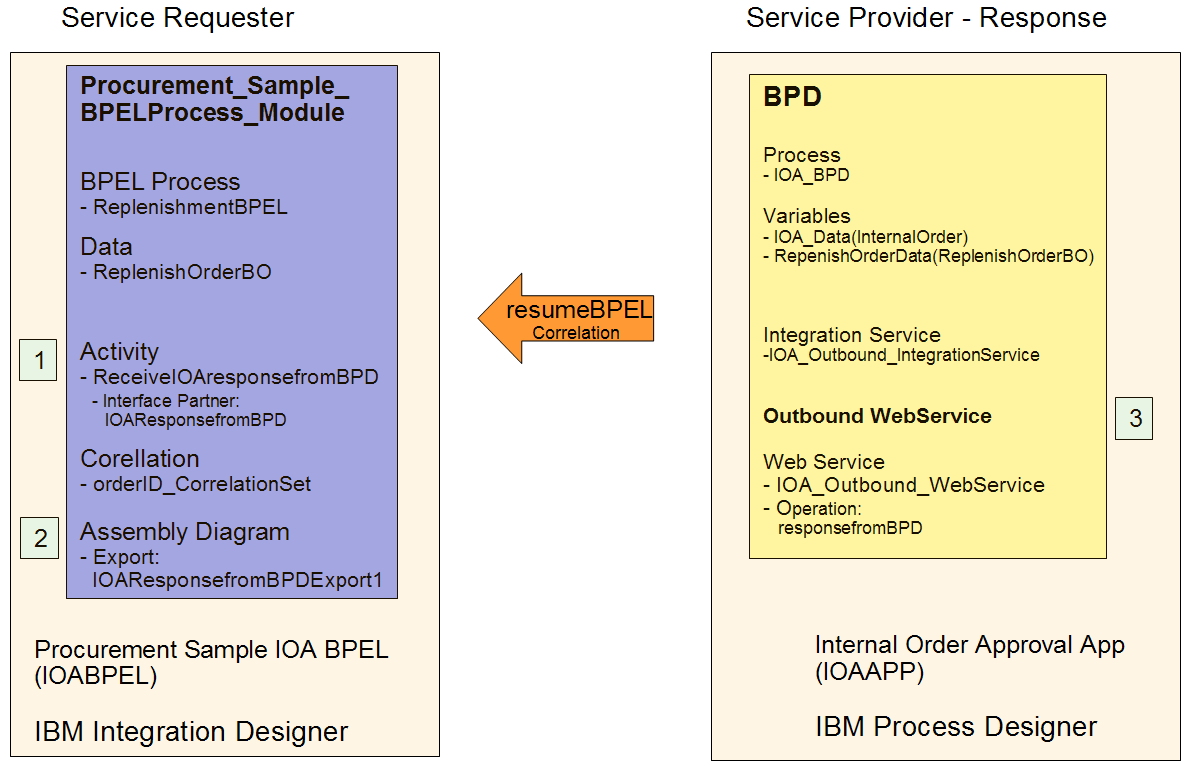
Requester. The five steps to enhance the artifacts in
the Service Requester and Provider are shown in
the diagram below.
1. Update BPEL Process to receive and correlate intermediate events
a. Model Receive Choice Activity
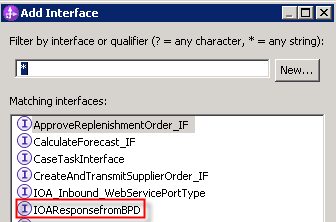
- Define an interface to receive the intermediate
events
Right-click the Procurement_Sample_BPELProcess_Module
> New > Interface.
The New Interface window opens. Enter the Name IOAResponsefromBPD .

Press Finish.
The
BPEL process, after received the message, doesn't send a confirmation
or reply to the BPD. Therefore we only need a one-way operation.
The Interface specification window opens.
Under Operations select a one-way operation.
Specify the operation name as responsefromBPD
, the Inputs Name as IOAresponse
and select the Inputs Type as ReplenishOrderBO .

Press Ctrl + S to save the
interface specification.
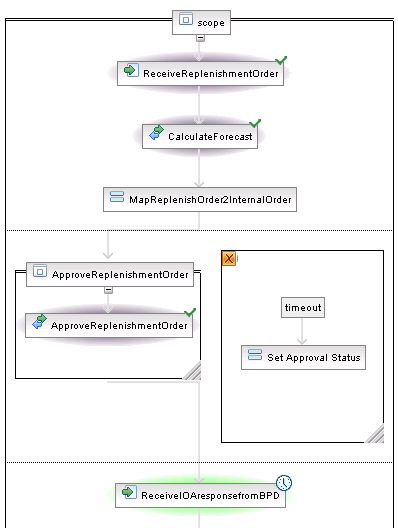
- Model the Receive Choice Activity IOA Reply from BPD
Open the ReplensihmentBPEL process.
Drag the IOAResponsefromBPD interface
from the Navigator to the canvas und Interface Partners.

Drag a Receive activity to the
canvas in between the ApproveReplenishOrder and the ApprovalDecision
Choice activities.
Name this activity ReceiveIOAResponsefromBPD.
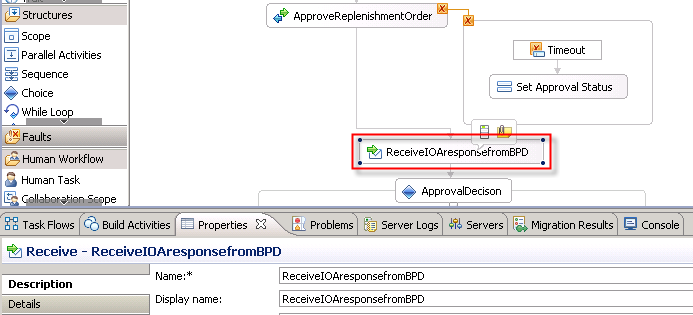
Under Details browse for and select IOAResponsefromBPD Interface
Partner. The Interface and Operation is automatically entered.
For the Inputs > Store into Variable select the ReplenishOrder variable.

Press Ctrl + S to save your
work. The IOAResponsefromBPD Receive activity still shows the error
that it does not use a correlation set.
b. Define Correlation Setting
- Define a Correlation Property
In the ReplenishmentBPEL process > Correlation
Properties on the right press the "+"- sign.
The Add a Correlation Property window
opens.
For the Name enter orderID_CorrProp and
for Matching data types select string
.
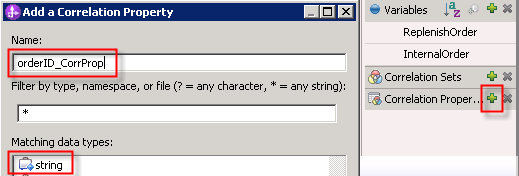
Press Ok.
- The Correlation Property orderID_CorrProp opens.
Select the StartReplensihment_IF > startReplenishmentOrder
operation and press Add...
.

The Create a Property Alias window opens. Select input1 : ReplenishOrderBO.orderID : String.

Press Ok.
- Repeat the same for IOAResponsefromBPD
reference partner interface with responsefromBPD operation. Press Add... .

The Create a Property Alias window opens. Select input1 : ReplenishOrderBO.orderID : String .
Press Ok.

- Define a Correlation Set
In the ReplenishmentBPEL process > Correlation
Set on the right press the "+"-
sign.
The Correlation Set window
opens.
For the Name enter orderID_CorrelationSet.
For the Property name select and flag the orderID_CorrProp.

- Initiate Correlation for the ReceiveReplenishmentOrder
activity
Select
the first activity, the ReceiveRepelenishmentOrder. When this order is
received and the process is instantiated we want to initiate
correlation.
Select Properties > Correlation. For the Correlation sets > Initiation select
Yes .

- Specify Correlation for the ReceiveIOAresponsefromBPD
activity
Select
the first activity, the ReceiveIOAresponsefromOrder. When this orderID
is received via the Web Service call we don't want to initiate the
correlation.
Select Properties > Correlation. For the Correlation sets > Initiation select
No.

Press Ctrl + S to save the
changes made to the ReplenishmentBPEL process.
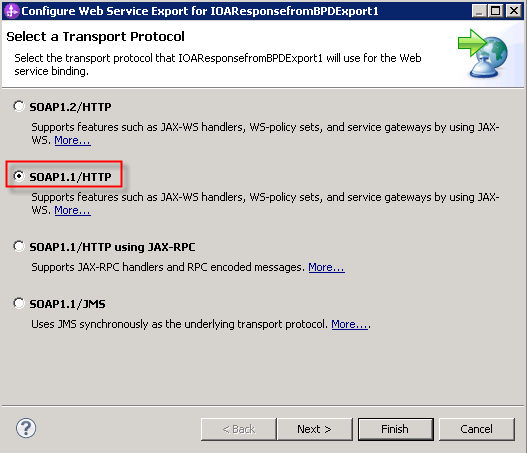
2. Expose an Export WSDL Interface
Make the new Interface Partner for the new receive node available.
3. Create the Outbound Web Service
a. Building the sample Integration service
- Create an Integration Service named IOA_Outbound_IntegrationService
Click Implementation > IOA_Outbound_IntegrationService the
appropriate service type (Integration service) as described in Building
services and name it Get Zip Code Data .
- Drag
a Web Service Integration component from the palette to the service
diagram and then use sequence lines to connect the component to Start
and End Events as shown below.
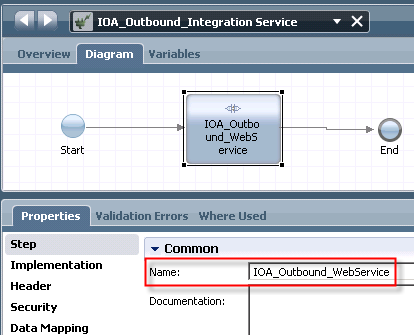
- Click on the Web Service Integration component in the diagram and
then click the Step option in the properties. Enter the name IOA_Outbound_WebService.
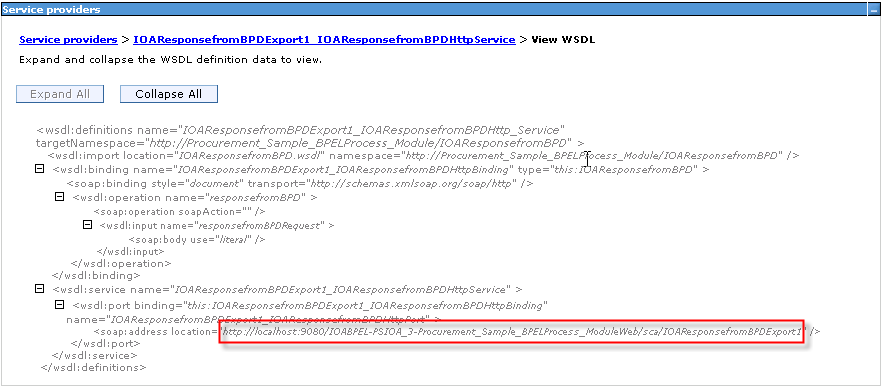
- Discover Web Service
Click the Implementation
> Discovery > WSDL URI option. Paste the content of the
clipboard, the one after entering ?wsdl to the input field.
The Operations drop-down list is populated with the services that are
available.
Note:
To use a protected WSDL, enable the check box and then provide the user
name and password required to access the WSDL.
Click the Discover button.

The Discover dailog opens.Press Discover
- Select Operation
Choose the operation that you want to use from the drop-down list. For
this sample service the responsefromBPD(ReplenishOrderBO)
operation.

- Click the Generate Types... button.
The Generate Types Wizard opens. Select the operation from the previous
step (responsefromBPD). Click Next.
The wizard lists the types to be generated.
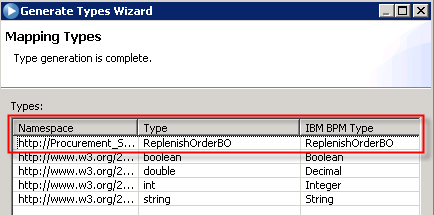
In the wizard, click the Next button to continue and then click
the Finish button when type generation is complete.
This creates the ReplenishOrderBO as a Data variable.

- Specify Input and Output for the Integration Service
Click the Variables tab for
the IOA_Outbound_IntegrationService.
Click the Add Input button and in the Name text box,
type: ReplenishOrderData.
Click the Select button next to Variable Type and choose ReplenishOrderBO from the available
types. (This type was generated in the preceding step.)
Click the Add Output button and in the Name text box,
type: ReplenishOrderData.
Click the Select button next to Variable Type and choose ReplenishOrderBO from the available
types as well. (This type was generated in the preceding step.)

- Perform data mapping for the Outbound Web Service
Click the Data Mapping option in the properties.
For the Input Mapping , click
the variable selector icon to the right of the text box and choose the
previously created ReplenishOrderData
variable.

Press Ctrl + S or Save to
save your work.
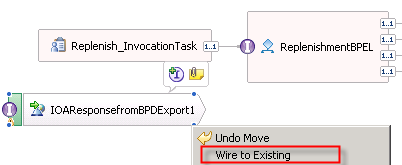
b. Integrate Outbound Integration Service with BPD and Test
Response Operation


