To run the sample requires not only to install and
execute a process model. It is necessary
to have the pre-requisites installed,
to enable the environment for work basket and business
category support,
to install the process and familiarize with it,
to import the required work basket specifications and spaces in
Business Space.
If you completed the chapter "Build it yourself" you can right
switch to section Run
the sample
in Business Space. Otherwise you will need be guided to perform
certain
installation and configuration steps with reference various sections in
Build it yourself.
The Java EE authorizations for work basket and business
categories for the userid/password admin/admin should already
be enabled. To enable work baskets and business categories perform
following instructions using the administrative console for the Human
Task Manager:
To install the final process model / application, perform
following steps:
Click the link WbBcSample
enterprise application, and save the ear file to a directory of
your choice, for example c:\tempWBSample\.
Ensure that your server is started. Launch the Administrative
Console.
Click Applications > New
Application. Within Enterprise Application browse and navigate
to the directory that you have used to save the ear file. Ensure that part of the
download not an additional
ending/file type .zip was
added.
Ensure that the WbBcSampleApp application is started.
In WID open File > Import
> Other > Project Interchange and press Next. Browse and navigate to the
directory that you have used before to save the zip file.
Click Open.
Select your workspace directory as your Project location
root.
Click Select All. Click Finish.
Wait until the automatic build process has finished.
Ensure that your server is started.
Right click on
the server and select Add and
Remove Projects and add /deploy the WbBcSampleApp module with the
Inquiry Request process to the
server.
Wait until the publishing has finished.
Deploy query table definition
In this section, we download the query table provided and deploy it to
the server.
Open a ‘Command Prompt’ or shell and navigate
to your profile
directory.Prepare
the launchclient
environment by executing the SetupCmdLine.bat script, whereas the
profile directory is e.g. WPS_PROFILE_DIR=c:\WIDv7_WTE\runtimes\bi_v7\profiles\qwps
with following command:
<WPS_PROFILE_DIR>\bin\SetupCmdLine.bat
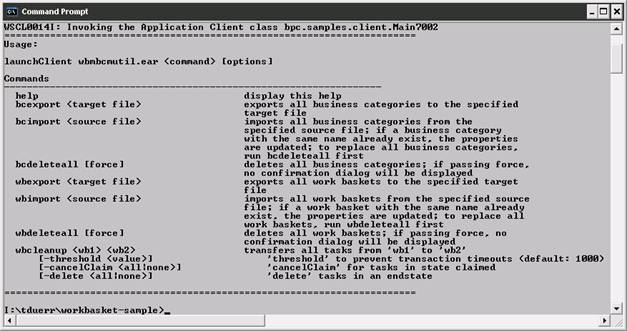
Test the client by
invoking the ‘help’ command via ‘launchclient.bat’. The
‘launchclient.bat’ file is in the ‘bin’ directory of the server
profile.
<WPS_PROFILE_DIR>\bin\>launchClient.bat
c:\tempWBSample\wbmbcmutil.ear help
You should see the help of
the client as result.
Prepare for the import of
the WorkBasket
definitions by executing the wbimport
command. This command has the following syntax:
<WPS_PROFILE_DIR>\bin\>launchClient.bat
<path to util directory>\wbmbcmutil.ear
wbimport <path to work basket
specification file of filetype XML>
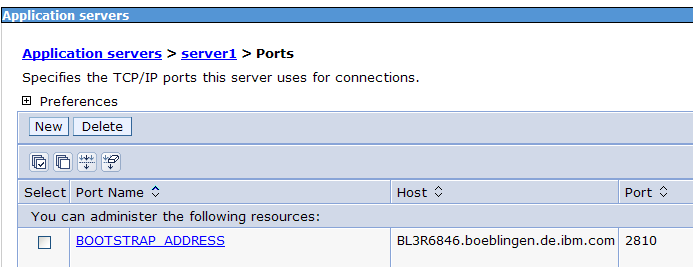
-CCBootstrapPort=<bootstrap port>
where the bootstrap port
has to be obtained via the administrative console.
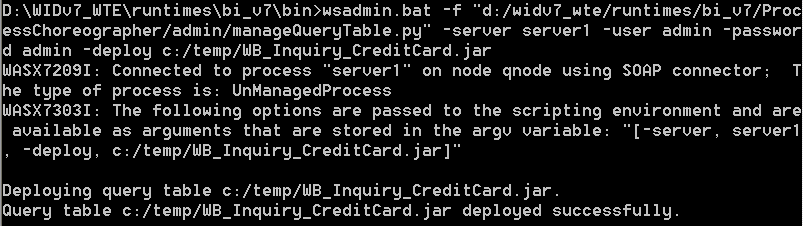
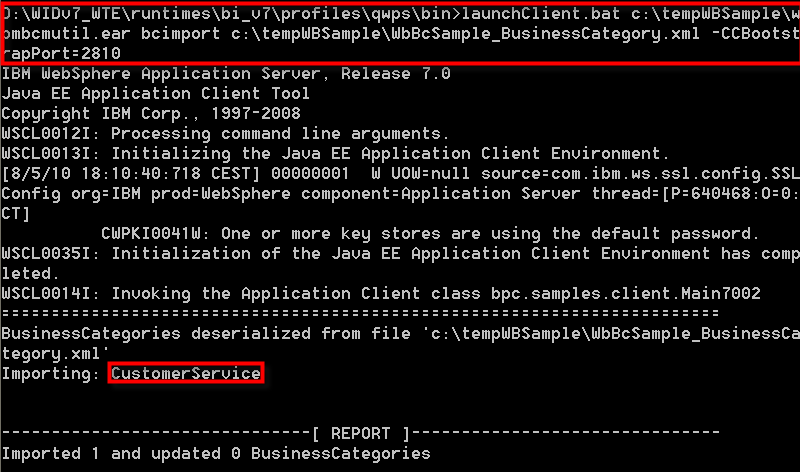
Finally execute your work
basket specification wbimport
command. This might look like this:
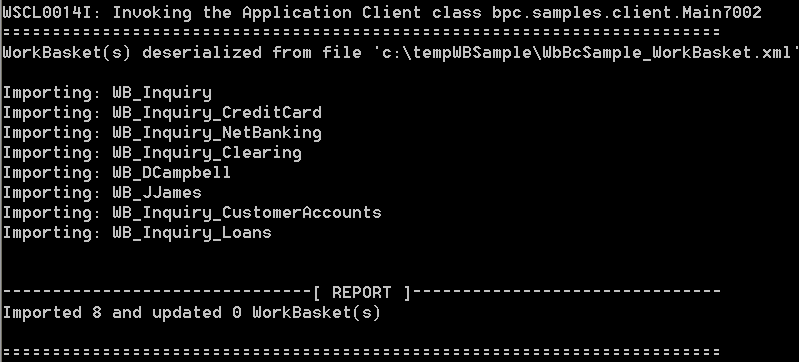
The following figure shows a sample output produced by the
import command.
Enter the userid/password
of
a user who has the role
‘WorkBasketSystemAdministrator’, here admin/admin.
Review the output / report for error messages.
Business category specification
In a
similar way the business category is imported. The bcimport command has the following
syntax:
WPS_PROFILE_DIR>\bin\>launchClient.bat
<path to util directory>\wbmbcmutil.ear
bcimport <path to business category
specification file of filetype XML>
-CCBootstrapPort=<bootstrap port>
Execute your business category
specification bcimport
command. This might look like this:
You will be prompted to
insert the userid/password of
a user who has the role
‘BusinessCategorySystemAdministrator’, here admin/admin.
Review the output / report for error messages.
Import the Business Space for the enduser
For users to start processes and access tasks in work baskets you
need to import a space provided and customized.
Perform following steps to import the space called Working
with Work Baskets:
Click the link to save the space Working with
Inquiry Work Baskets for enduser interaction to a
directory of your choice, for example C:\tempWBSample\.
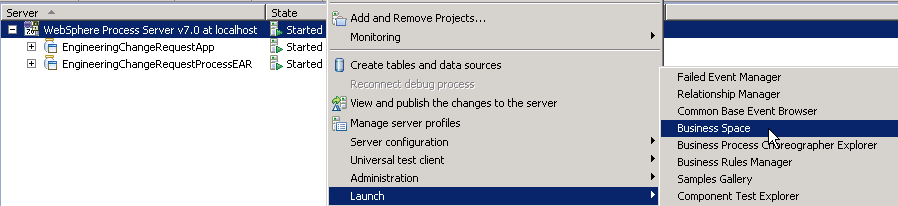
In WebSphere Integration Developer, switch to the Server view.
In the table, right-click WebSphere Process Server V7.0.
From the pop-up menu, select Launch > Business Space.
Optionally start the Business Space on WebSphere Process Server,
perform the following steps:
In a web browser supported by Business Space, open URL http://yourhost:
yourport/mum/resources/bootstrap/login.jsp.
Note: Replace yourhost with your server's
internet address and replace yourport with the
port of your server's HTTP transport, for example
The Login The login screen is displayed.
Enter a valid User ID bdaniel and Password wid.
Click Login.
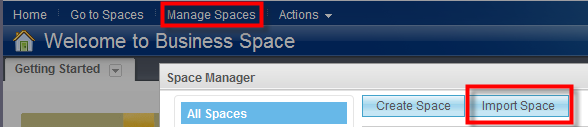
Import Space.
Select the Manage Spaces tab. Click Import
Spaces.
Navigate to the
directory that you have used before to save the Working+with+Inquiry+Work+Baskets.zip
file.
Select this space. Press Open.
Press OK.
The space is imported.
Press Done.
Note: This space is shared with edit permission for following
userids: admin,
dcampbell, dedwards, jjames. Owner of the space is the
userid bdaniel.
Run the sample in Business Space
In this section we run the process, and execute human tasks assigned
to the user via work baskets he is authorized for.
Users of this sample who successfully completed the "Build it yourself"
chapter just have to perform this section.
Start process
instances in the role of Process Starter.
Interact with work baskets in the role of Potential Owner.
Start the process
Start an Inquiry Request process to demonstrate the
effect of work basket handling.
Follow these steps:
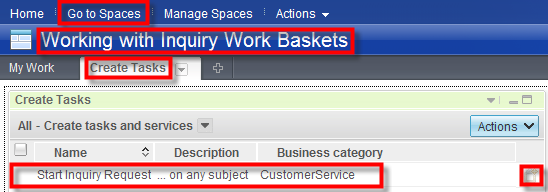
Switch to Go to Spaces. Select the tab to Create Tasks.
The Create task page opens.
Note:
In Business Space processes are started via invocation
tasks, processes are not instantiated from process templates.
The list shows the inline invocation task
Start Inquiry Request.
Press the icon on the far right to create an instance from this
task definition.
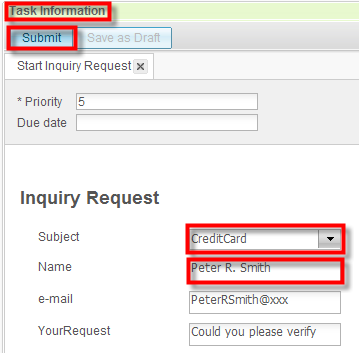
The Task Information widget is updated and shows the Inquiry Request
form pre-filled with some data.
Press Submit.
Start multiple process instances with different Subjects selected via the drop down
list and different Names.
Distribute and transfer tasks
One of the major concepts of work baskets imply that task instances
can be distributed from parent work baskets as well as transferred
between them. In WPS v7 this functionality is provided via APIs but not
yet supported in the Human Task template of the Business Space.
Therefore this exercise to act as a Distributer or Transfer Initiator
has to be postponed to a further release.
Work on tasks
The Create Response activity in the Inquiry Request process creates
task instances for all process instanced started. As you started
several processes you see human tasks allocated to the user bdaniel as Potential Owner of the work baskets WB_Inquiry_CreditCard and WB_Inquiry_CustomerAccounts.
Other tasks with Subject=Loan or Subject=NetBank were assigned to the
work baskets WB_Inquiry_Loans and WB_Inquiry_NetBanking. Potential
Owner of tasks in these work baskets it the user dedwards.
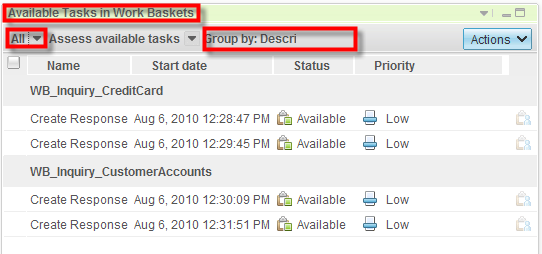
Switch to the My Work
page. Select the Available Tasks in Work Baskets
widget.
See the available task instances for All.
The task instances are grouped by the Description
specified during the customization of this widget.
This task list
doesn't use any query table and the work basket identifier can only be
used because this identifier is stored in the Description field.
Start and complete one of the task instances within the group of WB_Inquiry_CustomerAccounts.
Still use the Available Tasks in Work Baskets
widget.
Select the drop down next to All and select the query table QT_Inquiry_CreditCard. The view is
automatically refreshed.
This view shows the available task instances in state=ready based
in the query table, including a filter for the WB_Inquiry_CreditCard
work basket, developed in section create
query table (filter).
Notice that the customers name, work basket name, and type
column, equal to the business category is shown are shown as properties.
This completes our exercise! You have successfully completed the sample
!