You can choose between two versions of the client application:
- The simple version of the client application which will just display the list of Business Processes installed on your WebSphere Process Server.
To implement the simple version, follow the instructions in this chapter "Build it yourself". - The advanced version of the client application which will create a business object, start a long-running process, and query the status ot the process and the results.
To implement the advanced version, first follow the instructions in this chapter "Build it yourself" and then perform the additional steps described in the next chapter Advanced Version.
The paragraphs in this chapter describe the steps to build a most simple Microsoft® .NET® client application which uses the secured Web Services API delivered with WebSphere Process Server.
To develop the client application, we will use Microsoft Visual Studio® .NET 2005 and Microsoft Web Services Enhancements (WSE) 2.0 SP3.
In detail, the following steps are described:
- Find out URL of the Web Services Description file (WSDL) on your WebSphere Process Server.
- Create a new application project.
- Generate the C# web services proxy.
- Enable the proxy for Web services security.
- Design a one push button application window.
- Program the push button action.
Note: During this sample, we restrict ourselves to the Business Flow Manager API (BFM API) which can be used to interact with the BPEContainer. If you rather want to use the Human Task Manager API (HTM API) which can be used to interact with the TaskContainer, all steps are conceptually similar, but you will export the WSDL files from the TaskContainer application instead.
Find out URL for the WSDL on WebSphere Process Server
In this section, we determine the URL for the Web Services Description file (WSDL). We need this URL to access the WSDL file which is necessary to use the Web services interface.
The most simple case is when the following three conditions are met:
- You have installed both Microsoft Visual Studio and WebSphere Integration Developer on your local machine;
- As server, you run the integrated WebSphere Process Server which is shipped with WebSphere Integration Developer;
- You want to run the client application only on the same machine where the WebSphere Process Server is running.
In this case, the URL is
In the more general case, this is the URL:
http://yourhost:yourport/bpeContextRoot/sca/com/ibm/bpe/api/sca/BFMWS/wsdl.
Note: Replace yourhost with your server's internet address and yourport with the port of your server's HTTP transport.
Use the following steps to find out bpeContextRoot (the context root of the Web services interface for the BPE container application):
- Make sure your WebSphere Process Server is started.
- In a browser, open the administrative console.
The default URL is - In the navigation pane, expand Applications > Application Types and select WebSphere enterprise applications.
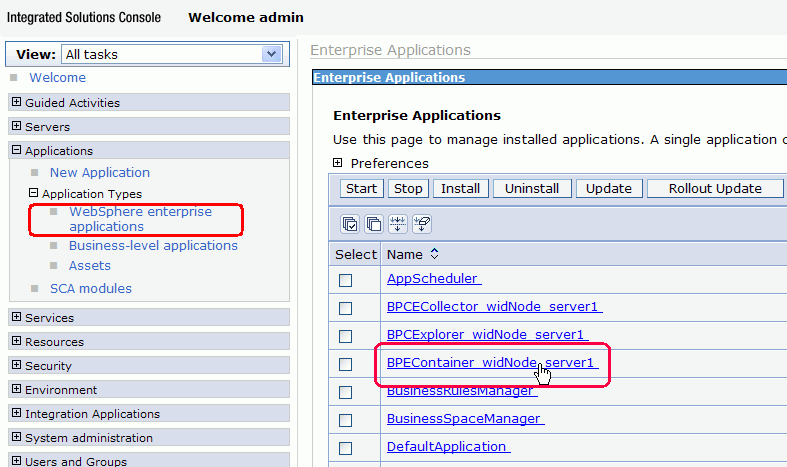
- Locate the application named
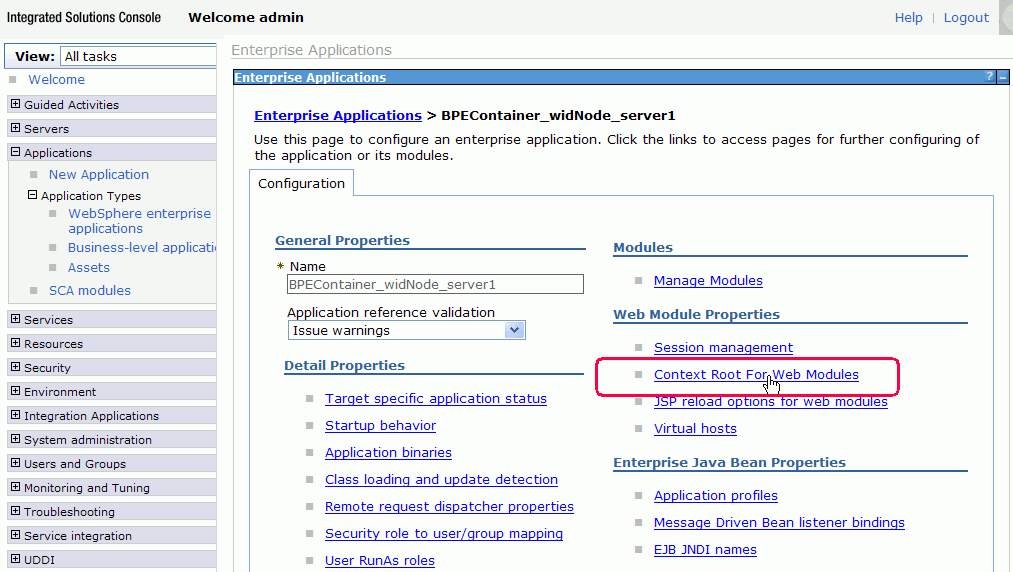
BPEContainer_{your_nodename}_server1 and click on this application name. - The configuration page for this application appears:
- Click on Context Root For Web Modules.
- The details page for the Context Root is displayed:
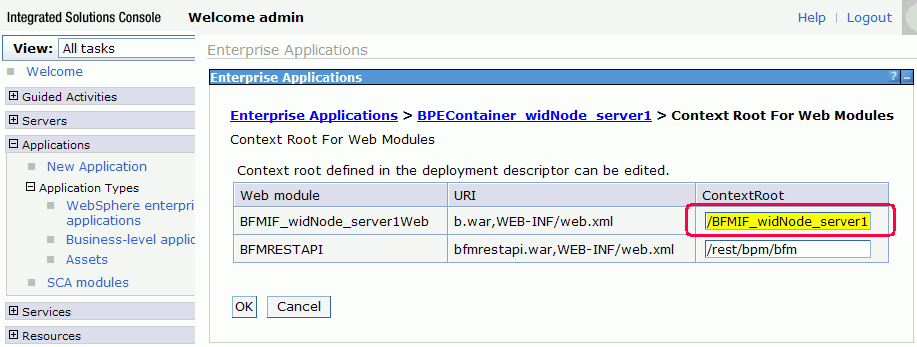
The context root is listed with a leading slash.
Make sure the server is started and verify in a Web Browser that the URL you determined can be used to display a WSDL file before you proceed to the next section.
Create a new application project
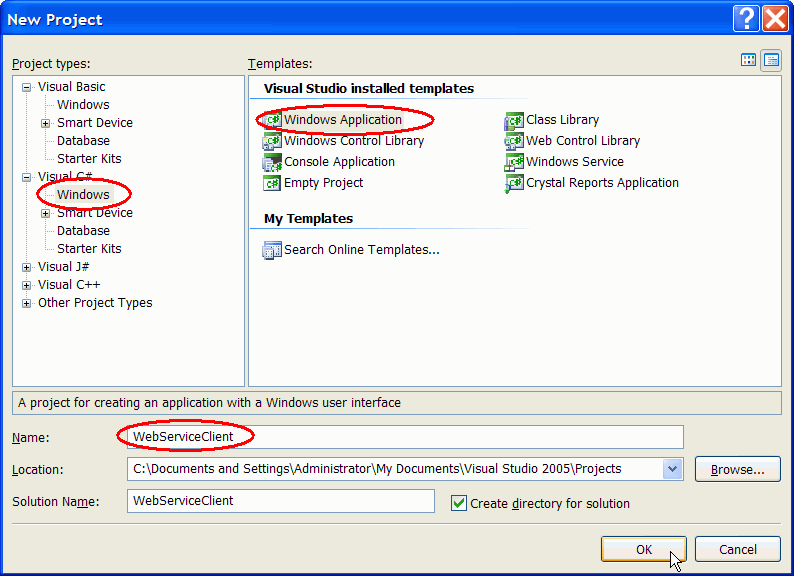
We will create a simple .NET client application which uses the Web services interface. To do this, we first create the Visual C# Windows Application project named WebServiceClient. Follow these steps:
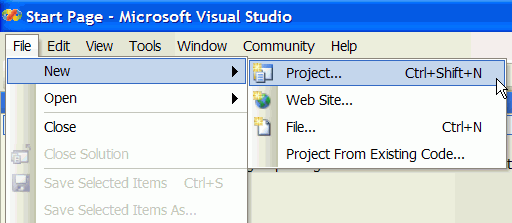
- In Microsoft Visual Studio, select File > New > Project.
- In the New Project window, as Project type select Visual C# > Windows and as Template select Windows Application.
- As Name, use
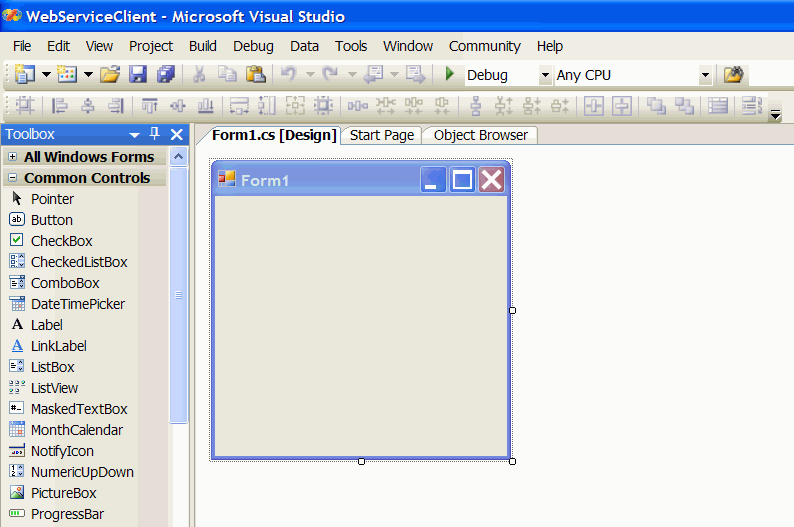
WebServiceClient. - Accept all other defaults and click OK. A new project is created, and an empty window with the name Form1 is created.
Create the Web services proxy
In this section, we access the Web Services Description file (WSDL) for which we previously determined the URL. Using this WSDL file, we then generate a C# proxy that allows to access the Web services operations as C# methods. Next, we modify the proxy to enable Web services security. Later on, we will use C# methods in our client code which is translated to Web service calls by this proxy.
Generate the C# proxy
First, we access the WSDL file. Do the following steps:
- Make sure that your WebSphere Process Server is started.
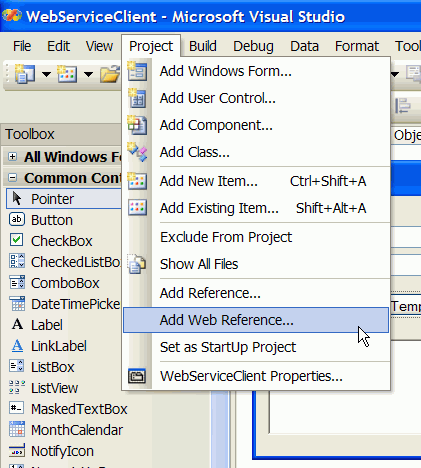
- In Microsoft Visual Studio, select Project > Add Web Reference.
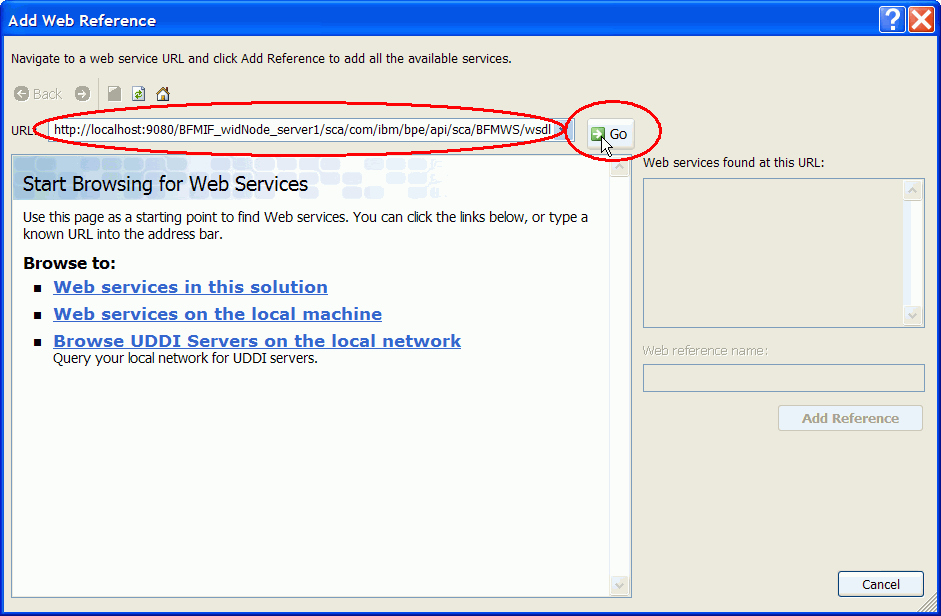
- The wizard for adding a web reference opens.
- Into the URL field, paste the URL which you determined previously, for example,
- Click Go. WebSphere Process Server will return the details for the BFMWS service.
- As Web reference name, enter
MyBFMAccessand click Add Reference.
Note: If you want to run the .NET client application and WebSphere Process Server on different machines, you may want to use the server's unique internet address rather than "localhost". As well, you can use "localhost" for the moment and change the service endpoint later.
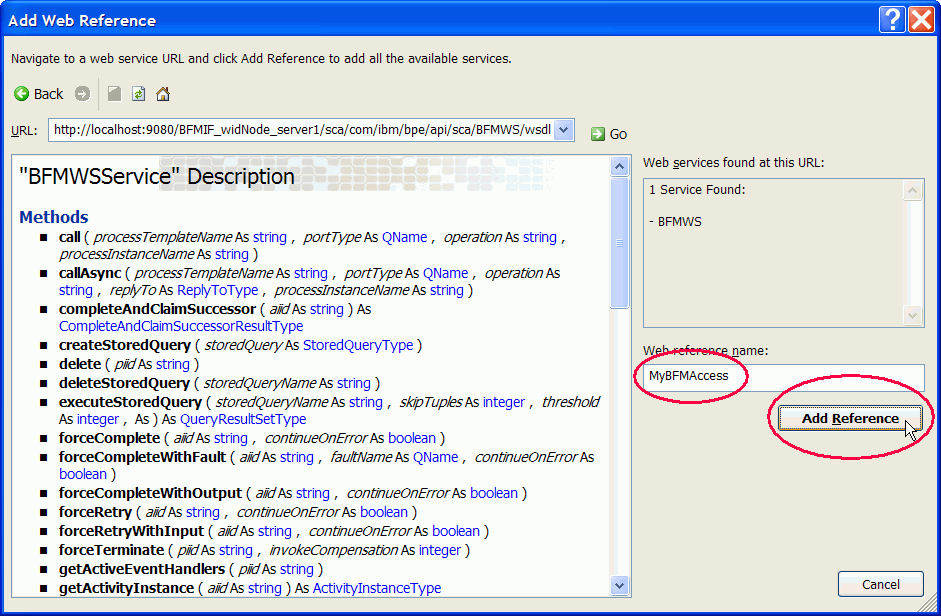
Now a C# proxy is created in the file Reference.cs.
Enable the proxy for Web services security
Note: For the steps in this section, the installation of the WSE component (Web Services Enhancements) is a prerequisite. See the Introduction chapter of this sample for information how to get the WSE component.
In this section we modify the proxy so the proxy can support secure Web services. Do the following steps:
- Select Project > Add Reference. The Add Reference window opens.
- Select Microsoft.Web.Services2 from the list and click OK.
- Select View > Object Browser. The tree view opens.
- Expand WebServiceClient > WebServiceClientMyBFMAccess.
- Right-click BFMWSService and select Go To Definition. The file Reference.cs is opened.
- Replace the string System.Web.Services.Protocols.SoapHttpClientProtocol by the string
Microsoft.Web.Services2.WebServicesClientProtocol - On the toolbar, click the Save button
 .
.
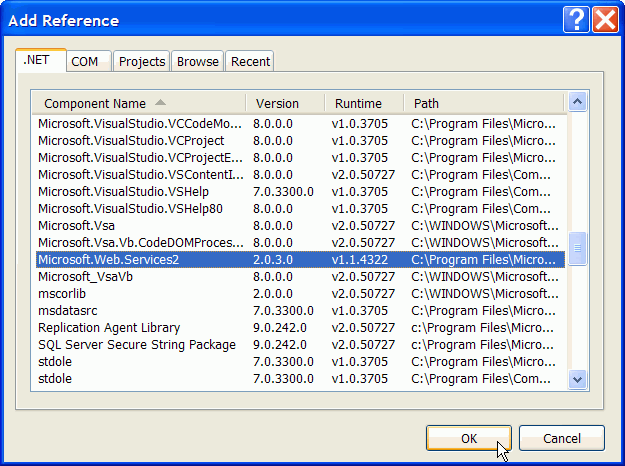
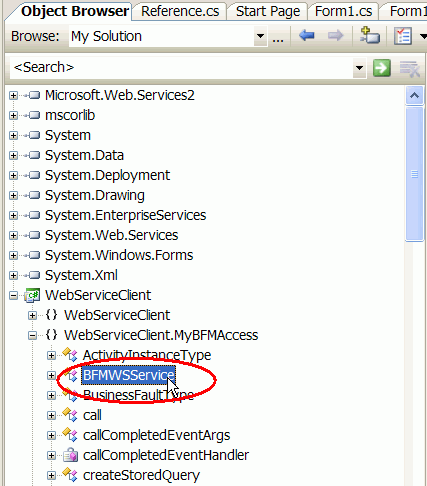
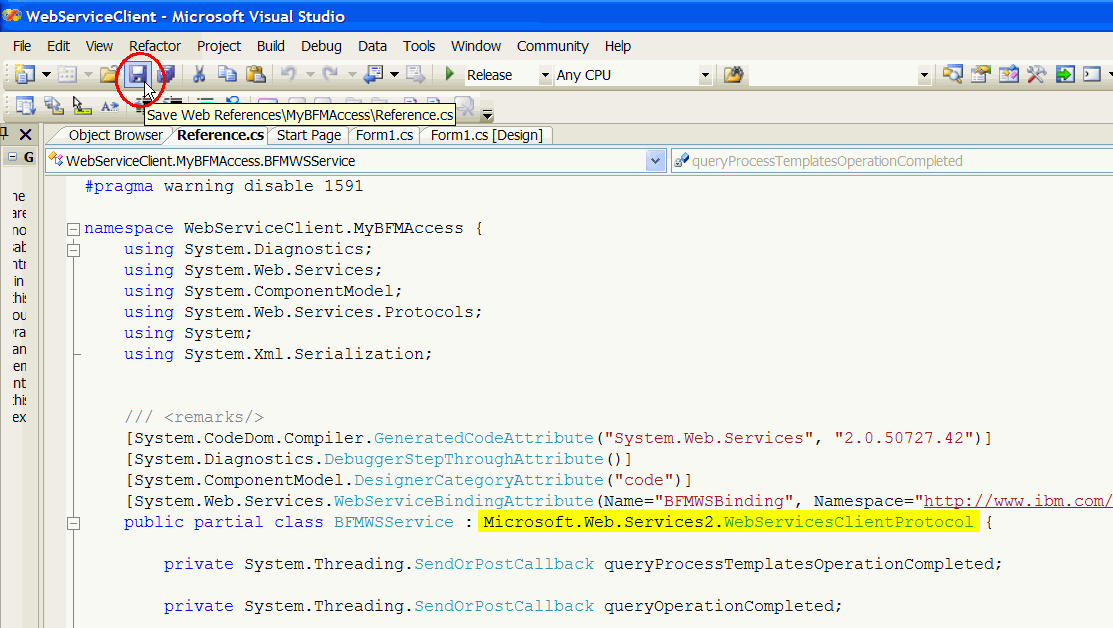
This code change alters the superclass of the proxy; the new class is part of the Microsoft WSE component and allows to call the method RequestSoapContext(...) which we will use in the implementation below.
Note: The change described in this section must be repeated whenever the proxy code is newly generated. Be aware that this code generation may happen automatically, for example, when you change the Web Reference URL via Solution Explorer > WebServiceClient > Web References > MyBFMAccess > Properties.
Create a simple client application
In this section, we create a tiny application, consisting of a single window which allows to display process templates.
Design a one push button application window
Complete the following steps:
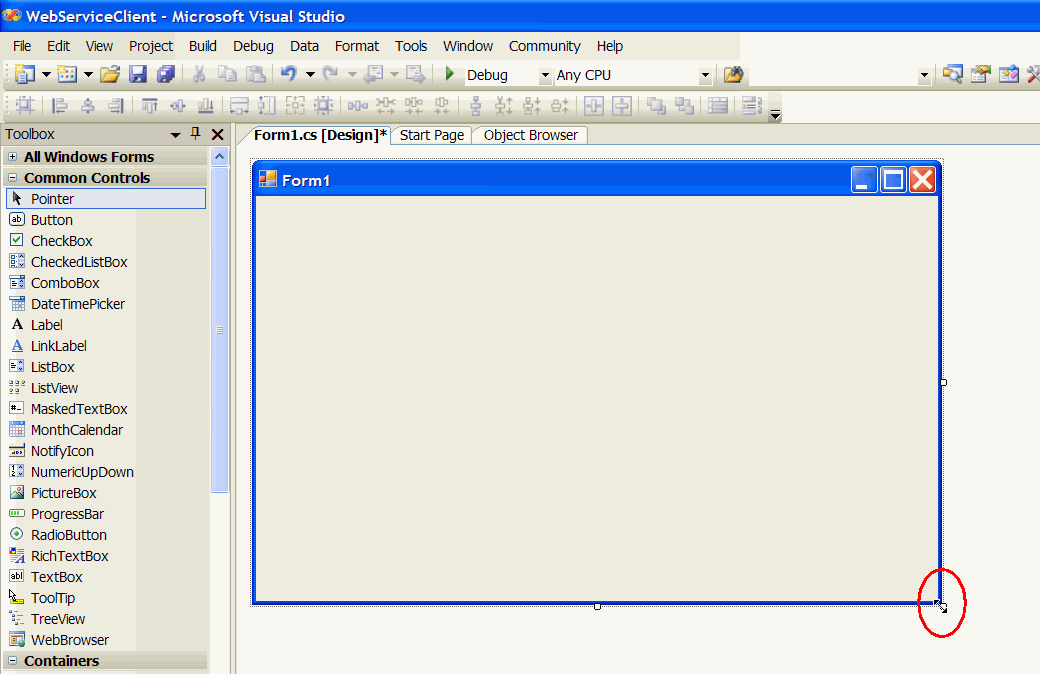
- In the Design view, enlarge the Window Form1 like shown below so the several control elements will fit.
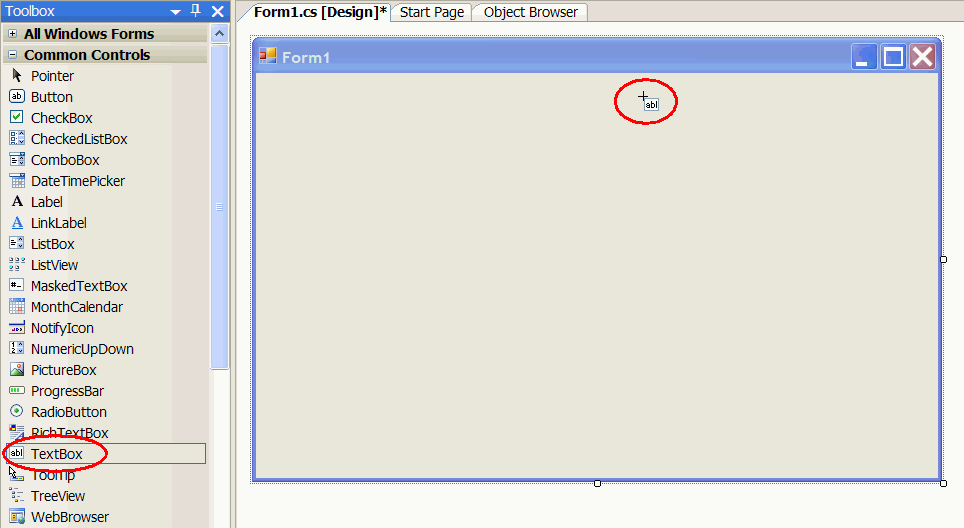
- In the Toolbox view, select TextBox and click inside the empty Form1 window.
- This creates a text box control element. Right-click this text box and select Properties.
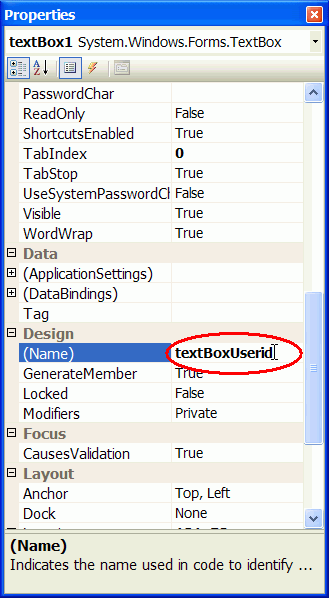
- In the Properties view, change the Name from textBox1 to
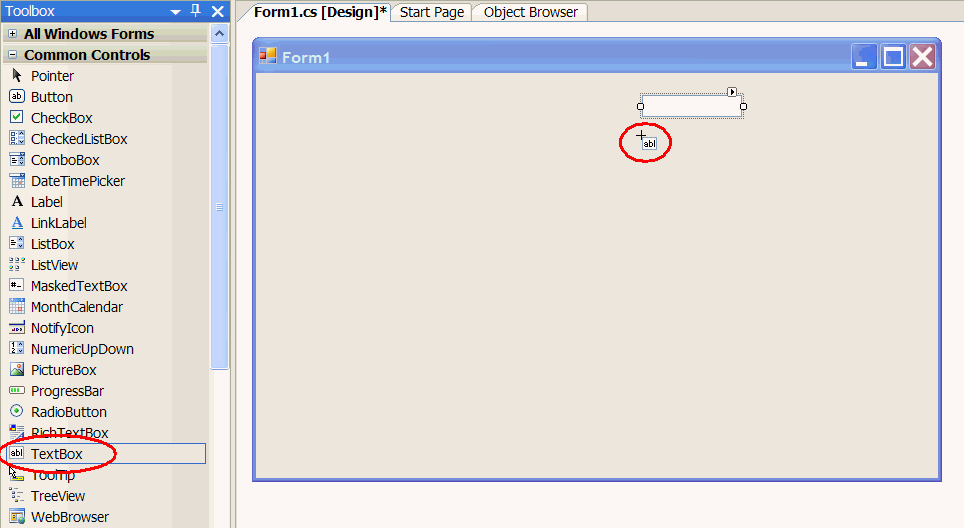
textBoxUserid. - In the Toolbox view, select TextBox again and click inside the Form1 window, below the previously created text box.
- Right-click the second text box and select Properties.
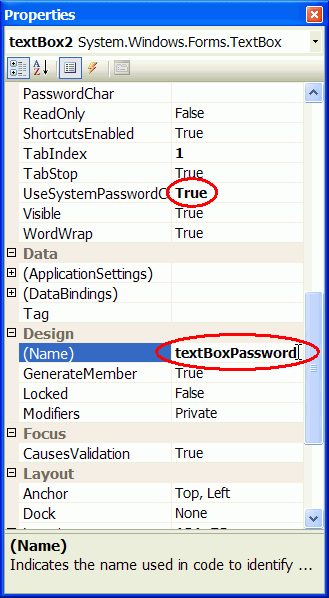
- In the Properties view, change the Name to
textBoxPassword. - Change the value for UseSystemPasswordChar from False to True.
- In the Toolbox view, select Button and click inside the Form1 window, below the second text box.
- This creates a push button control element. Right-click on the button1 push button and select Properties.
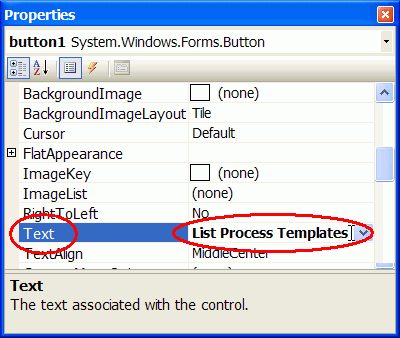
- In the Properties view, this time do not change the Name but rather the Text value to the new text
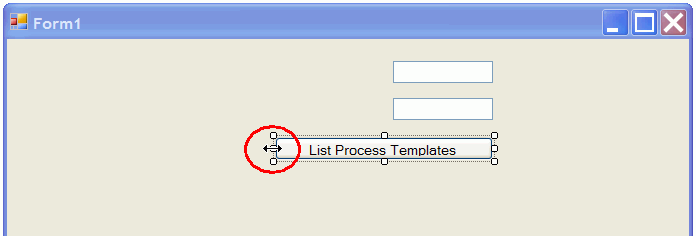
List Process Templates. - Inside the Form1 window, resize the push button to make the new label completely visible.
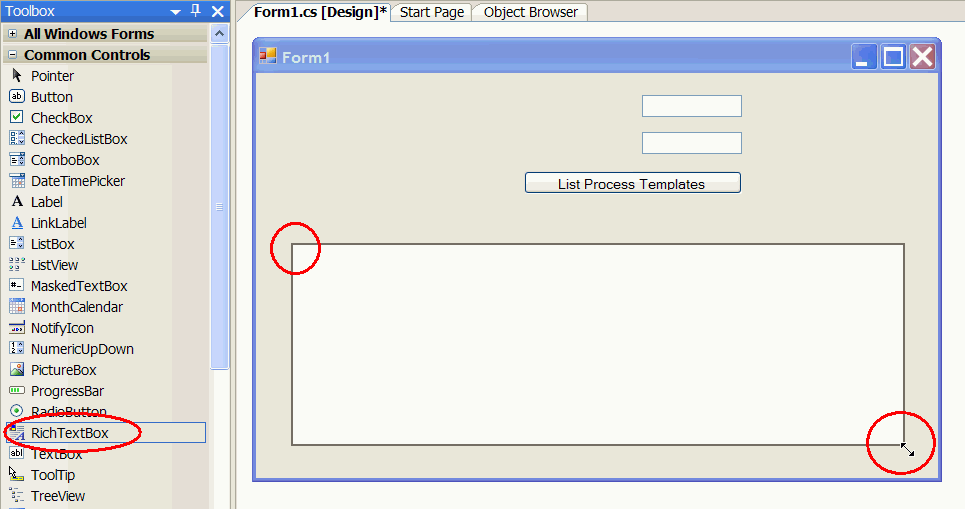
- In the Toolbox view, select RichTextBox and click inside the Form1 window. Then enlarge the new element resize as this will contain the output later on.
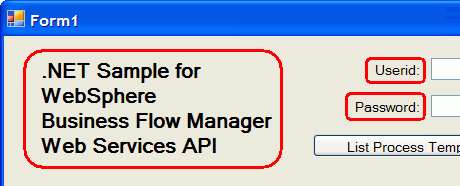
- Optionally add two labels Userid: and Password: to the window. In addition, the screenshots for this sample will show a heading on the left-hand side which is a multiline label using enlarged font.
- On the toolbar, click the Save button
 .
.

Program the push button action
In this section, we program the push button so it takes the userid and password values and makes the C# proxy call the WebSphere Process Server. Complete the following steps:
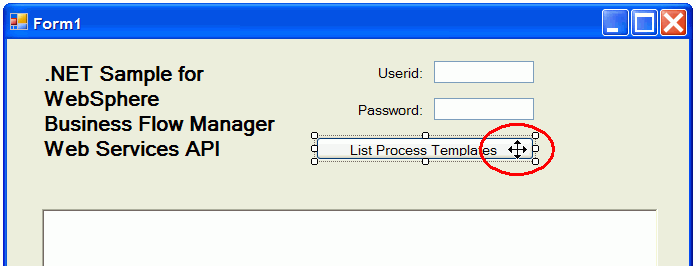
- In the Design view for the Form1 window, move the mouse over the List Process Templates push button and double-click.
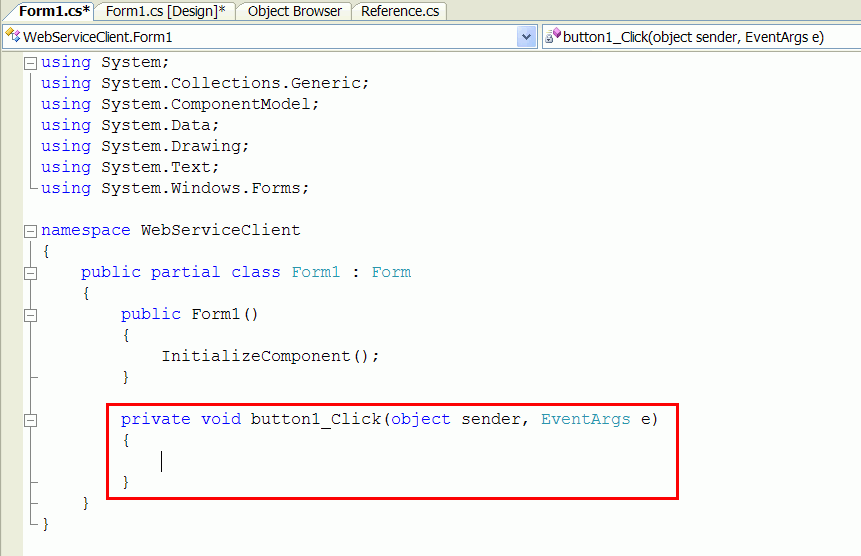
- The file Form1.cs opens, and caused by the double-click the empty method button1_Click(...) is included.
- Add the following two lines after the last using ... and before the namespace ... statement:
- To implement the body of the method button1_Click, add the following lines between the curly braces:
- On the toolbar, click the Save button
 .
.
using WebServiceClient.MyBFMAccess;
using Microsoft.Web.Services2.Security.Tokens;
These statements allows to use the short names rather than fully qualified names for several classes (BFMWSService, ProcessTemplateType, UsernameToken, PasswordOption) in the following lines of code.
try
{ // Get userid and password values and wrap it as UsernameToken:
UsernameToken token = new UsernameToken(textBoxUserid.Text, textBoxPassword.Text, PasswordOption.SendPlainText);
// Instantiate the proxy and attach the UsernameToken to the instance
BFMWSService myService = new BFMWSService();
myService.RequestSoapContext.Security.Tokens.Clear();
myService.RequestSoapContext.Security.Tokens.Add(token);
// Create an empty input object and run the query
queryProcessTemplates queryInput = new queryProcessTemplates();
richTextBox1.Text = " ... computing ..."; this.Refresh();
ProcessTemplateType[] templateTypes = myService.queryProcessTemplates(queryInput);
// Render the result: for each template, show three properties
richTextBox1.Clear();
if (0 == templateTypes.Length)
richTextBox1.Text = "No process templates found on server.";
for (int i = 0; i < templateTypes.Length; i++)
{
richTextBox1.AppendText("Name: " + templateTypes[i].name +
", Auto-delete: " + templateTypes[i].autoDelete +
", Long running: " + templateTypes[i].executionMode +
"\n");
}
}
catch (Exception exc)
{ // Whenever an error occurred, let the user know the details
MessageBox.Show(exc.Message, "Error running sample",
MessageBoxButtons.OK, MessageBoxIcon.Error);
richTextBox1.Text = " ... sample failed with exception: " + exc.GetType();
}
This code creates a UsernameToken from the values in the text boxes for userid and password.
Then it uses the proxy to query all process templates.
Finally, it displays some of the properties.
To keep the code simple, all potential runtime errors are mapped to one small code snippet.
The top of your editor window will now look similar to this:
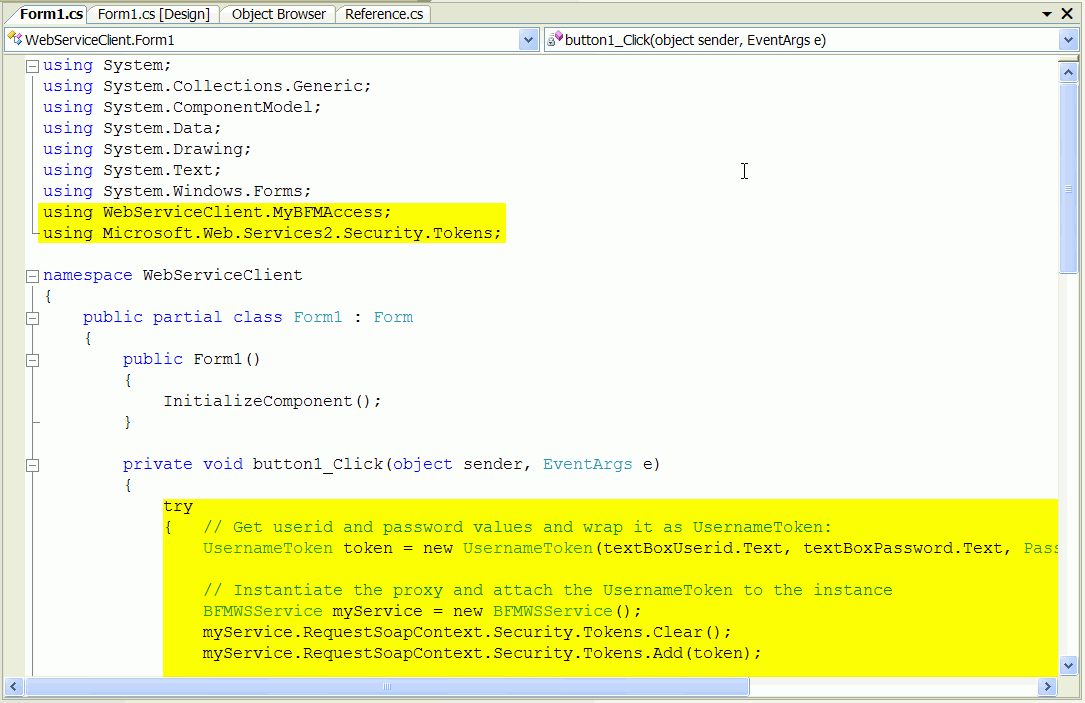
Click on this link to see the complete source code of Form1.cs.
You have now finished the implementation of the simple client application. Optionally, you can now use
Then proceed to the next chapter Run the sample to work with the application.
As well, you can upgrade the simple client application and let the client application do more advanced Web Service operations, by following the instructions in the Advanced Version chapter.